Everything You Ever Wanted to Know About Setting up Python on Windows, Linux and Mac
Overview
- Facing issues trying to install Python on your Linux, Mac or Windows machine? This article is for you!
- Step-by-step walkthrough on how to install Python along with popular data science tools
Introduction
Are you struggling to install Python on your machine? It’s actually a pretty common issue I’ve seen among beginners in data science. Installation might seem simple in theory, but things can get a bit tricky in reality.
I have personally faced various obstacles when trying to set up Python on my Linux and Windows machines. The installation seems to be running smoothly before boom! An issue about compatibility. Or another issue about a certain dependency being missing.
If you’ve ever faced these kinds of niggling issues when attempting to install Python on your machine – this article is for you. I had to visit several forums and websites to figure out where I was going wrong. It’s not a great experience. So I decided to collate everything and put it together in one place for you.
I have provided a step-by-step breakdown of how you can setup Python through Anaconda on all the three platforms:
- Linux
- macOS
- Windows
And if you’re new to data science and machine learning and looking to understand how to use Python, make sure you check out our beginner-friendly courses:
Table of Contents
- Important Tools for Data Science
- Steps to Install Python on Linux
- Steps to Install Python on macOS
- Steps to Install Python on Windows
Important Tools for Data Science
A Data Scientist’s toolbox can really surprise you as there can be multiple tools that are needed for different aspects of the job. There are, however, some tools that are more important (or widely used) than others. Here are a few must-have tools that every Data Scientist, beginner or experienced, needs:
- Python: Python is the most widely used programming language for Data Science. Almost every new development in machine learning is happening in Python first as compared to other languages. It owes this wide adoption to the fact that some really useful libraries are present in Python
- Pandas: When it comes to data manipulation and analysis, nothing beats Pandas. Pandas is a Python library that’s very helpful when we want to manipulate data before performing any analysis or building machine learning models
- NumPy: NumPy, like Pandas, is an incredibly popular Python library. NumPy brings in functions to support large multi-dimensional arrays and matrices. It also brings in high-level mathematical functions to work with these arrays and matrices
- Matplotlib: Matplotlib is the most popular data visualization library in Python. It allows us to generate and build plots of all kinds
- Scikit-Learn: Like Pandas for data manipulation and matplotlib for visualization, scikit-learn is the Python leader for building models
- Jupyter Notebook: Jupyter Notebook is a very useful IDE to perform data science experiments, It has options to even document your approach and create presentations and slides from your code experiments. You can learn more about it here
And the best part is that all of these tools come by default with Miniconda/Anaconda!
What are Anaconda and Miniconda?
Anaconda is a very important software to have when you are learning data science. It lets us install almost all the libraries/tools that we would need in our data science journey with Python. It has a very simple interface that lets us accomplish most data science tasks in just a few lines of code.
Minoconda is a smaller version of Anaconda. It’s a lightweight version and a good choice if you do not have enough disk space on your computer.
Let’s see how we can set up both Anaconda and Miniconda on our own machines!
Steps to Install Python on Linux
Linux is a widely loved platform among the data science community. It offers immense flexibility in terms of the data science tasks that we perform. But there’s a slight caveat here – it can be quite tricky to install software on Linux! This is especially true if you’re a Linux beginner.
Here are the steps to set up Python and popular data science tools on Linux.
Step 1: Get Miniconda
You can download Miniconda from this link:
https://docs.conda.io/en/latest/miniconda.html
You can choose the Linux version of the installer and the suggested Python version should be any version greater than Python 3.5.
Step 2: Install Miniconda
Now that you have downloaded the Miniconda file, the next step is to install it in your system. For that, first go to the directory in which the file is downloaded:
cd directory_name
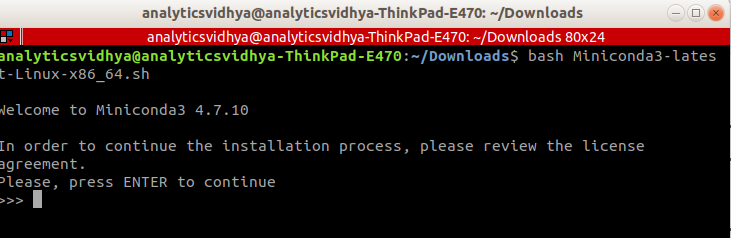
Then, in order to start the installation script, use the bash command with the Miniconda file name:
bash miniconda_file_name
If asked for confirmation, just press Enter to continue.
Once you see the license terms, keep pressing enter until it asks to accept the terms. Then type “yes” to accept the terms. It will then ask you to select the installation location:

You can give a separate location or just press enter to select the default one. I usually prefer the default option unless I have space issues on my main drive and then I give the alternate installation location.
After this, the process is fairly straightforward as you just need to say “yes” and press Enter for everything. Keep in mind that the installation might take some time so feel free to grab a coffee while your machine works hard to install everything!
Once you have finished the previous steps, you will be asked to open another terminal to activate the Miniconda installation. Open a new terminal window, and then we can proceed with the next steps.
Step 3: Create a new environment
An environment is basically your “workspace”. You can set it up as you want. How cool is that?
You can choose what version of which Python library should be in your environment and this will basically help you have more control over your data science workflow.
Now, the benefit of an environment in Miniconda is that it lets you create multiple such environments. You can manage multiple independent environments, each for a separate task!
Let me explain this using an example. Let’s say we are working with a State-of-the-Art framework (like PyTorch-Transformers for Natural Language Processing) and we need all the latest versions of the dependent libraries. This is where environments come in handy.
We can have that new setup co-exist along with a simpler setup where we have an old legacy project and we are forced to use certain versions of libraries that are needed for our project.
You can create an environment using the following command:
conda create -n av python=3 anaconda
‘av’ is the name of the environment (you can give it any name you want). And python=3 is the version of Python we want to use.
To check if the environment has been successfully created, type the following command:
conda env list
And this will give us a list of environments currently installed in our system.
Step 4: Activate the new environment
Now, to start working with the new environment that you created, type the following command:
source activate av
To make sure that things are working fine in the active environment, we can see the list of libraries installed in this environment using the following command:
conda list
The above command should give you an output like this:
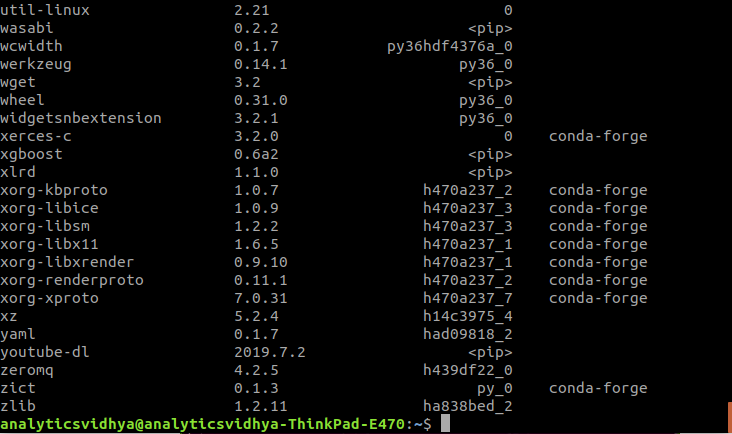
Once you are done working with an environment and you want to deactivate it, you can do that using:
source deactivate av
So now that the setup is fully complete, its time to check that everything works out as expected. Let’s go to the next step!
Step 5: Start a Jupyter Notebook
Time to fire up our Jupyter notebook:
jupyter notebook
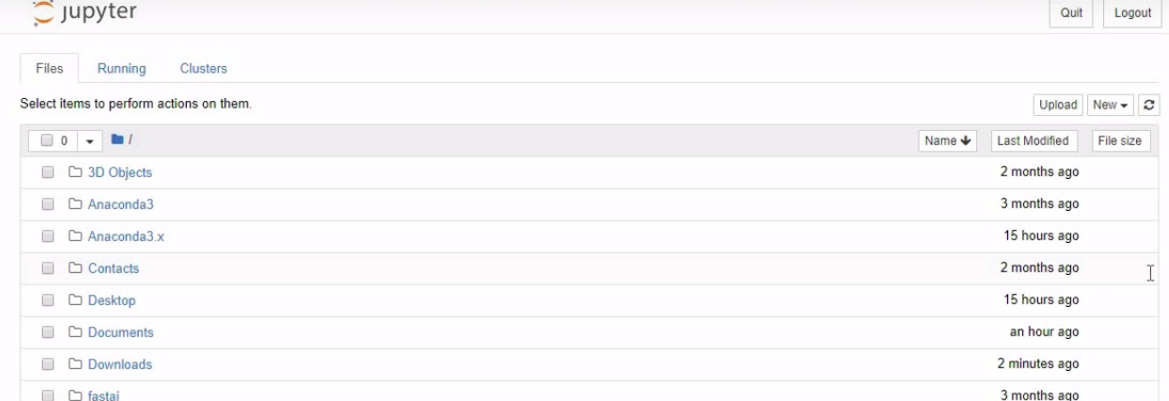
This will start the Jupyter Notebook in a browser:
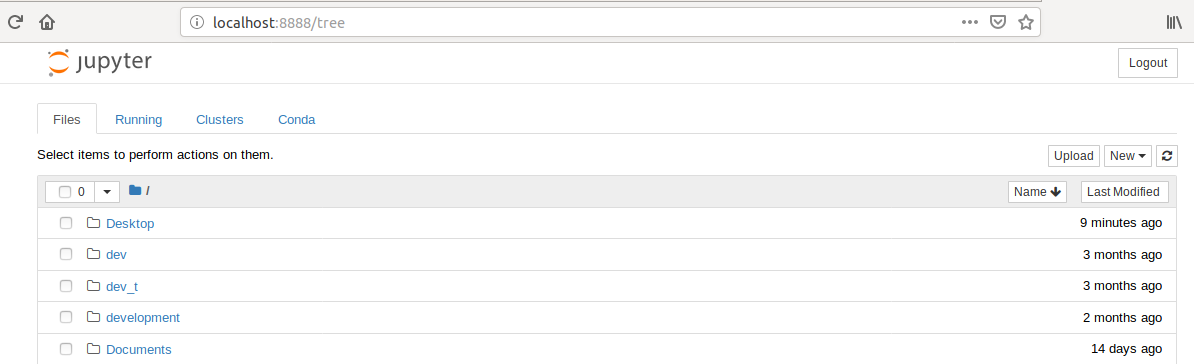
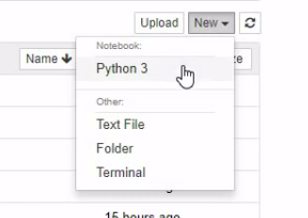
Next, you can simply click on “New” and select “Python 3” to start a Python 3 notebook to work with:
Pretty straightforward, wasn’t it?
Congratulations! You have now successfully installed Anaconda on your system. And since Anaconda by default comes with Python and all the data science libraries like Pandas, Numpy, Scikit-Learn, etc., you now have all of those in your system too!
In case you still have doubts or are stuck at any step, here is a video of the entire installation process:
Steps to Install Python on macOS
The installation steps for macOS are very similar to the Linux installation steps. Both of them have the same bash terminal. The only difference is the Miniconda installer file that you need to download.
You can download Miniconda for macOS from this link:
https://docs.conda.io/en/latest/miniconda.html
This time you have to choose the macOS “bash installer” and the suggested Python version should be any version greater than Python 3.5.
Once you have downloaded the above file, you just have to follow steps 2 to 5 from the Linux installation steps and that would be enough to get you started.
Watch the below video to get a full run-through of installing Python on macOS:
Steps to Install Python on Windows
Let’s have a look at the steps to install Python and other data science libraries on Windows.
Step 1: Get Anaconda
You can download Anaconda from this link:
https://www.anaconda.com/distribution/
You can choose the Windows version of the installer and the suggested Python version should be any version greater than Python 3.5.
Now you will see two choices – 32 Bit and 64 Bit installer. Choose the one which is compatible with your system (right-click on ‘My Computer’ to view this if you’re unsure).
Step 2: Installing Anaconda
Once you have downloaded the installation file, go to the “Downloads” folder and double-click on the file. A new window for installation will open:

Then click “Next” and this will take you to the license agreement. Click “I Agree” to accept it:

It will then ask you whether you want to install this software only for this user or all the users of the system. This is totally your choice to make. I usually go with the “recommended” option:

Now you can choose the location where you want this software to be installed:

Now, in the next window, you will get a couple of “advanced options”. You can untick both of them for now and click Install. This step might take some time:

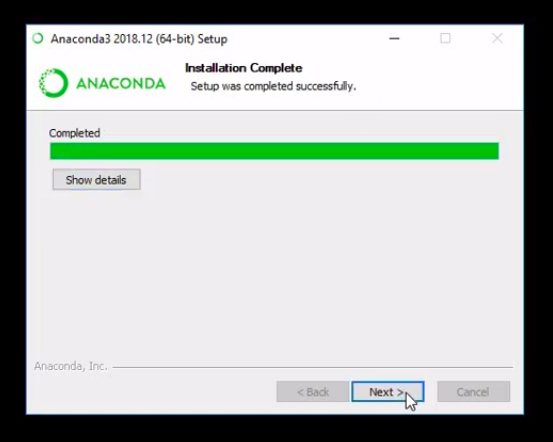
Once the installation is complete, you can click “Next”:
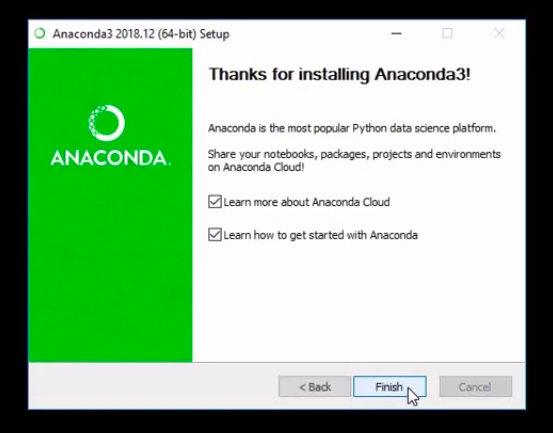
You can skip the installation for Microsoft Visual Code:

And click finish:
And voila! Python is all ready for you to begin analyzing data and building machine learning models.
Step 3: Start Jupyter Notebook
To see that everything has been installed correctly, we will open a Jupyter Notebook. To do that, first go the start menu and search for “Jupyter”:

Click on the “Jupyter Notebook” option and this will open the notebook in a browser:
Now you can simply click on “New” and select “Python 3” to start a Python 3 notebook to work with:
Here’s a video detailing how you can install Python on Windows in case you prefer learning through a visual format:
End Notes
So that was all about installing Python on all the popular platforms out there. My aim here was to acquaint you with the installation process and to clear any doubts you might have.
If you still face any issues, let me know in the comments section below and I’ll be happy to help you out! And make sure you check out the two courses below to start your journey into data science using Python:
A computer science graduate, I have previously worked as a Research Assistant at the University of Southern California(USC-ICT) where I employed NLP and ML to make better virtual STEM mentors. My research interests include using AI and its allied fields of NLP and Computer Vision for tackling real-world problems.


Help full sir....