What are Autoencoders? Learn How to Enhance a Blurred Image using an Autoencoder!
Overview
- What are autoencoders? How do autoencoders work? This article will answer your questions
- We will explore the concept of autoencoders using a case study of how to improve the resolution of a blurry image
Introduction
Do you remember the pre-digital camera era? It was a mystical process that only photographers and experts were able to navigate. We only saw a dark room bathed in dim red light. In short, retrieving photos was a time-consuming process.
Then the digital camera revolution began and we haven’t looked back since! We don’t even bother getting our pictures printed anymore – most of us have our photos in our smartphones, laptops or in some cloud storage.
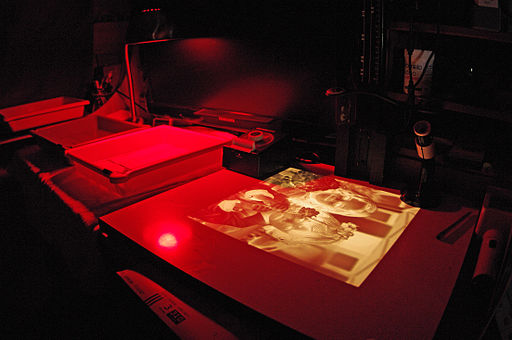
A Darkroom
You might be wondering what do photographs have to do with autoencoders? Well – it’s autoencoders that enable us to enhance and improve the quality of digital photographs!
Even now, we come across (and click) pictures that are hazy, pixelated and blurry. I’m definitely guilty of this and I know a lot of you struggle with clicking the perfect picture. This is where deep learning, and the concept of autoencoders, help us.
We’ll learn what autoencoders are and how they work under the hood. Then, we’ll work on a real-world problem of enhancing an image’s resolution using autoencoders in Python.
Prerequisites: Familiarity with Keras, image classification using neural networks, and convolutional layers. Check out these resources if you need to brush up these concepts:
Table of Contents
- What is an Autoencoder?
- Architecture of an Autoencoder (acts as a PCA with linear activations and MSE)
- A Sneak-Peek into Image Denoising Autoencoder
- Problem Statement – Enhance Image Resolution using Autoencoder
- Implementing an Autoencoder using Python
What is an Autoencoder?
As per this article by Pulkit Sharma:
“Autoencoders are essentially neural network architectures built with the objective of learning the lower-dimensional feature representations of the input data.”
Autoencoders are comprised of two connected networks – encoder and decoder. The aim of an encoder is to take an input (x) and produce a feature map (z):
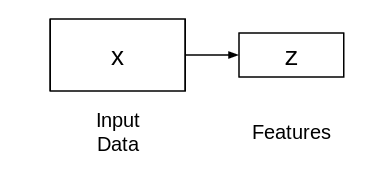
The size or length of this feature map (z) is usually smaller than that of x. Why do you think this happens?
Since we want z to capture only the meaningful factors of variations that can describe the input data, the shape of z is usually smaller than x.
Now, the question is how do we learn this feature representation (z)? How do we train this model? For that, we can add a decoder network on top of the extracted features and then train the model:

This is what a typical autoencoder network looks like. This network is trained in such a way that the features (z) can be used to reconstruct the original input data (x). If the output (Ẋ) is different from the input (x), the loss penalizes it and helps to reconstruct the input data.
A Sneak-Peek into Image Denoising Autoencoder
The problem we will solve in this article is linked to the functioning of an image denoising autoencoder. Let’s understand in detail how an autoencoder can be deployed to remove noise from any given image.
Let’s say we have a set of images of hand-written digits and some of them have become corrupted. Below are a few images with noise (corruption):

Removing this noise from the images is known as an image denoising problem. The desired output is clean images with the majority of the noise removed from it, as you can see below:

But how would an autoencoder remove this kind of noise from images?
As we have already seen in the previous section, the autoencoder tries to reconstruct the input data. So, if we give corrupted images as input, the autoencoder will try to reconstruct noisy images only.
So, what shall we do know? Change the architecture? Not really!
A small tweak is all that is required here. Instead of using the input and the reconstructed output to compute the loss, we can calculate the loss by using the ground truth image and the reconstructed image. This diagram illustrates my point wonderfully:
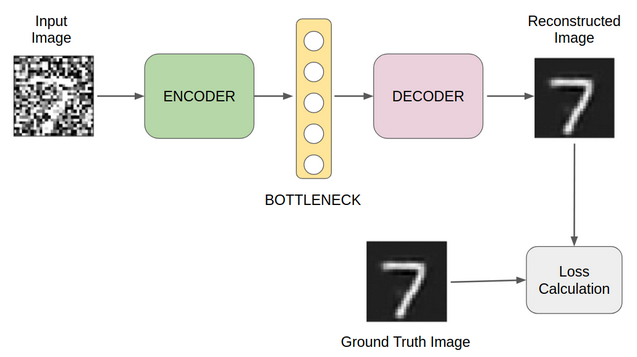
Image Denoising Autoencoder
Now that you are familiar with the functioning of a denoising autoencoder, let’s move on to the problem that we want to solve by using autoencoders.
Problem Statement – Enhance Image Resolution using Autoencoder
You’ll be quite familiar with the problem statement here. most of us have struggled with clicking blurred images and struggling to enhance their resolution. Well, we’ll solve that problem using autoencoders here!
Let’s say we have a set of images of people’s faces in low resolution. Our task is to enhance the resolution of these images. It can be done with the help of photo editing tools such as Photoshop. However, when there are thousands of images at hand, we need a much smarter way to do this task.
Here are a few sample images along with their ground truth:

Implementing an Autoencoder using Python
Let’s open up our Jupyter notebook and import the required libraries:
Download Dataset
We will work on the popular “Labeled Faces in the Wild” dataset. It is a database of face photographs designed for studying the problem of unconstrained face recognition. However, here our objective is not face recognition but to build a model to improve image resolution.
Let’s download and extract the dataset:
# download dataset
! wget http://vis-www.cs.umass.edu/lfw/lfw.tgz
# extract dataset
! tar -xvzf lfw.tgz
This dataset will be extracted in multiple folders. Therefore, it is important to capture the file path of all the images. We can do this easily with the help of the glob library:
#capture paths to images
face_images = glob.glob('lfw/**/*.jpg')
Load and Preprocess Images
The original size of the images is 250 x 250 pixels. However, it would take quite a lot of computing power to use these images on a system with modest configuration. Therefore, I will reduce the size of all the images:
Data Preparation for Model Training
Next, we will split the dataset (images) into two sets – training and validation. We will use the training set to train our model and the validation set to evaluate the model’s performance:
Let’s have a look at an image from the dataset:

The idea of this exercise is quite similar to that used in denoising autoencoders.
We will apply some modifications in the input image and calculate the loss using the original image. Since it is a resolution enhancement task, we will lower the resolution of the original image and feed it as an input to the model.
This is what the input will look like:

We will use the function below to lower the resolution of all the images and create a separate set of low resolution images.
Prepare Input Images
Let’s lower down the resolution of all the images. We will do it for both the training set and the validation set.
Let’s lower the resolution of all the images. We will do it for both the training set and the validation set:
Model Building
Let’s define the structure of the model:
Feel free to modify this architecture if you want. You can change the number of layers, change the type of layers, use regularization, and do a lot more. For the time being, let’s move ahead with this architecture.
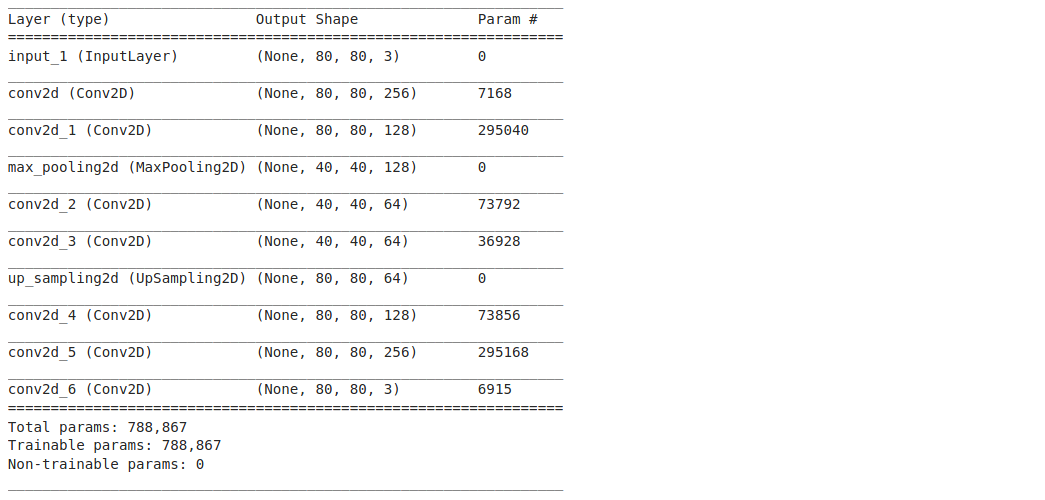
It is always a good practice to visualize the model architecture as it helps in debugging (in case there is an error). In Keras, it’s pretty simple – just execute <model name>.summary( ):
autoencoder.summary()
We can finally train our model:
Make Predictions (Enhance Images)
predictions = autoencoder.predict(val_x_px)

End Notes
In this tutorial on autoencoders, we implemented the idea of image denoising for image resolution enhancement. This task has multiple use cases.
For example, we can use this technique to enhance the quality of low-resolution videos as well. So, even without labels, we can work with the image data and solve several real-world problems. If you have any other use case or technique to work with image data in an unsupervised way, then please share it in the comments section below.
Data Scientist at Analytics Vidhya with multidisciplinary academic background. Experienced in machine learning, NLP, graphs & networks. Passionate about learning and applying data science to solve real world problems.


Thank you for sharing! I have a problem with your code. "NameError: name 'train_x' is not defined" Can you help me resolve?
you must have set up another name of the variable earlier. Check and correct the name to "train_X" or you must have not applied the train_test_split code.
Thanks for sharing. I'm getting an error. UnknownError: Failed to get convolution algorithm. This is probably because cuDNN failed to initialize, so try looking to see if a warning log message was printed above. [[node functional_3/conv2d_7/Relu (defined at D:\GPU testing\Image Super Resolution\Image Super Resolution using Autoencoders Testing.py:118) ]] [Op:__inference_train_function_1288] I'm using Nvidia GeForce 1650 Ti along with TensorFlow-gpu=2.3.0, CUDA=10.1, cuDNN=7.6.5 and python=3.8.5. I've been stuck with this problem for more than a week now. Can you help me resolve this?
Hi, Thanks for the helpful article. I implemented Autoencoder for a real world image dataset and my purpose was to 'denoise' the images for a downstream OCR. Since I do not have labelled/target images, I am introducing noise to train data and evaluate result against original images, as explained in the article too. The result this model produces on test images are not satisfactory at all. Even if I introduce noise to test images, at max I can get the original image back, but never better than input. My question is: how could I reduce a real world "noise", not the "systematic" noise I introduce by either resizing or adding gaussian noise etc. Thanks in advance.