Plotting Decision Surface for Classification Machine Learning Algorithms
Overview
Machine Learning algorithms for classification involve learning how to assign classes to observations. There are nuances to every algorithm. Each algorithm differs in how it predicts the class for every observation. Its decision-making process may seem opaque to most of the stakeholders.
A Decision Surface could be a powerful tool to visualize and understand how a model arrives at its predictions. It is a diagnostic tool to identify the strengths and weaknesses of a model. It also provides a “quick & dirty” way to identify areas where the model under-fits/over-fits the data.
This article describes how you can write your own function to plot a decision surface for any classification algorithm using Python. You will also learn how to create a simple synthetic dataset using built-in libraries and test your function. You can customize the function to suit your needs.
Let’s dive right into it.
Process-
Step 1:
Import libraries for working with arrays and visualization
Step 2:
Let’s create a function that takes in the feature matrix and target vector as input and creates a decision surface.

Step 3:
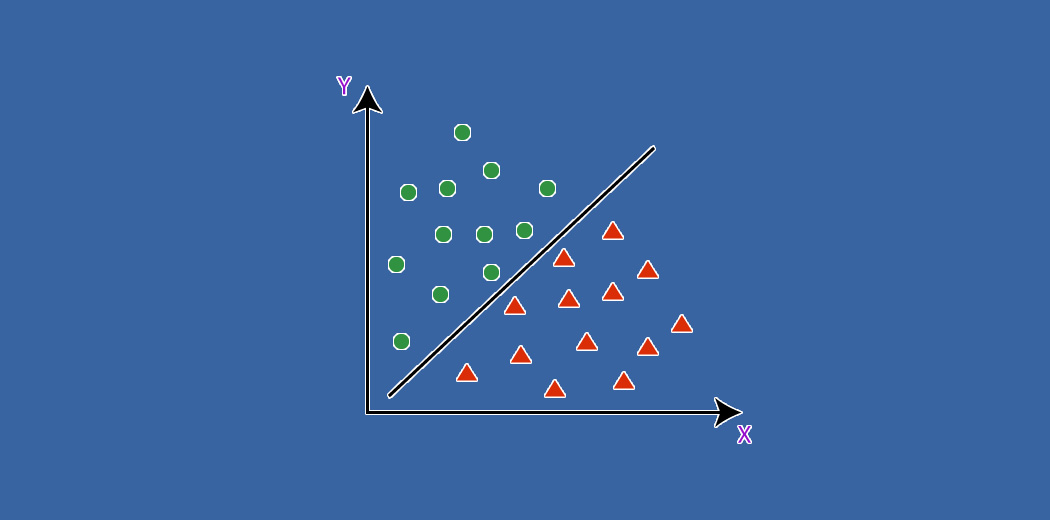
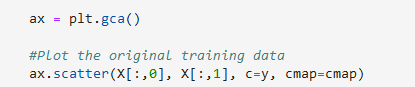
Then, draw a scatter plot of the original training data.
Now, determine the minimum and maximum of each feature.

The meshgrid function of the numpy module can then be used to generate a grid of values (500 in the example shown) for each feature using minimum and maximum values of the features.

Step 4:
The grid for each feature will be a 500 x 500 array. These arrays need to be flattened and then converted to a one-dimensional vector. The flatten reshape functions of the numpy module can be used for this purpose.


The feature vectors should be stacked to represent the feature matrix similar to the original feature matrix using the hstack function of the numpy module.

Step 4:
Let’s fit the model on the original dataset and make predictions using the grid of features we created.

The prediction vector has to be reshaped into the same shape as the feature grid to be able to draw a contour plot.
Step 5:
Now, we draw a contour plot using pyplot’s built-in contourf function.

That’s it for creating the function to draw a decision surface for any classification algorithm. It is ready to be tested on a synthetic dataset. Note that, it is always a good idea to test our custom-functions on a hypothetical dataset.
The make_blobs function of the sklearn library is the most commonly used function for this purpose. It allows us to specify the number of samples, number of features, number of classes, and several other parameters. In our example, we specify 1000 samples, 2 features, and 3 classes for the sake of simplicity.
![]()
Step 6:
Import a few different classification machine learning libraries for testing the above-written function.

Step 7:
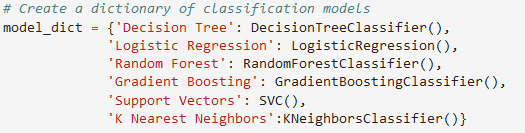
Create a dictionary of classification machine learning models
Step 8:
Plot a decision surface for the models in the dictionary using the above-written function.

The following are the decision surfaces for the different classification, out-of-the-box machine learning algorithms.
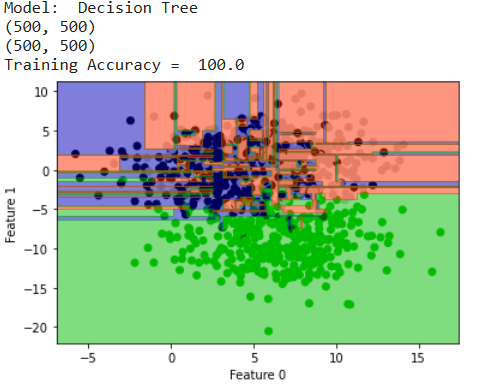
Decision Tree
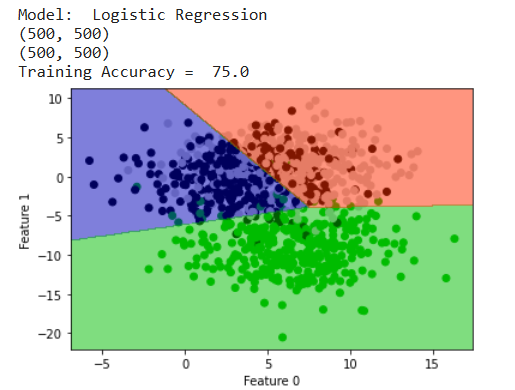
Logistic Regression

Random Forest

Gradient Boosting
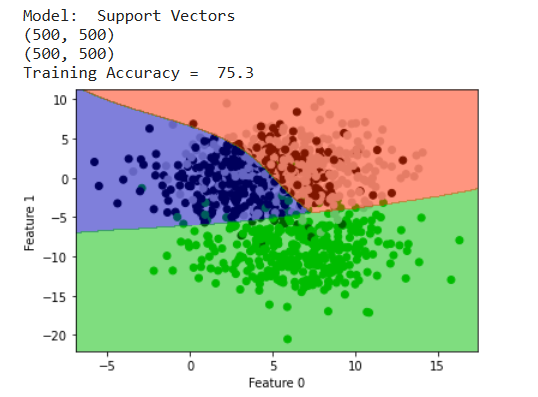
Support Vector
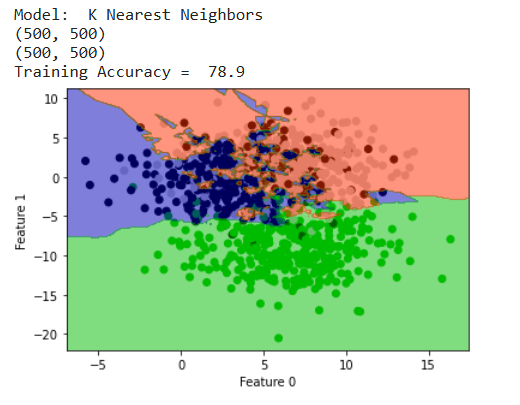
K-Nearest Neighbor
This function can be used with any model that has the .fit() and .predict() methods found in most sklearn algorithms.
Summary
In this article, you learned-
- How to create a function for plotting a decision surface for classification machine learning algorithms.
- How to create a hypothetical dataset.
- How to test decision surface plotting function on the hypothetical dataset and derive insights into the decision making process for the machine learning model.
Further Improvements
- Instead of using the model predictions to create the decision surface, you can use the predicted probabilities to see how confident the model is with its predictions.
- Plot a decision surface for a more complex algorithm like neural networks and iterate through several pairs of features.
About the Author

I am currently a Mechanical Engineer aspiring to be a data scientist. I have a B.E, Mechanical Engineering from GCT, Coimbatore, India, and M.S Mechanical Engineering from Texas A&M University, College Station, TX, USA. I have been working as a Mechanical Engineer for HI-Q Environmental Products Company for the past 17 years.


