JupyterLab 3.0 is Out! Get your Hands on the Latest JupyterLab Now
Overview
- JupyterLab is a brilliant coding environment to perform data science tasks
- JupyterLab releases JupyterLab 3.0 with some exciting changes and updates
Introduction
A lot of us were taken aback when we heard there is something better than Jupyter Notebook. Since many of us gave our hands to Jupyter Notebook to progress in our data science journey, there was not a chance to not check the ever-better- JupyterLab.
Trust me it was love at first sight for me and I am pretty sure you will or would have also enjoyed your transition to JupyterLab to perform your data science tasks.

The new year for people using JupyterLab started with its latest version- JupyterLab 3.0. In this article, I will walk you through all the updates and changes that you can see in JupyterLab 3.0
We recommend you go through this article before proceeding-
Table of contents-
- How to install JupyterLab 3.0
- Changes/Improvements in JupyterLab 3.0
- Debugger
- Table of contents
- Changes in the interface
- Multiple languages support
- Another method for installing extensions
How to install JupyterLab 3.0
If you already use JupyterLab then just use the following commands to upgrade your JupyterLab-
With pip:
pip install --upgrade jupyterlab
With conda:
conda update jupyterlab
If you’re new then use the following commands to install JupyterLab-
-
With pip:
pip install jupyterlab==3
But before this, you need to have pip installed on your system.
-
With conda:
conda install -c conda-forge jupyterlab=3same with this, you need to have Anaconda/Miniconda installed on your system before running this command.
Changes/Improvements in Jupyter Lab 3.0
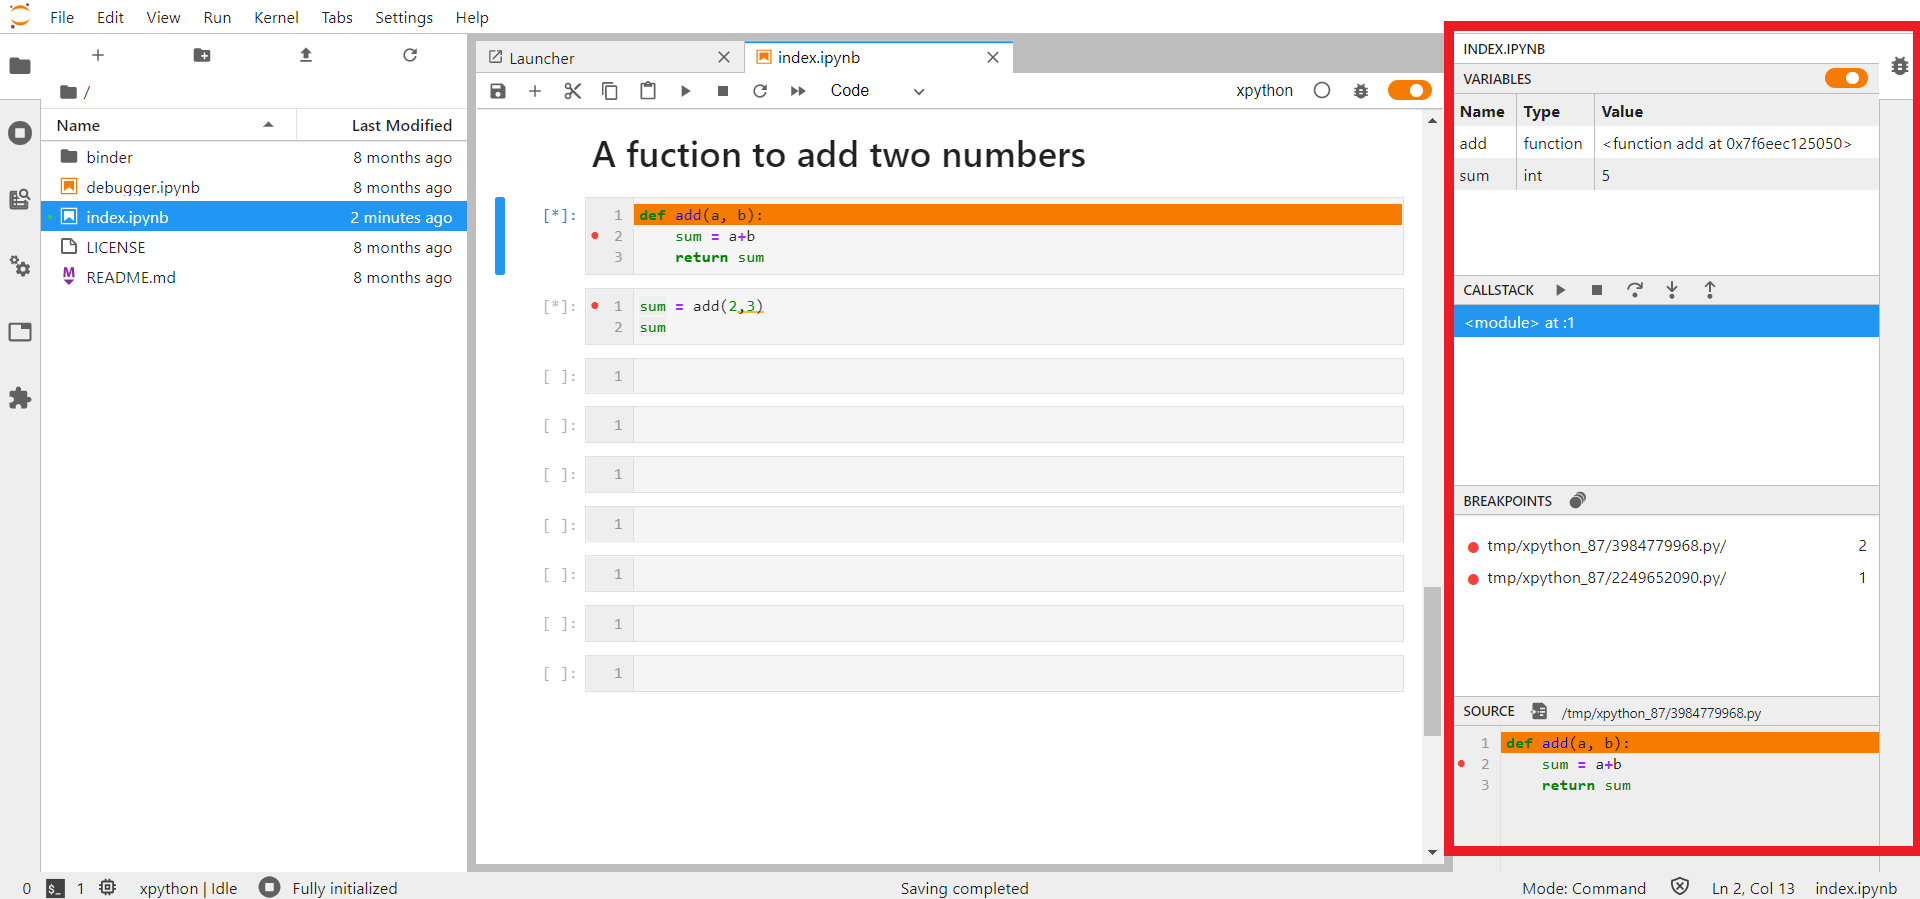
1- Debugger
JupyterLab 3.0 now comes with a front-end debugger by default. This means that notebooks, code consoles, and files can now be debugged from JupyterLab directly!
In order to use this debugger, you’ll need a kernel that supports debugging. For example, for python, we have xeus-python, commonly known as xpython. As of now, it is the only Python kernel that supports debugging and is compatible with JupyterLab. You need to install it first. Follow the following commands for installation of xeus-python-
With Conda:
The safest usage is to create an environment named jupyterlab-debugger with your miniconda installation-
conda create -n jupyterlab-debugger -c conda-forge jupyterlab=3 xeus-python
conda activate jupyterlab-debugger
After this installation, you can just select this kernel from the launcher

or you can switch to the xpython kernel using the kernel selection dialog:

And then you’re all set to debug your code-
2- Table of contents
Now you can easily see and navigate through the structure of your document. This is a very simple yet effective upgrade. You’ll get to see a table of content by clicking on this Toggle Auto-numbering:

And you can see the description as well by clicking this Toggle Markdown Text cells (notice the small button with alphabet M)-

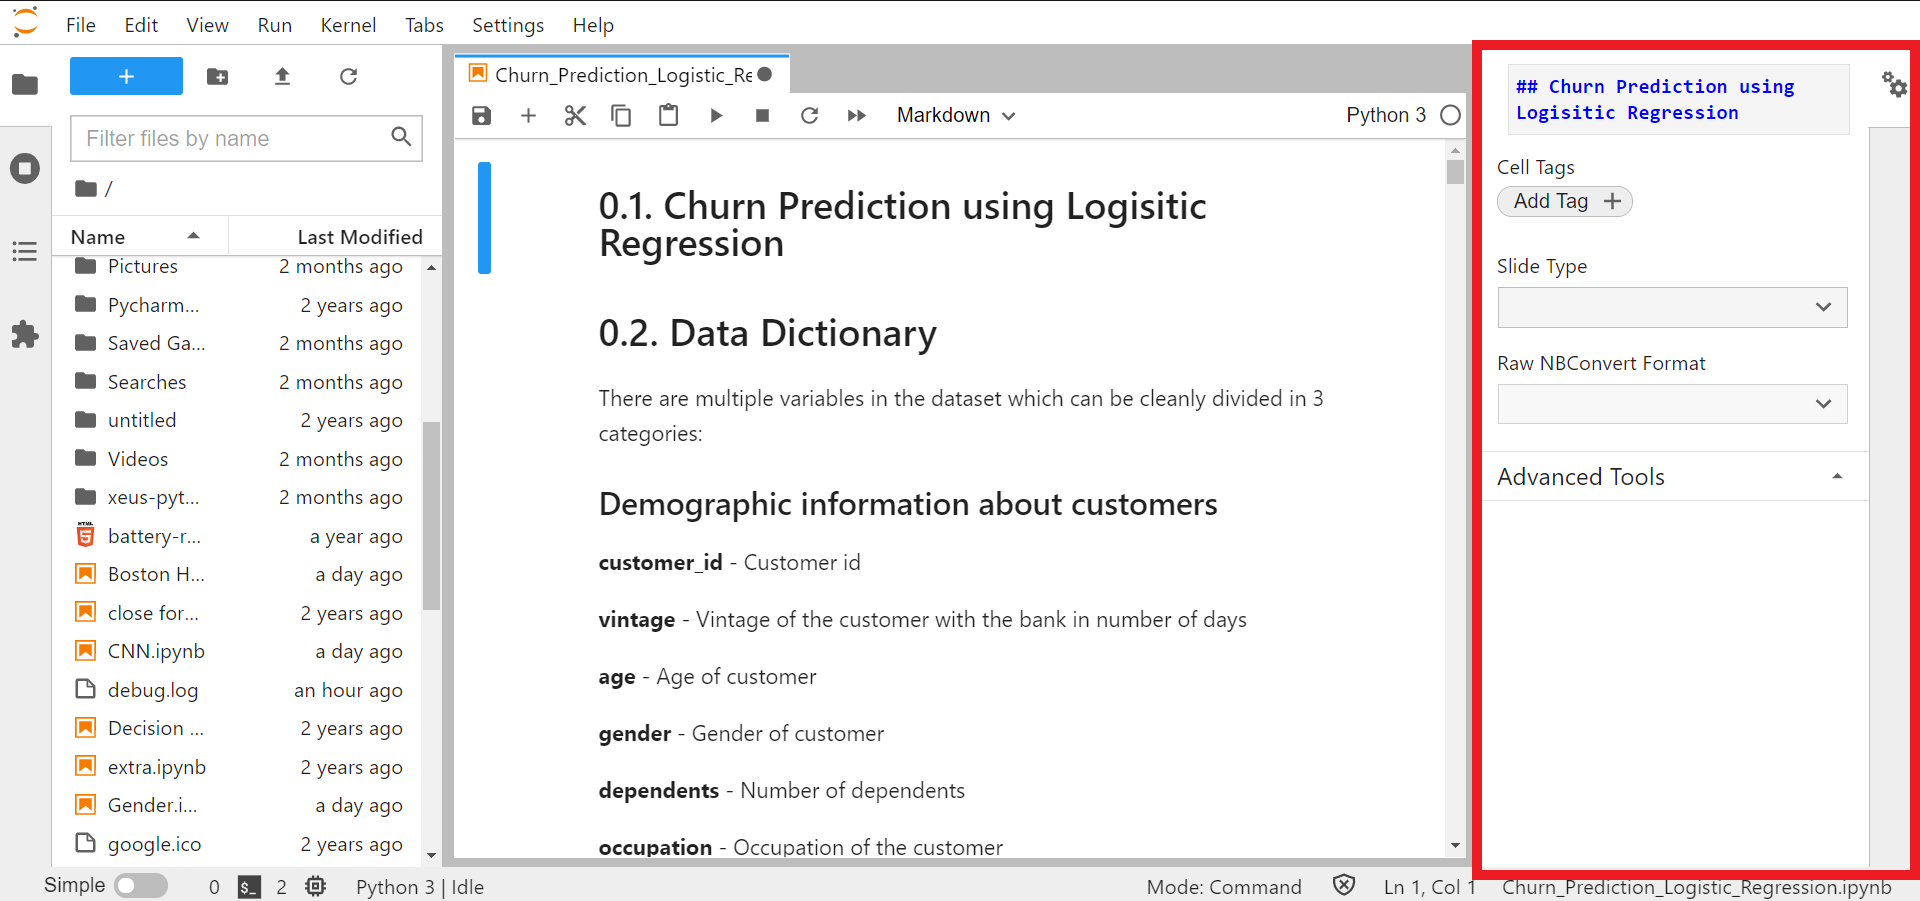
3- Changes in the Interface
There have been several changes in the user-side interface. The property inspector moved to the right sidebar now-
The command palette now comes floating on the center of the top of the window. This enables users to quickly invoke a command while keeping the sidebar closed or switching sidebar panels. You can access the command palette using the View menu or directly using the shortcut Ctrl+Shift+C.

The file browser now has a filter input which filters the list of files using the same fuzzy matching as the command palette-

And if we talk about Simple Interface mode then it has been extensively updated for a more targeted, documented-oriented feel. There is a toggle on the command prompt to switch to the Simple Interface mode,

or you can select Single Interface mode from the View menu, or you can just directly press Ctrl+Shift+D-

4- Multiple languages support
Yes, now you can change your interface and view contents in your language. For this, you will need to install a language pack. And you can get the list of available packs from here. Currently, only the Chinese language pack is available and its code is zh-CN. So to install this pack use the following command-
- With pip:
pip install jupyterlab-language-pack-zh-CN
- With conda:
conda install -c conda-forge jupyterlab-language-pack-zh-CN
In order to install these language packs, only the language code gets changed and the rest of the command remains the same. Once you’ve installed the language pack all you need to do now is to change the interface.
Go to:
Settings> Language> Chinese(Simplified China)
A confirmation pop-up will appear and once you will accept that and refresh your page, you’ll see everything on the screen in your selected language(Chinese in this case).

5- Another method to install extensions
JupyterLab is designed as an extensible environment. JupyterLab extensions can customize or enhance any part of JupyterLab. Earlier the Extension Manager in JupyterLab and the jupyter labextension install command can install source extension packages from npm. Installing a source extension requires Node.js and a JupyterLab rebuild to activate.
This method is still available if you wish to do it this way but now there’s another and easier method available which is using Python pip and conda packages.
One of the examples of extension is Debugger, which you saw earlier in this article. Another simple example of a Jupyter Lab extension is a Python file. In order to install this extension use the following command-
With pip-
pip install jupyterlab-python-file
With conda-
conda install -c conda-forge jupyterlab-python-file
As simple as that! and after successfully running this command you’ll see that the launcher now has an option of python file in it-

Here is the official documentation on how to install and manage extensions of JupyterLab.
End Notes
Here is the official documentation of all the JupyterLab changelog in version 3.0 along with the changes from developers’ end, bugfixes, etc. I hope you were able to understand this.
If you have any queries, let us know in the comments below.
I am a data lover and I love to extract and understand the hidden patterns in the data. I want to learn and grow in the field of Machine Learning and Data Science.


