Deploying PySpark Machine Learning models with Google Cloud Platform using Streamlit
This article was published as a part of the Data Science Blogathon
Introduction
In this article, I will be demonstrating how to deploy a machine learning model made with PySpark MLlib in Google Cloud Platform using Streamlit. PySpark is very efficient in handling large datasets and with Streamlit, we can deploy our app seamlessly.
Before getting started, here are the few things you need access to:
- Google Cloud Platform Compute Engine (VM Instance) – Google provides $300 credit in trial and if you are a student, you might be eligible for student credits.
- PySpark
- Python 3 and libraries such as Pandas, matplotlib
- Streamlit
Building your ML model
For the machine learning part, I am using New York Airbnb dataset. I am performing a regression model comparison with the target variable price. Even though all the models built for this problem only gives average evaluation metrics scores, for demonstration purpose, I am proceeding with this dataset.
The dataset involves a lot of preprocessing and feature engineering. Details of steps involved in the preprocessing and feature engineering can be found in the Jupyter Notebook here. The below diagram will give a much better understanding of the steps involved.
First, we need to pre-process the data. These include dealing with null values, encoding string-type variables manually into numerical values, removing outliers. Then the categorical variables are converted using string indexing and then one-hot encoding is used. I have used PySpark Pipeline for this. Now all of our features are in numerical format. Some additional features are also created using existing features. Now we can convert these into vector format since the MLlib only accepts the independent features in the vector format. If you prefer, you can export this data into a file for use in the streamlit program. Exporting into a parquet file is advisable as our data involves columns in vectorized format and CSV is not supported for vectors. Finally, various MLlib regression algorithms are applied. These include Linear Regression, Decision Tree Regression, Random Forest Regression. Gradient Boosted Tree Regression and Factorization machines regression. Sample MLlib code is shown below
def regression_model(mllib_model, train_df, test_df):
     if mllib_model == 'Linear Regression':
         lr = LinearRegression(featuresCol = 'features', labelCol='label')
         lr_model = lr.fit(train_df)
         fullPredictions = lr_model.transform(test_df).cache()
         lr_evaluator = RegressionEvaluator(predictionCol="prediction", labelCol="label",metricName="r2")
         r2 = lr_evaluator.evaluate(fullPredictions)
         lr_evaluator = RegressionEvaluator(predictionCol="prediction", labelCol="label",metricName="rmse")
         rmse = lr_evaluator.evaluate(fullPredictions)
         pred = [int(row['prediction']) for row in fullPredictions.select('prediction').collect()]
         actual = [int(row['label']) for row in fullPredictions.select('label').collect()]
         return r2,rmse,pred,actual
Designing your Streamlit Layout
You can either write your entire preprocessing code in your Streamlit program or import preprocessed data file that we saved earlier into the Streamlit program. Doing the latter will save you a lot of computation cost as streamlit programs are run from start if we change any variable in UI (unless @st.cache is used, in which case you can cache the computationally expensive operations).

A sample code is given below. Here we are taking input from the sidebar in the Streamlit UI and passing that input into the function to get the regression scores.
df4 = sc.read.load("processed_data.parquet")
splits = df4.randomSplit([0.7, 0.3], seed=12345)
train_df = splits[0]
test_df = splits[1]
##########  SIDEBAR
st.sidebar.title('MLlib Regression models')
st.sidebar.subheader('Select your model')
mllib_model = st.sidebar.selectbox("Regression Models",
         ('Linear Regression', 'Gradient Boost Tree', 'Decision Tree Regressor',
             'Random Forest Regressor', 'Factorization machine Regressor'))
st.sidebar.text('70 - 30 split')
def regression_model(mllib_model, train_df, test_df):
    if mllib_model == 'Linear Regression':
        lr = LinearRegression(featuresCol = 'features', labelCol='label')
        lr_model = lr.fit(train_df)
        fullPredictions = lr_model.transform(test_df).cache()
        lr_evaluator = RegressionEvaluator(predictionCol="prediction", labelCol="label",metricName="r2")
        r2 = lr_evaluator.evaluate(fullPredictions)
        lr_evaluator = RegressionEvaluator(predictionCol="prediction", labelCol="label",metricName="rmse")
        rmse = lr_evaluator.evaluate(fullPredictions)
        pred = [int(row['prediction']) for row in fullPredictions.select('prediction').collect()]
        actual = [int(row['label']) for row in fullPredictions.select('label').collect()]
        return r2,rmse,pred,actual
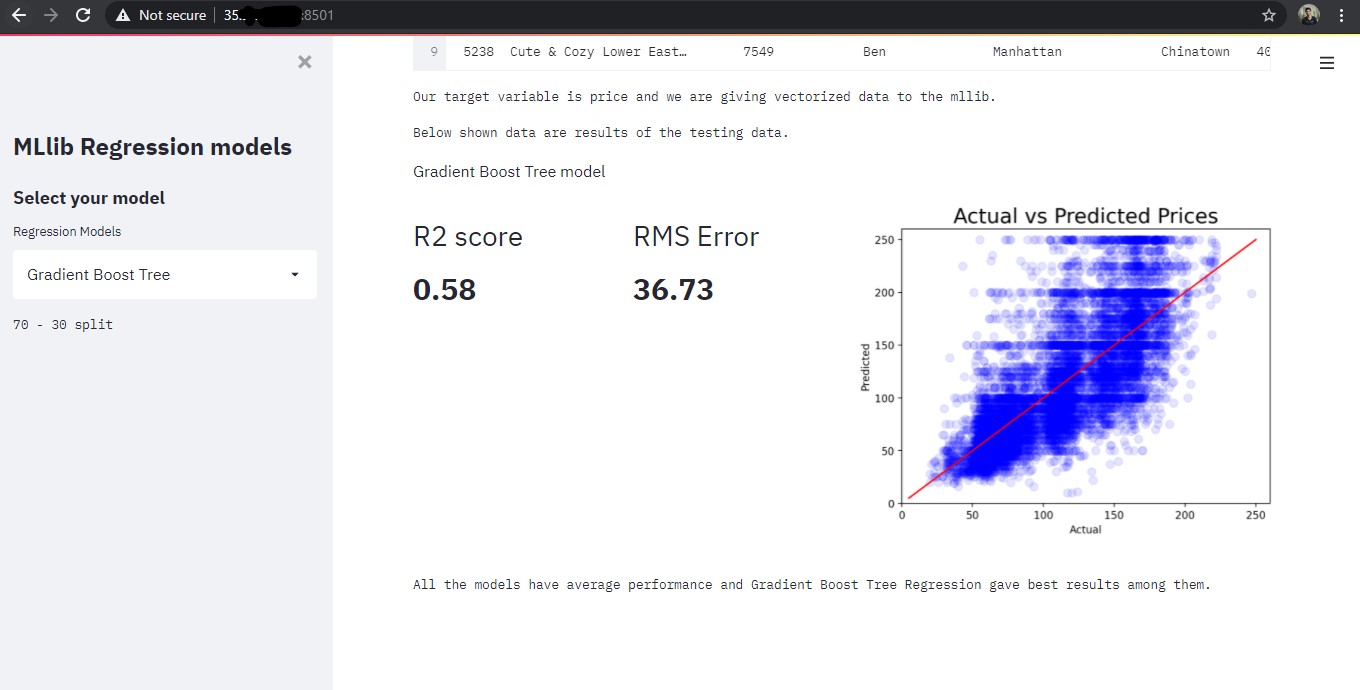
Evaluation metrics are displayed inside st.beta_columns() and for styling markdown and little-bit of CSS is used. For plotting in streamlit, matplotlib is used.

Deploying in Google Cloud Platform
Log on to GCP and make sure that you have enabled Compute Engine API. If so, navigate to sidebar > Compute Engine > VM Instance > CREATE INSTANCE
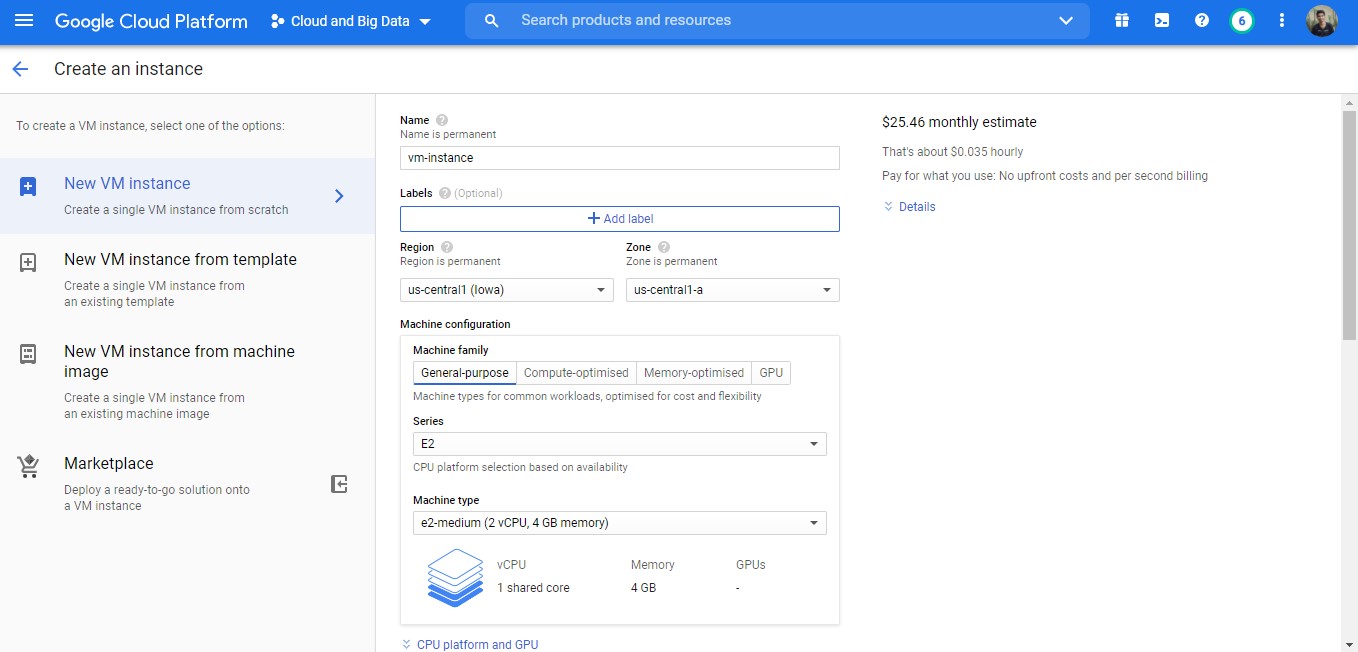
Keep an eye on price estimates on the right side as you change settings. Here are the recommended settings:
- CPU: General Purpose CPUs. I am using a second-generation E2 CPU. Its price is comparable to first-generation N1’s.
- OS: Ubuntu with 10-12 GB storage
- Enable HTTP and HTTPS traffic
Now you can proceed with the creation of VM Instance. If successful, your VM instance will show up as below.
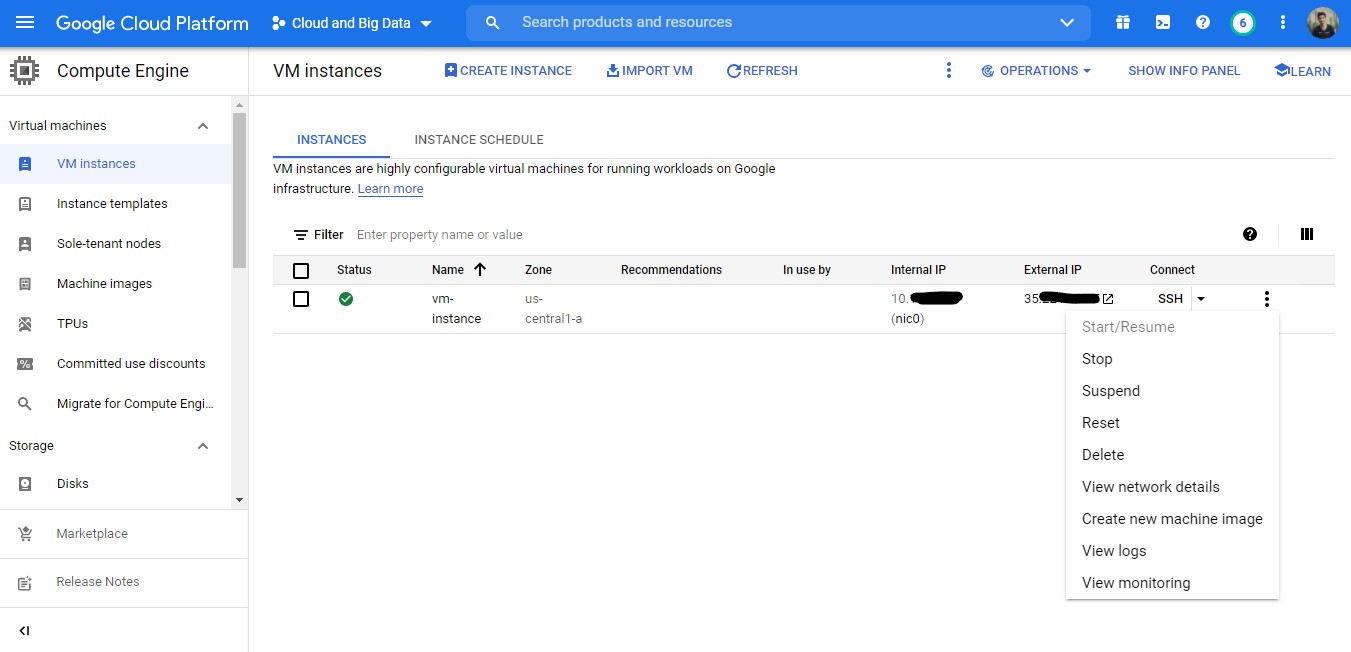
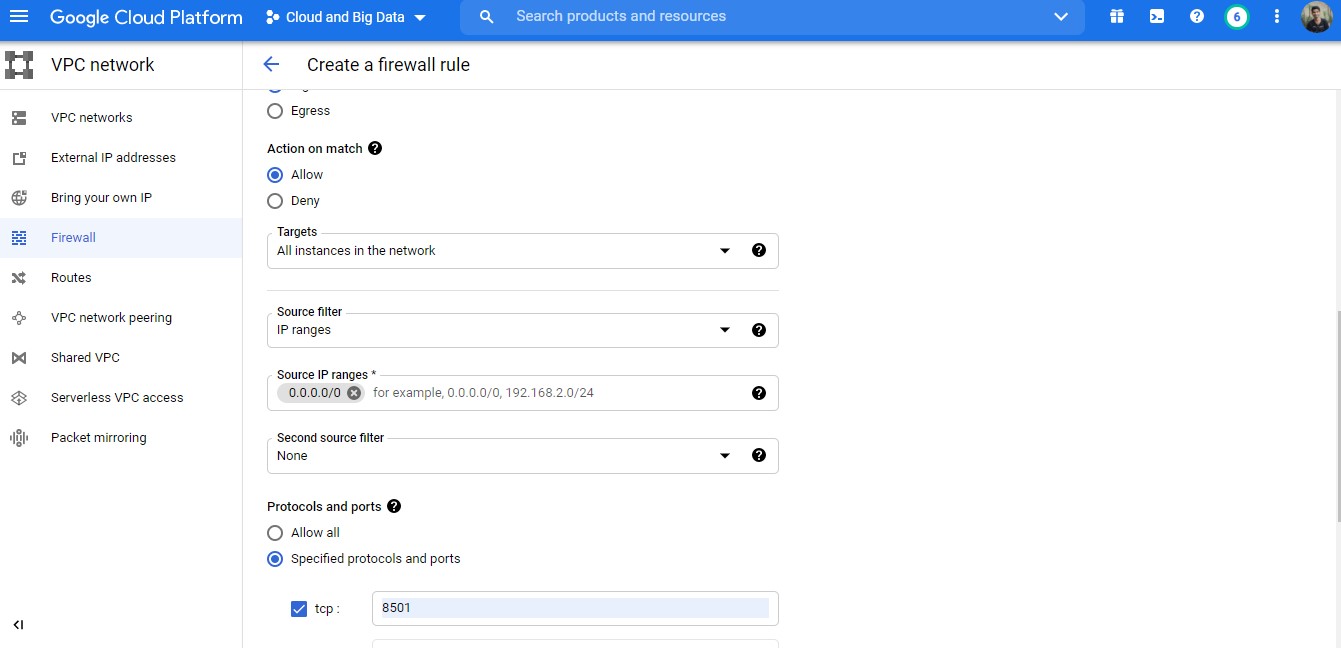
Now for accessing the Streamlit program using external IP, we’ll want to create a Firewall rule. This is essential as Streamlit uses port 8501. This can be done by clicking on ‘View network details’, then go to Firewall > CREATE FIREWALL RULE. Then set the following values
- firewall name
as ‘streamlit‘ - Direction of
traffic as ‘ingress’, - Target as
‘All instances’ in network’ , - Source
filters: IP ranges - Source ip:
0.0.0.0/0 - TCP port:
8501
Make sure this newly created rule shows up in the firewall list.
After completing the above steps, you can log in to your newly created VM instance by clicking on SSH in connect column. If successful, you will be seeing Ubuntu Terminal.
Now in the terminal, you can install the requirements.
- Mini-conda (also contains Python 3)
- For verifying conda installation, check whether the base is appearing in front of your VM name in the terminal.
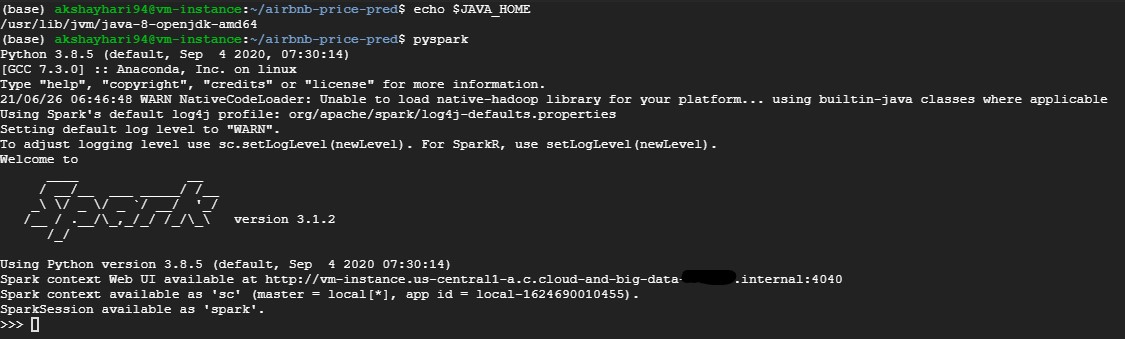
- Java 8 jdk (for PySpark) :
- For verification, type the below command.
$echo JAVA_HOME
- If your Java folder path is not displayed, set $JAVA_HOME path using export
- For verification, type the below command.
- PySpark and py4j
- Either install them manually or use pip install pyspark
- py4j is included in the pip install pyspark
- Make sure that you set environment variables correctly. Follow any PySpark installation guide.
- For verification, type pyspark in terminal. If successful, you will be getting the screen shown below
- Other Python libraries (use pip install )
- streamlit
- pandas
- matplotlib
To make sure, type pip list All your installed python libraries should show up there.
Now copy your Pyspark ML program to the VM instance. You can manually upload each file or use git to clone files.
git clone https://github.com/akshayhari/airbnb-price-pred
Go to the newly cloned program folder and run the python file using streamlit
streamlit run app.py

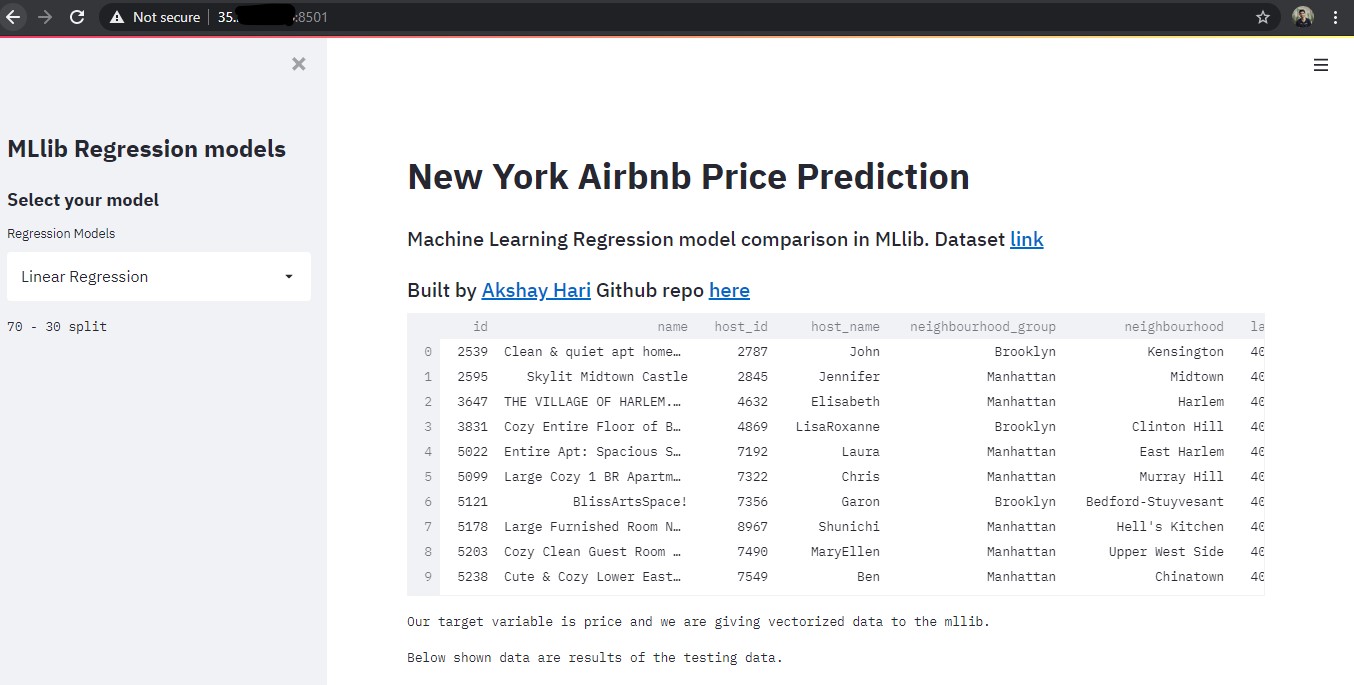
Now you can open the External URL in your browser and your app will show up the browser.
You can change ML models in the sidebar and the output will be reflected in the browser.
Conclusion
For demo projects with big datasets, you can use the above method for deployment. Keep in mind that in the above demo, my browser connection to the Streamlit instance is not secure. For smaller apps, you can make use of Google App Engine for deployment. I have also included Dockerfile and app.yaml file for GCP App Engine deployment, however, I ran into some performance issues. For me, this method is much faster than the App Engine deployment. Please let me know in the comments for any improvements.
Link for steps involved in EDA, preprocessing: Github
Link to my streamlit app: Github
References
- https://www.kaggle.com/spuchalski/predicting-price-of-airbnb-listings-in-nyc (Data preprocessing and feature engineering in pandas)
- https://docs.streamlit.io/en/stable/api.html
- https://spark.apache.org/docs/latest/ml-classification-regression.html
The media shown in this article are not owned by Analytics Vidhya and are used at the Author’s discretion.


