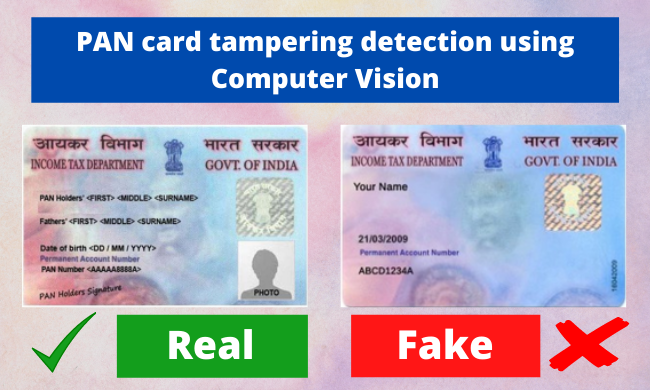
PAN card fraud detection using computer vision
This article was published as a part of the Data Science Blogathon
What is Computer Vision?
Computer vision is a field of artificial intelligence that trains computers to interpret and understand the visual world. Using digital images from cameras and videos and deep learning models, machines can accurately identify and classify objects — and then react to what they “see”.
Computer vision tasks include methods for acquiring, processing, analyzing and understanding digital images
Computer Vision in Image processing is mainly focused on processing the raw input images to enhance them or preparing them to do other tasks. Computer vision is focused on extracting information from the input images or videos to have a proper understanding of them to predict the visual input like the human brain.
Purpose
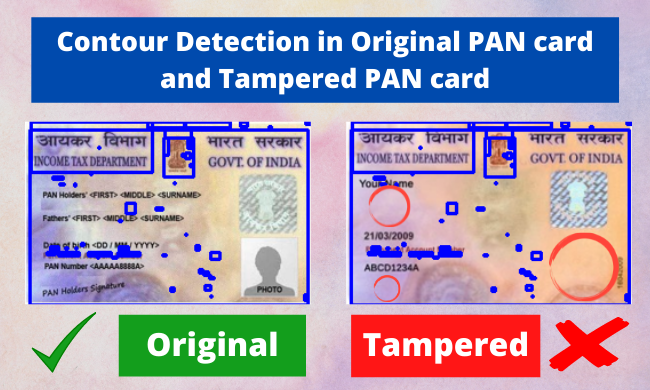
The purpose of this project is to detect tampering/fraud of PAN cards using computer vision. This project will help the different organizations in detecting whether the Id i.e. the PAN card provided to them by their employees or customers or anyone is original or not.
For this project we will calculate the structural similarity of the original PAN card and the PAN card uploaded by the user – This is the soul of this project we will discuss it thoroughly later in this blog.
Similarly in this project with the help of image processing involving the techniques of computer vision we are going to detect that whether the given image of the PAN card is original or tampered (fake) PAN card.
The steps involved in this project are as follows :
1. Import necessary libraries
2. Scraping the tampered and original pan card from the website
3. Scaling down the shape of the tampered image as the original image
4. Read original and tampered image
5. Converting an image into a grayscale image
6. Applying Structural Similarity Index (SSIM) technique between the two images
7. Calculate Threshold and contours and
8. Experience real-time contours and threshold on images
Importing the necessary packages
from skimage.metrics import structural_similarity
import imutils
import cv2
from PIL import Image
import requests
- Skimage: Scikit-image, or ski-mage, is an open-source Python package, in this project most of the image processing techniques will be used via scikit-image
- imutils: Imutils are a series of convenience functions to make basic image processing functions such as translation, rotation, resizing, and displaying images easier with OpenCV.
- cv2: OpenCV (Open Source Computer Vision Library) is a library of programming functions. Here in this project major reading and writing of the image are done via cv2.
- PIL: PIL (Python Imaging Library) is a free and open-source additional library for the Python programming language that adds support for opening, manipulating, and saving many different image file formats.
Make folders and sub-folders for storing images, you may create it manually it’s completely up to you (Optional).
!mkdir pan_card_tampering
!mkdir pan_card_tampering/image
Scraping original and tampered PAN card from different sources
original = Image.open(requests.get('https://www.thestatesman.com/wp-content/uploads/2019/07/pan-card.jpg', stream=True).raw)
tampered = Image.open(requests.get('https://assets1.cleartax-cdn.com/s/img/20170526124335/Pan4.png', stream=True).raw)
In the above code snippet, we are web scarping the images from different sources using the requests library.
Loading original and user-provided images
As you can see in the above output, The original size of the original image and the original size of tampered image are different which will result in unwanted/false results while doing image processing, that’s why scaling down both the image to equal shape is prominently needed.
Converting the format of a tampered image similar to the original image.
# Resize Image
original = original.resize((250, 160))
print(original.size)
original.save('pan_card_tampering/image/original.png')#Save image
tampered = tampered.resize((250,160))
print(tampered.size)
tampered.save('pan_card_tampering/image/tampered.png')#Saves image
Output :
(250, 160)
(250, 160)
Now, if you will see the output the shape of both the images (Original image and tampered image) is scaled down to equal shape i.e. (250,160). Now the image processing will be smoother and more accurate than it was before.
We can change the format of the image (png or jpg) if needed.
# Change image type if required from png to jpg
tampered = Image.open('pan_card_tampering/image/tampered.png')
tampered.save('pan_card_tampering/image/tampered.png')#can do png to jpg
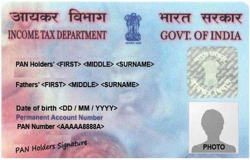
Display original PAN card image which will be used for comparison.
# Display original image
original
Output :
Display user-provided image which will be compared with PAN card.
# Display user given image
tampered
Output :

Reading images using OpenCV.
# load the two input images
original = cv2.imread('pan_card_tampering/image/original.png')
tampered = cv2.imread('pan_card_tampering/image/tampered.png')
Now in the above code, we are reading both the images (Original and Tampered) using cv2’s imread() function.
Convert the images into grayscale
# Convert the images to grayscale
original_gray = cv2.cvtColor(original, cv2.COLOR_BGR2GRAY)
tampered_gray = cv2.cvtColor(tampered, cv2.COLOR_BGR2GRAY)
In the above code, we have converted the original images (Original pan card and user given Pan card) to gray-scale images using cv2’s function cvtColor() which have parameter as cv2.COLOR_BGR2GRAY.
But why we need to convert them into grayscale? Here’s the reason why :
- Converting images into grayscale is very much beneficial inaccuracy of image processing because in image processing many applications don’t help us in identifying the importance, edges of the colored images also colored images are a bit complex to understand by machine because they have 3 channel while grayscale has only 1 channel.
Applying Structural Similarity Index (SSIM) technique between the two images
Hold on ! First we need to understand what is SSIM !
What is SSIM?
The Structural Similarity Index (SSIM) is a perceptual metric that quantifies the image quality degradation that is caused by processing such as data compression or by losses in data transmission.
How SSIM perform its function?
This metric is basically a full reference that requires 2 images from the same shot, this means 2 graphically identical images to the human eye. The second image generally is compressed or has a different quality, which is the goal of this index.
What is the real-world use of SSIM?
SSIM is usually used in the video industry but has as well a strong application in photography.
How SSIM helps in detection?
SSIM actually measures the perceptual difference between two similar images. It cannot judge which of the two is better: that must be inferred from knowing which is the original one and which has been exposed to additional processing such as compression or filters.
# Compute the Structural Similarity Index (SSIM) between the two images,
# ensuring that the difference image is returned

(score, diff) = structural_similarity(original_gray, tampered_gray, full=True)
diff = (diff * 255).astype("uint8")
print("SSIM Score is : {}".format(score*100))
if score >= 80:
    print ("The given pan card is original")
else:
    print("The given pan card is tampered")
Output :
SSIM Score is : 31.678790332739425
The given pan card is tampered
Let’s break down what just happened in the above code!
- Structural similarity index helps us to determine exactly where in terms of x,y coordinates location, the image differences are. Here, we are trying to find similarities between the original and tampered image.
- The lower the SSIM score lower is the similarity, i.e SSIM score is directly proportional to the similarity between two images
- We have given one threshold value of “45” i.e if any score is >= 80 it will be regarded as the original pan card else tampered with one.
- Generally SSIM values 0.97, 0.98, 0.99 for good quallty recontruction techniques.
Experience real-time threshold and contours on images
Contours detection is a process that can be explained simply as a curve joining all the continuous points (along with the boundary), having the same color or intensity. The algorithm does indeed find edges of images but also puts them in a hierarchy.
# Calculating threshold and contours
thresh = cv2.threshold(diff, 0, 255, cv2.THRESH_BINARY_INV | cv2.THRESH_OTSU)[1]
cnts = cv2.findContours(thresh.copy(), cv2.RETR_EXTERNAL, cv2.CHAIN_APPROX_SIMPLE)
cnts = imutils.grab_contours(cnts)
Here we are using the threshold function of computer vision which applies an adaptive threshold to the image which is stored in the form array. This function transforms the grayscale image into a binary image using a mathematical formula.
Find contours works on binary image and retrieve the contours. These contours are a useful tool for shape analysis and recognition. Grab contours grabs the appropriate value of the contours.
Creating bounding boxes (contours)
# loop over the contours
for c in cnts:
    # applying contours on image
    (x, y, w, h) = cv2.boundingRect(c)
    cv2.rectangle(original, (x, y), (x + w, y + h), (0, 0, 255), 2)
    cv2.rectangle(tampered, (x, y), (x + w, y + h), (0, 0, 255), 2)
Bounding rectangle helps in finding the ratio of width to height of the bounding rectangle of the object. We compute the bounding box of the contour and then draw the bounding box on both input images to represent where the two images are different or not.
#Display original image with contour
print('Original Format Image')
original_contour = Image.fromarray(original)
original_contour.save("pan_card_tampering/image/original_contour_image.png")
original_contour
Output :
Original format Image
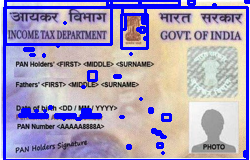
Inference :
- Here in the above output, you can see that the original image is shown with the contours (bounding boxes) on it using fromarray() function.
- Also, you can simply save the image using the save() function (Optional).
#Diplay tampered image with contour
print('Tampered Image')
tampered_contour = Image.fromarray(tampered)
tampered_contour.save("pan_card_tampering/image/tampered_contours_image.png")
tampered_contour
Output :
Tampered Image
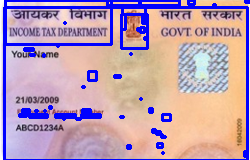
Inference: This similarly goes with the tampered image but one can notice that some of the contours are missing in the tampered image.
Here’s the illustration of the above result
# Display difference image with black

print('Different Image')
difference_image = Image.fromarray(diff)
difference_image.save("pan_card_tampering/image/difference_image.png")
difference_image
Output :
Different Image
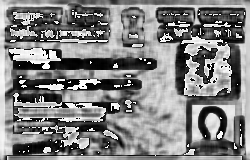
Inference :
- Here is another very interactive way to show the contours in terms of heated threshold i.e. by finding the heated zone (text/image zone) and normal zone (without text/image).
- The heated zone i.e the zone which has text/images will be shown in the dark (black) region and the other one as a light (kind of white) zone.
#Display threshold image with white

print('Threshold Image')
threshold_image = Image.fromarray(thresh)
threshold_image.save("pan_card_tampering/image/threshold_image.png")
threshold_image
Output :
Threshold Image
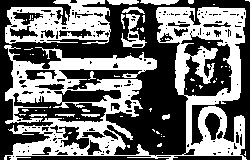
Inference: Everything here is just the same all we can see is the change in the role of color, here white color is showing the heated zone and the black color is showing the normal zone.
Summary
- Finding out structural similarity of the images helped us in finding the difference or similarity in the shape of the images.
- Similarly, finding out the threshold and contours based on that threshold for the images converted into grayscale binary also helped us in shape analysis and recognition.
- As our SSIM is ~31.2% we can say that the image user provided is fake or tampered with.
- Finally, we visualized the differences and similarities between the images using by displaying the images with contours, difference, and threshold.
Scope
This project can be used in different organizations where customers or users need to provide any kind of id in order to get themselves verified. The organization can use this project to find out whether the ID is original or fake. Similarly, this can be used for any type of ID like Aadhar, voter id, etc.
This concludes my discussion for today 🙂
Endnotes
Thank you for reading my article 🙂
I hope you have enjoyed the practical implementation and line-by-line explanation of PAN card fraud detection!
I’m providing the code link here so that you guys can also learn and contribute to this project to make it even better.
You will never gonna miss my previous article on, “Drug discovery using machine learning” published in Analytics Vidhya’s medium publication. Refer to this link
If got any queries you can connect with me on LinkedIn, refer to this link
About me
Greeting to everyone, I’m currently working as a Data Science Associate Analyst in Zorba Consulting India. Along with part-time work, I’ve got an immense interest in the same field i.e. Data Science along with its other subsets of Artificial Intelligence such as, Computer Vision, Machine learning, and Deep learning feel free to collaborate with me on any project on the above-mentioned domains (LinkedIn).
The media shown in this article are not owned by Analytics Vidhya and are used at the Author’s discretion.


Excellent Blog... Really helpful.. 👍👍