Running Pandas on GPU and Taking It To The Moon
This article was published as a part of the Data Science Blogathon
Pandas library comes in handy while performing data-related operations. Everyone starting with their Data Science journey has to get a good understanding of this library.
Pandas can handle a significant amount of data and process it most efficiently. But at the core, it is still running on CPUs. Parallel processing can be achieved to speed up the process but it is still not efficient to handle large amounts of data.
GPU (Graphics Processing Unit) is a better option than processes a huge amount of data on the fly. GPUs were primarily used for gaming and extensive video rendering work. Researchers found its potential in boosting Deep learning algorithms and currently most of the big projects rely on GPU support.
In this article, we will explore Nvidia Rapids which is an open-source library for executing data science pipelines entirely on GPUs. I will compare the normal Pandas performance in comparison to GPU data frames.

Rapids Setup
We will be testing out this library in Google Colab as it provides free GPU support. The GPU provided is of high memory (15GB) with less disk space. The installation process will take some time (16-18 minutes). Follow along with these steps.
Step 1: Enable GPU runtime
First, tap on the “Runtime” option from the menu bar and select “Change runtime type”. Next, select GPU as the Hardware accelerator.
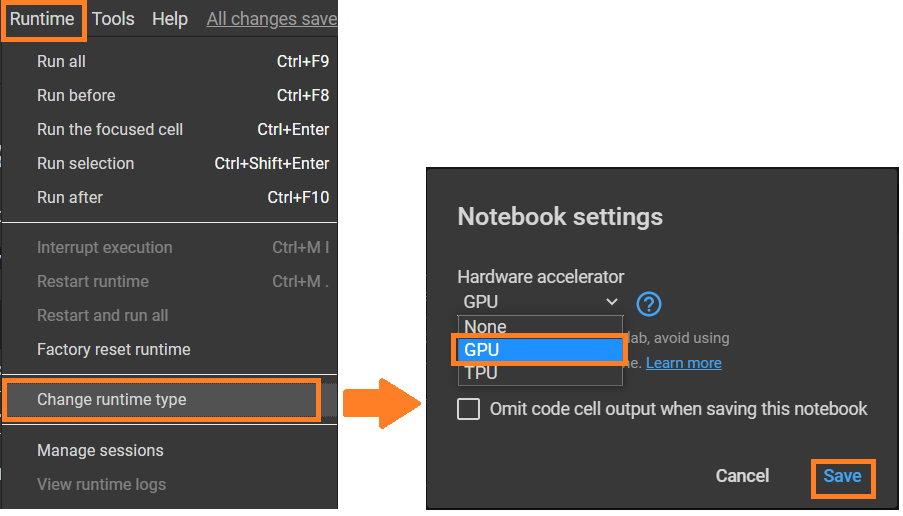
Steps to enable GPU runtime
Step 2: Check Graphic Card
Currently, CUDA, which makes it possible to run general-purpose programming on GPUs is only available for Nvidia graphic cards. Although Google colab allocates Nvidia or Tesla-based GPU but Rapids only supports P4, P100, T4, or V100 GPUs in Google Colab. You can this confirm by running this command:
! nvidia-smi
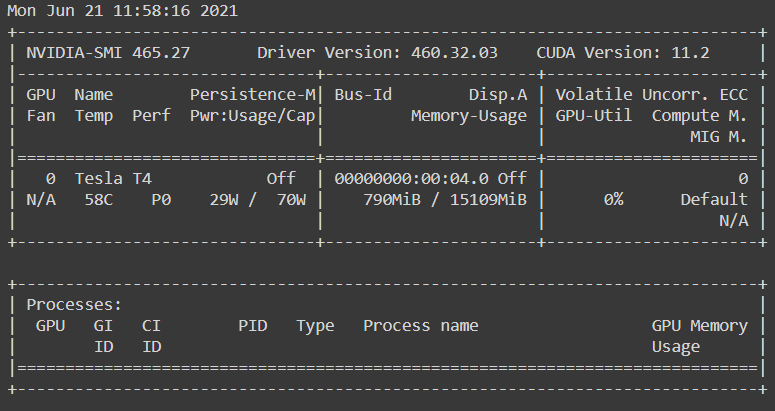
Output of command
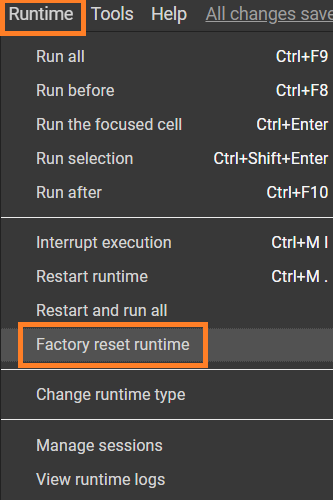
In case you get another GPU (like Tesla T8), then you need to go back to the “Runtime” menu and then select “Factory Reset Runtimes”
Step 3: Fetch the Rapids Colab installation files
! git clone https://github.com/rapidsai/rapidsai-csp-utils.git
! python rapidsai-csp-utils/colab/env-check.py
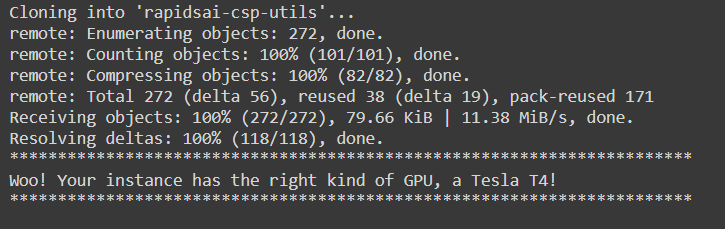
Output of command
Step 4: Updating Colab environment files and Kernel restart
The following commands will update the existing colab files and restart the kernel. Your session will crash after this command but it will restart automatically.
! bash rapidsai-csp-utils/colab/update_gcc.sh
import os
os._exit(00)
Step 5: Install condacolab
import condacolab
condacolab.install()
This is the last time that the session will crash and the kernel restarts. After restart, you can check if the installation was successful by running this command:
import condacolab
condacolab.check()
Step 6: Install Rapids
The last setup command and the most time taking (around 15 minutes) is for installing the Rapids on the colab instance and copying the files into the current working directory.
!python rapidsai-csp-utils/colab/install_rapids.py stable
Now we are all set to test out the GPU performances!
All the code discussed in this article will be available on this GitHub Repository
Creating a DataFrame
To test out the full potential of GPUs, we will create a fairly large dataframe. The code below creates pandas and cuDF dataframe with a size of 10000000 rows × 2 columns (10M x 2)!
Step 1: Import libraries
import cudf
import pandas as pd
import numpy as np
Step 2: Create Dataframes
gpuDF = cudf.DataFrame({'col_1': np.random.randint(0, 10000000, size=10000000),
                          'col_2': np.random.randint(0, 10000000, size=10000000)})
pandasDF = pd.DataFrame({'col_1': np.random.randint(0, 10000000, size=10000000),
                          'col_2': np.random.randint(0, 10000000, size=10000000)})
cuDF is a Python GPU DataFrame. It is built as a mirror to pandas dataframe and has almost every function that pandas offer. It can be used as a replacement for pandas and it will execute all the operations in GPU memory.
The creation time for these data frames is almost the same because we used a numpy array instead of lists. If lists were used, a significant difference is observed.
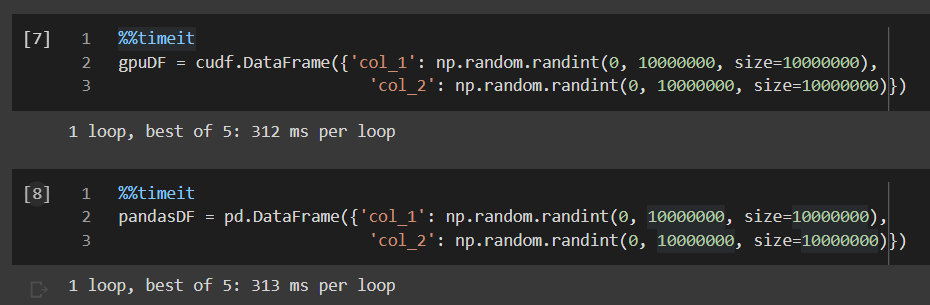
Dataframes creation time
Performing Operations
Let’s do some operations on these data frames to capture the speed difference and check if GPU really boosts the performance or not!
1. Logarithmic Operation
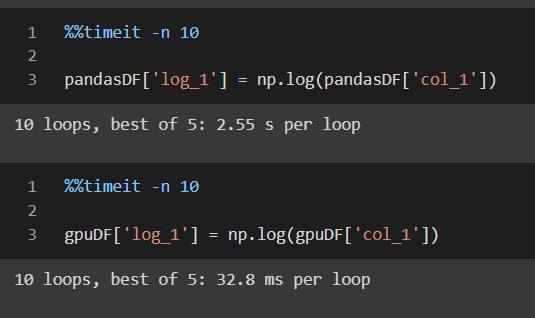
Applying np.log function on one of the columns of both data frames and doing it for 10 loops to get the best average:
%%timeit -n 10
pandasDF['log_1'] = np.log(pandasDF['col_1'])
%%timeit -n 10
gpuDF['log_1'] = np.log(gpuDF['col_1'])
Log operation time
As you can see that applying the logarithmic function on GPU dataframe yield results in 32.8 ms per loop as compared to 2.55 s per loop! This is the difference we expect in GPU-based processing. All the processes are efficient and done in high-performance memory.
2. Square Operation
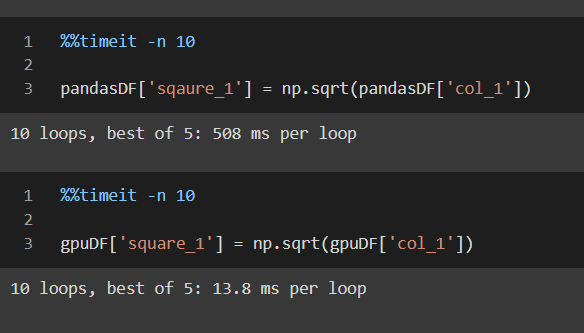
Applying np.sqrt function on one of the columns of both types of data frames:
%%timeit -n 10
pandasDF['sqaure_1'] = np.sqrt(pandasDF['col_1'])
%%timeit -n 10
gpuDF['square_1'] = np.sqrt(gpuDF['col_1'])
Square operation time
Here also, the execution time went from 508 ms per loop in pandas data frames to 13.8 ms per loop!
3. Converting “Int” data type to “string”
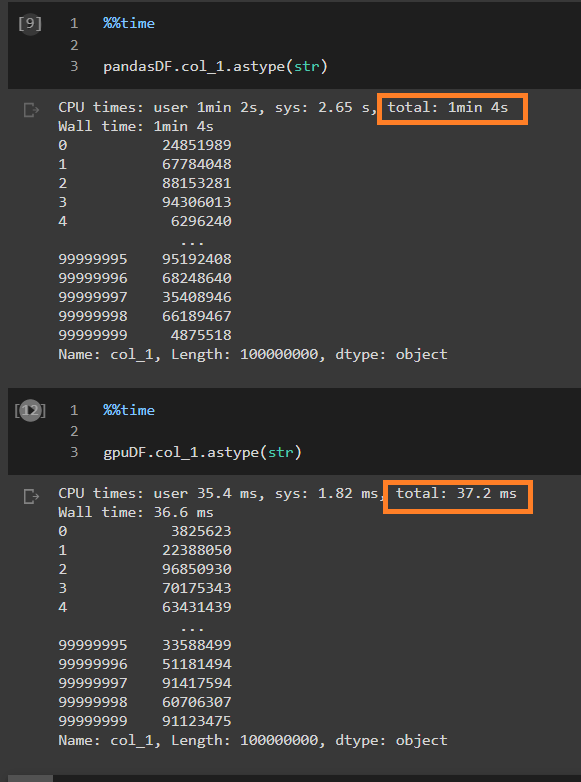
To amaze you, even more, Let’s convert the “col_1” of both types of data frames, which contains integer values ranging from 0 to 10M to string type values (object).
%%time
pandasDF.col_1.astype(str)
%%time
gpuDF.col_1.astype(str)
Integer to string type conversion
This execution difference in terms of speed matters in real-world projects where quick data ingestion and prediction are required.
Training a Linear regression model
Model training can take much of the time. Depending upon the type of model, it can vary but what if the model is trained in GPU memory? It is possible using Rapids. The dataframe to be passed to this GPU-based implementation is cuDF with the difference that the model will be built using cuML library, which is again, GPU based.
Let’s build this model step by step and compare its performance with sklearn based models!
Step 1: Import the essentials
import cudf
from cuml import make_regression, train_test_split
from cuml.linear_model import LinearRegression as cuLinearRegression
from cuml.metrics.regression import r2_score
from sklearn.linear_model import LinearRegression as skLinearRegression
Step 2: Create Fake data and split it (Training and testing)
n_samples = 2**20
n_features = 399
random_state = 23
X, y = make_regression(n_samples=n_samples, n_features=n_features, random_state=random_state)
X = cudf.DataFrame(X)
y = cudf.DataFrame(y)[0]
X_cudf, X_cudf_test, y_cudf, y_cudf_test = train_test_split(X, y, test_size = 0.2, random_state=random_state)
X_train = X_cudf.to_pandas()
X_test = X_cudf_test.to_pandas()
y_train = y_cudf.to_pandas()
y_test = y_cudf_test.to_pandas()
- make_regression function of cuML library makes it super easy to create regression-based dataset out of the hyperparameters provided. It takes in the number of features and the number of rows to be included in the dataset.
- train_test_split function of cuML is the same as used in sklearn
- cudf.DataFrame.to_pandas() convert the GPU powered dataframe to normal pandas dataframe that operates on CPU.
Now the dataset is ready, let’s train a skearn based model and check its training time.
sk = skLinearRegression(fit_intercept=True,
                            normalize=True,
                            n_jobs=-1)
sk.fit(X_train, y_train)
The time taken to train this model is:
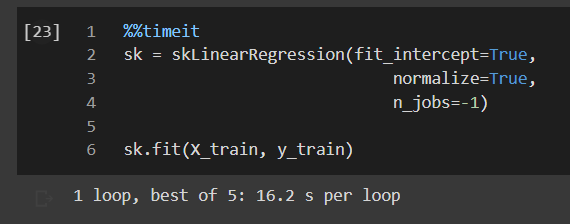
sklearn model training
Training a GPU-based model is not very different.
gpuModel = cuLinearRegression(fit_intercept=True,
                              normalize=True,
                              algorithm='eig')
gpuModel.fit(X_cudf, y_cudf)
Look at the time taken for this training:
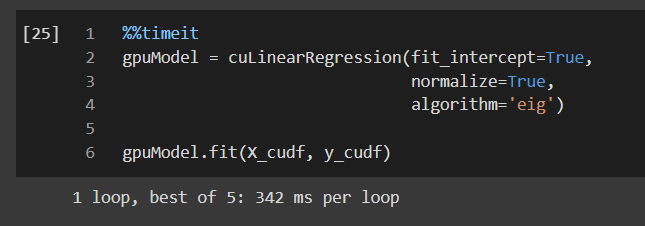
GPU based model training
While the sklearn model took 16.2 seconds to train the model per loop, GPU based cuML model took only 342 ms per loop!
Conclusion
In all terms, GPU-based processing is far better than CPU-based processing. Libraries like Pandas, sklearn play an important role in the data science life cycle. When the size of data increases, CPU-based processing becomes slower and a faster alternative is needed. GPUs fill this gap.
If you have any doubts, queries, or potential opportunities, then you can reach out to me via
1. Linkedin – in/kaustubh-gupta/
2. Twitter – @Kaustubh1828
3. GitHub – kaustubhgupta
4. Medium – @kaustubhgupta1828
The media shown in this article on Metrics for Image Classification are not owned by Analytics Vidhya and are used at the Author’s discretion.
Hi, I am a Python Developer with an interest in Data Analytics and am on the path of becoming a Data Engineer in the upcoming years. Along with a Data-centric mindset, I love to build products involving real-world use cases. I know bits and pieces of Web Development without expertise: Flask, Fast API, MySQL, Bootstrap, CSS, JS, HTML, and learning ReactJS. I also do open source contributions, not in association with any project, but anything which can be improved and reporting bug fixes for them.


