Build an end-end Currency Convertor chatbot with Python and Dialogflow
This article was published as a part of the Data Science Blogathon
Introduction
Hello all, Hope you are fine. In this tutorial we will learn how to create chatbots using Dialogflow and python, as well we will learn the deployment of chatbots to telegram. In our previous articles, we have learned to create a simple rule-based chatbot using simple python and NLTK libraries. I would like to request you to have a look at the article creating a simple chatbot using python to get a basic understanding and application of chatbots.
Table of Contents
- What is Chatbots
- Brief on Dialogflow
- Implementing Currency Converter Chatbot
- Agent
- Intent
- Small Talk
- Creating Flask APP
- testing with ngrok
- currency converter API
- Deployment on Telegram
- End Notes
What is Chatbot?
A chatbot is a natural language understanding application that is widely used by product-based as well as service-based companies to reduce human work and response as soon as possible to maintain customer satisfaction. Chatbots are even used as a marking purpose to recommend products, and also to increase the traffic of a site.
Chatbots have much application in today’s era and most of the business is transforming and increasing productivity using chatbots built using the latest technologies. Applications, types of chatbots already we have learned in the previous article.
Brief on Dialogflow
Dialogflow is a platform introduced by Google used to implement chatbots. It is a leading chatbot implementation platform that works on a natural language understanding to create an interactive conversational interface for websites and android, and the term is also known as conversational AI.
Features of Dialogflow
- Develop serverless Apps
- Design Voice-first world
- understand user sentiments
- Reply to an automatic spelling correction
Many other companies also provide platforms to implement chatbots like AS lily, Facebook wit.ai, IBM Whatson, etc. then why do we prefer Google Dialogflow to get started?
Dialogflow is user-friendly and powered by Google Cloud machine learning technology hence most people preferred Dialogflow to start learning implementation of chatbots. Apart from this Dialogflow offers Multi-channel integration of chatbots in an easy way, Dialogflow offers a free edition to work with it and work on the concept of NLP technology.
If you want to read more on Dialogflow please refer to this Blogspot article.
Practical Implementation of Currency Convertor Chatbot
Now we have a theoretical understanding of chatbots and their implementation framework. let’s get our hands dirty with implementing a simple end-to-end currency convertor bot.
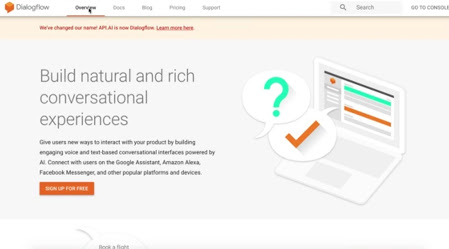
Create Dialogflow account
In your browser itself visit the Dialogflow cloud website and create an account using an email address.
Agents
An agent is the main application of a chatbot or the name of the agent defines your chatbot. its task is to manage end-user conversations. All the conversations we are doing are with agents only. There are different terms used through which agent gets different commands to perform.
The chatbot agent is the same as a human agent working in a call centre. Both are trained under certain scenarios, and they do not violate their training in any circumstances, that’s the speciality of chatbots.
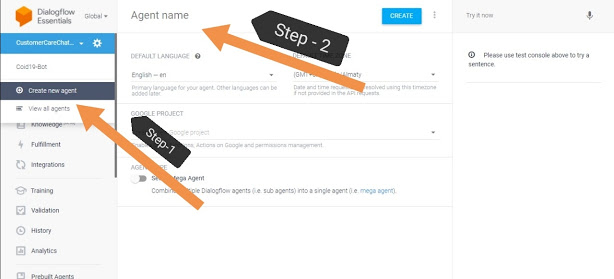
As you are signed in to Dialogflow, in the left panel at the top you can see the option of the agent. Click on it and click create a new agent. Name your agent what you prefer.
Intents
The intent is an end-user expression made for a conversation with an agent. In simple words, the intent is an expression made by the end-user and the chatbot matches the expression in his training data and finds the relevant response for the user.
so, along with intent, we need to train the chatbot on responses to generate. for a particular intent, there can be multiple kinds of responses or intent can be written differently and can have a single response.
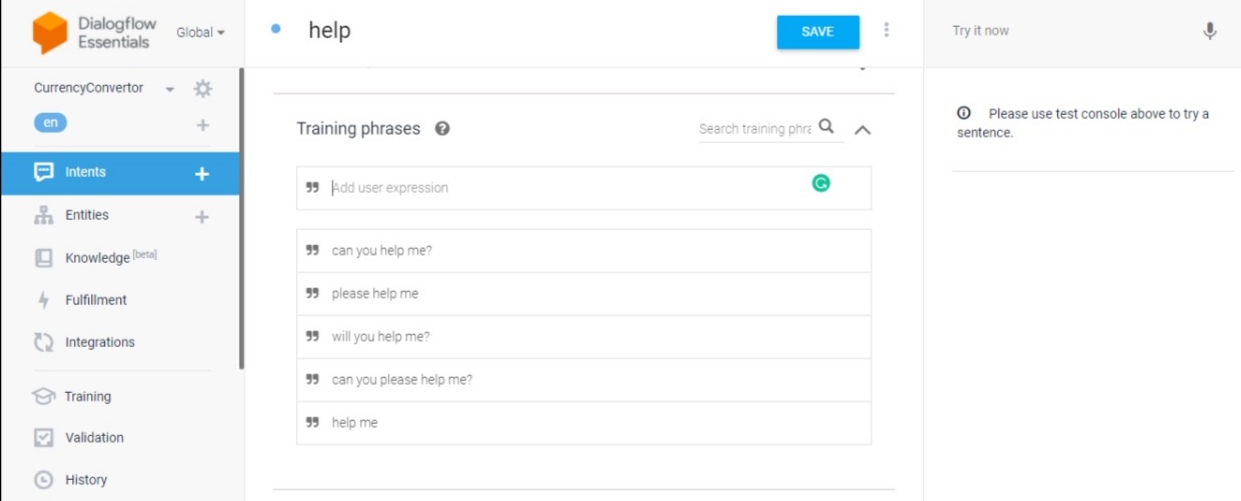
Below the agent section, you can see the intent option. Click on it, and as you click there is two default intent created for your chatbot. one is welcome and one is fallback intent. If you want you can modify their response. for now, click on create new intent and name it as help. Now for help different users can query in a different way, so try to include a few with different tastes. The intent is to be defined in the training phase as shown below.
After creating intent scroll down and you will find an option for a response. This is a chatbot response for a particular intent, so define some responses that you want to give.
Small Talk
Dialogflow provides some groups with a set of questions that are mostly asked by the users to a chatbot. We humans first try to test any application before in use and whenever we communicate with any chatbot, we try to ask some weird questions to it. so Dialogflow provides us that questions on which we can train our chatbot so that It is reliable to handle such queries fired by users.
When you scroll down the left panel, you have an option of small talk. just click on it and you can see some groups like About agent, emotions, etc. And this group contains a set of questions. first, enable the small talk, and whichever question you want to include just add an answer for that and save it. This is how the small talk for Dialogflow chatbot works.
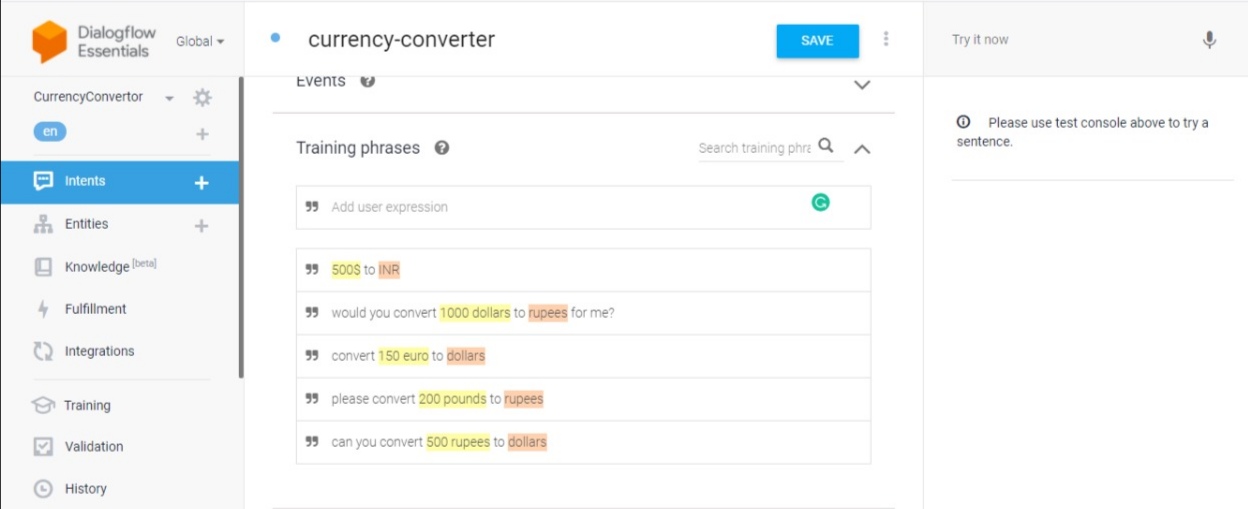
Create currency convertor Intent
Again visit the Intent section and create new intent for the currency converter. here we will be using the action and parameters section to match the currency and unit to convert and the currency name in which to convert. In the training, phase tries adding some expressions like convert 500 dollars to rupees. as you press enter you will see Dialogflow automatically identify the unit and current as a unit and second as currency name and add to a parameter in the Action and parameter section box.
If in any intent it matches it wrong, correct it by just clicking on it. There are lots of parameters present at default in Dialogflow, But our main application goal is to convert currency from one unit to another. After adding some intent in action and parameter section make both the action as compulsory to give if any user wants to use our chatbot then he needs to provide unit currency and currency name in which to convert.
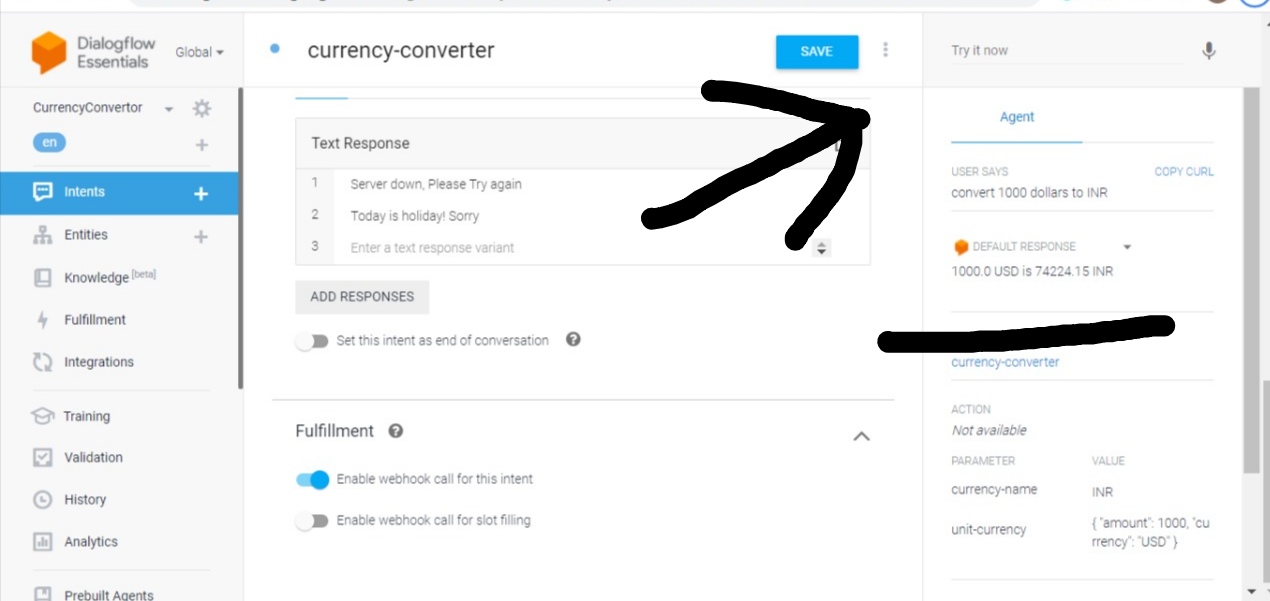
You can see the prompt option in action and parameter. If any user does not provide anyone parameter then this prompt will be displayed. so write an appropriate message for the user to provide the currency value and name. If the chatbot fails to identify the parameter then add relevant response from the chatbot side in the response section like server down, please try again later.
Connect Flask with Dialogflow chatbot
How we will communicate to Dialogflow through the flask. If you try to communicate to your chatbot using the try it now sections on the right side then you’ll observe the diagnostic info option which is a JSON file containing details of your talk with a chatbot. we will pass this to the flask packet which will convert the value and return the result to us.
How we will communicate Dialogflow with Flask code because Dialogflow is running on a server and flask is running on a local system. One method is to host the flask code but we are currently in a development stage, and we need to check the code again and again so we cannot deploy it again and again. So there is one solution to use software like ngrok which brings your machine code online. It is tunneling software that brings your machine code online for some time and you can test your errors online while developing your project.
Build Flask Template
If you are new to python development then understand that Flask is a micro web framework of python which is used to develop web applications or to work on server-side scripting. First, build a basic flask template that will work as a packet for the chatbot and run it using a terminal or any Python IDE.
from flask import Flask
app = Flask("__name__")
@app.route("/")
def index():
    return "hello world"
if __name__ == "__main__":
    app.run(debug=True)
Download ngrok
Visit the ngrok website and according to the operating system you are using download ngrok. Extract the zip file and run it and you will see a ngrok command prompt is prompted.
In ngrok command prompt write below command
ngrok HTTP 5000
Flask default running port is 5000. Copy the second URL it displays on the command prompt and open it in a browser. you will observe that your flask app is connected and it’s now online.
Connect Dialogflow to URL
In your, Dialogflow click on fulfillment in the left panel and enable webhook. As you enable it, it will ask for an URL. paste the same URL we got from ngrok and save the changes. Using this Dialogflow will make a POST request in a form of a response to a user query.
One second thing to do is enable webhook calls in the currency converter intent that we have created. Visit currency converter intent and scroll down and enable webhook calls.
Convert one currency to another currency
The complete connection setup is complete. Now we have to accept the response of the Dialogflow POST request and get access to data in form of JSON. And again after converting we need to send the result back to Dialogflow. For converting amounts from one currency to another currency we will take the help of online API(Application programming interface) from currency convertor API.
Please visit here and click on the get API key. enter your email address and submit it. Check your mail and verify it. After that you also got your API key verified and can use it. Now we have an API key so we can request through the website and can get desired results. Visit documentation of the site and copy the URL to which we have to make a request. In our flask app, we need to change the currency name so we will format the URL in a dynamic way.
The complete code is here, and its explanation is given below the code.
from flask import Flask, request, jsonify
import requests
app = Flask("__name__")
def fetch_conversion_factor(source, target):
    url = "https://free.currconv.com/api/v7/convert?q={}_{}&compact=ultra&apiKey=c6676f7365214fddb240".format(source, target)
    response = requests.get(url)
    response = response.json()
    return response['{}_{}'.format(source,target)]
@app.route("/", methods=['POST'])
def index():
    data = request.get_json()
    #print(data)
    source_currency = data['queryResult']['parameters']['unit-currency']['currency']
    amount = data['queryResult']['parameters']['unit-currency']['amount']
    target_currency = data['queryResult']['parameters']['currency-name']
    #print(source_currency)
    #print(amount)
    #print(target_currency)
    cf = fetch_conversion_factor(source_currency, target_currency)
    final_amount = amount * cf
    final_amount = round(final_amount,2)
    response = {
        'fulfillmentText':"{} {} is {} {}".format(amount,source_currency,final_amount,target_currency)
    }
    return jsonify(response)
if __name__ == "__main__":
    app.run(debug=True)
EXPLANATION ~
We have created a separate function to make requests to URL with source currency and target currency which in return the JSON object which contains the value of 1 unit of source currency to target currency. after getting one unit conversion we calculate the required amount and round it to 2 decimal places. fulfillment text is a name that is captured by Dialogflow and print as the default response when it made a POST request. so write the same name as written in response. After that, we return the response in JSON format to Dialogflow.
Now when you run the application or test your chatbot on the right panner try it now. And pass some intents and check whether a response is coming or not. Try converting some currency to another unit and you will see the default response.
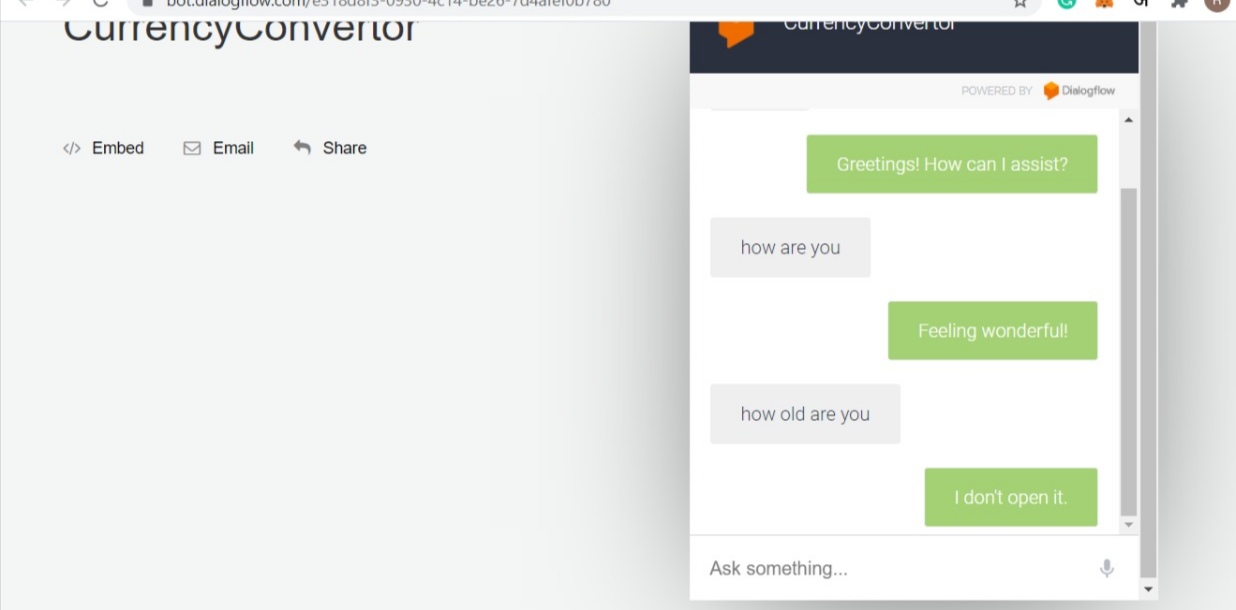
Web Demo of Currency Converter
Visit the integration section from the left panel in Dialogflow, and click on the web demo. It will give you a link, visit it and enjoy the web version of your chatbot.
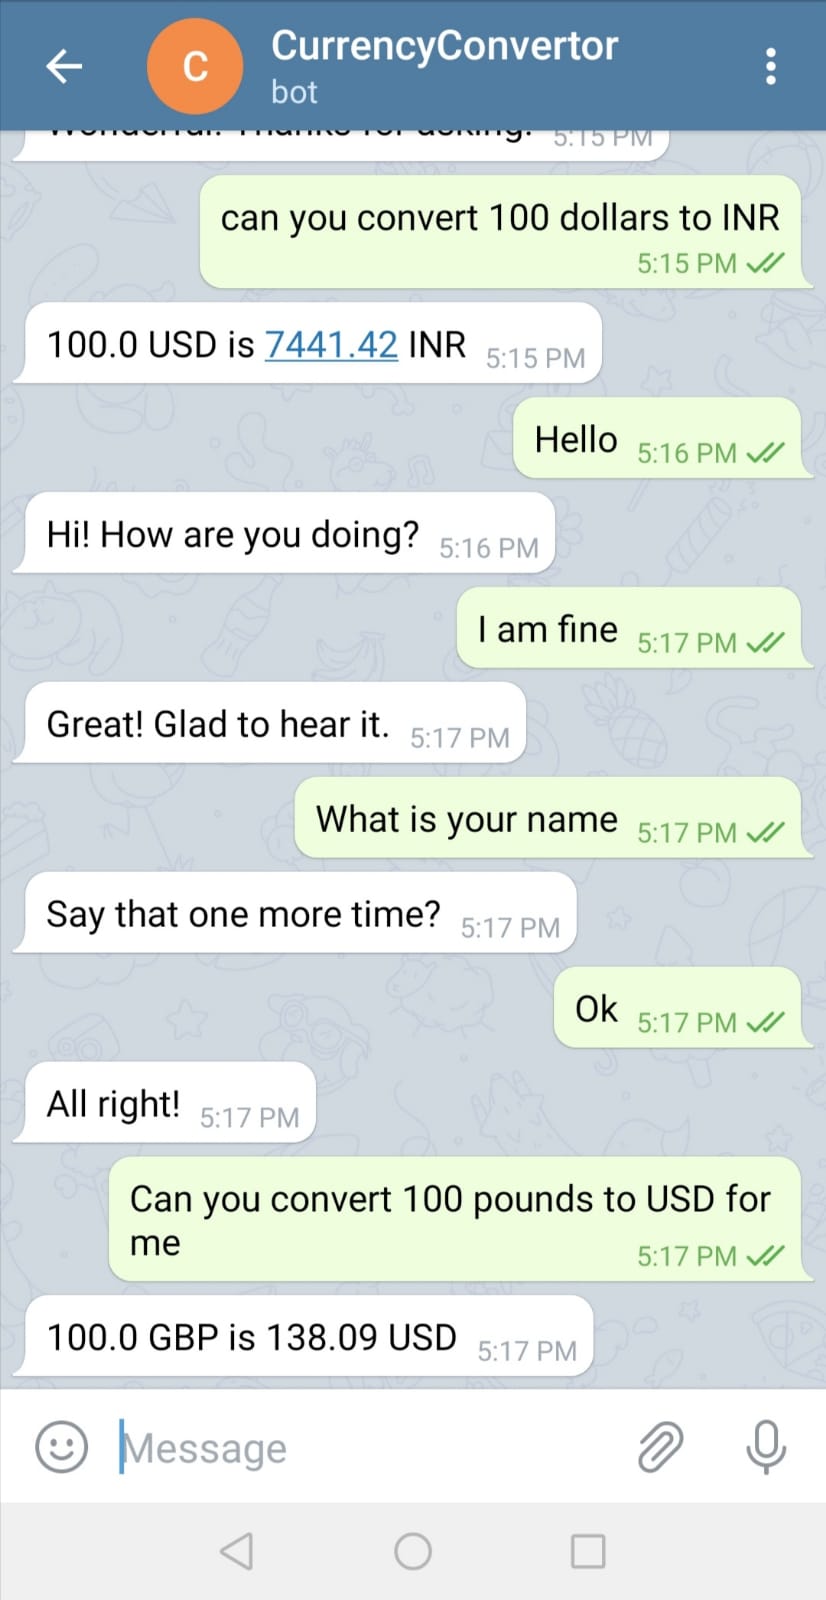
Deployment of Chatbot to telegram
Now I will show you how you can integrate your Dialogflow chatbot with a telegram.
- First open telegram web in a browser you are working in
- No search for bot father in telegram and visit at the top which comes.
- It will give you many options, and at first, the option is for my bot. just click on that and click or type start.
- It will ask the name and username of your chatbot. you have to pick a unique name that does not already exist on the platform.
- After that, your bot is created and It will give you one token to access the chatbot. just copy that token.
- In the Dialogflow integration section, click on telegram and enable it. It will ask for a token and paste the token you received from the telegram. And that done.
Enjoy chatting with your chatbot through telegram.
End Notes
Thank you if you follow the article till here. We have created a complete end-to-end Dialogflo chatbot using Python Flask. There are more advanced chatbots and you can include many applications along with converting currency and it can perform multiple tasks. My aim was to introduce you to the Dialogflow platform with practical implementation to realize its power in chatbot applications. Furthermore, you can deploy your Flask app to any cloud service like AWS, Heroku.
If you have any doubts, please mention them in the comment section below. I will be happy to help you out.
About the Author
Raghav Agrawal
I am pursuing my bachelor’s in computer science. I am very fond of Data science and big data. I love to work with data and learn new technologies. Please feel free to connect with me on Linkedin.
If you like my article, please give it a read to others too. link
I am a final year undergraduate who loves to learn and write about technology. I am a passionate learner, and a data science enthusiast. I am learning and working in data science field from past 2 years, and aspire to grow as Big data architect.


