Pratically Demistifying BERT Language Representation Model
This article was published as a part of the Data Science Blogathon
TABLE OF CONTENTS
Introduction
Understanding BERT
- What is Bert
- Difference From Word2Vec
- BERT Training
- BERT Model Variations
Implementing BERT in Tensorflow
- Downloading Model
- Creating Data
- Preprocessing Input
- Encoding To Create Embeddings
- Understanding Embeddings(using keys)
Conclusion
References
As one can see it will be a little long blog but if you like you can skip BERT TRAINING Section.
INTRODUCTION
With recent developments in NLP and NLU, the algorithms tend to understand more about how human interacts. One such algorithm is BERT, which captures the imagination of what data-scientists always desired to do leading to explore all sorts of new practices and developments at state of art level accuracy.
Today BERT is powering every query asked by google search and for developers google open-sourced it. So developers can use it for different tasks such as :
NSP – In this, the model is given an input sentence and its job is to predict the entire sentence/ word(G- Mail)
Q&A – As we humans do, the model is provided with inputs as questions and its job is to predict the answers for them. (Google Search)
Text-Generation – One can generate text, given enough training data.
Translation – Given input sentences in a specific language, its task is to predict its translation in the desired language(Google Translate). and much more(almost all sorts of NLP and NLU tasks)
Note:- These are all what BERT can be used for and not what it does
UNDERSTANDING BERT
Before diving into code let’s understand what really is the BERT and how it is different from the previous model, designed to do the same tasks, how it was trained and what variations are available.
What Is BERT
BERT is a short form of Bi-Directional Encoder Representation From Transformers which is a language model and as the name suggests it has 3 important factors to focus on, let’s understand them one by one:
1. BI-DIRECTIONAL
Bi-directionality means it can see the inputs from both directions and even from between, which was not possible in previous models as they were uni-directional(from left to right/right to left), due to which the model was unable to see the entire sentences which lead to biased representation of word(encodings).
2. ENCODER
The main purpose of the BERT is to generate encoding/ embeddings in a way such that they are not biased and later use them in tasks of the desired type, due to these type of embedding model learns the general patters of how human talks and generate responses/output based on that which are not biased.
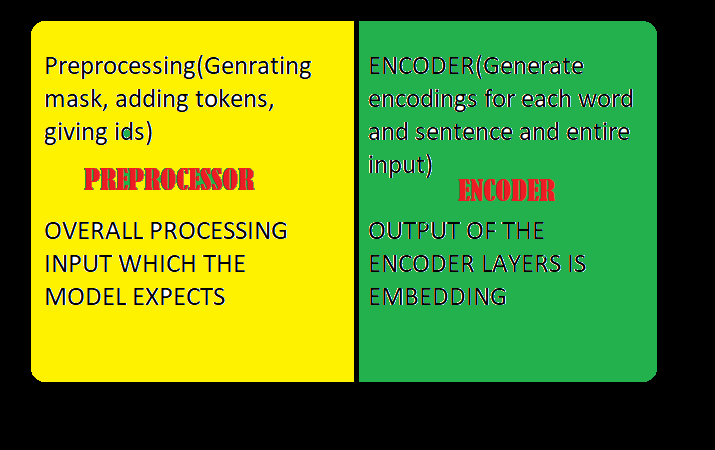
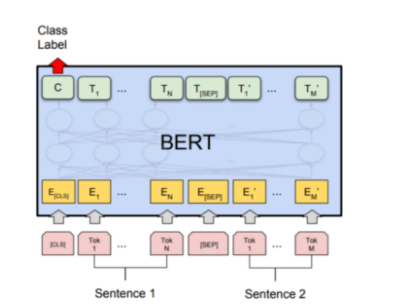
To do this the BERT model consists of multiple encoder layers whose work is to do preprocessing and then encode the inputs in some form of embeddings which can later be used by some model. Refer figure1:
3. TRANSFORMER
Bert is from the transformer family but different in the way that it only has encoder blocks and uses only attention and feed-forward layer to generate segment embeddings. Also, the hyperparameters for the attention head are different(usually 12-16 attention heads) compared to the original transformer model.
Overall it is a language model, which can be integrated with multiple models, tasks and gives very great results.
Difference: – Word2Vec & BERT
Due to all the above mentioned(more specifically attention heads and bi-directionality), it allows capturing the meaning/semantics of words in different contexts not possible earlier with a most commonly used model like Word_2_Vec. To understand this consider 2 sentences:
1. They were playing fair and square:- here ‘fair’ means accordance to rules
2. There was a fair organized nearby: – here ‘fair’ means an event
But an algorithm like Word_2_Vec will output the same embeddings in both cases, i.e it does not understand the context of the sentence as it can only take the inputs one at a time or for parallel from right to left or left to right(does not allow to see entire sentence).
On the other hand, as BERT takes input in parallel it can see the entire sentence and using the attention heads it has, it can give attention to the word which it thinks has the most impact on the predicted word, thus allowing for more generalized embedding and a different representation of the same word.
BERT Training
The varying usage of BERT is due to its training procedure. Usually, there were 2 steps involved in the training model- Pre-Training and Fine-Tuning. Let’s look at each one of them in more detail:
PRE-TRAINING: – The model was trained on 2 types of semi-supervised tasks namely MLM and NSP
Masked Language Model (MLM)
In this semisupervised task, the input to the model is masked (blank)with a [MASK] token and the model job is to predict the word in place of masked token which is then later fed to a softmax unit having inputs as vocabulary and predicts the output word.
However in the 2nd part (the prediction feeding) word is no longer masked, so it creates a model not to generalize well so a different procedure is applied to the way of masking input as only 15% of words are masked but not all with mask token i.e out of 15%:
- 80% of the time have [MASK] token
- 20% of the time have random tokens as masked
- 10% of the time have the same input token which was masked.
This allows the model to use its bi-directional learning aspect leading to better representation of words.
Next Sentence Prediction(NSP)
In this task 2 sentences(A and B) are taken such that :
- 50% of the time B is the next sentence to A
- 50% of the time B is some random sentence from training data
and the model’s job is to learn the relationship/semantic meanings between each sentence by doing a binary classification(is next/ not next).
Source Paper
Doing above allows it to unlock its relationship capturing abilities and create contextualized word embeddings. Having known enough, let’s look at the final aspects of the model.
FINE-TUNING:- After training the model it can be fine-tuned over a variety of tasks such as Sentence – Sentence Prediction,
- Question- Answering,
- Single-Sentence-Classification,
- Single-Sentence-Tagging,
- Language Translation,
- Feature Extraction(create embeddings) and much more.
BERT Model Variations
Bert is available in 2 variations:
BERT_Large (Archive SOTA results)
- Layers – 24
- Hidden State – 1024
- Self Attention Heads – 16
- Total Parameters – 340 Million
BERT_base (small model)
- Layers – 12
- Hidden State – 768
- Self Attention Heads – 12
- Total Parameters – 110 Million
For most of the use cases, BERT_base is sufficient and provides good results on finetuning.
IMPLEMENTING BERT IN TENSORFLOW
Enough words! let’s get our hands dirty on coding. For understanding purposes, we will create word embeddings using the model and try to understand the different aspects of the encoder layers defined earlier in a practical way.
As you have seen above in the diagram, the model has 2 parts preprocessing and encoding, and luckily tensorflow hub allows us to directly use the model for fine-tuning.
Downloading Essentials
Head to the TensorFlow Hub website – a place where the pre-trained models can be accessed and used.
Scroll down and below you can see:

Download the first model and preprocessing file for it. Open them one by one and copy their URL as they can be directly used to download the required files. To do so open a python file and write the following:
preprocess_url = "https://tfhub.dev/tensorflow/bert_en_uncased_preprocess/3"
encoder_url = "https://tfhub.dev/tensorflow/bert_en_uncased_L-12_H-768_A-12/4"
here we are storing those URLs as text in preprocess_url and encoder_url respectively for later references.
Using these we can create preprocessor and encoder objects. To do so we need to use the following syntax:
-
bert_preprocess_model = hub.KerasLayer(preprocess_url)
-
bert_encoder_model = hub.KerasLayer(encoder_url)
We just used hub.KerasLayer() to wrap saved model as Keras layers and store it in variables used.
Creating Data
To create the data, we can simply create a python list of sentences to test as:
test_text = ['I love pizza',
 	     'India is my country',
 	     'Italy is fun place to visit']
Here we have used India and Italy – country – same reference and Italy and Pizza – somewhat the same context. Our job here is to make data biased and see how BERT performs. So let’s move on to the next part.
Preprocessing Input
As mentioned earlier the preprocessor object can now be used as a function pointer which can take in test_text and spit out the processed_text dictionary:
processed_text = bert_preprocess_model(test_text)
print(processed_text.keys())
>> dict_keys(['input_mask', 'input_word_ids', 'input_type_ids'])
As can be seen the inputs to the model have been processed in a way that the encoder expects. Basically, it created a mask, added ids, and tokens for each word and all input sentences. More on this is given in the UNDERSTANDING KEYS section below.
Encoding
To generate embedding now all we need to do is to pass this processed_text to the encoder object we created earlier(bert_encoder_model):
bert_results = bert_encoder_model(text_preprocessed)
bert_results.keys()
>> dict_keys(['default', 'sequence_output', 'pooled_output', 'encoder_outputs'])
UNDERSTANDING KEYS
As can be seen, the entire output is again in the form of dictionaries. so understanding them from both the processing and encoding stage becomes crucial.
PROCESSING
After processing 3 keys are generated namely – input_mask, input_type_ids, input_words_ids. Let’s understand them one by one :
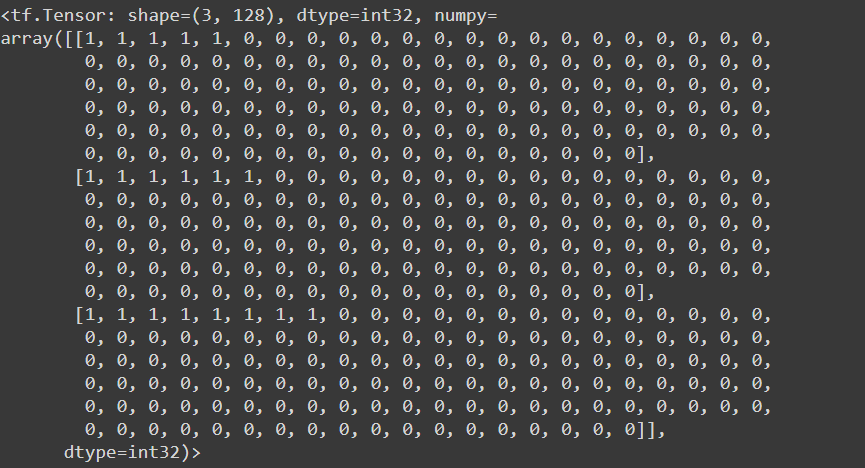
input_mask
- A mask of the words in a sentence – all masks starts with `CLF` token and `SEP` token
- So the masked array is of size `sentence size + 2`
- The token is defined for CLF – 101 and SEP – 102
- Tensor shape – (no of sentence, 128- maximum length of sentence- other padded with zeros as no values present)
Let’s visualize the input mask used:
# input_mask
print(text_preprocessed['input_mask'])
Returns:
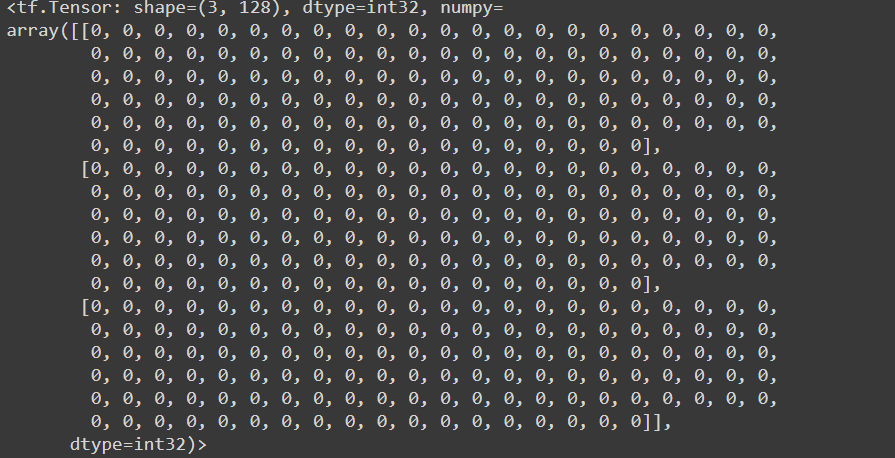
input_type_ids
- Give id’s to multiple input sentences array in one training data
- Help in identifying sentence positional encoding
To see the input_type_ids use:
# input_mask
print(text_preprocessed['input_type_ids'])
Returns:
input_words_ids
- has the token ids of the input sequences.
- Give unique id’s for individual words
- Each word is encoded(ids can be from a vocabulary), padded and separated
- Length : (no of sentence, 128-max length of each sentence)
To visualize the input_words_ids use:
# input_mask
print(text_preprocessed['input_words_ids'])
Returns:
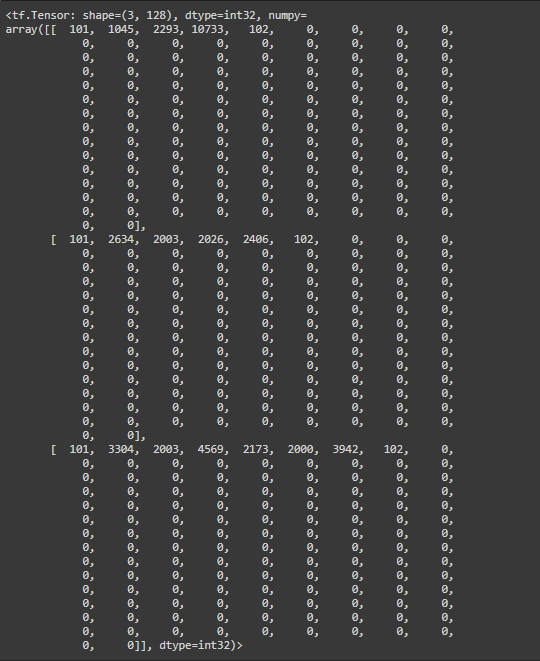
output shape: (0, 128-max length of sentence)
ENCODING
After encoding 3 keys are generated namely – pooled_output, sequence_output, encoder_outputs. Let’s understand them one by one.
pooled_output
- Embedding for the entire sentence
- Length : `(no of sentence, no of hidden units – 768[this case])`
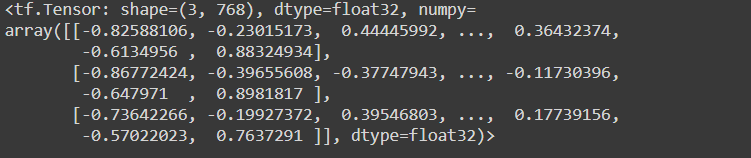
- Also, these 768 elements will not be 0 as bert carries some of the contextual meaning for each meaning i.e relates how much one feature differs from each other [-ve less relatable, +ve – very relatable], this is the feature why bert is so popular and powerful in NLP task.
To see the pooled_output :
print(bert_results['pooled_output'])
Returns:
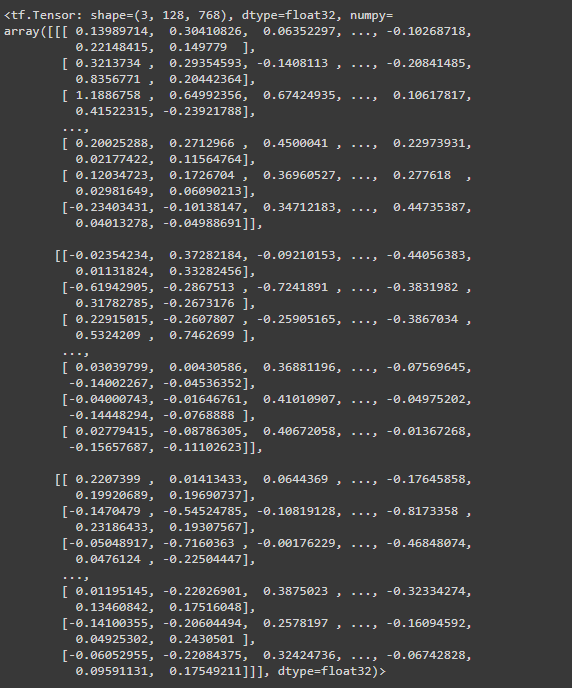
sequence_output
- This is the representation/ embedding of individual words of a sentence
Includes:
- Due to processing sentence become a length of 128
- The hidden state is 768
- No of sentences
So the length of the sequence output array/ tensor becomes
(no of sentences, length of sentence-128, no of hidden units -768 )`
sequence_output can be accessed as :
print(bert_results['sequence_output'])
Returns:
encoder_outputs
- It is the intermediate activations of transformer block and its last encoding is similar to sequence outputs
- Length same as sequence output – `(no of sentences, length of each sentence- 128, no of hidden units-768)`
To understand what was said run the following code:
bert_results['encoder_outputs'][-1] == bert_results['sequence_output']
Here we are just checking if the last output([-1]) of encoder_outputs is the same as sequence outputs using == operator which will return boolean values as:
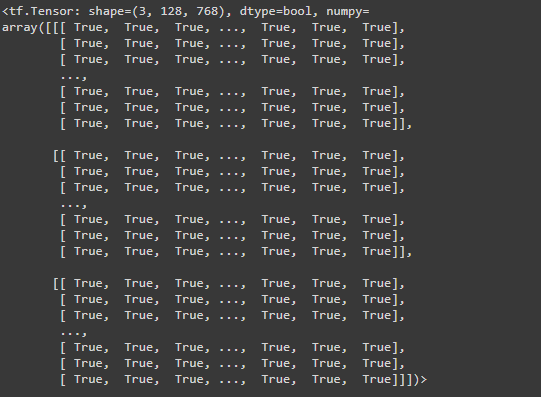
Clearly, all are returning TRUE.
CONCLUSION
With this, we have covered all the basics required to implement BERT. Hope you found this useful and if so kindly share the article and provide feedback as they are what inspire me to write these pieces. For more knowledge-hungry people, I have provided some impactful references where you can visit to gain in-depth knowledge of the topic.
REFERENCES
Collab File:- For all codes refer here.
BERT Details(in-depth):- BERT (Bidirectional Encoder Representation From Transformers), For a visual representation refer here.
Inspiration: A humble and respectful thanks to code basics which inspire me to write the content.
Hey All✋, My name is Purnendu Shukla a.k.a Harsh. I am a passionate individual who likes exploring & learning new technologies, creating real-life projects, and returning to the community as blogs. My Blogs range from various topics, including Data Science, Machine Learning, Deep Learning, Optimization Problems, Excel and Python Guides, MLOps, Cloud Technologies, Crypto Mining, Quantum Computing.


