Some Amazing Applications of OpenCV Library
This article was published as a part of the Data Science Blogathon
Introduction
OpenCV is a great tool for image processing and performing computer vision tasks. It is an open-source library that can be used to perform tasks like face detection, objection tracking, landmark detection, and much more. It supports multiple languages including python, java C++. Although, For this article, we will be limiting to python only.
The library is equipped with hundreds of useful functions and algorithms, which are all freely available to us. Some of these functions are really common and are used in almost every computer vision task. Whereas many of the functions are still unexplored and haven’t received much attention yet.
In this article, I will show you some of the most amazing functions of OpenCV that you can use for many amazing applications.
Good to know
Before starting, it will be good to have basic knowledge of OpenCV. It will hardly take ten to fifteen minutes to cover all the topics.
- You should know how to read and write images using OpenCV
- You should know about the different color spaces present in OpenCV and know how to convert one to another.
- You should know how to create a NumPy array and should be familiar with the basic operation of NumPy.
Although beneficial, these might not hold you back from understanding anything.
We will be covering four applications in this article that are
- Remove watermarks from images
- Remove background from images
- Creating filters for images
- Cartooning any image
Watermark using OpenCV
Watermarks could be really annoying and there comes a time in everyone’s life where we search down the whole internet to remove that little piece of text. Gladly, your search ends here. By using OpenCV, we can concur this task with less than 10 lines of code.
We start by importing the required libraries(that are OpenCV and Numpy) and reading the image, containing the watermark. We then change the color space from BGR to HSV. We are using HSV color format as it helps in getting a better mask image which we will create in the further step. A mask is an image having only two values that are black and white. The purpose of the mask is to apply changes only in the specific parts of an image. For our purpose, the mask image should contain white values wherever the watermark is present and black everywhere else.
For creating our mask image, we will use thresholding which I have already performed for this image. What thresholding does is, tells whether a value lies in the given range or not. If you wish to use some other image, you can find your own thresholding values using this piece of code. Now, we have the mask image, we can call the main function required to perform this task. We will use cv2.inpaint() function on our mask image to remove the watermark. What the function really does is, it allows removing small noise from the image using a method called inpainting.
The function can be used with two algorithms. One is based on the marching method while the other is based on fluid mechanics. You can read more about them and the cv2.inpaint() function here. Thankfully, we don’t have to write those algorithms on our own. We can enable a flag object inside the cv2.inpaint() function and choose any algorithm we want to use.
import cv2
import numpy as np
img=cv2.imread(path) # enter path of the image
hsv=cv2.cvtColor(img, cv2.COLOR_BGR2HSV)
l_b=np.array([0,0,220])
u_b=np.array([255,255,255])
mask=cv2.inRange(hsv,l_b,u_b)
dst = cv2.inpaint(img,mask,5,cv2.INPAINT_TELEA)
#dst = cv2.inpaint(img, mask, 5, cv2.INPAINT_NS)

You can check the results from the above image. Our inpainting function has worked well. If you think you need to have better results, you can try tuning the thresholding values. You can also use methods such as Gaussian blur to enhance the quality of the mask image.
Removing Background Noise using OpenCV
When dealing with images, background noise is very common. By using this function of OpenCV, you can extract only useful information from the image and discard anything present in the background. A good thing is that it allows you to enter the output shape of your final image so that you don’t have to guess, what will be the size of your image. For this task, I will be using the given image.

Our task is to remove the background and extract the foreground(the notebook) from the image. The function we will use requires two sets of points. The first set will contain 4 points that will cover the foreground region. In the above image, if you look closely, you’ll be able to see 4 dots. The first set will be the coordinates of these points. The other set of points will be the border points of our output image. After that, we will use cv2.getPerspective() function that will give us the output matrix and the cv2.warpPerspective function will convert that matrix into the desired shape.

You can check the results from the above image.
Filter Images using OpenCV
Unlike textual data, images can be used to extract several features. These features highlight the properties of the image. We can use these features to blur the image, sharpen the image, extract edges from the image, and much more. To perform this task we will be using the concept of convolution. Convolution is basically the process of applying the kernel over each pixel across the image. Kernel? A kernel is a small matrix consisting of numbers that usually sum up to unity. Depending upon the values of the kernel, we can extract several features from an image.
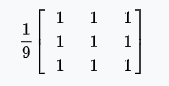
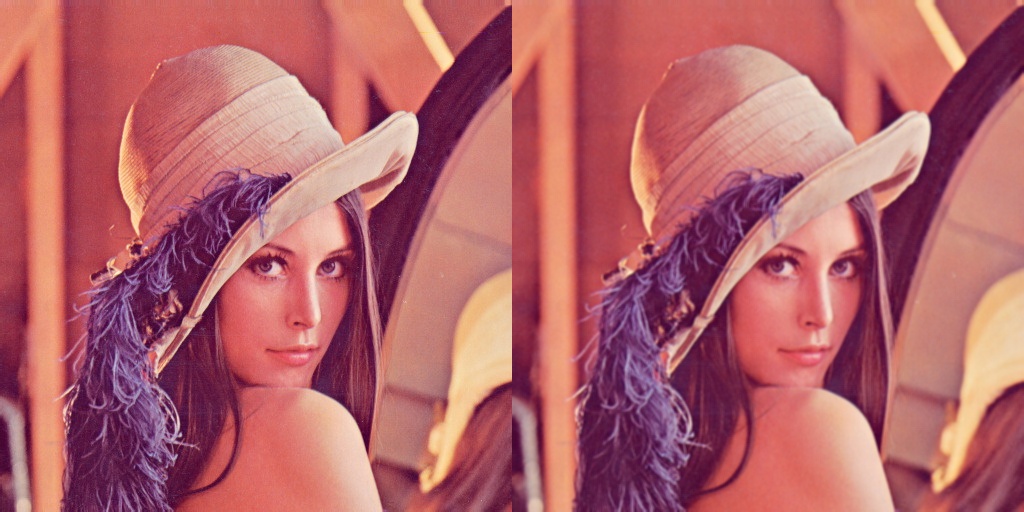
In this task, we will be going to simply blur an image using convolutions. We will use the below filter(kernel) for our task. This kernel is also called an averaging filter. As the name suggests, it averages the surrounding pixels and assigns the value to the central pixel. You can even choose a different set of values as you like, just make sure that all the values sum up to 1.
After reading the image, we will create our kernel and make a NumPy array of it. Then we will call cv2.filter2d() function, which will take in the input image, depth, and the kernel. And that’s all. We can simply show our results.
import cv2
import numpy as np
img = cv2.imread(path) # enter path of the image
kernel = np.array([[1,1,1],
                  [1,1,1],
                  [1,1,1]])
kernel = kernel/9
res = cv2.filter2D(img, -1, kernel)
cv2.imshow("img",res)
cv2.waitKey(0)
You can use this link to find more amazing filters that you can apply to your favorite images.
Convert Images into Cartoon using OpenCV
Everyone loves cartoons and what’s better when you can make one with your favourite pic. With OpenCV, you can accomplish this task easily using some of the very basic functions. Basically, the whole process includes three steps.
- Extract the edges from the image.
- Apply image smoothening to the input image.
- Add the results from step 1&2.
We start by reading our image and converting it to grayscale. We can use this grayscale version of the image and feed it to the cv2.adaptiveThreshold function to get the edges of the image. You can even use the previous application to extract edges from the image. Then we have to apply smoothing to our image. Smoothing of an image refers to making a less pixelated version of the image. In simpler words, we are just reducing the number of distinct pixels in our image. This can be achieved by using the bilateral filter function present in OpenCV. Then we can just add the smoothened image and the edges using the ‘bitwise_and’ operator in OpenCV to get our cartoon image.
import cv2
import numpy as np
img = cv2.imread("images/lena.jpg")
gray = cv2.cvtColor(img, cv2.COLOR_BGR2GRAY)
gray = cv2.GaussianBlur(gray,(5,5),-1)
edges = cv2.adaptiveThreshold(gray, 255, cv2.ADAPTIVE_THRESH_MEAN_C, cv2.THRESH_BINARY,9,10)
color = cv2.bilateralFilter(img, 20, 245, 245)
cartoon = cv2.bitwise_and(color, color, mask=edges)
cv2.imshow("cartoon",cartoon)
cv2.waitKey(0)
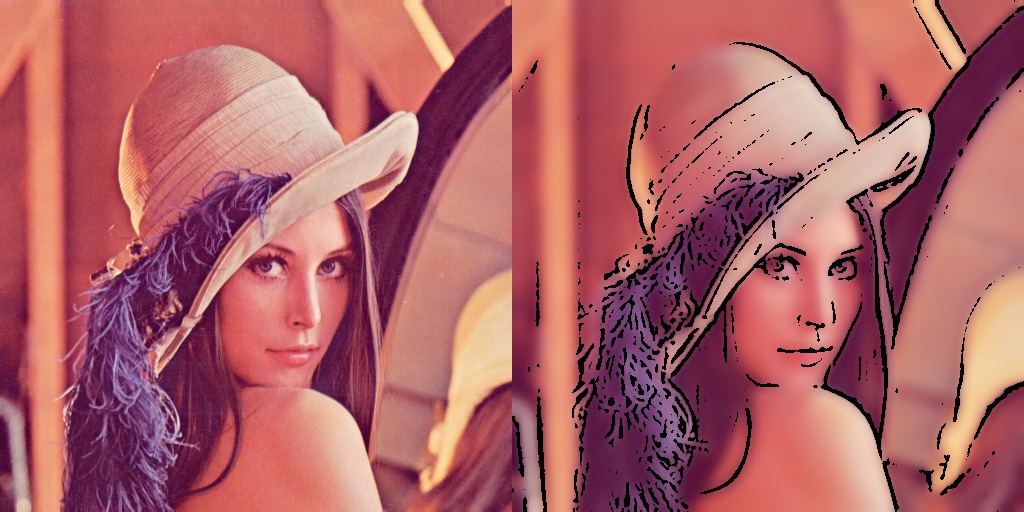
You can add more steps in between to enhance the results like changing the color space, use different filters, etc.
Conclusion
OpenCV is an essential part of the computer vision community and using it we can build thousands of amazing applications. You might have thought that some of these applications are used by us in day-to-day life. What was the last time when you used Cam Scanner to scan a copy of your assignments? Do you think the 2nd application might have played a role in it? Isn’t the cartooned image we created somewhat look like a Snapchat version of the image. Through these applications, the purpose was to encourage you to explore the solutions to real-life problems using easy and efficient tools like OpenCV.
Where to go from here
The applications we have covered in this article are just the top of the glacier. When you start digging deeper into the field of computer vision, you will get to know more interesting and amazing concepts. You will learn about deep learning approaches to solve complex problems. You will learn about pre-trained models that could give excellent results for a huge number of problems. You will train your own models, create datasets and find solutions to problems that seem unrealistic to even ask at first.
Thanks. I hope you enjoyed reading this article.


