End-to-End Guide to Docker for aspiring Data Engineers
This article was published as a part of the Data Science Blogathon
Docker! Docker! Docker! We heard it so many times. What is it? Why is it used? Is it required? YES!! YES!!
Docker is evolved into a vast area. Today we will explore pretty much everything about docker (I meant basics).
What is DOCKER?
Docker is an open-source platform, where we can automate our project deployment, software application deployment and we can deploy any of our trained deep learning, machine learning models inside CONTAINERS which not only makes it easier for production but also it adds automation and abstraction.
Great!! It is a basic explanation. Docker allows developers to super easily deploy their desired applications or models using containers, so that they can run on the host machine or localhost. It bundles entire dependencies, requirements of an application in a uniform structure. These features make it easy for production as well as enables systematic usage of the resources.
Now I know you all are thinking what is a container??
What is a CONTAINER in Docker?
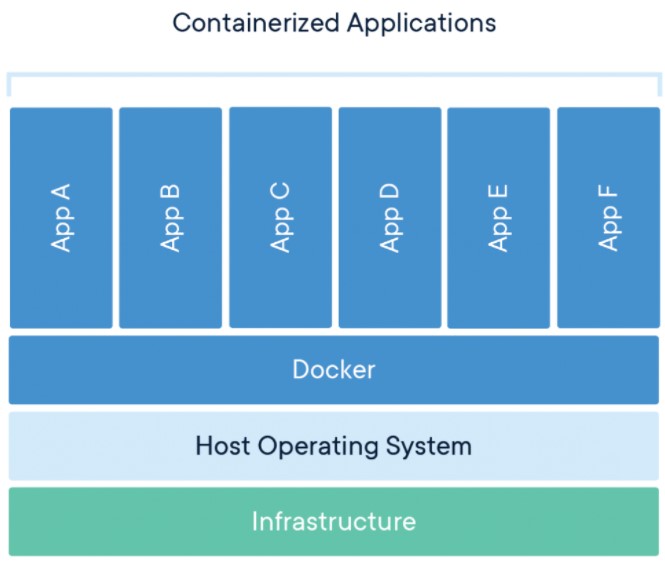
A Container is somewhat like a bag that holds all our requirements, it is a standard software unit that bundles up or packages all our code, dependencies and has its virtual environment so that we can run our application efficiently from one host environment to another. It can also be referred to as a docker container image. The container image is a standalone and executable package, which has all the necessary settings and libraries to run the desired application.
We call it a container image, that container image becomes a container during the runtime. If we dockerize our application, that image will be called a container only when it runs on DOCKER ENGINE. (Accessible for both Windows and Linux machines).
Containers running on Docker Engine:
· Standard: The containers can be set up in any machine, which means they are portable.
· Lightweight: It does not require an operating system of its own, it shares the host machine’s kernel. Reduces licensing and serving costs and increases efficiency.
· Secure: It provides a layer of abstraction in default, which isolates the container’s capabilities.
Let’s Begin
In this tutorial, we will explore some of the features of docker, building a docker image, running a docker container, and finally we will develop a deep learning model and containerize it for training.
Setting up the Docker Environment
Earlier, installing docker on to your favorite OS was chaotic, Docker is evolved and become more stable. We can pretty much use it in any operating system.
Docker is now available for Mac, Windows, and Linux. For more information regarding the installation refer official docker installation guide on Mac, Linux, and Windows.
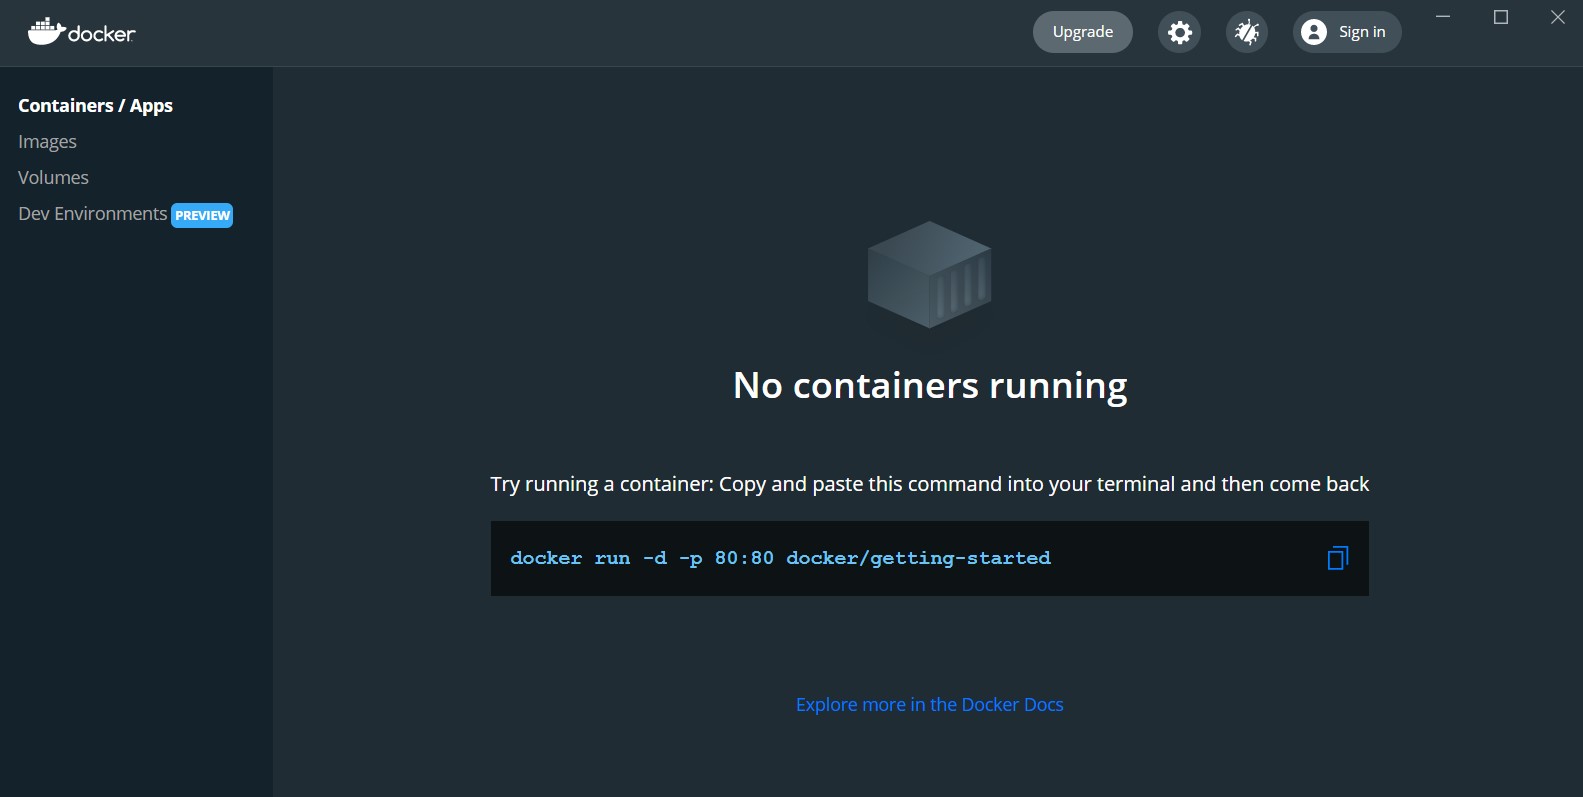
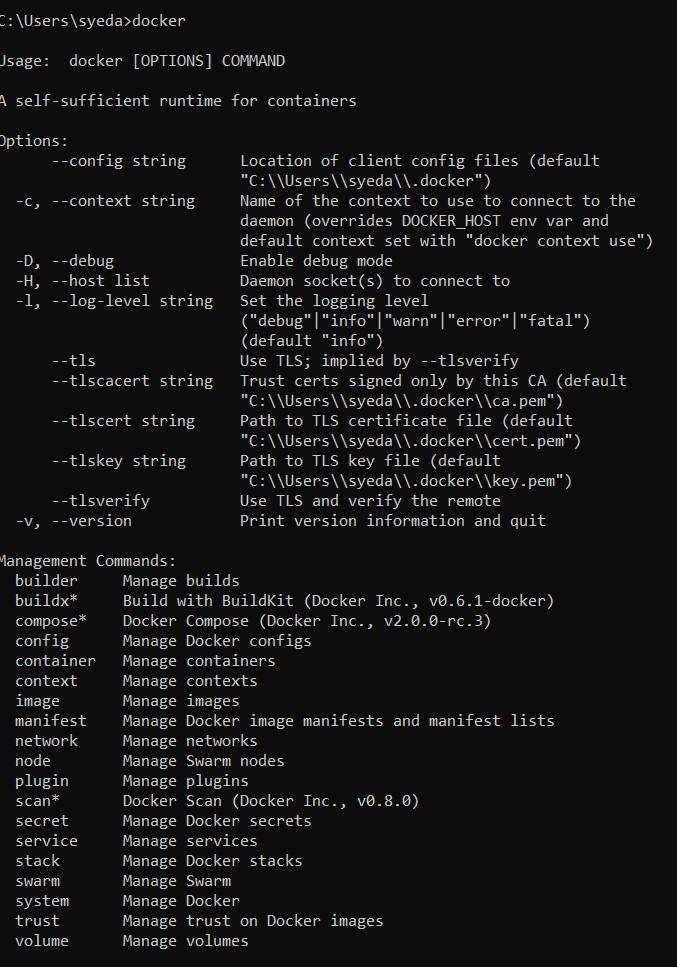
For this tutorial, I will be using the Docker Desktop, with WSL2 enabled. It’s easy to set up the Docker in the windows machine. For the windows users, once you install the Docker it will look something like this.
Author
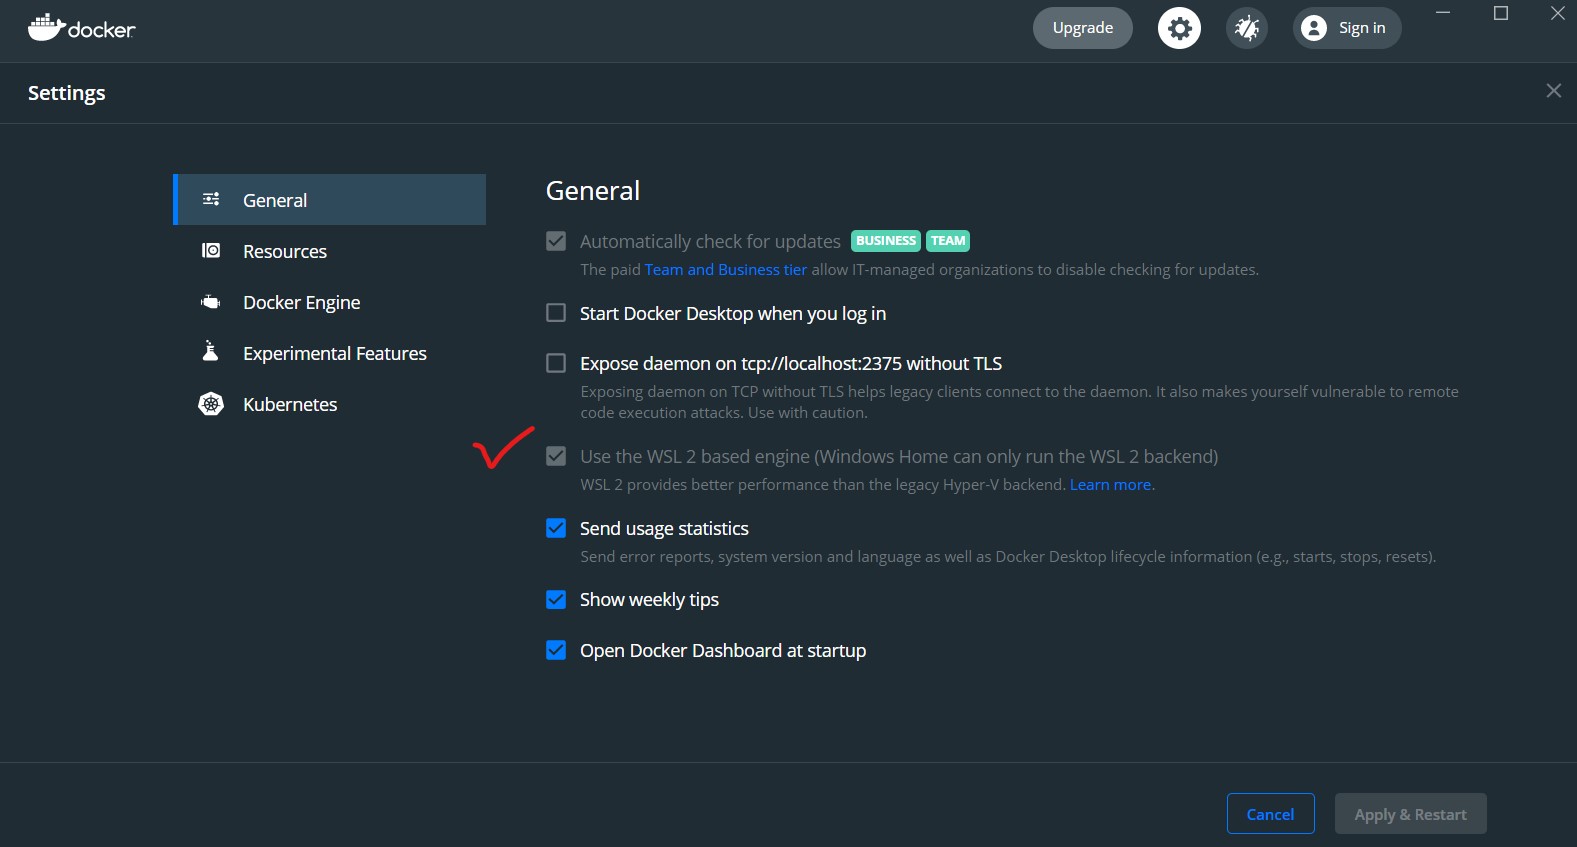
For Windows machines, make sure that the WSL2 option is enabled in the Docker settings. Once you successfully install the docker, then open the command prompt and type docker. It should display all the docker instructions and docker commands.
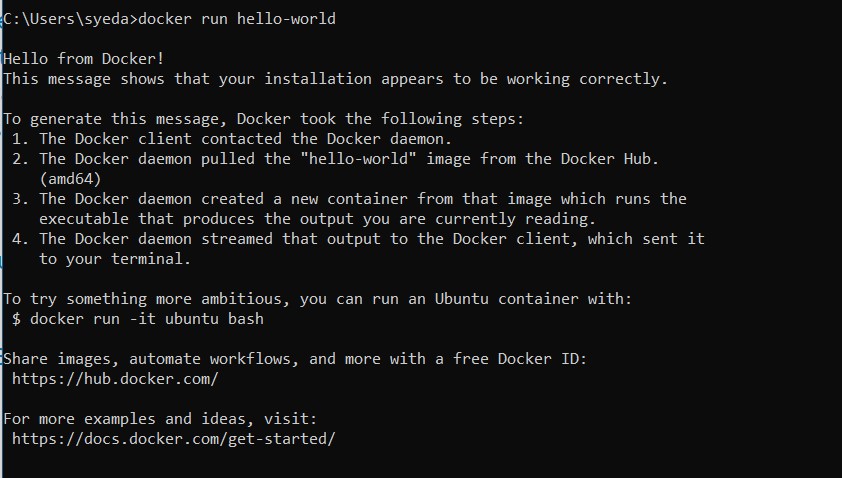
Now to test the Docker installation, just run the below command. It will pull an image and print hello-world.
Must-Know Docker Commands
These are all the basic docker commands.
| COMMANDS | FUNCTIONS |
| docker build | Used for building a Docker image |
| docker container | Used to manage the containers |
| docker events | Used to view the server events |
| docker image | Used to manage the docker images |
| docker images | Returns the list of docker images |
| docker kill | Kills the running containers |
| docker logout | Used to logout of docker hub |
| docker login | Login to docker hub |
| docker logs | It returns logs from a container |
| docker push | Push an image to docker hub |
| docker port | Used to mention the running port number |
| docker pull | Pull an image from the docker hub |
| docker run | Run a new docker image |
| docker rm | Remove container |
| docker rmi | Remove the image |
| docker tag | Tag an Image referring source image |
| docker stop | Stop the running container |
Now let’s play with some of the docker commands. Previously, we just ran the docker hello-world image. Now to see the number of images present, just run “docker images” in the command prompt. It shows the total number of images present, with the Repository name, Tag, Image ID, age of that image, and size.

To delete a Docker image, you can just use “docker rmi ” if this fails you can just add “-f” means forcing it to remove. that is “docker rmi -f “. This will remove a particular image.

Some Important Terminologies related to Docker
· Images – The outline of our application which form the basis of containers. We can pull the images from any public repositories.
· Containers – Actual application is run using containers and created from Docker images. Containers created using docker run as we did for hello-world. By running the command docker ps, the number of running containers can be seen.

· Docker Daemon – It manages to build the image, running it, and distributing the Docker containers. It is a background service running on the host machine.
· Docker Hub – A Docker registry used to store and pull the docker images. We can push our docker image and also get it from the registry when required.
The Dockerfile
The Dockerfile is a more systematic, efficient, and flexible way to build Docker images. You create the Dockerfile and add the commands which are needed to build the environment inside the image.
The most used Dockerfile commands are:
| Commands | Uses |
| FROM | To specify the parent image. |
| WORKDIR | To set the working directory. |
| RUN | To set the working directory. |
| COPY | To copy over files or directories from a given location. |
| ADD | Handles URLs and unpack compressed files. |
| ENTRYPOINT | Command that will always be executed when we run the container. |
| CMD | Arguments passed to the entrypoint. |
| EXPOSE | Defining the port to access our container application. |
| LABEL | Add metadata to the image. |
Our First Image
– Official images are developed and maintained by the Docker team.
Some of the official images are, python, ubuntu, TensorFlow, etc. images are official images.
– User images are created by us. We build it on some base image or using official images.
First let us create a very basic python script (test.py). Refer below
a = 5
b = 2
print(a+b)
print("This is our first docker image")
Now, in the same project directory create a file with the name “Dockerfile” and here we need to have some commands, which will copy the working directory and also need to mention the entry point to the docker. A Dockerfile is a text file that contains commands that are executed while creating an image. The commands are equal to Linux commands. Below is the content of Dockerfile.
FROM python:3
WORKDIR ./docker_test
COPY . .
RUN apt-get update
ENTRYPOINT [ "python3", "test.py" ]
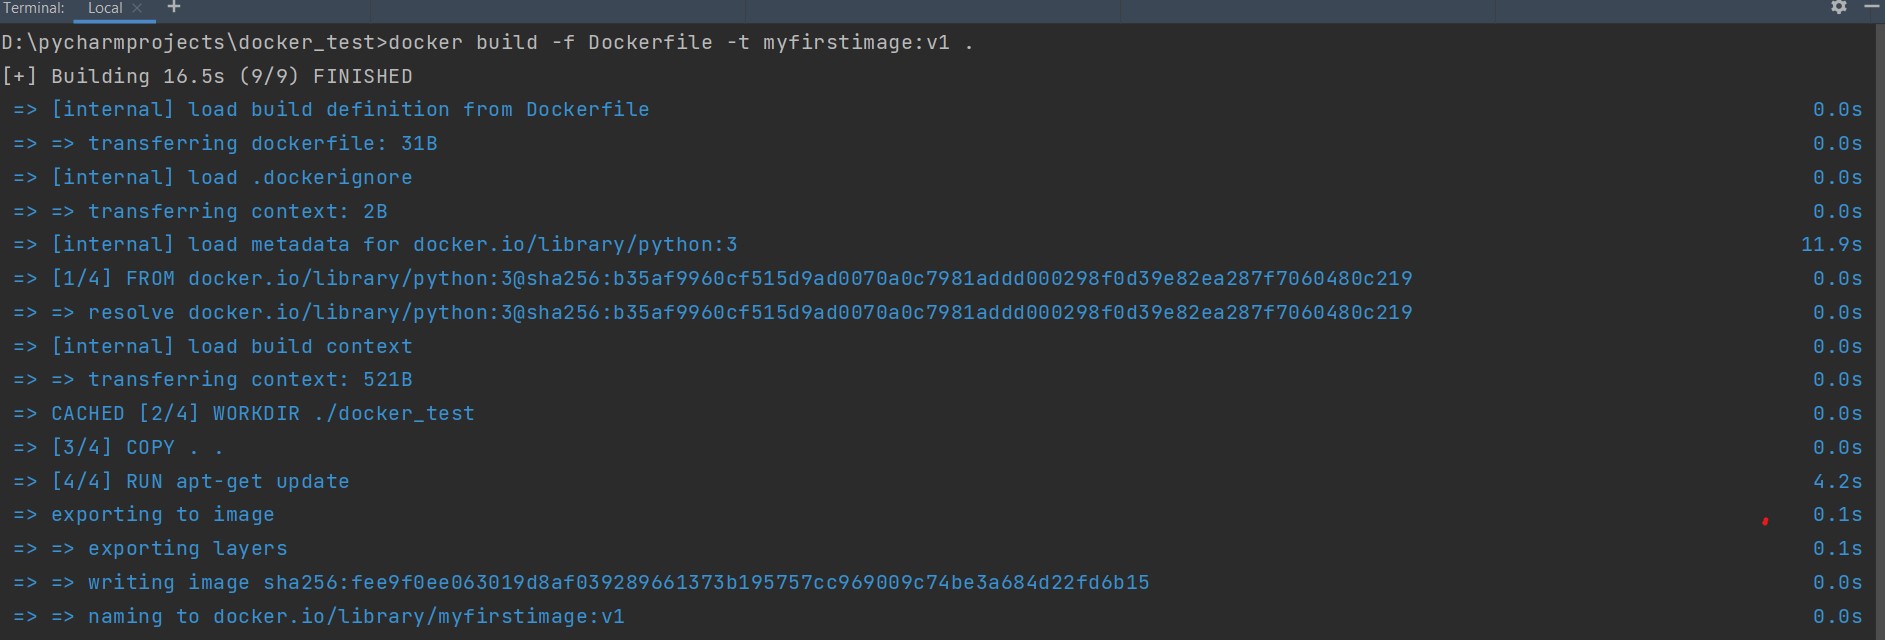
Now in order to build the image, run the docker build command in the same directory.
docker build -f Dockerfile -t myfirstimage:v1 .
In the above command, we need to mention the “Dockerfile” which we created and the name and version of our image as well as a dot at the end of the build command.
After building the image, let us check if the image is present. Just run docker images. You can see it has created the image with the mentioned name and version.

Now, let us run the image. We know that the output should be 7, according to the small python script we wrote earlier. To run the image, docker run myfirstimage:v1.

Hurray!!! We have created and ran our first image.
Deep Learning Model and Docker
We usually train Deep Learning models in our system or the local machine. Using docker we can build an image that contains all the data handling processes and the training script. We can give different arguments for the docker container while running, arguments like data path, batch size, epochs, etc.
Using the docker container for training a deep learning model can save a lot of resources. For example, by dockerizing the model we can run it on the cloud without any local dependencies, but the required resources must be allocated in the cloud. We can also use different cloud platforms for starting the training of dockerized containers.
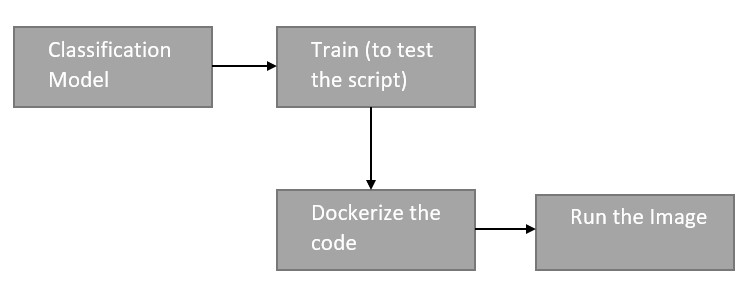
Here first, we are building a classification model using a small dataset. But, we are not going to train it as it is. We are going to dockerize the entire pipeline and build an image, and then we are going to run the image using a couple of parameters so that the model can start training.
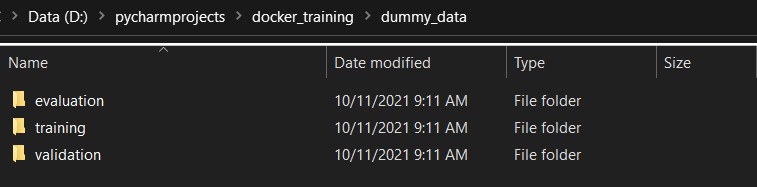
We will use a small food dataset. The dataset contains three folders that are training, validation, and evaluation. First, we will build the CNN model using transfer learning, and then we can write the docker file. Here I am using Xception as my backbone network.
The dataset is available here
Importing the modules in Python
Now, let us build the model. First, import the necessary modules.
from tensorflow.keras.preprocessing.image import ImageDataGenerator
from tensorflow.keras.applications import Xception
from tensorflow.keras.layers import Dropout, Flatten, Dense, Input
from tensorflow.keras.models import Model
from tensorflow.keras.optimizers import SGD, Adam
from sklearn.metrics import classification_report, confusion_matrix
import numpy as np
import argparse
import os
Define a function called build_model and inside it specify the model and the layers. The function takes the number of classes as the input. We are using the Xception model, you can use any other deep learning pretrained model.
def build_model(n_classes):
    base_model = Xception(weights='imagenet', include_top=False,input_tensor=Input(shape=(224, 224, 3)))
    head_model = base_model.output
    head_model = Flatten()(head_model)
    head_model = Dense(512)(head_model)
    head_model = Dropout(0.5)(head_model)
    head_model = Dense(n_classes, activation='softmax')(head_model)
model = Model(inputs=base_model.input, outputs=head_model)

for layer in base_model.layers:
layer.trainable = False

return model
Data Pipeline
Then we will define a function for the data pipeline. This function will accept arguments as batch size, training data path, validation data path, and evaluation data path. Then we will define the training generator, validation generator, and evaluation generator as we normally do in classification models.
def data_pipeline(batch_size, train_data_path,
                  valid_path, eval_path):
    train_augment = ImageDataGenerator(
        rescale=1. / 255,
        rotation_range=25,
        zoom_range=0.15,
        width_shift_range=0.2,
        height_shift_range=0.2,
        shear_range=0.15,
        horizontal_flip=True,
        fill_mode='nearest'
    )
    valid_augment = ImageDataGenerator(
        rescale=1. / 255
    )

    train_gen = train_augment.flow_from_directory(
        train_data_path,
        batch_size=batch_size,
        target_size=(224, 224),
        class_mode='categorical',
        color_mode='rgb',
        shuffle=True
    )

    valid_gen = valid_augment.flow_from_directory(
        valid_path,
        batch_size=batch_size,
        target_size=(224, 224),
        class_mode='categorical',
        color_mode='rgb',
        shuffle=False
    )

    eval_gen = valid_augment.flow_from_directory(
        eval_path,
        batch_size=batch_size,
        target_size=(224, 224),
        class_mode='categorical',
        color_mode='rgb',
        shuffle=False
    )

    return train_gen, valid_gen, eval_gen
Training Function
To get the count of the number of images in the dataset, we will define a small count function and then the training function. In the training function, we will give input as a path to the main directory, batch size, and the number of epochs. After the model is trained, we will evaluate the model on the evaluation set and then generate a classification report and confusion matrix to check its performance.
def trainer(all_data_path, batch_size, epochs): # path to directory containing all the folder
    path_train_data = os.path.join(all_data_path, 'training')
    path_valid_data = os.path.join(all_data_path, 'validation')
    path_eval_data = os.path.join(all_data_path, 'evaluation')
    total_train_img = number_of_images(path_train_data)
    total_valid_img = number_of_images(path_valid_data)
    total_eval_img = number_of_images(path_eval_data)

    # print(f"Total training images: {total_train_img}")
    # print(f"Total validation images: {total_valid_img}")
    # print(f"Total evaluation images: {total_eval_img}")

    train_gen, valid_gen, eval_gen = data_pipeline(batch_size=batch_size,
                                                   train_data_path=path_train_data,
                                                   valid_path=path_valid_data,
                                                   eval_path=path_eval_data)

    classes_dict = train_gen.class_indices
    model = build_model(n_classes=len(classes_dict.keys()))
    optimizer = Adam(lr=1e-5)
    model.compile(loss='categorical_crossentropy',
                  optimizer=optimizer,
                  metrics=['accuracy'])

    model.fit_generator(
        train_gen,
        steps_per_epoch=total_train_img // batch_size,
        validation_data=valid_gen,
        validation_steps=total_valid_img // batch_size,
        epochs=epochs
    )

    print("Training is completed")
    print("[INFO] Evaluation phase...")

    prediction = model.predict_generator(eval_gen)
    prediction_index = np.argmax(prediction, axis=1)

    my_classification_report = classification_report(eval_gen.classes,
                                                     prediction_index,
                                                     target_names=eval_gen.class_indices.keys())

    my_conf_matrix = confusion_matrix(eval_gen.classes, prediction_index)

    print('[INFO] Classification Report: ')
    print(my_classification_report)

    print('[INFO] Confusion Matrix: ')
    print(my_conf_matrix)
Then we will use the Argument parser library to pass our parameter externally. Here we are only passing the batch size and number of epochs. The path for the dataset is defined here and it should only be the folder name, because while building the docker image we will copy the entire directory, so we need to specify only the folder name, not the full path. Those arguments are taken as input by our training function.
if __name__=='__main__':
    parser = argparse.ArgumentParser()
    parser.add_argument("--batch_size", type=int, help="Batch size", default=32)
    parser.add_argument("--epochs", type=int, help="Training epochs", default=1)

    args = parser.parse_args()

    data_path = 'dummy_data'
    trainer(data_path, args.batch_size, args.epochs)
To check if our script is working, we will just run it and see if it starts the training. To run the file, just use the below command.
python train.py --batch_size 32 --epochs 2

The Entire code
Below is the entire code.
from tensorflow.keras.preprocessing.image import ImageDataGenerator
from tensorflow.keras.applications import Xception
from tensorflow.keras.layers import Dropout, Flatten, Dense, Input
from tensorflow.keras.models import Model
from tensorflow.keras.optimizers import SGD, Adam
from sklearn.metrics import classification_report, confusion_matrix
import numpy as np
import argparse
import os
def build_model(n_classes):
    base_model = Xception(weights='imagenet', include_top=False,input_tensor=Input(shape=(224, 224, 3)))
    head_model = base_model.output
    head_model = Flatten()(head_model)
    head_model = Dense(512)(head_model)
    head_model = Dropout(0.5)(head_model)
    head_model = Dense(n_classes, activation='softmax')(head_model)

    model = Model(inputs=base_model.input, outputs=head_model)

    for layer in base_model.layers:
        layer.trainable = False

    return model


def data_pipeline(batch_size, train_data_path,
                  valid_path, eval_path):
    train_augment = ImageDataGenerator(
        rescale=1. / 255,
        rotation_range=25,
        zoom_range=0.15,
        width_shift_range=0.2,
        height_shift_range=0.2,
        shear_range=0.15,
        horizontal_flip=True,
        fill_mode='nearest'
    )

    valid_augment = ImageDataGenerator(
        rescale=1. / 255
    )

    train_gen = train_augment.flow_from_directory(
        train_data_path,
        batch_size=batch_size,
        target_size=(224, 224),
        class_mode='categorical',
        color_mode='rgb',
        shuffle=True
    )

    valid_gen = valid_augment.flow_from_directory(
        valid_path,
        batch_size=batch_size,
        target_size=(224, 224),
        class_mode='categorical',
        color_mode='rgb',
        shuffle=False
    )

    eval_gen = valid_augment.flow_from_directory(
        eval_path,
        batch_size=batch_size,
        target_size=(224, 224),
        class_mode='categorical',
        color_mode='rgb',
        shuffle=False
    )

    return train_gen, valid_gen, eval_gen


def number_of_images(directory):
    count = 0
    for root, dirname, filenames in os.walk(directory):
        for filename in filenames:
            _, ext = os.path.splitext(filename)
            if ext in ['.png', '.jpg', 'jpeg']:
                count += 1

    return count


def trainer(all_data_path, batch_size, epochs): # path to directory containing all the folder
    path_train_data = os.path.join(all_data_path, 'training')
    path_valid_data = os.path.join(all_data_path, 'validation')
    path_eval_data = os.path.join(all_data_path, 'evaluation')

    total_train_img = number_of_images(path_train_data)
    total_valid_img = number_of_images(path_valid_data)
    total_eval_img = number_of_images(path_eval_data)

    # print(f"Total training images: {total_train_img}")
    # print(f"Total validation images: {total_valid_img}")
    # print(f"Total evaluation images: {total_eval_img}")

    train_gen, valid_gen, eval_gen = data_pipeline(batch_size=batch_size,
                                                   train_data_path=path_train_data,
                                                   valid_path=path_valid_data,
                                                   eval_path=path_eval_data)

    classes_dict = train_gen.class_indices
    model = build_model(n_classes=len(classes_dict.keys()))
    optimizer = Adam(lr=1e-5)
    model.compile(loss='categorical_crossentropy',
                  optimizer=optimizer,
                  metrics=['accuracy'])

    model.fit_generator(
        train_gen,
        steps_per_epoch=total_train_img // batch_size,
        validation_data=valid_gen,
        validation_steps=total_valid_img // batch_size,
        epochs=epochs
    )

    print("Training is completed")
    print("[INFO] Evaluation phase...")

    prediction = model.predict_generator(eval_gen)
    prediction_index = np.argmax(prediction, axis=1)

    my_classification_report = classification_report(eval_gen.classes,
                                                     prediction_index,
                                                     target_names=eval_gen.class_indices.keys())

    my_conf_matrix = confusion_matrix(eval_gen.classes, prediction_index)

    print('[INFO] Classification Report: ')
    print(my_classification_report)

    print('[INFO] Confusion Matrix: ')
    print(my_conf_matrix)


if __name__=='__main__':

    parser = argparse.ArgumentParser()
    parser.add_argument("--batch_size", type=int, help="Batch size", default=32)
    parser.add_argument("--epochs", type=int, help="Training epochs", default=1)

    args = parser.parse_args()

    data_path = 'dummy_data'
    trainer(data_path, args.batch_size, args.epochs)
If the training is running properly, then we can move forward to the next step to dockerize the code and build the image. Now, we will write the Dockerfile required for building the image.
Creating Dockerfile
Create a file named Dockerfile.
FROM tensorflow/tensorflow:latest-gpu
We will be using tensorflow latest image as our base image.
WORKDIR ./docker_training
COPY . .
Work directory will be your project directory and the command COPY will copy all the files in the current directory inside the image.
RUN apt-get update
RUN pip install matplotlib
RUN pip install scikit-learn
RUN pip install numpy
RUN pip install pillow
The above commands will install the required python packages while creating the image.
ENTRYPOINT [ "python3", "train.py" ]
Now this command will run the train.py file when we run our docker container.
The entire Docker file is given below.
FROM tensorflow/tensorflow:latest-gpu
WORKDIR ./docker_training
COPY . .
RUN apt-get update
RUN pip install matplotlib
RUN pip install scikit-learn
RUN pip install numpy
RUN pip install pillow
ENTRYPOINT [ “python3”, “train.py” ]
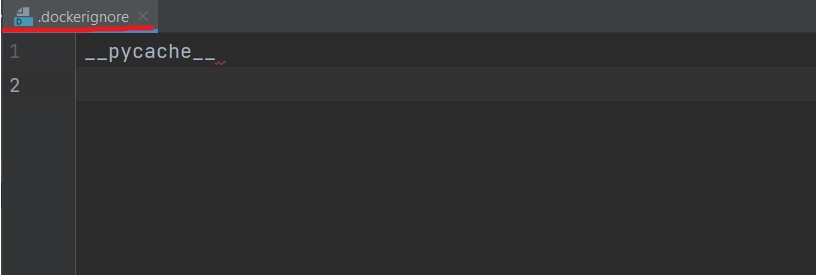
.dockerignore file in Docker
After this, we will create a .dockerignore file and this will ignore all the folders or files mentioned here while building the image. Here below I am just discarding the pycache while building the image.
Now, let us build our docker image. Execute the below command inside the project directory.
docker build -f Dockerfile -t cnnmodel .
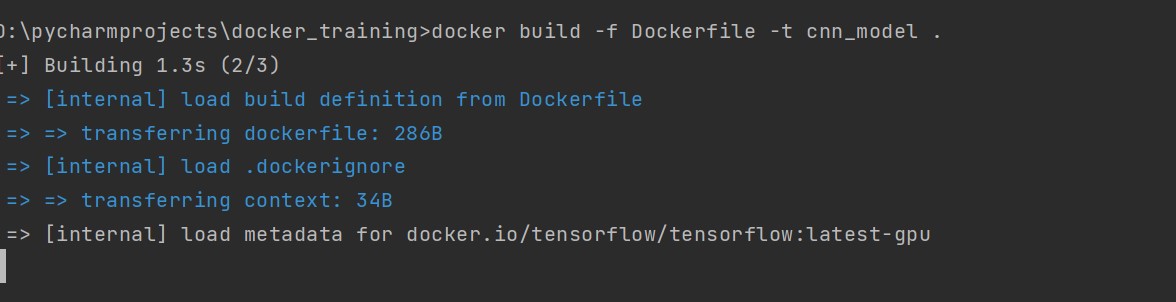
Once the image is created, we will check if the image is present.
docker images

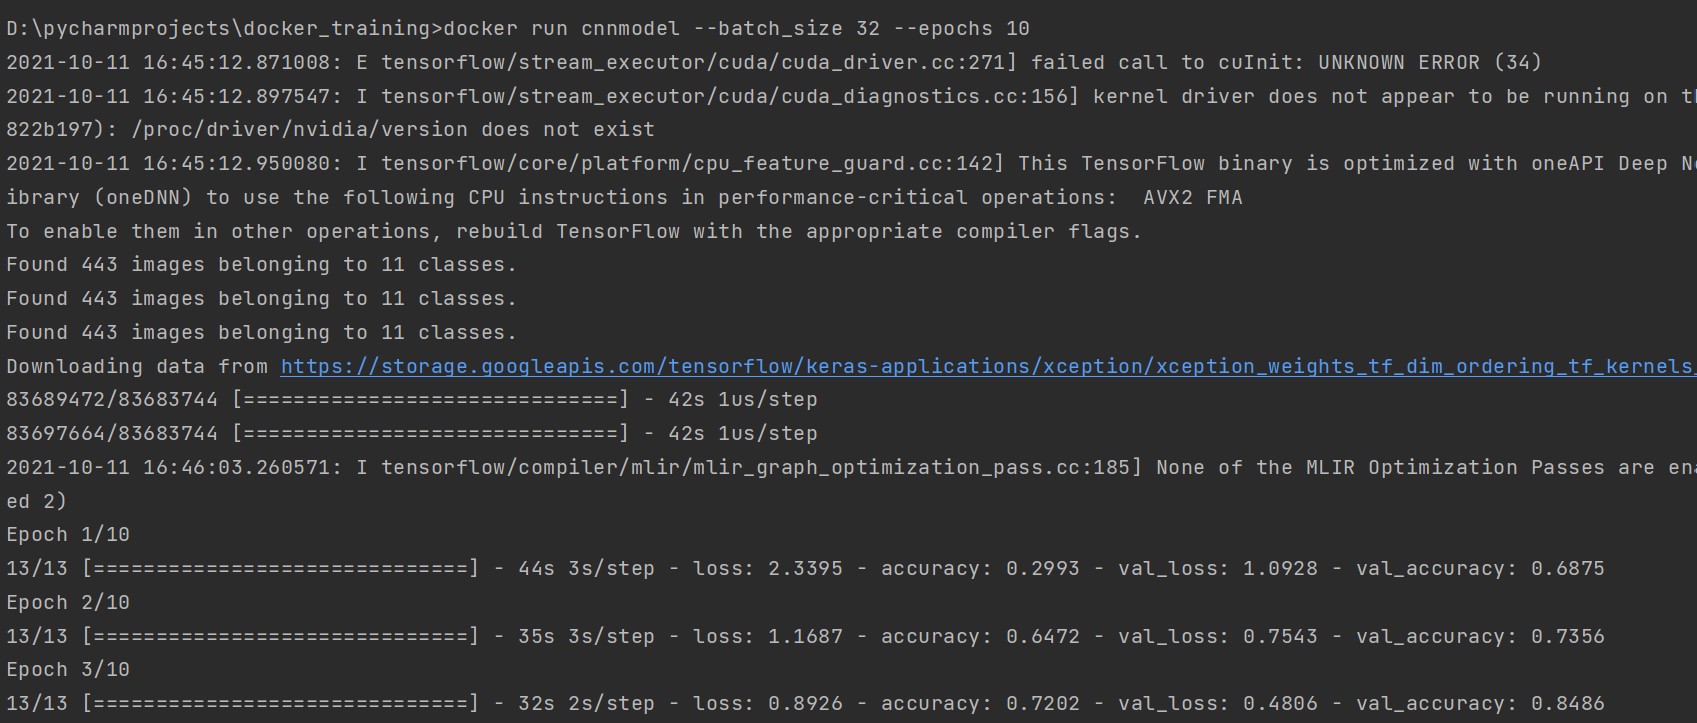
Now we are all set to test our docker image. Run the below command to start the training of our CNN model using a docker image.
Run the Docker Image
docker run cnnmodel --batch_size 32 --epochs 10
It will start the training.
The entire code setup is also available here.
The docker image can be pushed to the docker hub, and then we can deploy the container in the Kubernetes cluster.
End Notes
That’s it. Now you can build your own docker images and also train the different models with the help of docker images. Try with more complex models or complex problems and run it using docker. Keep exploring, Keep learning. Thank you.
Image Sources
Image 1 – https://developers.redhat.com/blog/2014/05/15/practical-introduction-to-docker-containers
Image 2 – https://www.docker.com/resources/what-container
I am an enthusiastic AI developer, I love playing with different problems and building solutions.


