Tensorflow For GPU Computations
This article was published as a part of the Data Science Blogathon
Introduction
In this article, we are going to learn how we can enable tensorflow for GPU Computations. Okay, let’s face it, Deep Learning Models are data-hungry and are often huge require a lot of computation power to train. Doing so on our device CPU is unfeasible because it runs the training one input at a time.
The above slows down the training process and requires heavy memory usage, leading to freezing from other works. The process doesn’t stop here, and the effect can also be seen in inferencing.
I have been unproductive most of the time unless I switched to Tensorflow for GPU Computations; frankly speaking, “GPUS are the new norms.” However, the hurdles many newbies and I faced are enabling GPU for computation due to Windows 10 and Tensorflow.
But fret not. This article helps leverage your Tensorflow for GPU computation in the most straightforward manner possible. So let’s get started.
Refresher – Tensorflow for GPU Computations
Before moving on further, let’s understand how these devices work and why to use them.
GPUs are an abbreviation for Graphics Processing Unit. Yes, you read right!. The devices, the key to smooth gameplay, and heavy graphics editing can be now utilized to perform the deep learning task.
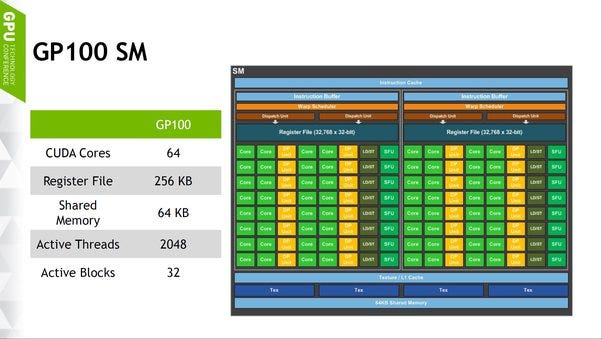
A GPU is a tiny device compared to a CPU. Still, it has more logical cores(transistors dedicated to ALU’s, control units, and memory cache) arranged in blocks of 32 (see fig 1). Also, they are optimized for performing fast floating-point calculations to render graphics by carrying out the same operations along with many cores, also called parallelization
Nowadays, these are optimized to perform deep learning computations to leverage parallelization. In a single clock cycle, enable tensorflow for GPU computation which can carry a lot of data(compared to CPU) for calculation, doing training a lot faster and allowing for better memory management. If you like to learn more, kindly refer to this medium article.
GPU Computation
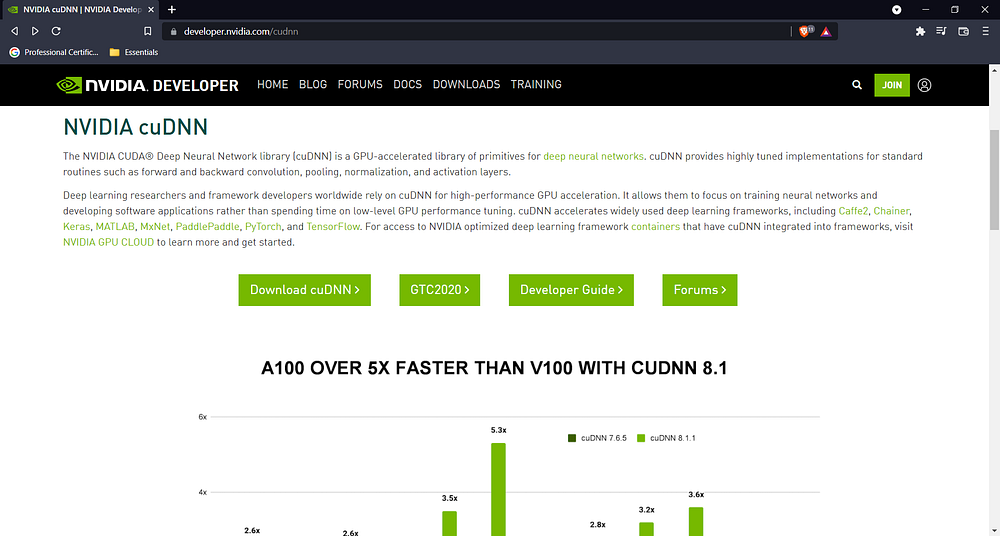
As mentioned in the previous section, the devices are now being optimized to perform deep learning computation, and NVIDIA is a leading producer. They have launched the cuDNN (Cuda Deep Neural Network) Library, which supports many DL frameworks such as Caffe2, Chainer, MxNet, Chainer, Tensorflow, Pytorch, Paddle.
For the most part, enabling tensorflow for GPU computation is right from the start is no big deal; however, the process becomes complicated due to windows 10 and TensorFlow limitations.
So let’s see how one can enable the same on a windows pc with NVIDIA GPU. For demonstration purposes, device specifications:
PC:- HP Pavillion Gaming PC with NVIDIA GTX 1650
OS:- Windows 10 Home Edition
Python Distribution: Anaconda
So let’s start the process ⚙
Step 1 — Downloading Essentials
🌟1–1 Cuda Toolkit
Cuda toolkit is C++ binding developed for using accelerated computing. It consists of GPU accelerated libraries, compiler(NVCC), development tools, and support for CUDA runtimes.
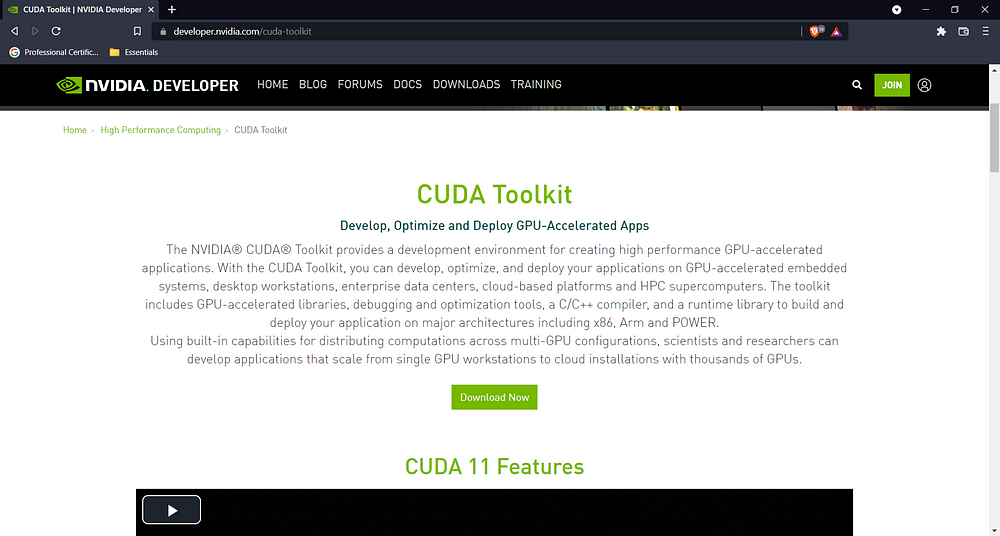
👉 First, check Cuda version compatibility for your device(GPU) to download the toolkit (For my case, it is version 10) and then head to the Official Download Page. Make sure you land on a page that looks like this:
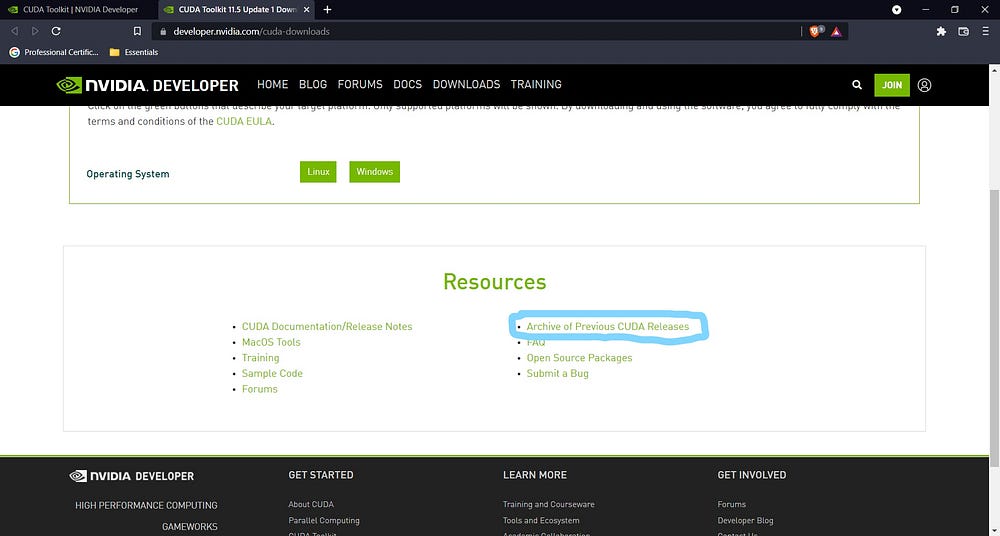
👉 Click on the Download Now button, taking you to the selection page. Note here you need to select the Archive of Previous CUDA Releases link.
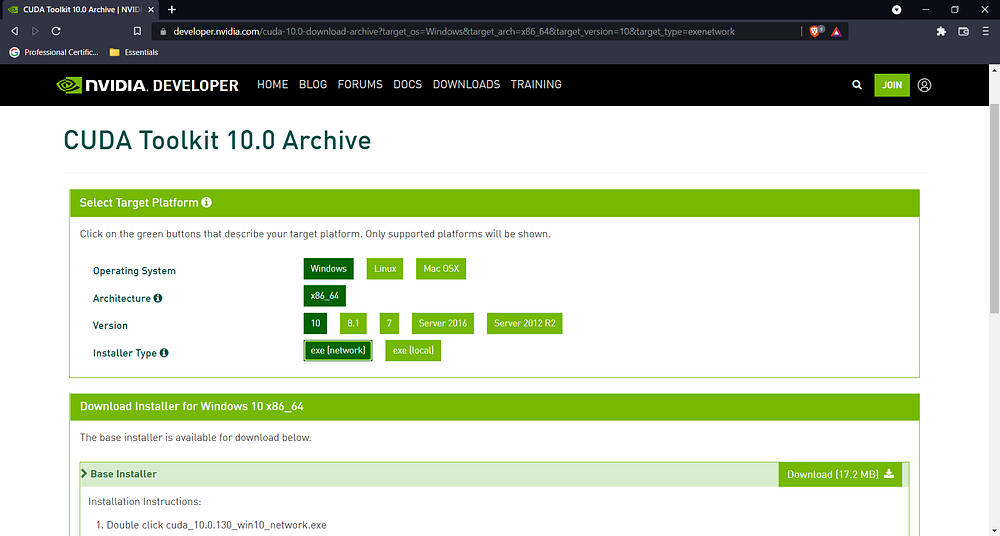
👉 Now select the required version and click on it. The best way is to use CTRL+F and then inter version no, e.g.

👉 Select the specific platform(Win, Linux, Mac), Architecture (32 /64 bit), OS (10/8/8.1/Sever 2016/2018 R2), and installer type (local/network)and then click on Download. In this case, I selected the following config:
While it’s downloading(2.1GB), let’s download the cuDNN files; required later.
🌟1–2 cuDNN (Members Exclusive Section!)
It is worth noting that one should only download the file specific to their Cuda toolkit version.
👉 Go to the cuDNN official site for downloading packages and click on the download cuDNN button. This will open a new page asking you to log in to your Nvidia account( if not present, sign up using the Join Now button, it’s free!).

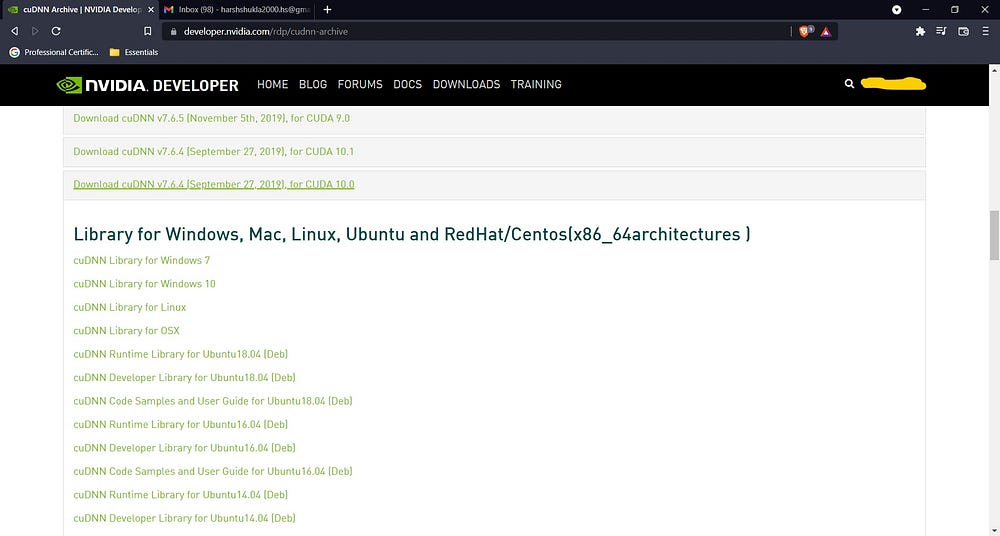
👉 Fill in the required credentials and verify yourself; finally, a page something like this will open, make sure to click on agree and then archive cuDNN releases:
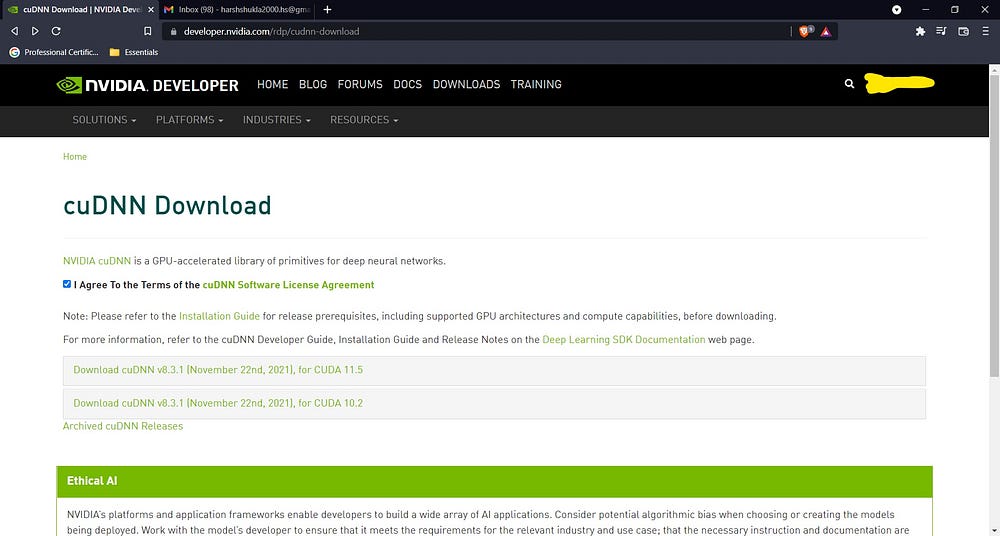
👉 Finally, find the version compatible with your CUDA and then select your distribution, the library files😉.
The above step will start downloading the files. Meanwhile, let’s switch gears and download the final software Visual Studio.
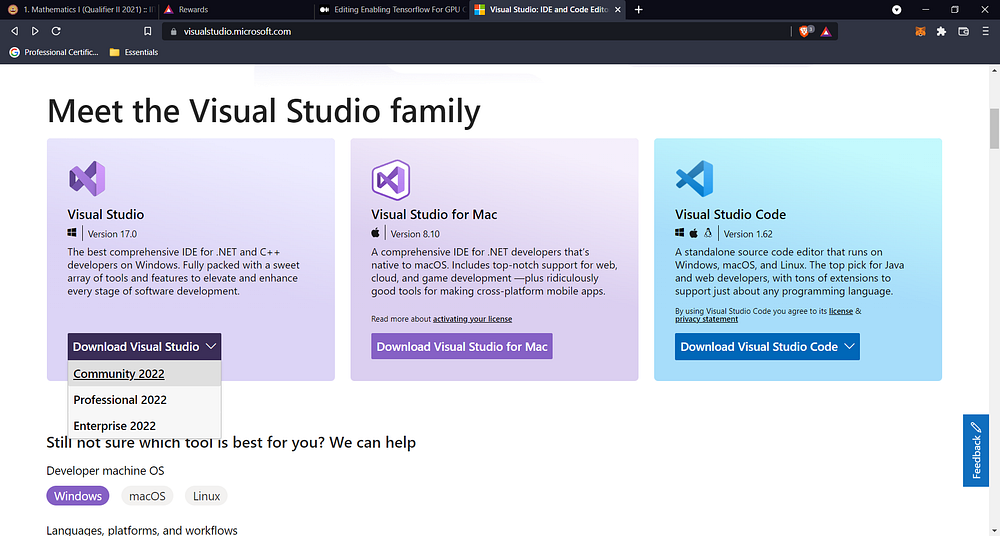
🌟 1–3 Visual Studio
As stated earlier, the Cuda toolkit is C++ binding, and one will require Vs. Build Tools to build them. For best results, it’s also advised to install everything related to C++ too!.
👉 To download, visit the Official Page, click Download Visual Studio, select the required version.
I prefer VS Community being it free and sufficient for most of the tasks.
This will start the downloading process, and finally, we can install all files.
Step 2 — Installing Files
The section is pretty straightforward but with few discrepancies in the cuDNN part for those who omitted steps 1–3
🌟 2–1 Installing VS
I know it’s pretty simple, but please follow along with this section to set up things correctly.
👉 Open the downloaded file and give the necessary permissions to download the basic installer and nestle it.
Once done in the next popup window, select Desktop & Mobile development with C++. The development files contain libraries for running out cuDNN library smoothly on desktop and mobiles(Android Studio support)
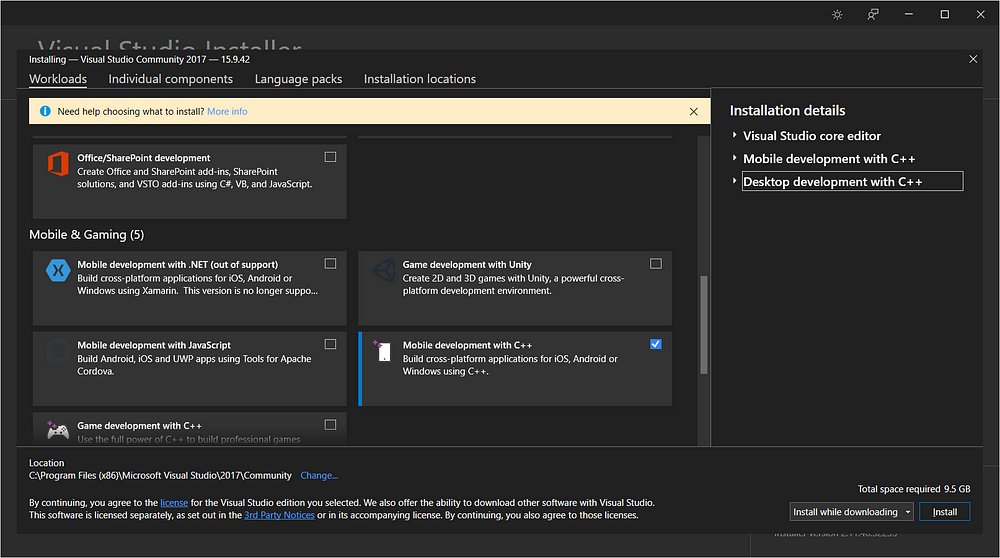
As you can see, the file is 9.5 Gb, so make sure you have a good internet connection!
Next up, we will install the remaining one.
🌟Installing Cuda Toolkit — Important!
Workaround for non-VS ones is discussed here, so don’t omit reading!
Click the installer, unpack the file, wait until a new window popup and check the compatibility.
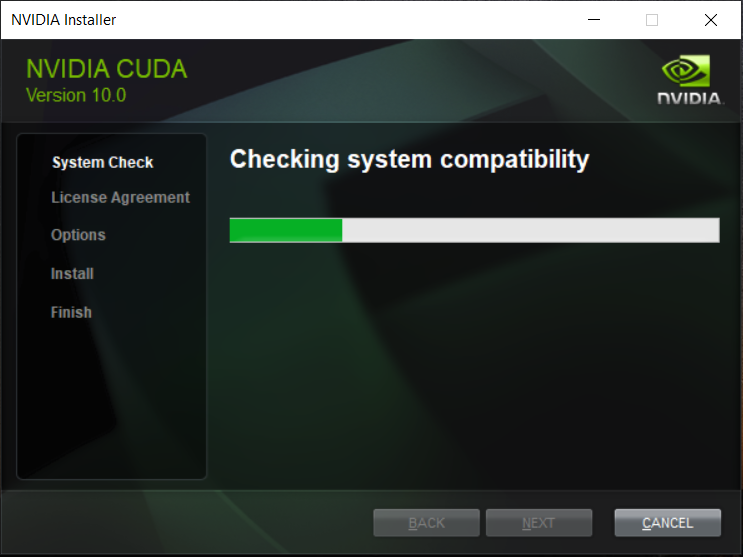
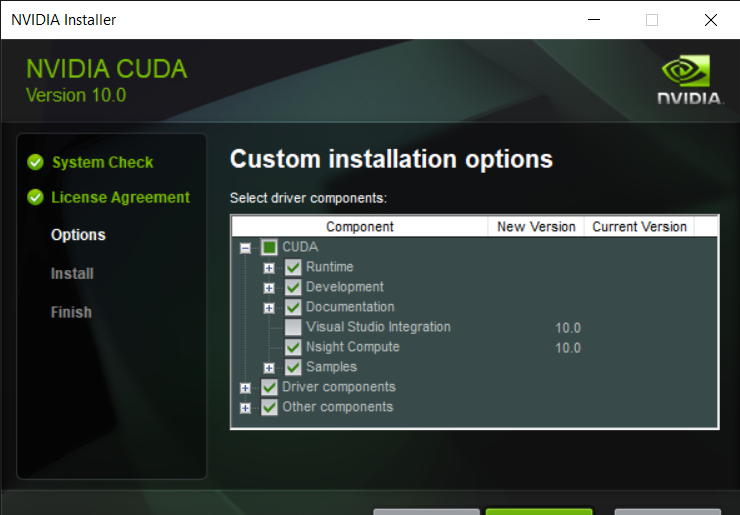
Once done(allowed), click on AGREE AND CONTINUE, and in the next window, the step is split into 2
- If VS installed: — Click Express Install.
- If Vs. Not Installed — Select Custom and then next. In the next window, navigate to CUDA and enlarge to find Visual Studio Integration, uncheck it and click next. After selecting the installation path, voila!
Reference: issue addressed here.
Once done, let’s perform the last step.
Step — 3 Setting Up Environment Variables
If you have thought the work was done, I am sorry to say windows will make you work overtime🤣
These steps set up the path for CUDA to look for when frameworks will require them. Here is the most convenient way to do this:
👉 Find the cuDNN folder and unzip it. You will find below folder name bin, include and lib in a folder named Cuda.
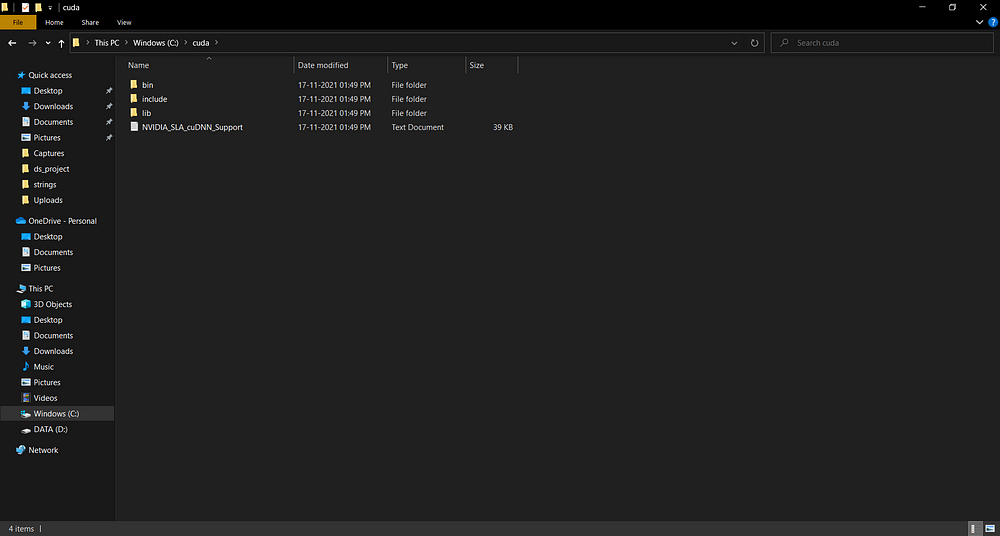
Each folder contains files listed below:
- bin- cudnn64_7.dll (version specific dll file*)
- lib/x64- cudnn.lib (the library file)
- include- cudnn.h(the header file)
👉 Copy-paste this to your system drive(C) so that your path looks like C:cuda .
👉 Next, open the system environment variables window by typing env in the search bar.
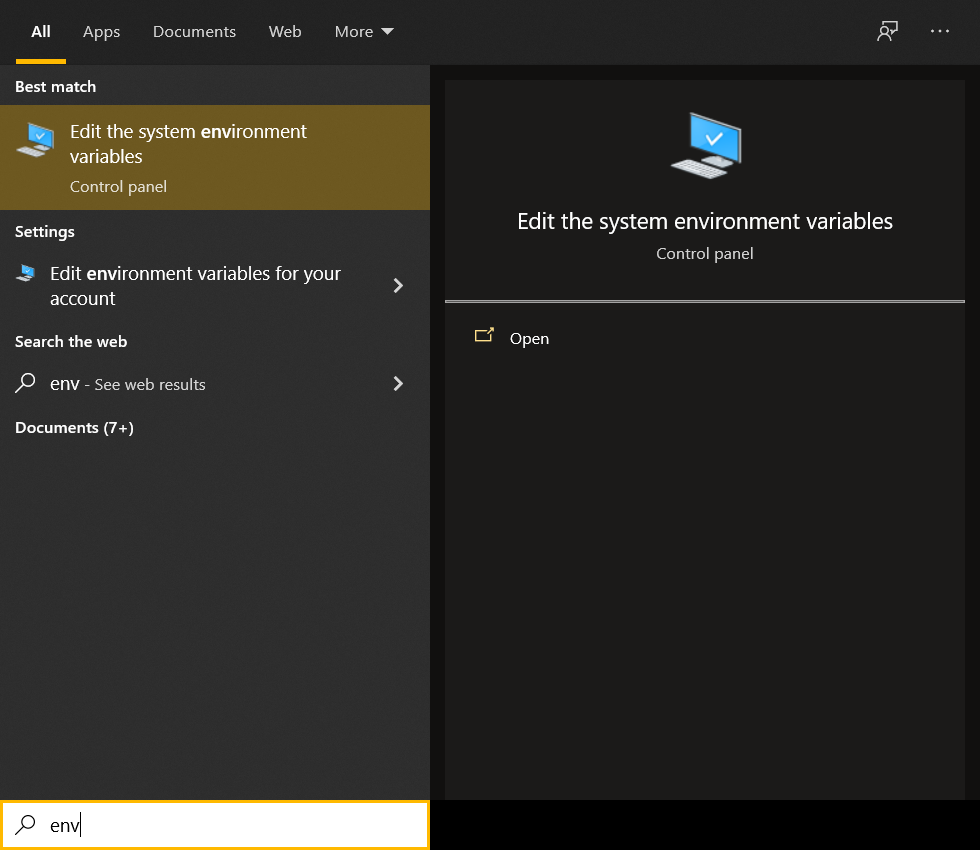
👉 Once the editor is open, click on Environment Variables. Then, under System Variable, find the Path , select it, and click on Edit…
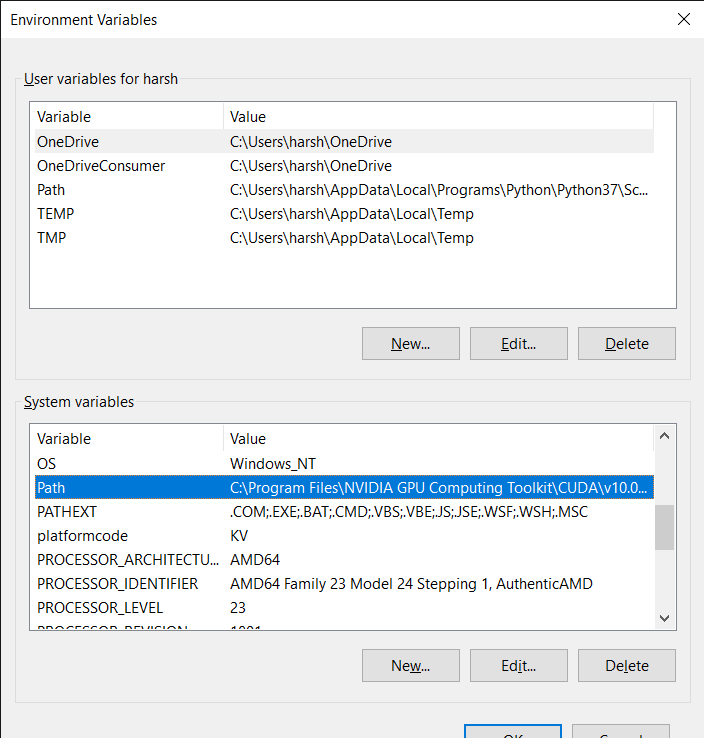
Add the files location path as :
- bin :
c:cudabin - include:
c:cudabin - lib :
c:cudalibx64
The easiest way is to copy each file path and paste it.

Now let’s test it using a framework, in this case, TensorFlow.
Step 4- Creating Environment(Anaconda Required)
This section assumes you have anaconda installed. If not, kindly install it from here.
Its best practice to create a new environment to keep all files separate from the original. Hence we will carry the legacy here😊.
Open the search bar again and type anaconda and open the shell window which appears.

Inside the window, type the below command:
conda create -n myenv python=3.6
where myenv is the environment name(here tf_gpu is used) and python=3.6 insures for python 3.6 (most stable as per observations).

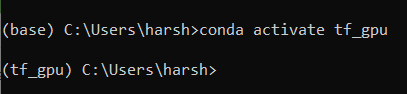
👉 Activate the environment using conda activate myenv . This opens the workplace.
👉 Finally, install the TensorFlow GPU Support package (tensorflow-gpu ) as:
pip install tensorflow-gpu==2.0.0

where 2.2.0 is the specific version supported by cuda_toolkit.
👉 As a final step, let’s check if everything is working correctly by importing the library as:
python — this ensures we are in the python terminal and not the shell.
import tensorflow — Standard import, but here is the trick. If you get a message as :
Successfully opened dynamic library cudart64_100.dll
It means the module is recognized, and the processing will happen on GPU; else, kindly check if the process was followed correctly!
One last bit of info is that if you look carefully, the file opened is the same file present in the bin folder of the cuDNN files (the reason I said version-specific)
Conclusion
Well, this was a head-scorching article, but if you have followed along and enabled the GPU support, congrats. Your computation has been significantly benefited(see fig), and you can now work more efficiently.
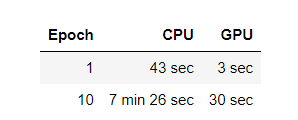
Comparison — Image By AuthorAs final pieces of advice, I want to share are :
- For small datasets, never bother going for GPU; CPUs are enough for the job,
- If you don’t have the device, use Google collab, which provides free instances in the cloud with markdown support.
- Make sure to optimize the code/processing pipeline to use less GPU memory, or you can even use prefetch and caching!
For learning more, you can visit my blog’s page as I cover various topics in a beginner-friendly format. Also, you can contact me on LinkedIn, Twitter.
Thanks for reading,
STAY SAFE, STAY HEALTHY😀
The media shown in this article is not owned by Analytics Vidhya and are used at the Author’s discretion.
Hey All✋, My name is Purnendu Shukla a.k.a Harsh. I am a passionate individual who likes exploring & learning new technologies, creating real-life projects, and returning to the community as blogs. My Blogs range from various topics, including Data Science, Machine Learning, Deep Learning, Optimization Problems, Excel and Python Guides, MLOps, Cloud Technologies, Crypto Mining, Quantum Computing.


