Setting Up CI/CD Using GitHub Actions
This article was published as a part of the Data Science Blogathon.
Introduction
CI/CD refers to the process in which your development team involves frequent code changes pushed in the main branch while ensuring that it does not impact any changes made by developers working parallelly. It provides smooth and convenient management.
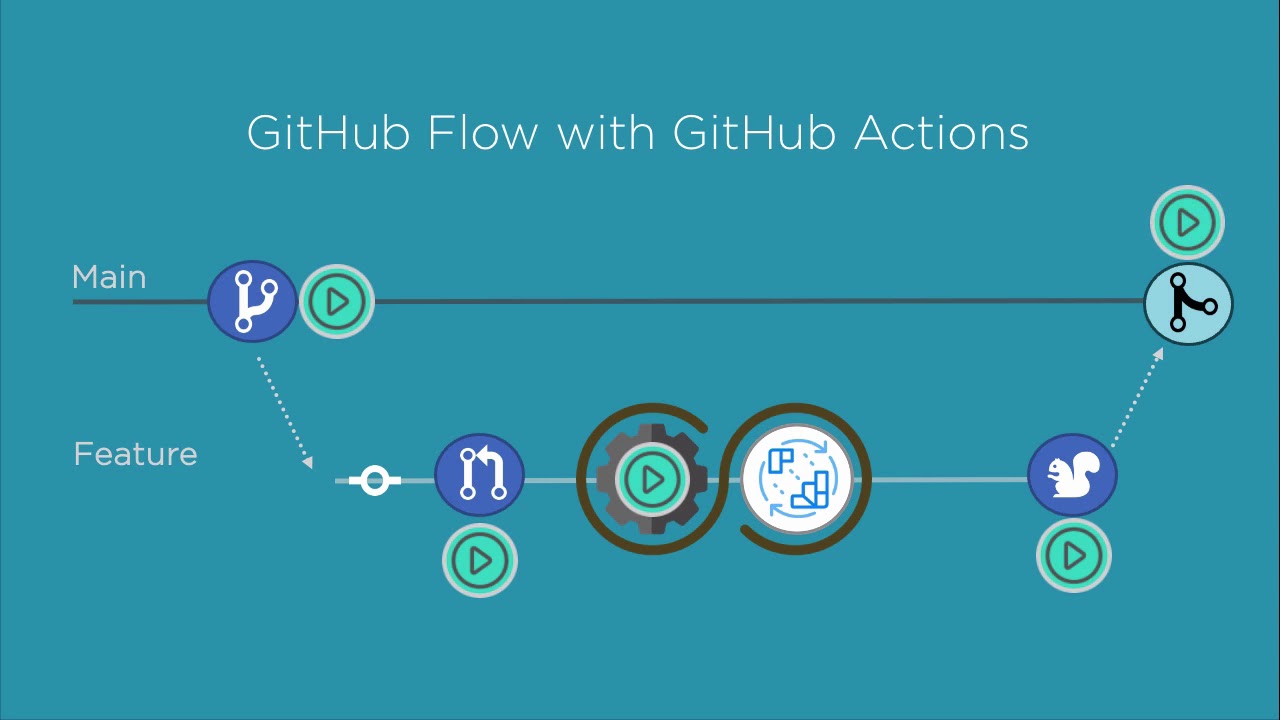
We will be doing CI/CD with the help of GitHub actions. GitHub Actions make it easy to automate all your software workflows now with the help of CI/CD. Build, test, and deploy your code right from GitHub. It uses YAML syntax to define the events, jobs, and steps. These files are stored in GitHub workflows, and a series of commands are automatically triggered whenever a code is pushed.

Various Stages of the CI/CD pipeline:
Build – We will compile the code in this stage.
Test – We will test the code in this stage. We can save both efforts as well as time can be saved by performing the techniques of automation.
Release – In this stage, we will release the application in our GitHub repository.
Deployment – We will deploy the application to the production environment.
Validation and compliance – Your organization’s needs determine the steps to validate a build.
What are GitHub Actions?
1. GitHub Actions help to automate tasks within the software development life cycle.
2. GitHub Actions are event-driven, i.e., we can run a series of commands after a specified event has occurred.
3. We can use GitHub Actions to automatically run your software testing scripts. An event automatically triggers the workflow, which contains a job. The job then uses steps to control the order in which actions are run. The workflow is an automated procedure that you add to your repository. Workflows are one or more jobs that can be scheduled or triggered by an event. We can use the workflow to build, test, package, release, or deploy a project on GitHub. A job is a set of steps that execute on the same runner. By default, a workflow with multiple jobs will run those jobs in parallel.
Prerequisites or Requirements
1. A machine with 256 MB of RAM, although more than 2 GB is recommended
2. GitHub account and the project repository added to GitHub, which you want to keep track of.
3. Complete information about the frameworks used in the project(along with their versions).
CI/CD using GitHub Actions
This section will show how we can set up a CI/CD pipeline on our applications using GitHub. To get started, firstly, we have to create a new repository. Clone that repository on your machine. Now, open your command line tool that opens the cloned repository and push your application there. Once we have the application code in the repository, we can start creating workflows in GitHub actions. Workflow can vary on a requirement basis or from project to project.
Below are the detailed steps of the complete workflow:
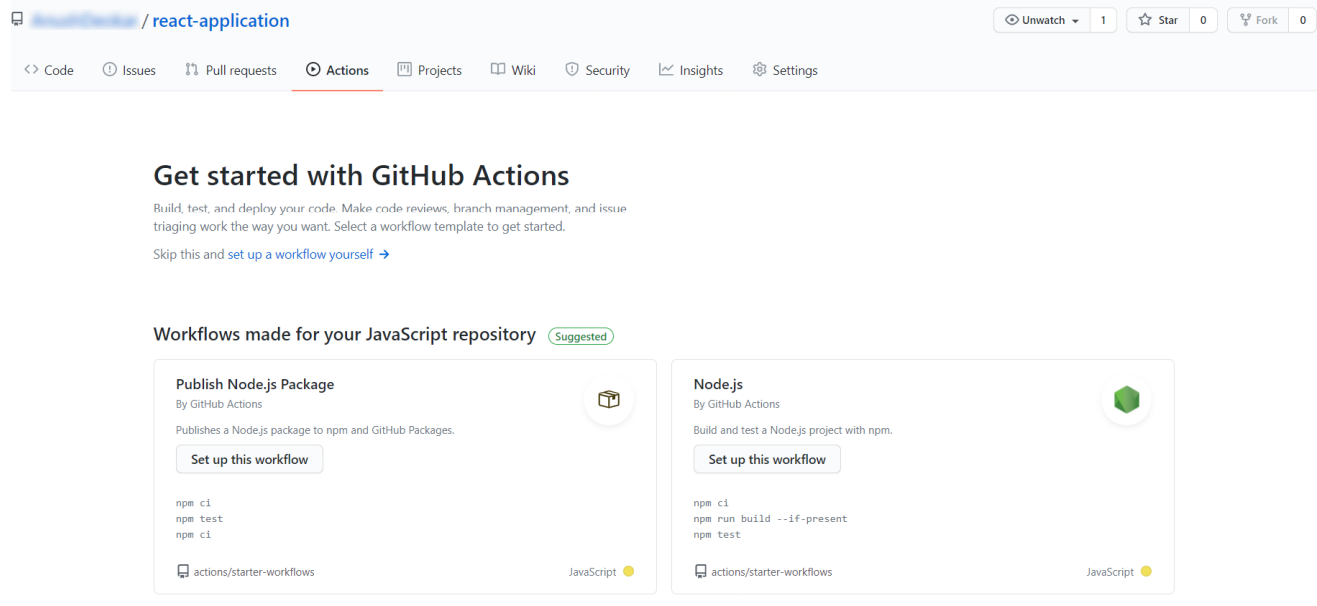
1. Click on the Actions button available on the repository navbar.

2. Select the workflow you want to apply (GitHub will automatically recommend the workflows based on your code). For, e.g. for a react project, we will choose the node.js package.
3. Now, you can see a workflow file is created, which is a YML file. You can make the pipeline by directly editing the file. We can include the dependencies, the job step that needs to be done, and the command so that it can now deploy if everything is successful.
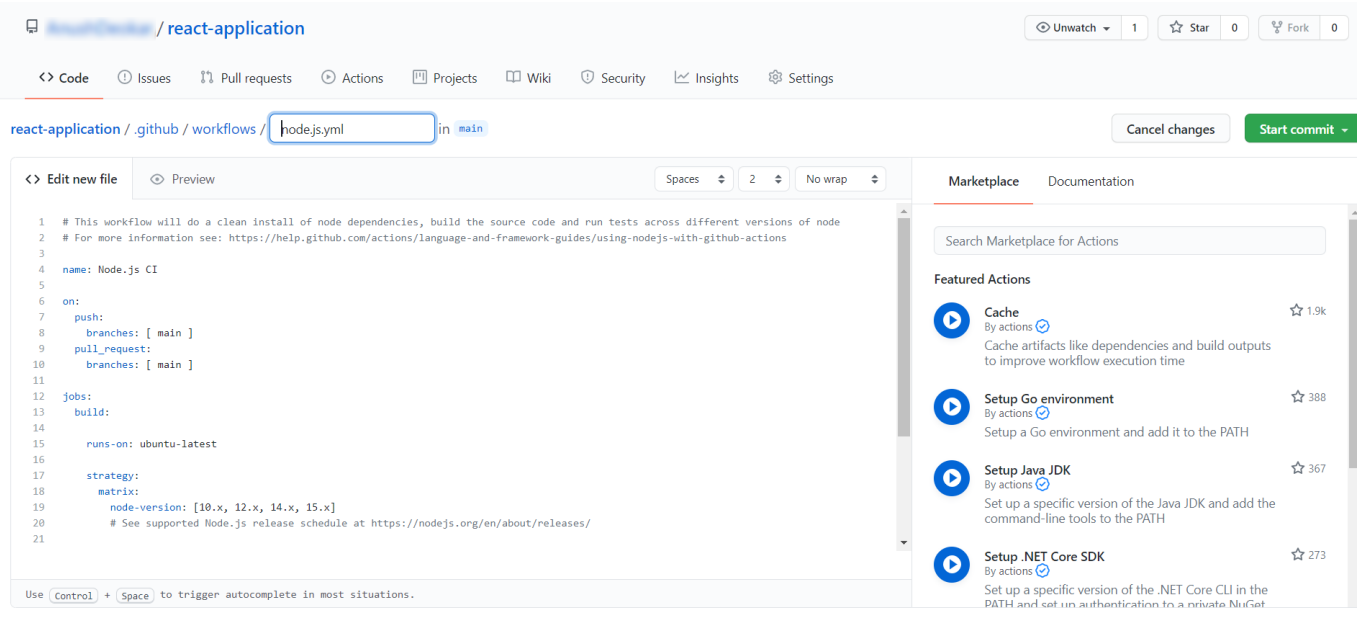
Here is the link to my pipeline code. I have created steps to build, run, test, and deploy the code locally whenever a code is pushed on GitHub. As it is a react project, I have selected node.js workflow for the project.
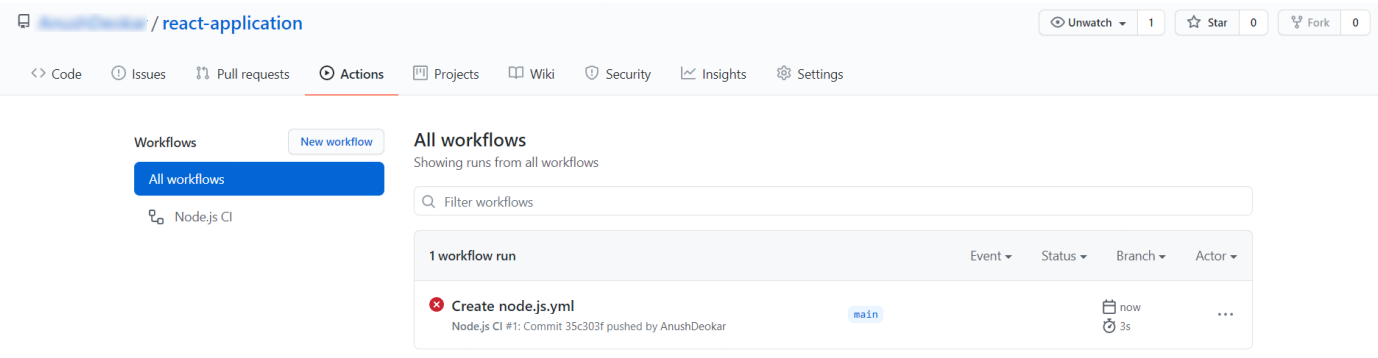
4. After editing the XML file, click on start commit->commit.
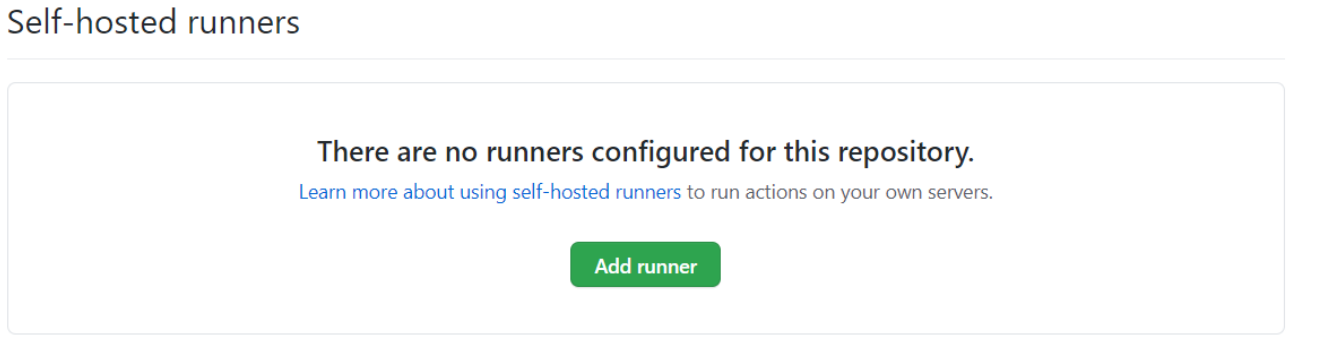
5. You will see that your build has failed because we have not installed any runner for git actions. To resolve this, click on settings->Actions(On side Nav).
6. Scroll to the bottom and click on add runner.
7. Now, a series of commands appear to run the runner. Open your command prompt(so that we can run these commands) or any terminal where you are working and go to your project directory. And also, in GitHub, select the command according to your need.
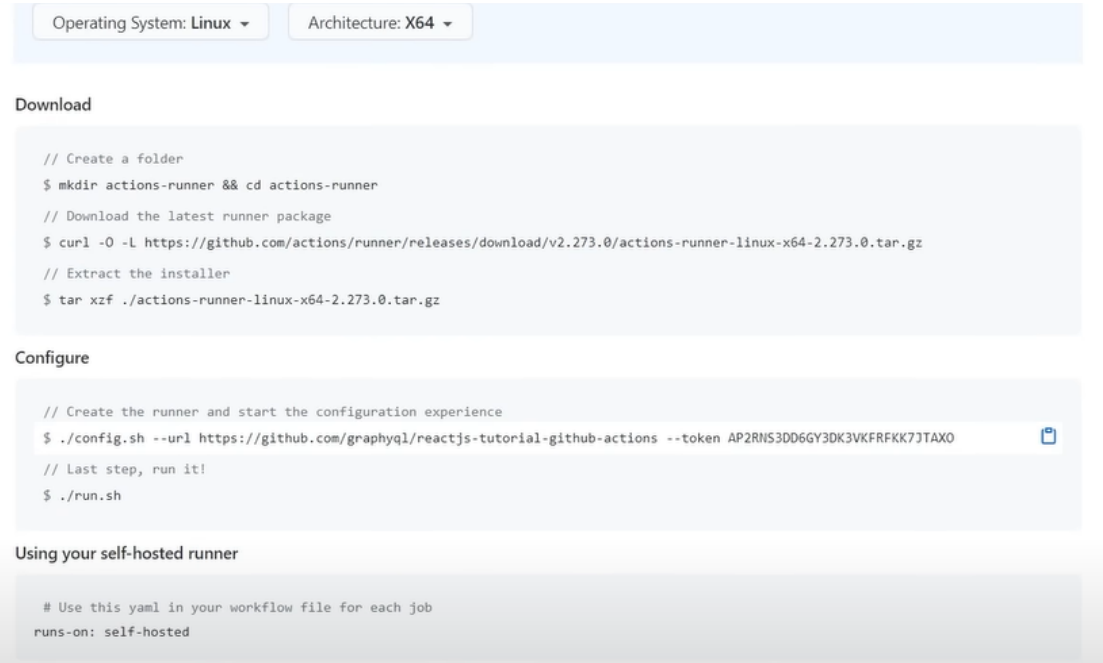
8. Create an actions runner folder and cd into it in the terminal run. I was using the commands mkdir actions-runner and cd actions-runner.
9. Now download the latest runner package by running the command given in Github. You will see the following screen.

10. Next, configure the file by running the commands above. Use the token number provided in GitHub to connect to GitHub. We have completed the setup for the GitHub actions. We can see the following message
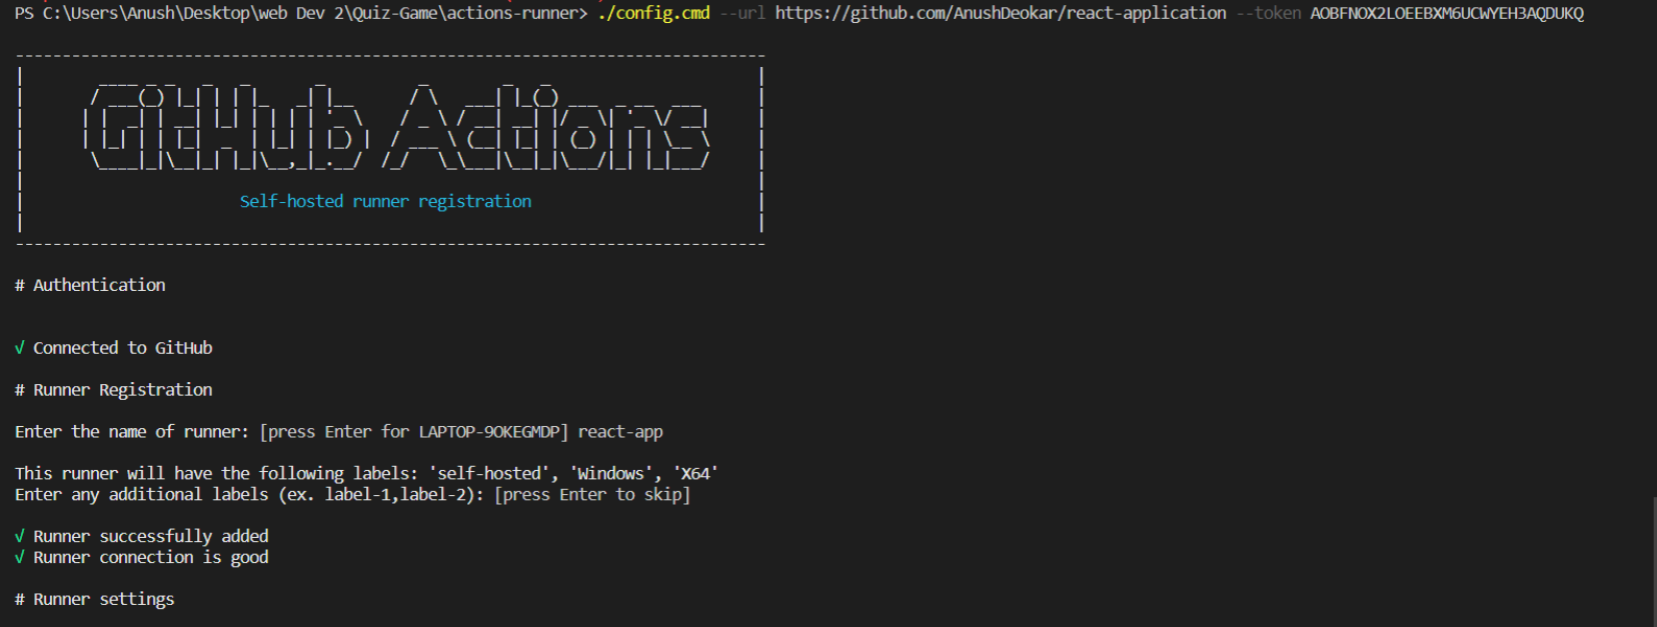
11. We have built out a runner, but on GitHub, you will see our runner is offline.
To make the runner online, run the last line given above, i.e. ./run.cmd on windows. And now we can see that the runner is idle(running or online).

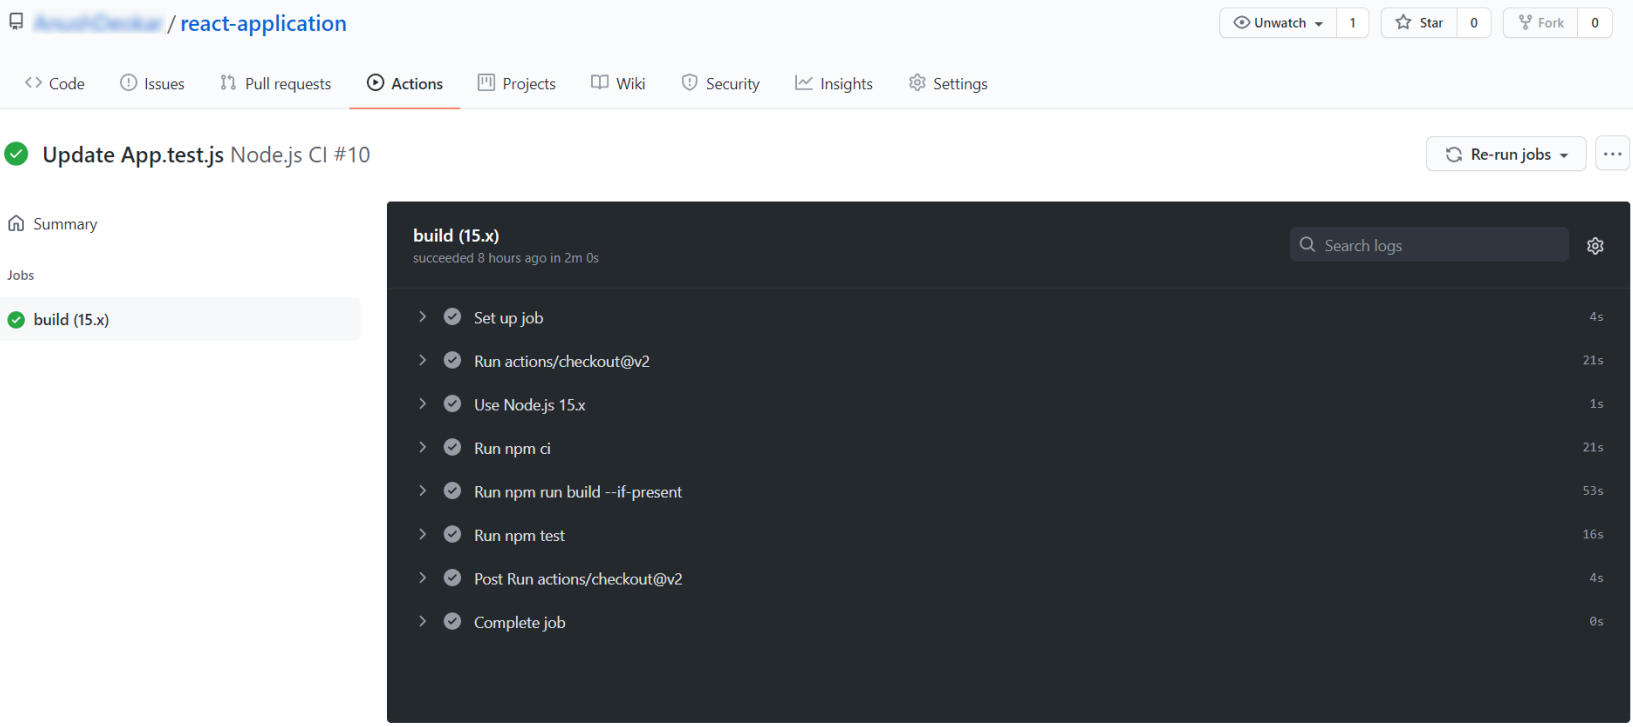
12. Now, we are ready to complete the CI/CD process. Go to actions->latest workflow->on the top right corner, click on run all jobs.
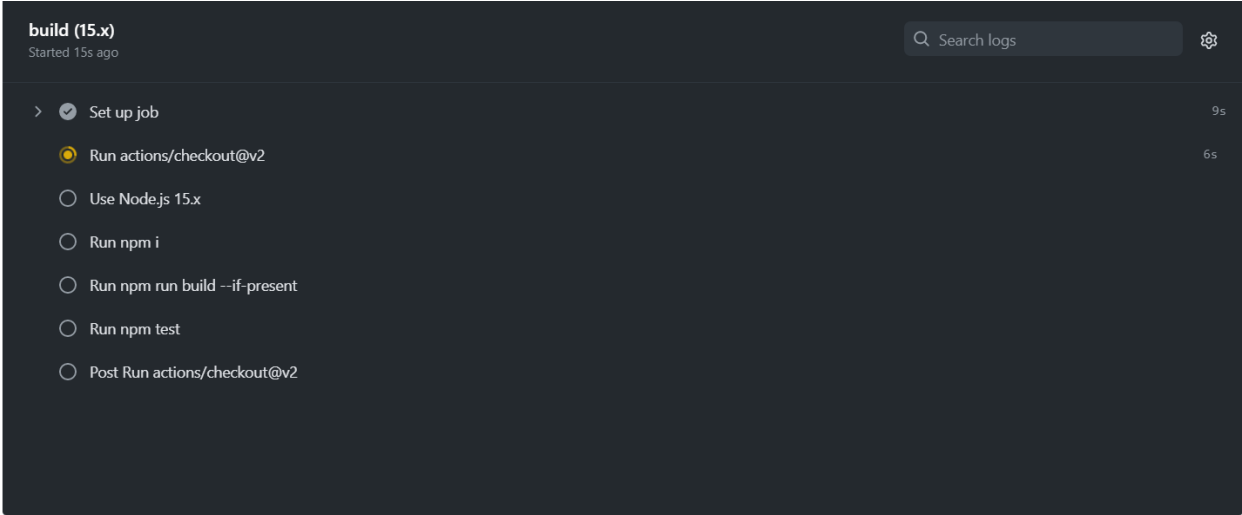
Viewing progress on the build option on the right side will take some time.
Please Note that Continuous delivery is automatically done if you have written your terminal commands (which we use to run the app locally) in your pipeline file. For example, if we have a react application in the pipeline file, we need to write run: npm start will deploy our app, and hence continuous delivery is performed.
Thus, With the help of GitHub actions, continuous Integration and delivery can be done quickly.
Conclusion
We have successfully integrated CI/CD on our basic web app using GitHub Actions.
I will briefly summarise all the points I have covered in this article.
1. Set Up Jobs: This step allows us to set up the required environment and packages.
2. Run action check: The AUTH token is persisted in the local git config. It enables your scripts to run authenticated git commands. We will remove the token during the post-job cleanup.
3. Run subosito/flutter-action: This action creates a flutter environment for active use. It works on Linux, Windows, and macOS.
4. Install Dependencies: We use Install dependencies to install dependencies for our project. Run flutter pub get to make sure the dependencies are up to date.
5. Analyze: Analyzes each commit or pull request by running all supported static code analysis tools for the languages found in your repository.
6. Format: It runs the Run flutter format command. Post-Run Actions/ setup java@v1 A simple GitHub action that enables running post-run steps once a workflow job has ended.
7. Complete Job: See Events that trigger workflows for a complete list of events that can be used to trigger workflows.
It is all for today. If you have any suggestions or doubts, please feel free to comment below. I will reply to your queries.
Thanks for reading, 🤩
The media shown in this article is not owned by Analytics Vidhya and is used at the Author’s discretion.


