Hindi Character Recognition on Android using TensorFlow Lite
This article was published as a part of the Data Science Blogathon.
Introduction
If you ever wanted to build an image classifier for text recognition, I’m assuming you probably must have implemented the classic Handwritten Digit Recognition application from TensorFlow’s official examples.
Often referred to as the ‘Hello World’ of Computer Vision, it’s a great starting point for a beginner in ML to build a classifier application. Wouldn’t it be great to build a custom classifier that recognizes any character(s)? As of today, we’ll build a Hindi character recognition app, but feel free to pick a dataset of your own choice or simply follow me. Sounds exciting, right?
We are going to build a Machine Learning model that will be able to recognize Hindi characters, and that too, right from scratch. Not only will we be building an ML model, but we will also be deploying it on an Android mobile application. This article will therefore serve as an end-to-end tutorial covering almost everything you need to build and deploy an ML application.

I will try to explain everything as simply and clearly as possible. So, are you excited? I’m very much.
Data Preparation
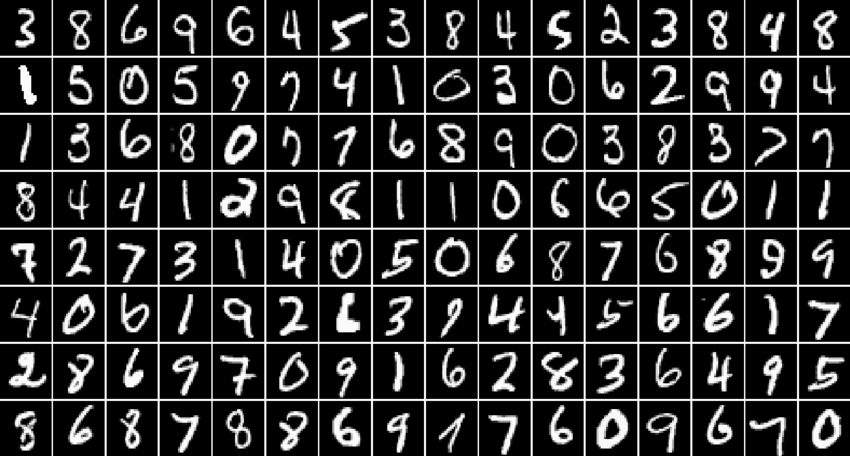
We need lots of data to train a Machine Learning model that should yield good results. You must have heard about the MNIST Digit database, right? Let’s recall.

[Source: https://www.researchgate.net/figure/Samples-from-the-MNIST-digit-recognition-data-set-Here-a-black-pixel-corresponds-to-an_fig1_200744481]
MNIST, as it stands for “Modified National Institute of Standards and Technology,” is a popular handwritten digit recognition database with over 60,000 images for the digits 0-9. Now, it is important to understand the looks and format of the MNIST database as we will be synthesizing a dataset for Hindi characters that is “MNIST-like.”
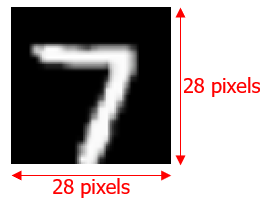
Every digit in the MNIST dataset is a 28 x 28 binary image in white color with a black background.

Okay, now that we have the idea, let’s synthesize our dataset for Hindi characters. I have the dataset already saved in my GitHub repository. Feel free to clone the repository and download the dataset.
The dataset contains all the Hindi vowels, consonants, and numerals.
These images have to be converted into NumPy arrays (.npz), to be fed for model training. The script below will help you with the conversion.
Import dependencies
import tensorflow as tf
from tensorflow import keras
from PIL import Image
import os

import numpy as np
import matplotlib.pyplot as plt
import random

!pip install -q kaggle
!pip install -q kaggle-cli
print(tf.__version__)
import os
os.environ['KAGGLE_USERNAME'] = ""
os.environ['KAGGLE_KEY'] = ""
!kaggle datasets download -d nstiwari/hindi-character-recognition --unzip
Convert JPG images into NPZ (NumPy array) format
# Converts all the images inside HindiCharacterRecognition/raw_images/10 into NPZ format.
path_to_files = "/content/HindiCharacterRecognition/raw_images/10/"
vectorized_images = []

for _, file in enumerate(os.listdir(path_to_files)):
   image = Image.open(path_to_files + file)
   image_array = np.array(image)
   vectorized_images.append(image_array)
np.savez("./10.npz", DataX=vectorized_images)
Load the training images NumPy array
The training images are vectorized into the NumPy arrays. In other words, the training images’ pixels are vectorized between the values [0, 255] into a single ‘.npz’ file.
path = "./HindiCharacterRecognition/vectorized_images/numeral_images.npz"
with np.load(path) as data:
    #load DataX as train_data
    train_images = data['DataX']
Load the training labels NumPy array
Similarly, the labels of the respective training images are also vectorized and bundled into a single ‘.npz’ file. Unlike the images array, the labels array contains discrete values from 0 to n-1, where n = no. of classes.
path = "./HindiCharacterRecognition/vectorized_labels/numeral_labels.npz"
with np.load(path) as data:
    #load DataX as train_data
    train_labels = data['DataX']
NO_OF_CLASSES = 5 # Change the no. of classes according to your custom dataset
In this example, I’m training the model for 5 classes – ३, अ, क, प, and न. The dataset covers all the vowels, consonants, and numerals, so feel free to choose any class.
Normalize the input images
Here, we normalize the input images by dividing every pixel by 255, so each pixel holds a value between [0, 1].
Pixels having the value 0 are completely dark (black), while their counterparts with the value 1 are white. Any value between 0 and 1 is grey with its intensity depending upon which end is the closest.

# Normalize the input image so that each pixel value is between 0 to 1.
train_images = train_images / 255.0
print('Pixels are normalized.')
Inspect the shape of the image and label arrays
- The shape of the image array should be (X, 28, 28) where X = no. of images.
- The shape of the labels array should be (X, ).
Note: The no. of images and no. of labels should be equal.
train_images.shape
train_labels.shape
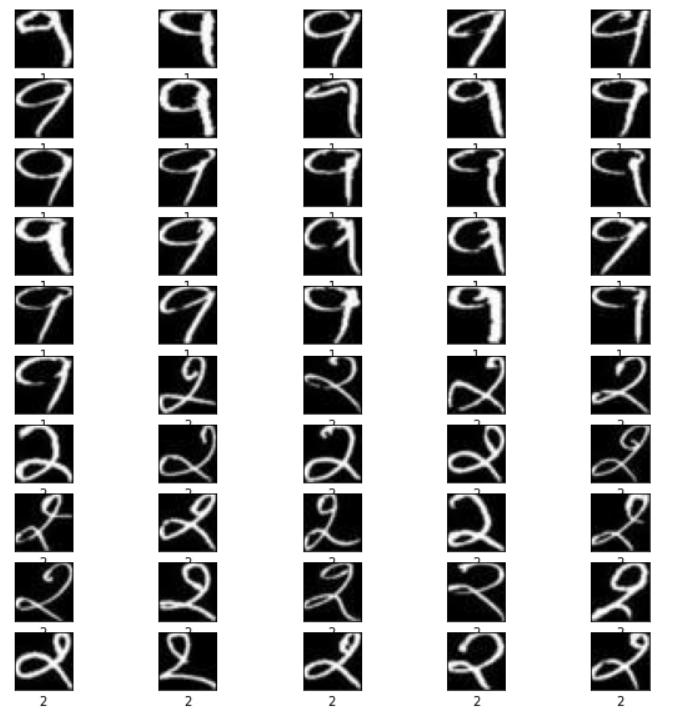
Visualize the training data
# Show the first 50 images in the training dataset.
j = 0
plt.figure(figsize = (10, 10))
for i in range(550, 600): # Try playing with difference ranges in interval of 50. Example: range(250, 300)
   j = j + 1
   plt.subplot(10, 5, j)
   plt.xticks([])
   plt.yticks([])
   plt.grid(False)
   plt.imshow(train_images[i], cmap = plt.cm.gray)
   plt.xlabel(train_labels[i])
plt.show()

[Source: Screenshot from my Google Colab notebook]
Phew, that was some work. Finally, we are done with the first step. Our dataset looks perfect now and is ready to be trained.
Model Training
Okay, so far, so good. The main game begins now. Let’s start with the model training.
In the cell below, we define the model’s layers and set the hyperparameters such as the optimizer, loss function, metrics to quantify the model performance, no. of classes, and epochs.
# Define the model architecture.
model = keras.Sequential([
   keras.layers.InputLayer(input_shape=(28, 28)),
   keras.layers.Reshape(target_shape = (28, 28, 1)),
   keras.layers.Conv2D(filters=32, kernel_size = (3, 3), activation = tf.nn.relu),
   keras.layers.Conv2D(filters=64, kernel_size = (3, 3), activation = tf.nn.relu),
   keras.layers.MaxPooling2D(pool_size = (2, 2)),
   keras.layers.Dropout(0.25),
   keras.layers.Flatten(),
   keras.layers.Dense(NO_OF_CLASSES)
])

# Define how to train the model
model.compile(optimizer = 'adam',
              loss = tf.keras.losses.SparseCategoricalCrossentropy(from_logits = True),
              metrics = ['accuracy'])

# Train the digit classification model
model.fit(train_images, train_labels, epochs = 50)
model.summary()
It took me around 30-45 minutes to train the model for 5 classes, with each class having approximately 200 images. The time to train the model will vary depending upon the no. of classes and image/per class you choose for your use case. While the model is training, go and have some coffee.
Quantization
We are halfway through this blog. The TensorFlow model is ready. However, to use this model on a mobile application, we will need to quantize it and convert it into the TF Lite format, a lighter version of the original TF model.
Quantization allows a worthy trade-off between the accuracy and size of the model. With a slight decrease in the accuracy, the model size can be decreased drastically, thereby making its deployment easier.
Convert the TF model into the TF Lite format
# Convert Keras model to TF Lite format.
converter = tf.lite.TFLiteConverter.from_keras_model(model)
tflite_float_model = converter.convert()

with open('model.tflite', 'wb') as f:
   f.write(tflite_float_model)

# Show model size in KBs.
float_model_size = len(tflite_float_model) / 1024
print('Float model size = %dKBs.' % float_model_size)
# Re-convert the model to TF Lite using quantization.
converter.optimizations = [tf.lite.Optimize.DEFAULT]
tflite_quantized_model = converter.convert()

# Show model size in KBs.
quantized_model_size = len(tflite_quantized_model) / 1024
print('Quantized model size = %dKBs,' % quantized_model_size)
print('which is about %d%% of the float model size.' % (quantized_model_size * 100 / float_model_size))
# Save the quantized model to file to the Downloads directory
f = open('mnist.tflite', "wb")
f.write(tflite_quantized_model)
f.close()

# Download the digit classification model
from google.colab import files
files.download('mnist.tflite')

print('`mnist.tflite` has been downloaded')
Almost done. We now have the TF Lite model ready to be deployed on an Android app.
Deploy Model
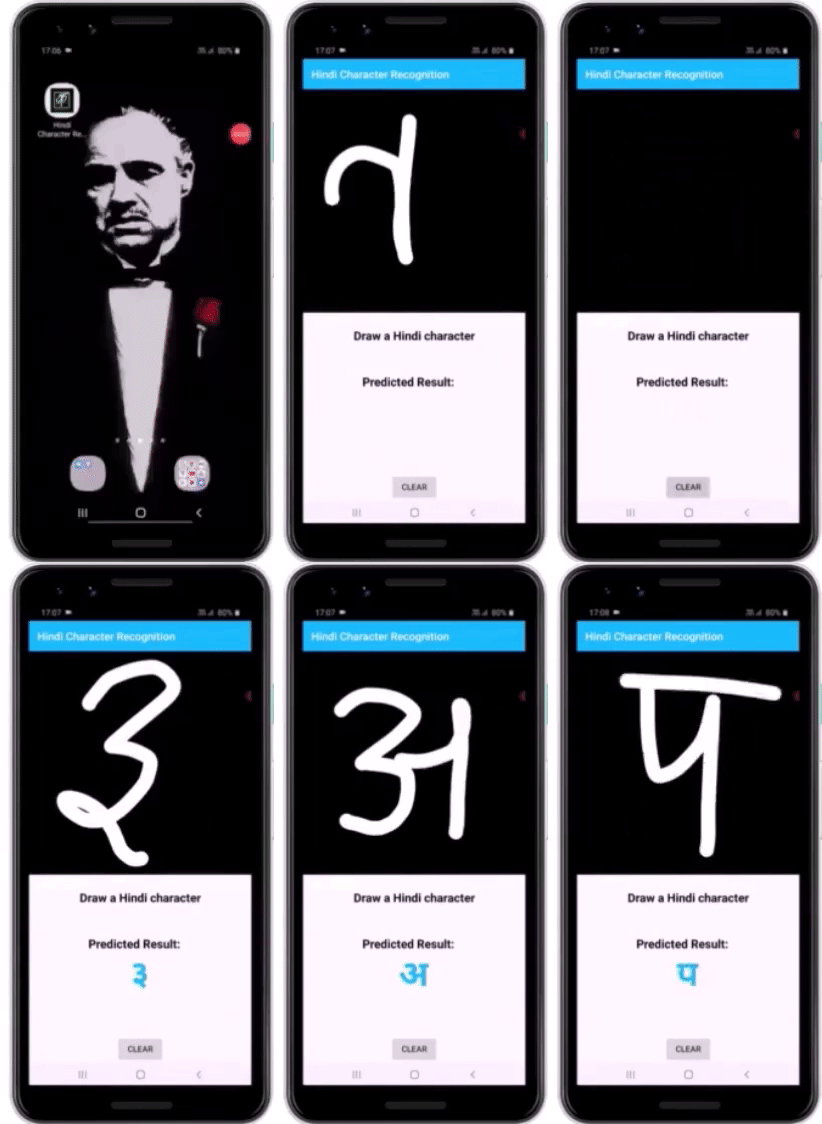
I have already developed an Android application for character recognition. In Step 1, you might have cloned the repository. In that, you should find the Android_App directory.
Copy the mnist.tflite the model file inside the Hindi-Character-Recognition-on-Android-using-TensorFlow-Lite/Android_App/app/src/main/assets directory.
Next, open the project in Android Studio and let it build itself for some time. Once the project is built, open the DigitClassifier.kt file, and edit Line 333 by replacing with the no. of output classes in your model.
Again, in the DigitClassifier.kt file, edit Line 118 through Line 132 by setting the label names according to your custom dataset.
Finally, build the project again and install it on your Android mobile and enjoy your own custom-built Hindi character recognition app.

[Source: https://github.com/NSTiwari/Hindi-Character-Recognition-on-Android-using-TensorFlow-Lite]
Conclusion
So that’s a wrap for this article. To quickly summarize:
- We started with data preparation to synthesize an MNIST-like dataset for Hindi character recognition consisting of vowels, consonants, and numerals; vectorized the images and labels for feeding into the neural network.
- Next, we architected the model by adding Keras layers, configured the hyperparameters and started the model training.
- After the TF model was trained, we quantized and converted it into TF Lite format to make it ready to deploy.
- Finally, we built an Android app (although not from scratch, as it was beyond the scope of this blog) and deployed our classifier model on it.
I hope you liked the blog as much as I enjoyed writing it. If you want to talk more about this, feel free to connect with me on LinkedIn. Till then, adieu.
The media shown in this article is not owned by Analytics Vidhya and is used at the Author’s discretion.


