Creating a Music Streaming Backend Like Spotify Using MongoDB
This article was published as a part of the Data Science Blogathon.
Introduction
You must have seen streaming services such as Spotify, Deezer, and Apple Music. So, what better way to flex our backend skills than to work with MongoDB to create our own Spotify backend clone, all with NodeJS? In this article, I will show you how to handle uploading songs to the database, streaming music, user authentication, the ability to choose your favorite songs, and a recommendation engine using machine learning. First up, here is how to set up MongoDB Atlas for NodeJS.
Setting up a MongoDB Database
1. Sign up for a MongoDB account here to use MongoDB Atlas. You can either register with your email address or use a GitHub or Google account to log in.
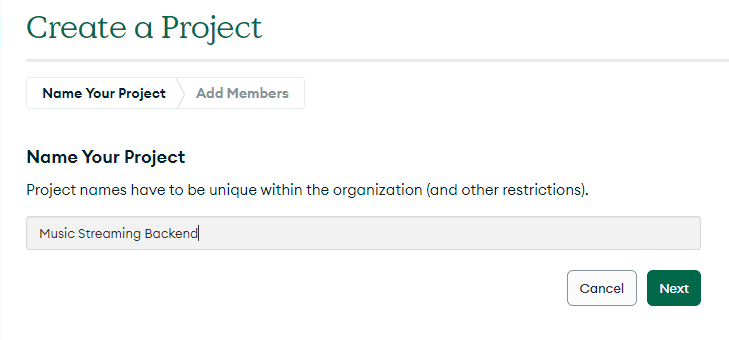
2. Click `New Project` to take you to a new page. Enter the new project name and click `Next.`
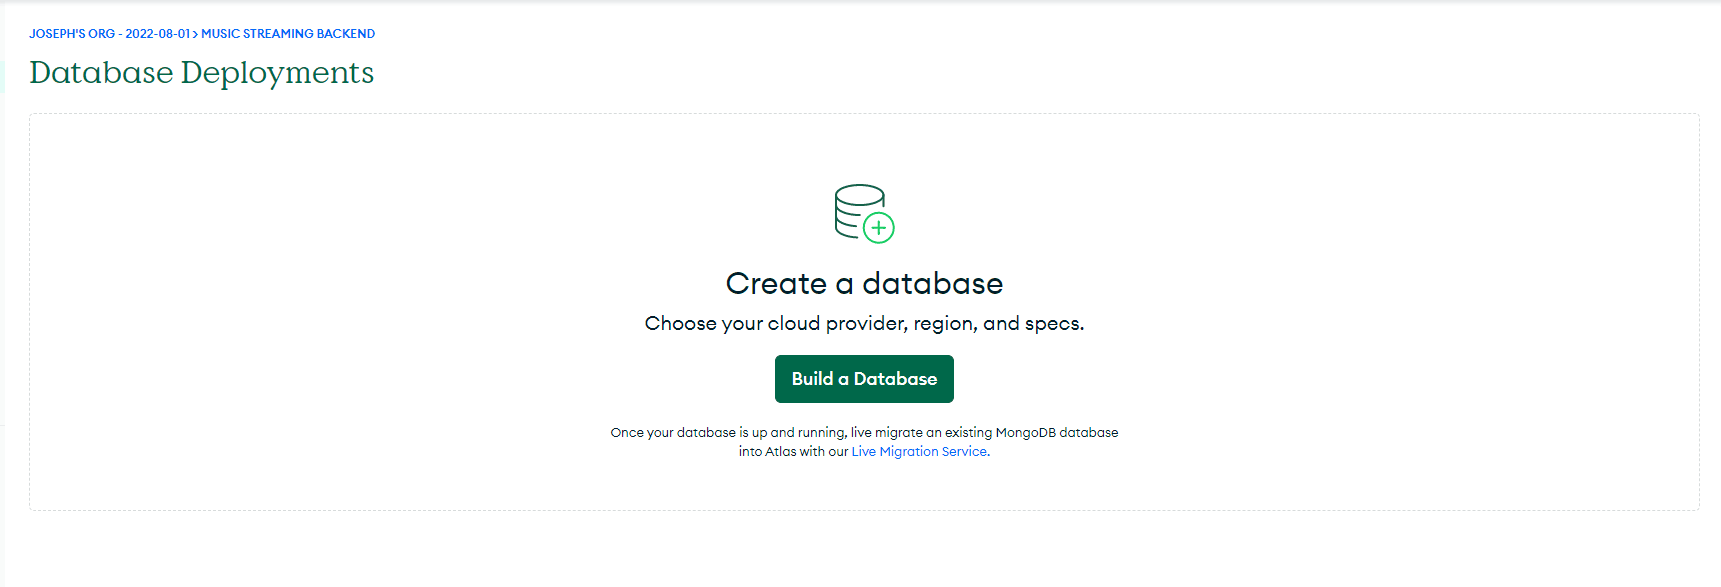
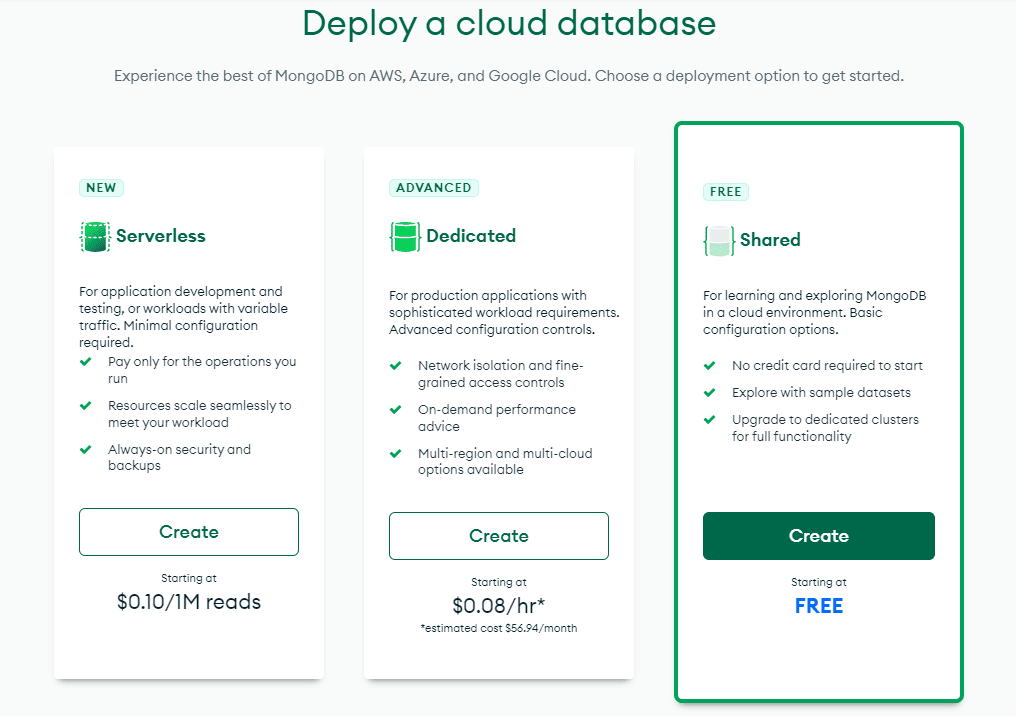
3. Once the project is created, we will need to create a database for the project. Click `Build Database` and then click `Create` under `Shared` to set it up for free. On the following page, leave all the options to their default and click `Create Cluster.
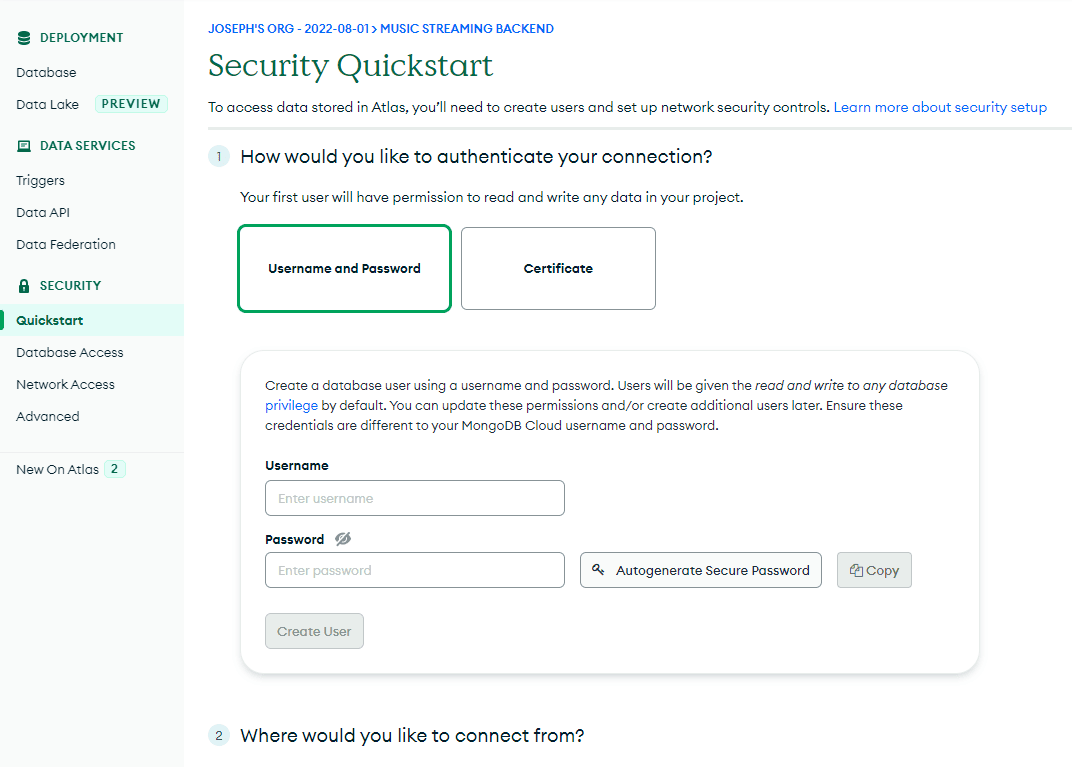
4. We need to create a database user to access the database. So, enter a username, click `Autogenerate Secure Password, then click ‘Copy.’
5. Scroll down to the section for IP access. Click `Add My Current IP Address` to allow access from your local environment. On the `Database Deployments` page, click `Browse Collections` on your new cluster. If there are no databases, there should be an option to `Add My Own Data` to create your first database.
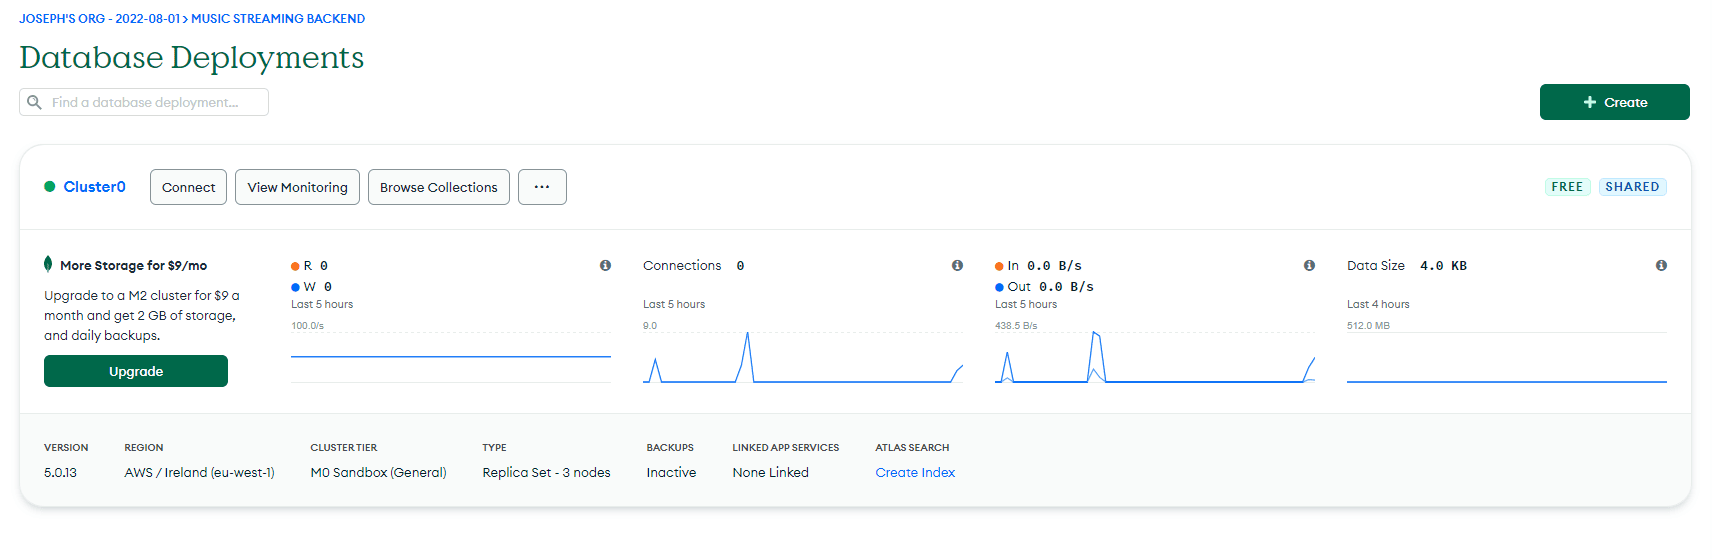
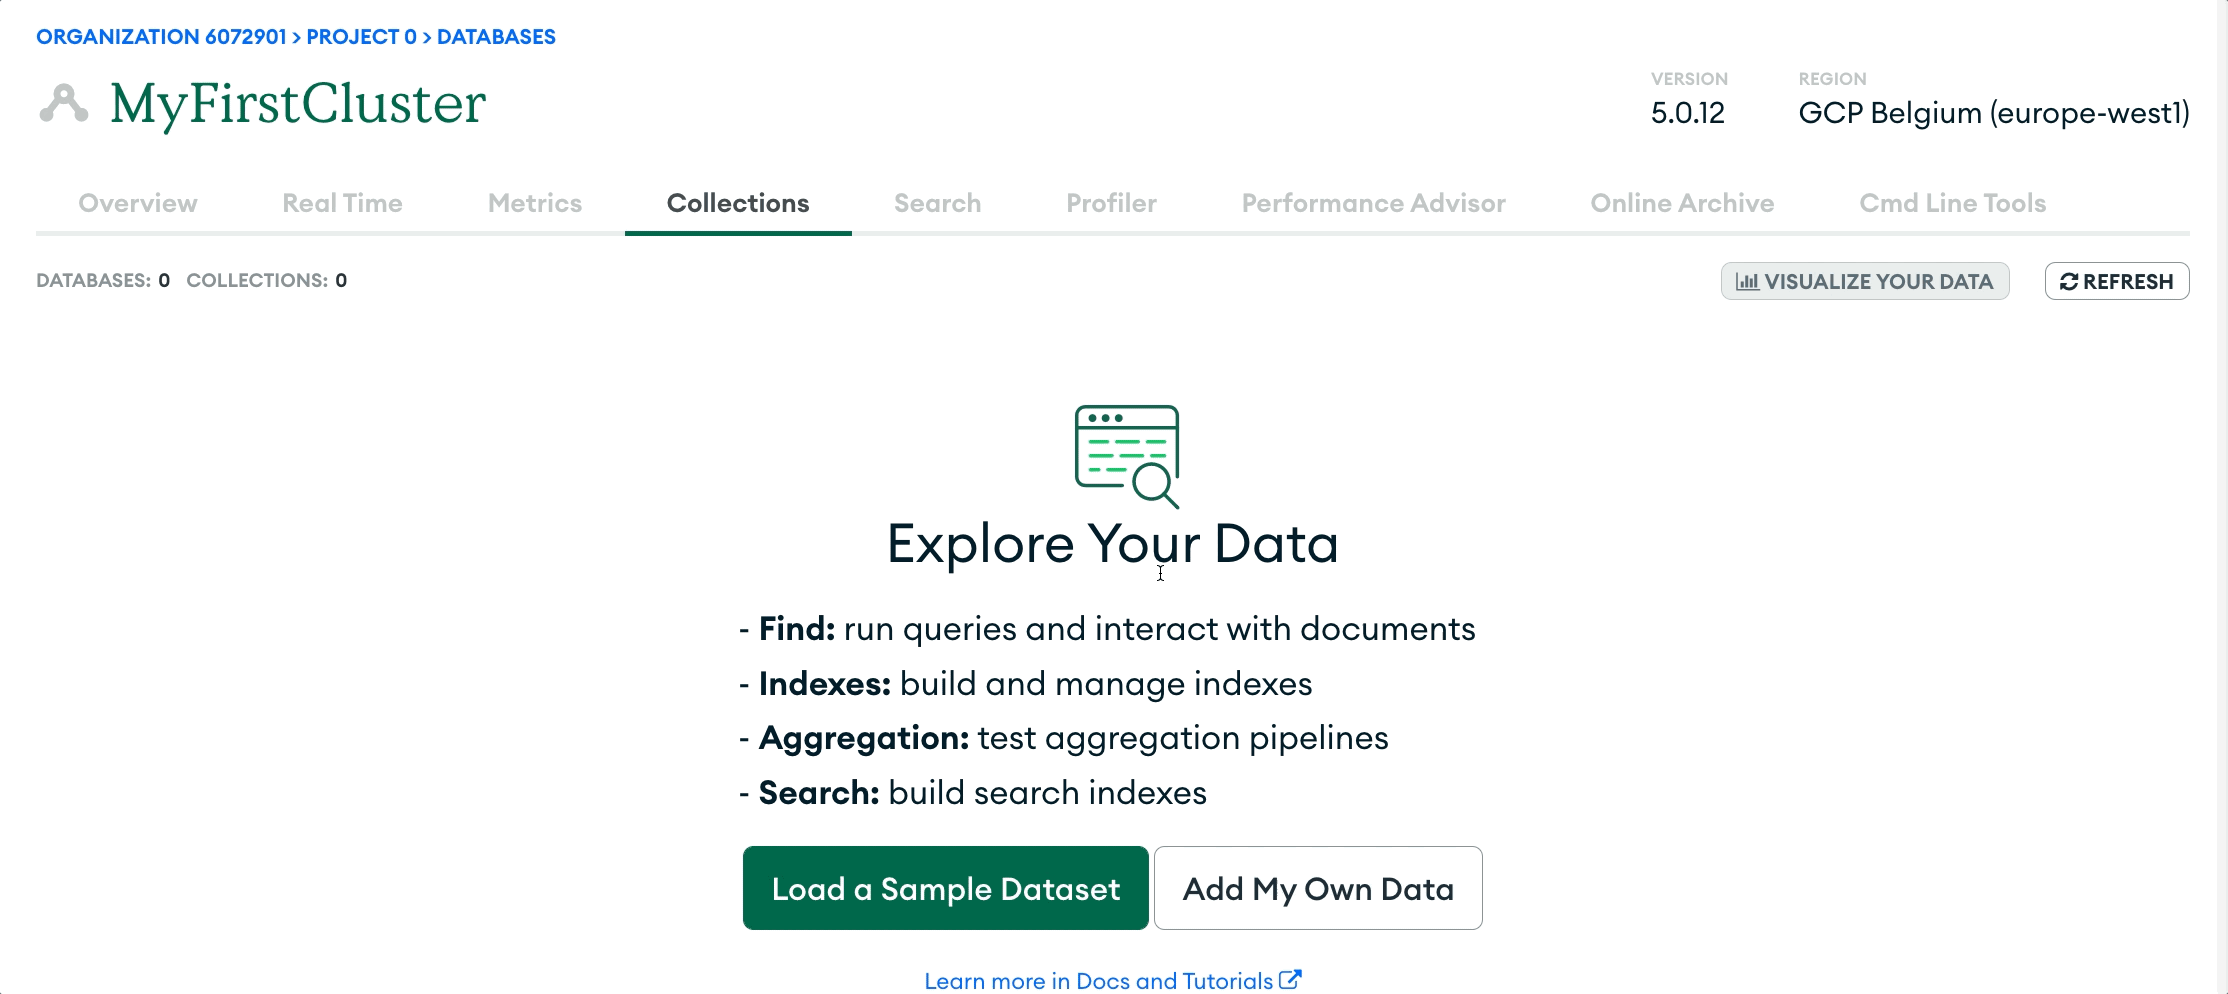
Enter the database and collection name in the modal that appears, then click `Create.` You have now created your own MongoDB Atlas database!
Now, to connect to the cluster for the app, we need to access its connection string.
Connecting to the MongoDB Database
To access the connection string, we need to go back to the Cluster page, then click `Connect` and click `Connect to your application` as the Connection Method.
We now need to select our driver and version. The driver will be `Node.js`, and the version should be the latest version available, 4.1 currently.
A code sample will contain the connection URI, which should look like one of the following:
mongodb+srv://:@DOMAIN/?retryWrites=true&w=majority
OR
mongodb+srv://:@DOMAIN/?retryWrites=true&w=majority
The second example is how the connection string should be. Replace with the username of the created database user. Then replace it with the password you copied earlier. Afterward, replace it with the database name.
Great. Now we have a created database and a URI to connect. Now we can work on our Node project.
Setting up Node.js
First, create a typescript project and install the packages we need.
npm init -y
npm i express mongodb express-async-handler
npm i -D typescript @types/express
Now set up a `tsconfig.json` file in the root folder.
Adding Environment Variables
Create a new `.env` file in the root folder and add the following variables.
ATLAS_URI={YOUR_ATLAS_URL}
DB_NAME={YOUR_DATABASE_NAME}
Connecting to the Database
Create a folder named `src` where all our main code will live.
Begin by creating a new `DB` folder inside `src` and a file named `index.ts,` where we will hold our connection to MongoDB.
We need to define an async function to use our connection string to connect to the database. Next, we reference the database we created earlier and define a function to return it.
Setting up the Express server
Add an `index.ts` file to the `src` folder. We first load our environment variables using the `dotenv` module. Then we create our Express application and initialize our database connection before calling `app.listen`.
Authentication
To authenticate users of our app, we can use JWT tokens. Get started by installing the following NPM packages:
npm i express-jwt jsonwebtoken bcrypt
npm i -D @types/bcrypt
To sign and generate JWT tokens, we use `jsonwebtoken,` which also requires a token secret. So store any long and random string in the `.env` file as the secret:
JWT_SECRET=XnX2ySZeRKm7cgU5D2yAZpW3m6KFWdQB
Registration
As we set up our authentication routes, we can separate them under a new Express router. We will add our code in a new file named `auth.ts` in a new `routes` folder under `src.`
But first, we can define an interface in `src/db/types.ts` for a `User object`:
When registering a user, we need to save their information in the database but have their password hashed. We can use `bcrypt.hash` to hash the passwords.
We then send a success message to let the user know upon completion.
Logging in
When logging in as a user, they will send an email and password to our login route. We then check if the user exists in the database. If the user exists, we later check if the password sent matches the password hashed in the database.
Once verification is complete, we generate a signed token with the user id in the payload. Then we return the access token to the user.
Authorization
When accessing a protected route, the user needs an `Authorization` header in their request.

Example Authorization Header
To verify the token from a user, we can use `express-jwt`. The package exports a middleware function that allows us to use our secret and a specified algorithm to verify tokens. Using `express-jwt`, we can access the user id in any route we want.
However, we will also define a middleware on top of this. Our added middleware constructs a MongoDB `ObjectId` from the id. `ObjectId`s are needed instead of strings when querying the database.
Create a new folder named `middlewares` and a file called `verifyAuth.ts.` Our file will export an array of the middleware functions to use in order.
Adding the Authentication Router
Back in `src/index.ts,` we can now import our authentication router. Then we will provide it at `/auth`.
CRUD for Songs Using Mongo DB
Now we will define methods to Create, Read, Update and Delete endpoints for songs.
We will first define an interface in our `src/db/types.ts` file for a `Song`:
Now create a file named `songs.ts` in `src/routes` and create a `Router`. Since we want our app to be mainly available to authenticated users, we can add the `verifyAuth` middleware at the router level.
Uploading Music
We need to allow music artists on our application to upload their music. So we must store metadata about the song and also an audio file. We can use `multer` from NPM to process the file data from a request. Then we can use GridFS from MongoDB to store our files directly.
Install these two packages to get set up with `multer` and `GridFS`:
npm i multer multer-gridfs-storage
And in `src/upload.ts`, we can export an instance of `multer` like so:
Create Song
Now we can define the POST route at the base path to insert a document into the songs collection.
Maybe at the end, you could implement an ‘artist’ role for the users. Then only the users who submit a form to apply to become a producer can access this route.
READ Song
We can define three routes for reading songs: listing all songs, listing only songs by the user, and reading a specific song.
When finding multiple songs, we use `collection.find` from MongoDB. We can also sort the songs by the upload date so that the latest songs are listed first.
Add the first route to list all songs. We also provide an optional query parameter to get songs from a specific user.
Now define a new route to get songs by the current user, quite similar to before.
To get a specific song, we can use `collection.findOne` and specify the `_id` to get by id. Note MongoDB will return `null` if a song does not exist, so we return a 404.
UPDATE Song
We update a song by calling `collection.updateOne` and using code similar to our POST route.
DELETE Song
We want to delete a song from the database in the Delete route, but only if the song is from the user.
Now that we have all of our main CRUD routes defined, add the router to the main application under “/songs” as shown with the authentication router.
Streaming Music Using MongoDB
Initializing a GridFS Bucket
As I mentioned before, we use GridFS to store audio files. Although currently have no access to a GridFS bucket within our application.
So now we can return to `src/db/index.ts` and modify the `connectToServer` function to create a bucket too. Then we also have to export a function to get the bucket instance.
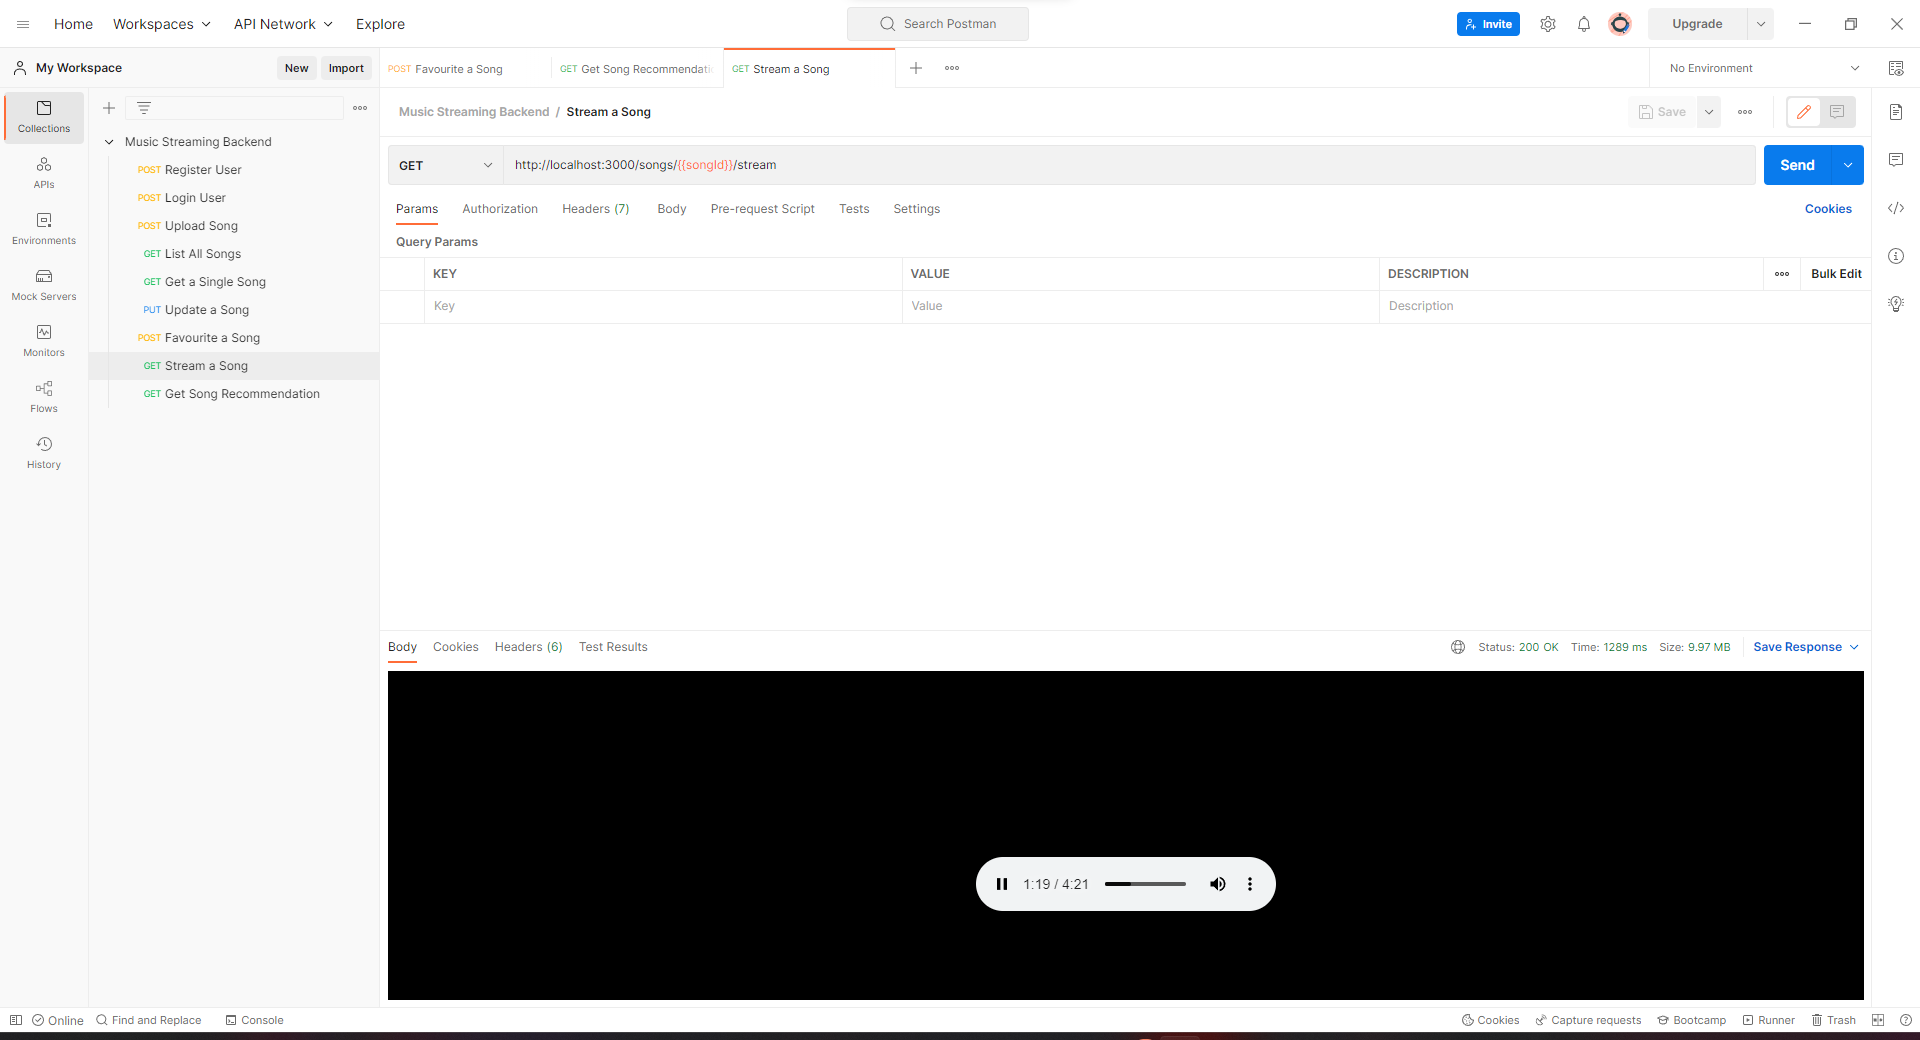
Accessing Audio File Stream
We will now create another route to access the file stream with our songs router. The route will have a similar layout to get a specific song. But instead, we will open a download stream from the GridFS bucket and pipe it to the response.
Note that we will also set the `Content-Type` header to the file mime type specified when creating the `Song`.
So now, if we were to enter the URL to the route in our browser, the song would play.
Recommendation System
Now that we have a way of uploading and listing songs, we need a way for users to discover more. We will implement a recommendation system similar to Spotify using K-Means clustering.
With K-Means clustering, we can group into K amount of clusters. We can use this approach to predict a user’s favorite songs based on songs they have liked.
There are many implementations and tutorials for this online but for this article, we will use `scikitjs`. `scikitjs` is a machine learning library for JavaScript, a port of the popular `scikit-learn` in Python.
To get started, install the following packages from NPM.
npm i @tensorflow/tfjs-node scikitjs
Installing TensorFlow is also necessary as `scikitjs` makes use of it for faster mathematic operations. If you are familiar with Python and `scikit-learn`, the following JavaScript code should be familiar.
And just like that, we can create a K-Means clustering model, fit (train) it with data, and run a prediction.
Now, all we need to do is run predictions on our songs. But wait. On which features of the track will we train? Sample rate? Duration? Genre? Well, we need to analyze the song to get more useful features.
We need to analyze the song first, to get more useful features. We want features such as tempo, energy, danceability, and so on. Fortunately, there is an open-source library that can do just that.
Essentia
Essentia is an open-source library for audio analysis written in C++. They provide many algorithms for working with audio. To get started with Essentia and JavaScript, they also have `Essentia.js`.
npm i essentia.js
Essentia converts audio data into a vector before running the analysis. So first, we will need to decode the audio files.
Decoding Audio
To make things simple, we will install `audio-decode` from NPM.
npm i audio-decode
Great now we can analyze our songs!
Running Analysis
We can begin by creating an `engine` folder in our `src` folder. Then create a file named `features.ts` where we will get our audio features.
Here is the breakdown of this initial code:
- We import two utility functions to help with streaming files later
- We define an object with the algorithms we want from Essentia
- We initialize Essentia with its WebAssembly backend
- We store the keys in the musical scale to map each key to a number
And to get each feature using Essentia, we can call a function with the same name:
essentia.[algorithm](audioData);
The return value would be an object, and the key for the value we want correlates to the feature name. We represent the mapping to algorithm names and keys in `algorithms.`
const feature = essentia.Intensity(audioData);
const value = feature["intensity"];
However, the only exception to this rule is the `key` feature. It returns a key (C, D, E, F, G, A, B) and a scale (major or minor). So, we can define a function to represent the object numerically.
And now, we can define a function to take either a filepath or a stream and convert it into raw audio data.
`extractFeatures` will take in decoded audio data and then run it on each of our defined algorithms.
Now, if you were wondering, here is the implementation for the two functions in `src/util.ts`:
Model Training
Create a new file named `kmeans.ts` inside that previous `engine` folder. Here we will handle loading and saving our clustering model. We also train with some sample audio data here.
First, import the necessary files and define functions to load and save the model.
For the sample audio, I scraped a list of some 80 audio URLs from Pixabay. Then, I used `axios` and streams to download all the files. You can find all the downloaded files in the GitHub repository (link at the end).
We can now define `trainWithAudio`, which reads the files in a directory, extracts its features, and appends them to a data array. Then we run `model.fit` with the data.
And now, to run this function, we could create a route in our server that will execute it. However, we will now cover that here as the actual training process is slow. You can find the trained model file in the GitHub repository.
Moving on, we can now see how to add predictions of songs as they are uploaded.
Clustering Uploaded Songs
First, create a function to get a file stream from GridFS, then extract the features and return a prediction. Note that we need to standardize the data to remove the mean because of the different units used in the features. Add the code to a new file named `predict.ts` in the `engine` folder.
Now we can go to `songs.ts` to import our K-Means model and cluster the new file in the POST route.
Also, update our Typescript interface for a user, defined in `types.ts.`
Great! So now we need a way of getting specific songs based on the user’s interests.
Adding Favorite Songs
In `src/routes/songs.ts,` we can add a new POST route with an `:id` param to update favorite songs. We will represent it as a list of `ObjectId`s and toggle the presence of the id in the array using either the `$pull` or `$push` operator.
And again, ensure to update the `User` interface in `src/db/types.ts.`
Getting the Most Liked Cluster
We can open `src/engine/predict.ts` and create a function named `getFavouriteCluster`. It will get the clusters from the user’s favourite songs and see which one appears the most.
Suggesting New Songs
Now that we have the target cluster, we can define a function to get a list of other songs with the same cluster. Note that we will also exclude the songs the user has already marked as favorites.
Recommendations Route
Add a new route at `/recommend` in the songs router. The route will take an optional URL parameter to control how many results we want.
If the user has no songs favorited, we return any song but not more than the `limit.` If they have, we can get the suggested songs.
Also, ensure this route is above the routes with “:id”.
And to finish, we can import our `load` function to load the K-Means model when the server starts.
Conclusion
Finally, I set up all of the routes in Postman to see how it turned out.
Now take a step back. Here is everything we learned.
- How to set up MongoDB and connect to a database with NodeJS.
- Creating an Express app and implementing token authentication
- Allowing users to upload their music to the server
- . Added a route to stream music
- Implementing a recommendation engine to discover more music.
Gracias por leer. If you have any questions, make sure to drop a comment.
Check out my other articles here and consider following me 👍.
The media shown in this article is not owned by Analytics Vidhya and is used at the Author’s discretion.


hi this is a longshot but can you help me with this guide? I'm referencing your tutorial for my senior project but I'm having a lot of trouble. thank you
Hello, this is a great article. i was hoping to find the link to the Github but I can't find it here. can you help?
you forget to tell create "type.ts" under "src" folder. these are the lines for type.ts import { Request as JwtRequest } from "express-jwt"; import { User } from "./db/types"; export type Request = JwtRequest & { user: User };