Saving the Titanic Using Azure AutoML!
This article was published as a part of the Data Science Blogathon.

Introduction
Solution Architecture
Let’s try to implement this.
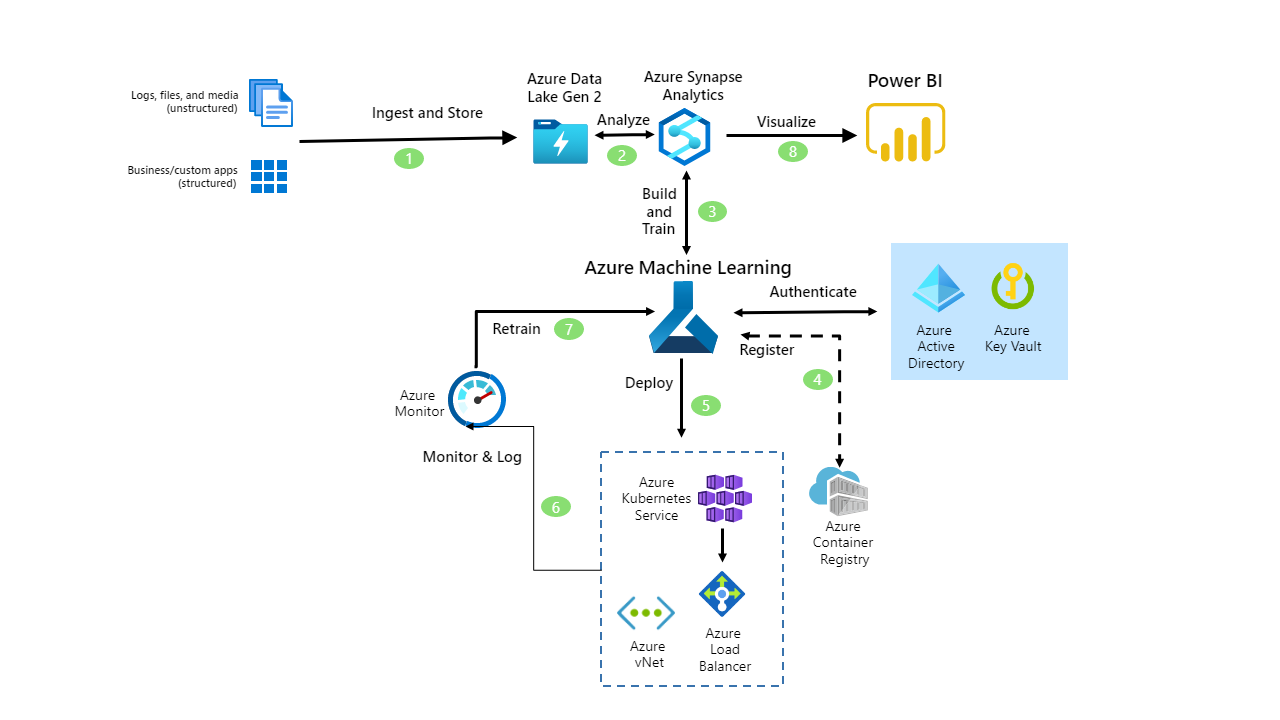
Source: Microsoft Learn
AutoML Solution
What are we waiting for? Let’s get started.
Source: securecloudaas
We will explore the titanic dataset and understand how the entire process of machine learning gets automated. Before we continue, let us look at what AutoML is. This AutoML exercise will guide you on how to use your Azure Subscription and Azure Machine Learning Studio to try multiple pre-processing techniques and model-training algorithms in parallel automatically.
Here we explore the power of cloud computing to find the best-performing ML model for our data. Automated ML helps us to train models without in-depth data science or programming knowledge. For people having some experience in data science and programming, it provides a way to save time and resources by efficiently automating the process of algorithm selection and hyperparameter tuning.
Let us start by creating a Machine Learning resource in our Azure cloud. I have named my resource blog space because this is for the blog but feel free to name it whatever you like. I have kept the default values and have not made any changes.
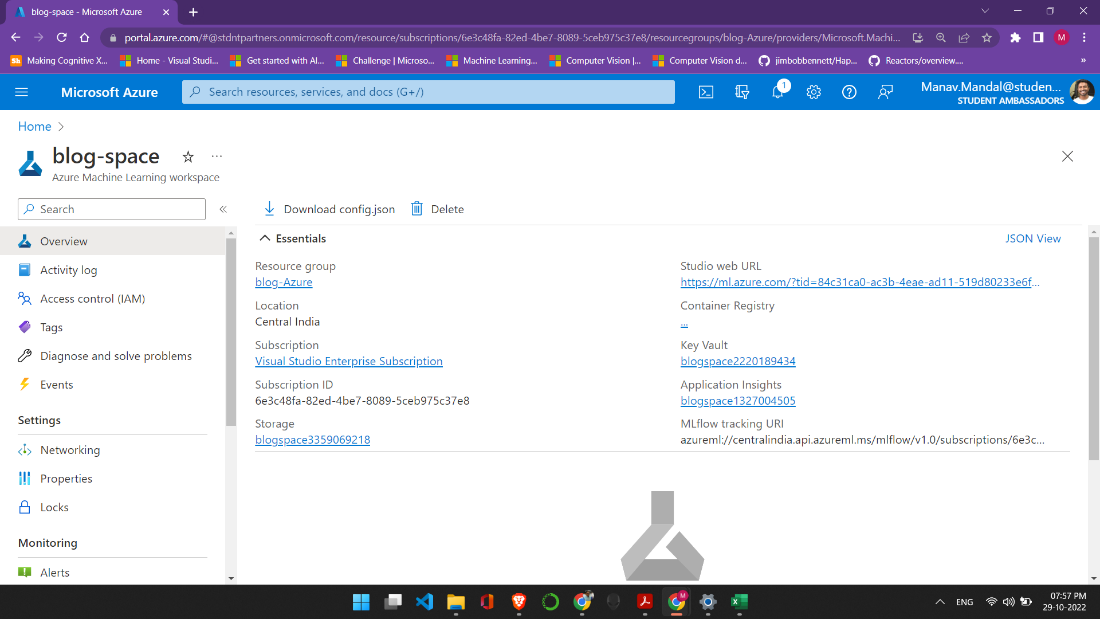
After creating the resource group, you should get a page like the one shown above, click on the Studio Web URL that will take you to the Machine Learning Studio or you could visit here and log in with your credentials.
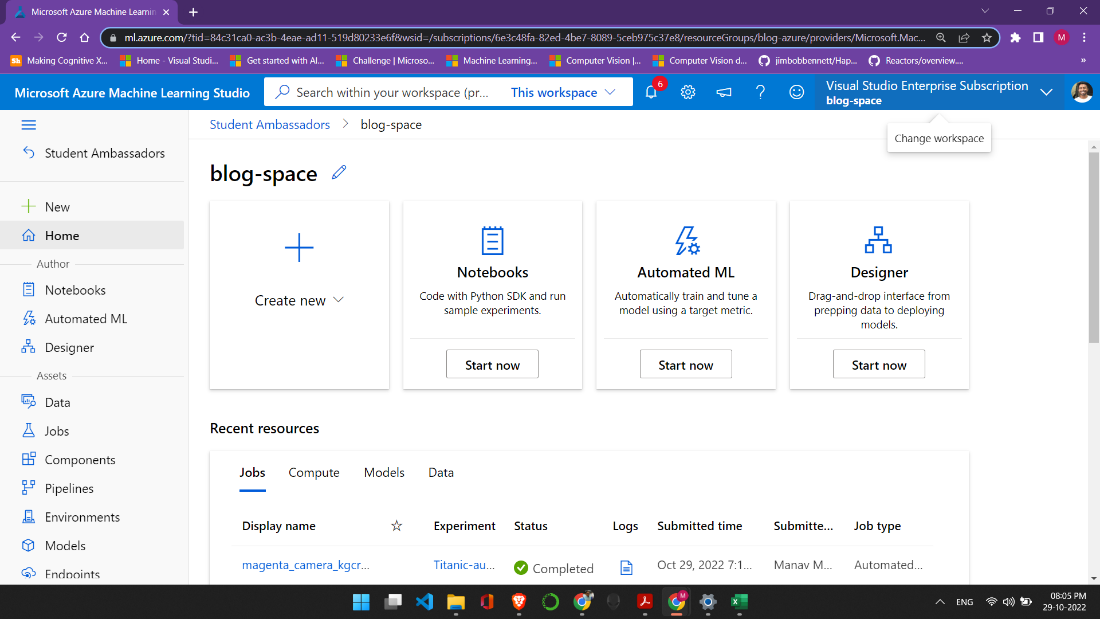
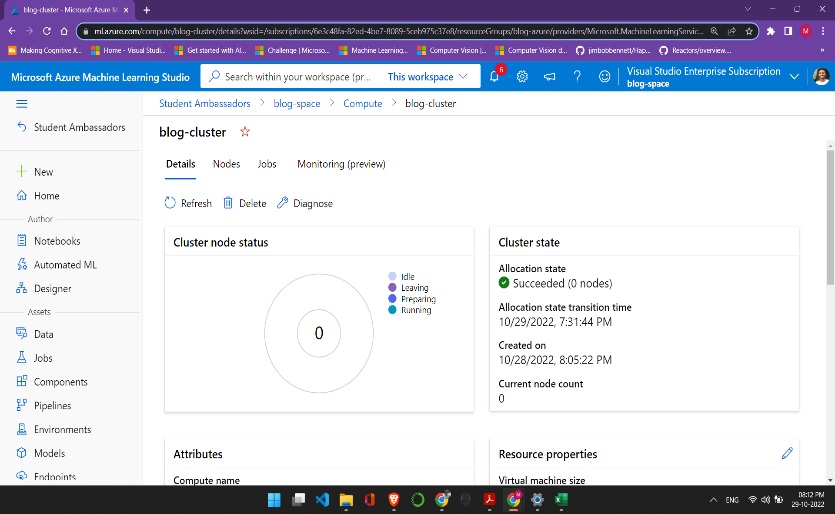
This is what the studio looks like, and as we can see, many amazing features can be and are being used by developers worldwide. In the left column, scroll down and click on compute. Here we will create our compute instance and compute cluster. We keep the default values, but you can select the VM according to your subscription. I have selected Standard_DS11_v2 (2 cores, 14 GB RAM, 28 GB disk), but you are free to choose from the list.
Code Snippets
Let the coding begin!
In the Compute Instance, click on the Jupyter option, which opens the Jupyter Notebook (Make sure to click on Jupyter and not Jupyter Lab). Next, we will create a new notebook, and I have named my notebook Automated ML. Let’s go through the notebook one code cell at a time. In addition to the latest version of the azureml-sdk and azureml-widgets packages, we need the azureml-train-automl package to run the code in this notebook.
!pip show azureml-train-automl
With the required SDK installed, we can connect to our workspace.
import azureml.core
from azureml.core import Workspace
ws = Workspace.from_config()
print("Ready to use Azure ML {} to work with {}".format(azureml.core.VERSION, ws.name))
We need to load the training data in our notebook. The code below looks complicated, but it searches the data store for a Titanic dataset. If it is not present, upload the data and store it in the data store.
Collecting the AutoML Data
from azureml.core import Dataset
default_ds = ws.get_default_datastore()
if 'Titanic dataset' not in ws.datasets:
default_ds.upload_files(files=['./Titanic.csv'], # Upload the Titanic csv file
target_path='Titanic-data/', # Put it in a folder path in the datastore
overwrite=True, # Replace existing files of the same name
show_progress=True)
#Create a tabular dataset from the path on the datastore
tab_data_set = Dataset.Tabular.from_delimited_files(path=(default_ds, 'Titanic-data/*.csv'))
# Register the tabular dataset
try:
tab_data_set = tab_data_set.register(workspace=ws,
name='Titanic dataset',
description='Titanic data',
tags = {'format':'CSV'},
create_new_version=True)
print('Dataset registered.')
except Exception as ex:
print(ex)
else:
print('Dataset already registered.')
# Split the dataset into training and validation subsets
diabetes_ds = ws.datasets.get("Titanic dataset")
train_ds, test_ds = diabetes_ds.random_split(percentage=0.7, seed=123)
print("Data ready!")
Remember the cluster we created before? Well, let’s connect to it here.
from azureml.core.compute import ComputeTarget
training_cluster = ComputeTarget(workspace=ws, name="blog-cluster")
One of the most important configuration settings is the metric by which model performance should be evaluated. You can retrieve a list of the metrics that are calculated by automated machine learning for a particular type of model task (classification or regression) like this:
import azureml.train.automl.utilities as automl_utils
for metric in automl_utils.get_primary_metrics('classification'):
print(metric)
Setting Up AutoML
Having decided the metric you want to optimize (in this example, AUC_weighted), you can configure the automated machine learning run. Since this is a simple dataset, I have kept the number of iterations to 4. Since this is a simple dataset, I have kept the number of iterations to 4.
from azureml.train.automl import AutoMLConfig
automl_config = AutoMLConfig(name='Automated ML Experiment',
task='classification',
compute_target=training_cluster,
training_data = train_ds,
validation_data = test_ds,
label_column_name='Survived',
iterations=4,
primary_metric = 'AUC_weighted',
max_concurrent_iterations=2,
featurization='auto'
)
print("Ready for Auto ML run.")
With all configurations set, we are now ready to run our experiment. I have set show_output = False, but you can set it to True to see the model being run in real-time.
from azureml.core.experiment import Experiment
from azureml.widgets import RunDetails
print('Submitting Auto ML experiment...')
automl_experiment = Experiment(ws, 'Titanic-automl-sdk')
automl_run = automl_experiment.submit(automl_config)
RunDetails(automl_run).show()
automl_run.wait_for_completion(show_output=False)
Output
We can retrieve the best performing as done below, and we can also view the best-run transformation and best-run metrics. The code is not available in the notebook, but you can try it out. I will share the code here.
print('nBest Run Transformations:')
for step in fitted_model.named_steps:
    print(step)
print('nBest Run Metrics:')
best_run_metrics = best_run.get_metrics()
for metric_name in best_run_metrics:
    metric = best_run_metrics[metric_name]
    print(metric_name, metric)
Finally, having found the best-performing model, you can register it.
Difficulties Faced
It wasn’t a cakewalk at all

Conclusion
How does this benefit you?
All Azure AutoML does is help data scientists and developers build, deploy, and manage high-quality models faster and with 100% confidence. With such large and complex operations in place, industries need a solution that can be brought into production as soon as possible and reliably simultaneously.
- Open-source interoperability
- rapid model training and deployment
- integrated tools

To summarize, here are a few key takeaways why you might prefer AutoML over the traditional workdlow:
We can evaluate machine learning models with reproducible and automated workflows to verify the
- fairness of the model,
- explainability,
- error analysis,
- causal analysis,
- model performance,
- exploratory data analysis,
- Contextualize responsible AI metrics for technical and non-technical audiences to involve stakeholders and streamline compliance review.
Trust me, some of the lines in the code took some time and effort to understand. Don’t let this bring your spirits down; you’ve got to push through it.
So that’s it from my side. Happy Coding!
-Manav Mandal (Microsoft Learn Student Ambassador)
LinkedIn
Instagram
The media shown in this article is not owned by Analytics Vidhya and is used at the Author’s discretion.


