This article was published as a part of the Data Science Blogathon
Introduction
Android Apps have truly captured our lives. Almost every day we use some of the other android apps to accomplish our task. Be it social media apps like WhatsApp, Twitter, or networking apps like LinkedIn, Android apps have a major impact on our lives.
In this article, we will look at:
- What is Kivy and KivyMD
- Installation
- A Simple app
- Important Components
- Stitching our ML App
- Convert the Python file to APK!
Image by Author (Made in Canva)
Before I proceed with the article, here is a quick demo of the android app running on my device:
What is Kivy and KivyMD?
Kivy is a Python library that facilitates the creation of cross-platform applications that can run on Windows, Linux, Android, OSX, iOS, and Raspberry pi too. It is a popular package for creating GUI in Python and in recent years, it is gaining a lot of popularity due to its easy-to-use nature, good community support, and easy integration of different components.
KivyMD is built on the top of the Kivy library, It is a collection of Material Design widgets to be used with Kivy. It offers more elegant-looking components and the code is almost the same. Currently, we use KivyMD components for creating the UI (User Interface) of the application and Kivy for all the core functionalities such as internet access and building the app.
The best part about these packages is that the code is structured in object-oriented format from the beginning itself and we will see in the upcoming sections how it makes the development process easy.
Installation
For installing the Python packages, you can use the pip package manager. I would suggest creating a virtual environment for this development. It will be helpful to manage the packages more easily. First, install the Kivy Package:
pip install kivy
Now you can install the KivyMD package too:
pip install kivymd
Note: Some of the required dependencies may be left out of installation. You can use the following installation commands to fix this error.
pip install kivy-deps.angle
pip install kivy-deps.glew
pip install kivy-deps.gstreamer
pip install kivy-deps.sdl2
A Simple App
To get you started with the app development using these packages, we will create an app that just displays some text, with no functions ahead.
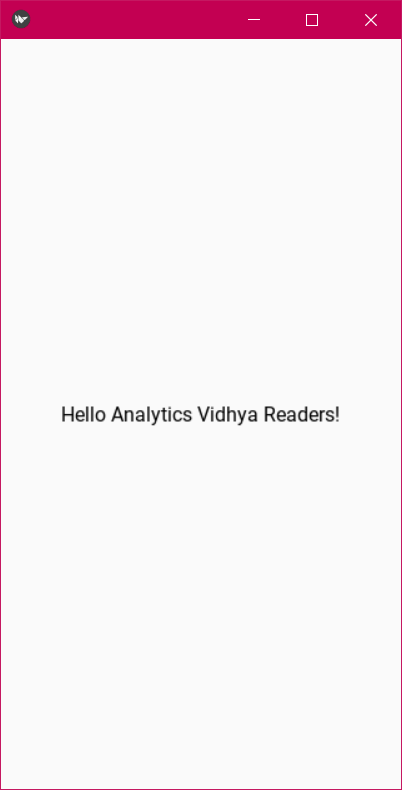
The code for this app is:
from kivymd.app import MDApp
from kivy.lang.builder import Builder
from kivy.uix.screenmanager import Screen, ScreenManager

Builder_string = '''
ScreenManager:
    Main:
<Main>:
    name: 'main'
    MDLabel:
        text: 'Hello Analytics Vidhya Readers!'
        halign: 'center'
'''

class Main(Screen):
    pass

sm = ScreenManager()
sm.add_widget(Main(name='main'))

class App(MDApp):
    def build(self):
        self.help_string = Builder.load_string(Builder_string)
        return self.help_string

App().run()
Let’s break it down:
- First thing first, we have imported some essential packages. Every KivyMD application needs to be built on top of the base app provided as “MDApp” by KivyMD. This app class contains all the basic initializations and the code required to boot up the app. We have inherited this class and override the “build” function with our code.
- Next is the Kivy builder function that helps in setting up the frontend for our app. The front-end components are created using the YAML format Builder string or KV lang in hierarchical style. This defines what components will be used in the app, their properties, attributes, and callbacks. All these things are defined by the builder string.
- The YAML format makes it easy to write the specifications of the components. For instance, the “MDLabel” component, which is used for displaying text, has been placed under the “Main” screen component. Its text and position are defined one level after the declaration.
- In the inherited MDApp class, the function build is loading the builder sting and returning it
This is how a KivyMD app is structured and you can consider this as a boilerplate code for future apps.
Important Components
There are many components supported by KivyMD to make your apps interactive. You can add text, images, icons, dropdowns, navigation bars, tables, and literally anything that the native android app development offers. The developers of this library are constantly adding new features. Here I am describing only a few of them which will be used to stitch our android applications.
Screen and ScreeenManager
The screen is the component where other components would be placed. It can also be called the playground for components. The screens are also similar to website pages where different pages have different elements. Each component in the screen is placed one position lower to maintain the hierarchy. We usually assign a name to the screen so that we can access the components of that screen.
The screen manager manages all these screens. Any screen can be accessed via this screen manager. Declaration syntax for this:
Builder_string = '''
ScreenManager:
    Main:
<Main>:
    name : 'main'
    .
    .
    '''

class Main(Screen):
    pass

sm = ScreenManager()
sm.add_widget(Main(name='main'))
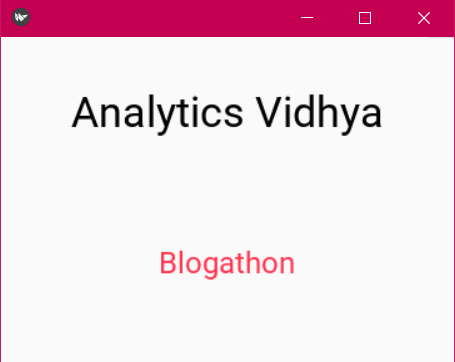
MDLabel
This component is used to display any type of text on the application screen. The title of the application, any form field, or other text can be displayed using this component. As I have already used this component in the basic app code, let me add some more properties:
- You can control the size of the text using “font_style”. HTML heading level, “Subtitle1”, “Subtitle2”, “Body1” and many more are available.
- Changing the color of the text is done by using the “text_color” parameter. It takes in the RGB value (percentage-wise, not absolute).
- “halign” and “valign” are used to align the text horizontally and vertically.
- The “pos_hint” parameter is used to define the exact location. It takes a dictionary of center_y and center_x
- “id” parameter defines the id of the label component
The example below shows these implementations (I have provided Builder string here because there is no change in the logic):
Builder_string = '''
ScreenManager:
    Main:
<Main>:
    name: 'main'
    MDLabel:
        text: 'Analytics Vidhya'
        halign: 'center'
        pos_hint: {'center_y':0.9}
        font_style: 'H4'
    MDLabel:
        text: 'Blogathon'
        halign: 'center'
        pos_hint: {'center_y':0.7}
        text_color: (1, 0.2, 0.3, 1)
        font_style: 'H5'
        theme_text_color: 'Custom'
'''
MDTextField
These are components that help in getting the value from the user and pass it to the logic. It means that the area where the user enters the values asked are the text fields. It is also similar to the input fields used in web development.
Generally, a text field has a placeholder text, some text below the field, and icons too. For the scope of this article, I am not explaining all the properties of all the components. To create a basic text field, you need to define the helper text and its id:
Builder_string = '''

ScreenManager:

    Main:
<Main>:

    MDTextField:

        id: input

        hint_text: 'Enter some text'

        width: 100

        size_hint_x: None

        pos_hint: {'center_y':0.61, 'center_x':0.5}

'''
Make sure to define the id of these text fields. I will explain how to access these inputs when binded with a button to do some activity.
MDButton
Buttons are used to perform some action. On the android application, whenever you do some task and tap on some icons, that’s also one of the kinds of buttons. Buttons can trigger activity to some business logic dependent or independent of the inputs.
For instance, if an app fetches an image with the click of a button, it is not taking any user inputs. In our case, we will take the inputs from the user to check to predict whether the song belongs to rock or hip-hop. There are many styles of buttons offered by the KivyMD. We will be using “MDRaisedButton”. The button takes in the “text”, “id”, and “on_press” parameter. The on_press parameter can trigger a function in the base class of the app (inherited MDApp)
Builder_string = '''
ScreenManager:
Main:
<Main>:
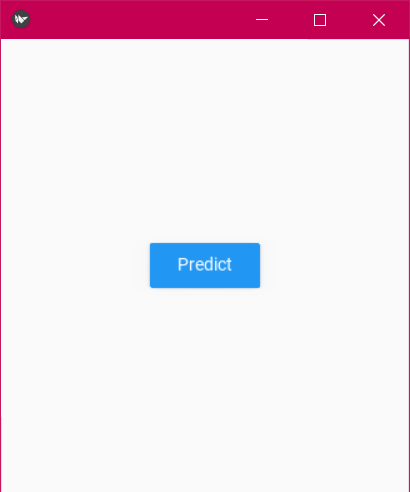
MDRaisedButton:
pos_hint: {'center_x':0.5, 'center_y':0.5}
text: 'Predict'
'''
How to access the values from MDTextField?
The MDTextField allows the users to enter an input to the application. This input needs to accessed so that we can make predictions based on the values entered by the user. As I told you at the beginning itself, the object-oriented structure is a boon.
In the basic app structure, have a look at the app class again:
class App(MDApp):
    def build(self):
        self.help_string = Builder.load_string(Builder_string)
        return self.help_string
Here the “self.help_string” is the object of the builder string that contains all the references to the components defined in the builder string given that you defined the ids for them (This is the reason for defining ids of the components). You can access any component in your Python code using these ids.
To access the value, use this syntax:
self.help_string.get_screen('').ids..text
All the codes discussed in this article are available on my GitHub Repository.
Stitching Our ML App
Now that you are aware of some of the components of KivyMD, we can develop our ML app. The approach we will follow for this app would be using the ML model as an API and then calling that API in our KivyMD app.
If you’re unaware of how to wrap the ML model as API, then you can check out my articles master list and search for “Deploying ML Models as API Using FastAPI and Heroku” article published in Analytics Vidhya
Here are all the things needed for the frontend of our App:
- A screen manager with one screen for all the components we place.
- A big title on top of the screen that displays, “Music Genre Predictor”.
- 8 MDLabels for all the features of the model, 1 MD label with no text. This no text label will be used to display the result returned from the API.
- 8 MDTextFields to get the values from the user.
- 1 MDRaisedButtton which on clicking should be bound to a function that makes the API call and replaces the empty MDLabel with the result value.
I would suggest read a bit more about these components and try to implement at least the UI part.
The builder file for our would look like this:
Builder_string = '''

ScreenManager:

    Main:

<Main>:

    name : 'main'

    MDLabel:

        text: 'Music Genre Predictor'

        halign: 'center'

        pos_hint: {'center_y':0.9}

        font_style: 'H3'


    MDLabel:

        text: 'Acousticness'

        pos_hint: {'center_y':0.75}


    MDTextField:

        id: input_1

        hint_text: '(0.0000009491 - 0.9957965)'

        width: 100

        size_hint_x: None

        pos_hint: {'center_y':0.75, 'center_x':0.5}

        .

        .

        (Repeat MDLabel and MDTextField for other 7 features)


    MDLabel:

        pos_hint: {'center_y':0.2}

        halign: 'center'

        text: ''

        id: output_text

        theme_text_color: "Custom"

        text_color: 0, 1, 0, 1


    MDRaisedButton:

        pos_hint: {'center_x':0.5, 'cent er_y':0.1}

        text: 'Predict'

        on_press: app.predict()

'''
You can see that the MDRaisedButton has been bound to a function called predict().
For processing the inputs from the UI layer to our Python code and making the model API call:
- We need to create a function called “predict” in our app class [ class Main(MDApp) ]. The button on the UI will trigger this function.
- Inside this function, we will get all the values of the MDTextField using the ids of the text fields. The values are returned as strings. Therefore, we need to convert them back to float.
- Now we need to make the API calls. In Kivy, we need to use the UrlRequest function which is imported from:
from kivy.network.urlrequest import UrlRequest
This function takes in the URL for making the request in “url” parameter and the “on_sucess” parameter takes the function which needs to be triggered after the request is complete.
class MainApp(MDApp):

    def build(self):

        self.help_string = Builder.load_string(Builder_string)

        return self.help_string


    def predict(self):

        acousticness = self.help_string.get_screen('main').ids.input_1.text

        danceability = self.help_string.get_screen('main').ids.input_2.text

        energy = self.help_string.get_screen('main').ids.input_3.text

        instrumentalness = self.help_string.get_screen('main').ids.input_4.text

        liveness = self.help_string.get_screen('main').ids.input_5.text

        speechiness = self.help_string.get_screen('main').ids.input_6.text

        tempo = self.help_string.get_screen('main').ids.input_7.text

        valence = self.help_string.get_screen('main').ids.input_8.text

        url = f'https://kivymlapp.herokuapp.com/predict?acousticness={acousticness}&danceability={danceability}&energy={energy}&instrumentalness={instrumentalness}&liveness={liveness}&speechiness={speechiness}&tempo={tempo}&valence={valence}'

        self.request = UrlRequest(url=url, on_success=self.res)


    def res(self, *args):

        self.data = self.request.result

        ans = self.data

        self.help_string.get_screen('main').ids.output_text.text = ans['prediction']


MainApp().run()
Here, the “res” function is passed in “on_scuess” and it is responsible for accessing the response body and replacing the empty label text with the response we got from the API.
(You should replace the Url in Url variable with your deployment link)
Let’s see the app in action!
Hurray! you have successfully created a KivyMD app that makes an API call to model deployed as API!
Conversion to APK
I know you must be happy to see that the app is working on your windows machine but the main purpose of this article was to make an android app. Let’s convert this Python program to an APK file!
Note: Add ca_file=cfi.where() and verify=True parameters in UrlRequest function when converting the Python file to APK as the absence of these parameters crashes the app in android device.
For conversion, follow these steps:
1. Rename the name of this code file to “main.py”
2. Open up this Colab notebook of mine: https://colab.research.google.com/gist/kaustubhgupta/0d06ea84760f65888a2488bac9922c25/kivyapp-to-apk.ipynb
3. Upload your main.py file and start running the notebook till the 7th cell.
4. After running the 7th cell, you will get a “buildozer.spec” file. This file defines the android app specifications need to convert the Python file to APK. You need to make the following changes to these lines:
# (str) Title of your application
title =

# (str) Package name
package.name =

# (str) Package domain (needed for android/ios packaging)
package.domain = <Name this as: com. >

# (list) Application requirements
# comma separated e.g. requirements = sqlite3,kivy
requirements = python3,kivy, kivymd,

# (list) Permissions
android.permissions = INTERNET
5. Now you can run the remaining commands. It will take some time to convert the files.
6. You will get an APK file. Copy that file to your android device and play with your app!!
Conclusion
In this detailed article, we talked about what is Kivy and Kivymd. Then we saw how to install KivyMD, looked at various components to be used in our android app, how to structure our code to create the ML model prediction app, and finally how to convert this Python application to APK.
If you have any doubts, queries, or potential opportunities, then you can reach out to me via
1. Linkedin – in/kaustubh-gupta/
2. Twitter – @Kaustubh1828
3. GitHub – kaustubhgupta
4. Medium – @kaustubhgupta1828
Kaustubh Gupta
06 Jul, 2021
Hi, I am a Python Developer with an interest in Data Analytics and am on the path of becoming a Data Engineer in the upcoming years. Along with a Data-centric mindset, I love to build products involving real-world use cases. I know bits and pieces of Web Development without expertise: Flask, Fast API, MySQL, Bootstrap, CSS, JS, HTML, and learning ReactJS. I also do open source contributions, not in association with any project, but anything which can be improved and reporting bug fixes for them.


This is a great post! I'm a big fan of KivyMD and I'm looking forward to trying out some of the examples.