This article was published as a part of the Data Science Blogathon.
Introduction
This article will show how we can create a free student account on Microsoft Azure without any credit/debit card details and get $100 free for the first 12 months. The prerequisite is that you must have a school or university email address to avail of this benefit.
After creating the student account, I will also show you how you can create a virtual machine on it to deploy your web applications.
First, let’s discuss Microsoft Azure in more detail.
It is a public cloud computing platform developed by Microsoft. It includes a computing engine, analytics, storage, networking, etc. It also provides a portal for users to manage their cloud services and resources that they have taken from Microsoft.
Below are the various services offered by Microsoft Azure:
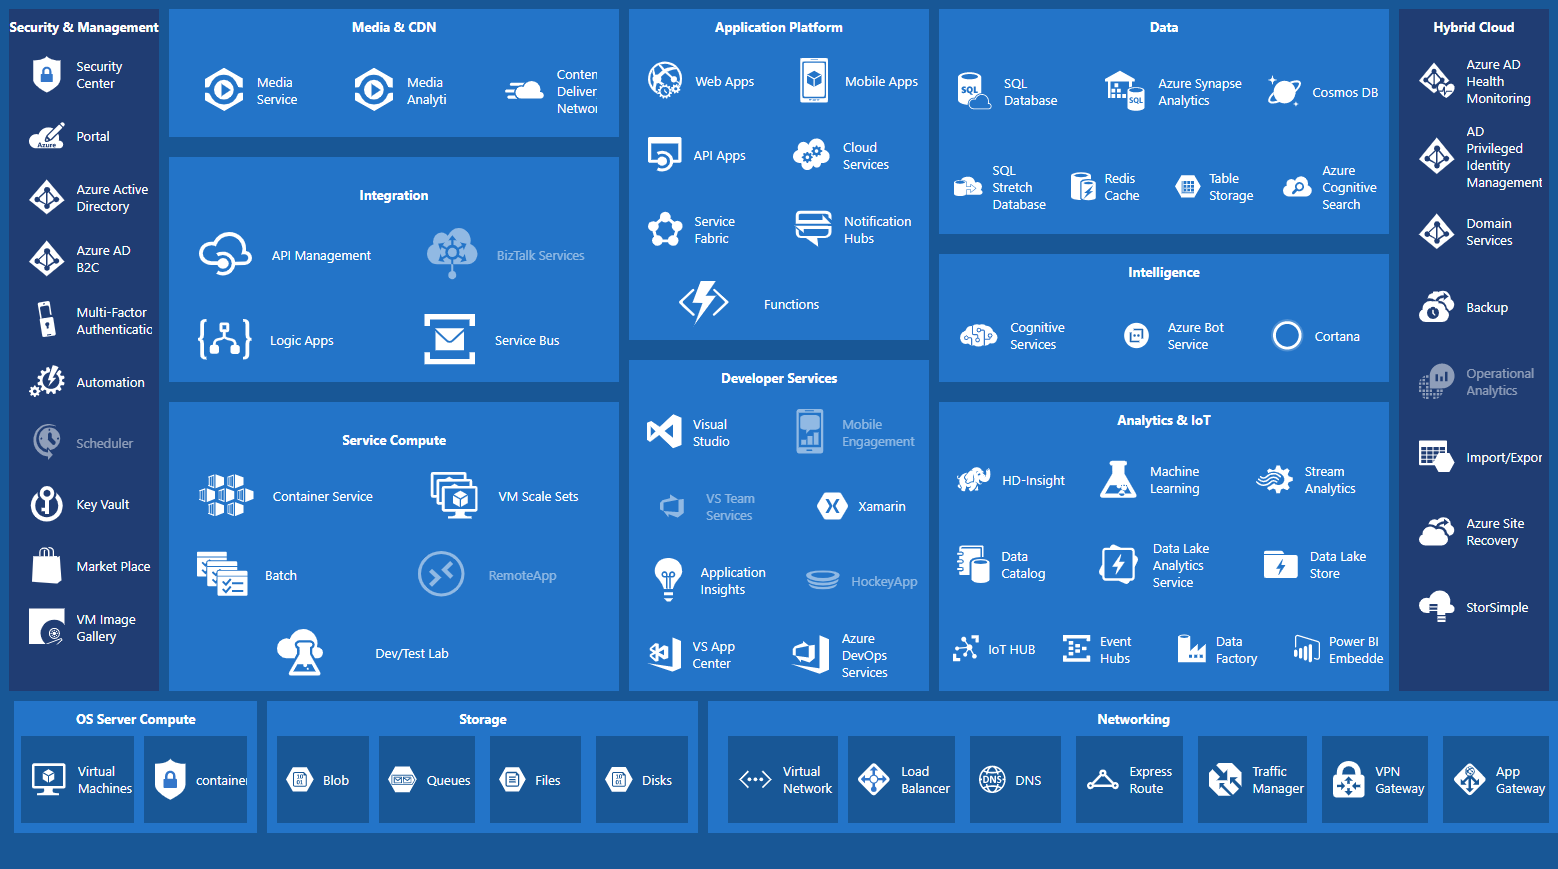
This tutorial will use its Compute Engine service and create a Virtual Machine to host web applications.
Let’s get started, 😉
Creating a Student Account
In this section, we will create our free student account. As I mentioned earlier, you must have a school or university email.
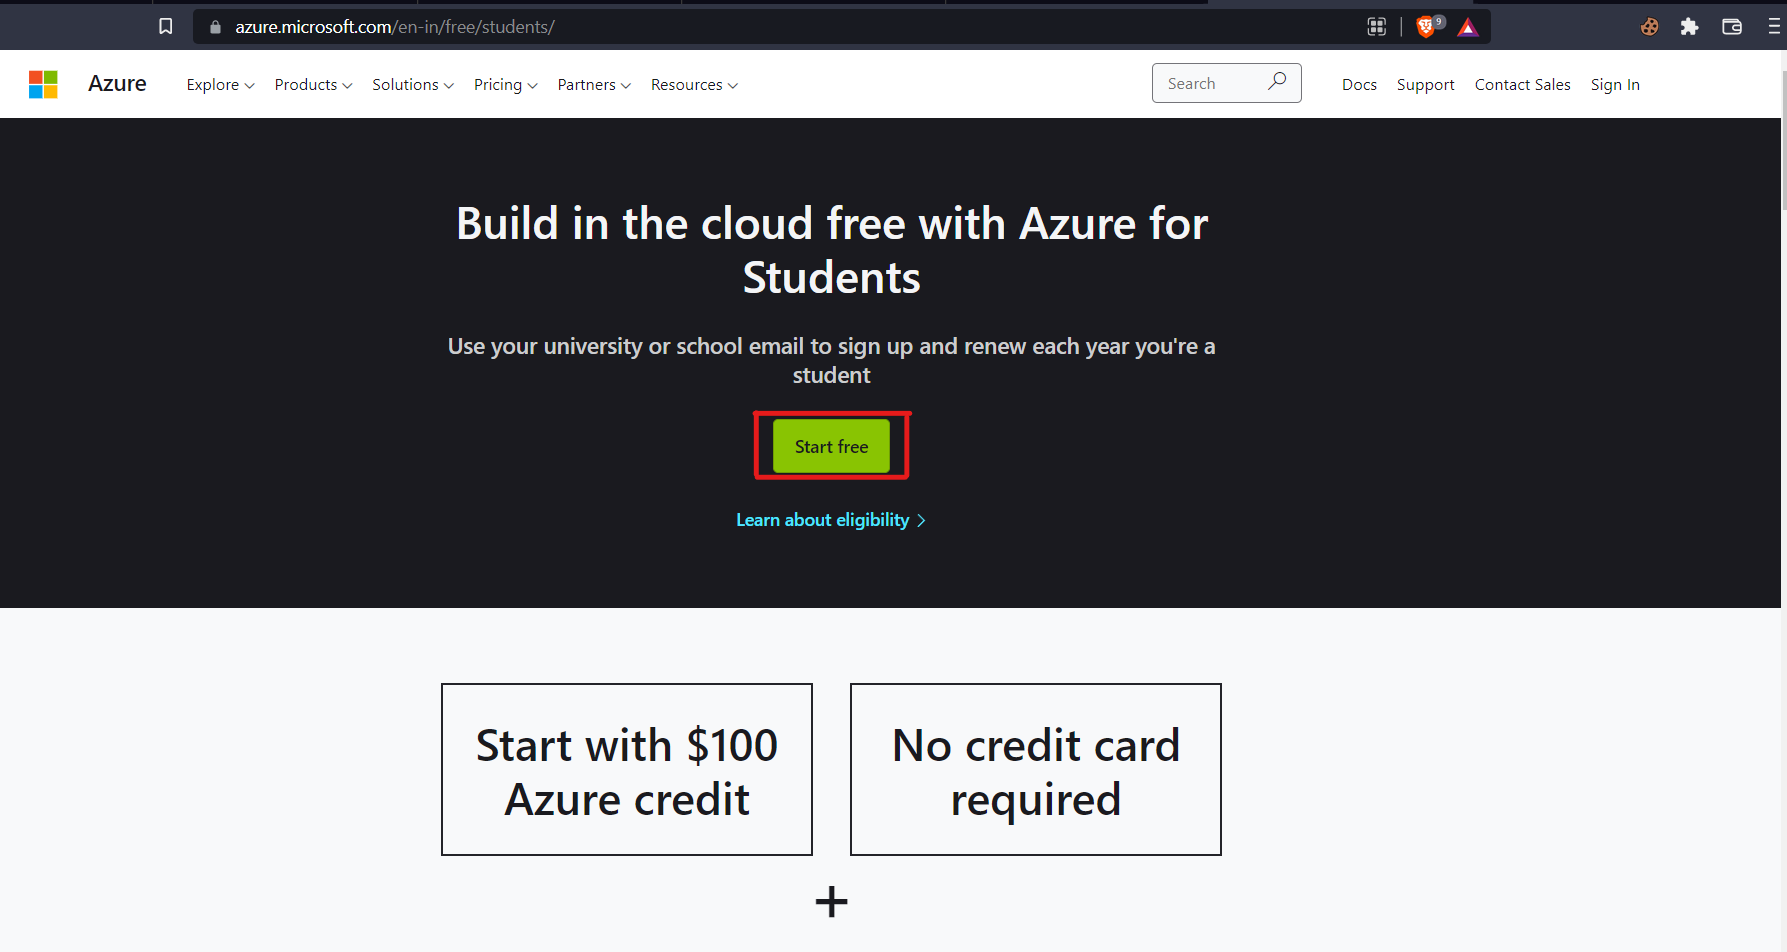
1. Go to the Microsoft Azure Website.
2. Click on Start free button.
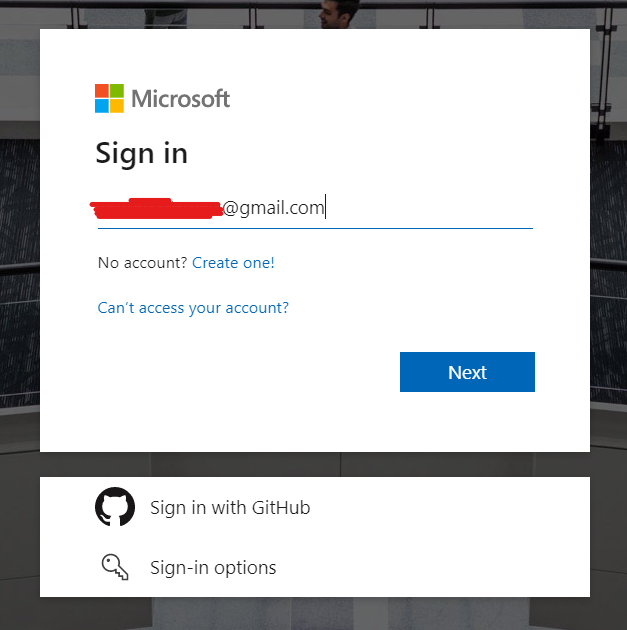
3. Now login to your Microsoft Account, or you can create a new account if you don’t have any.
Note: Do not use your Work/Institution email while signing in on your Microsoft Account. Log in using any of your personnel’s Gmail or Yahoo email addresses. We will later use the Work/Institution email to verify the student account.
4. After successful login, a Student Verification Page opens, in which you have to enter your Work/Institution email address to verify your academic status.
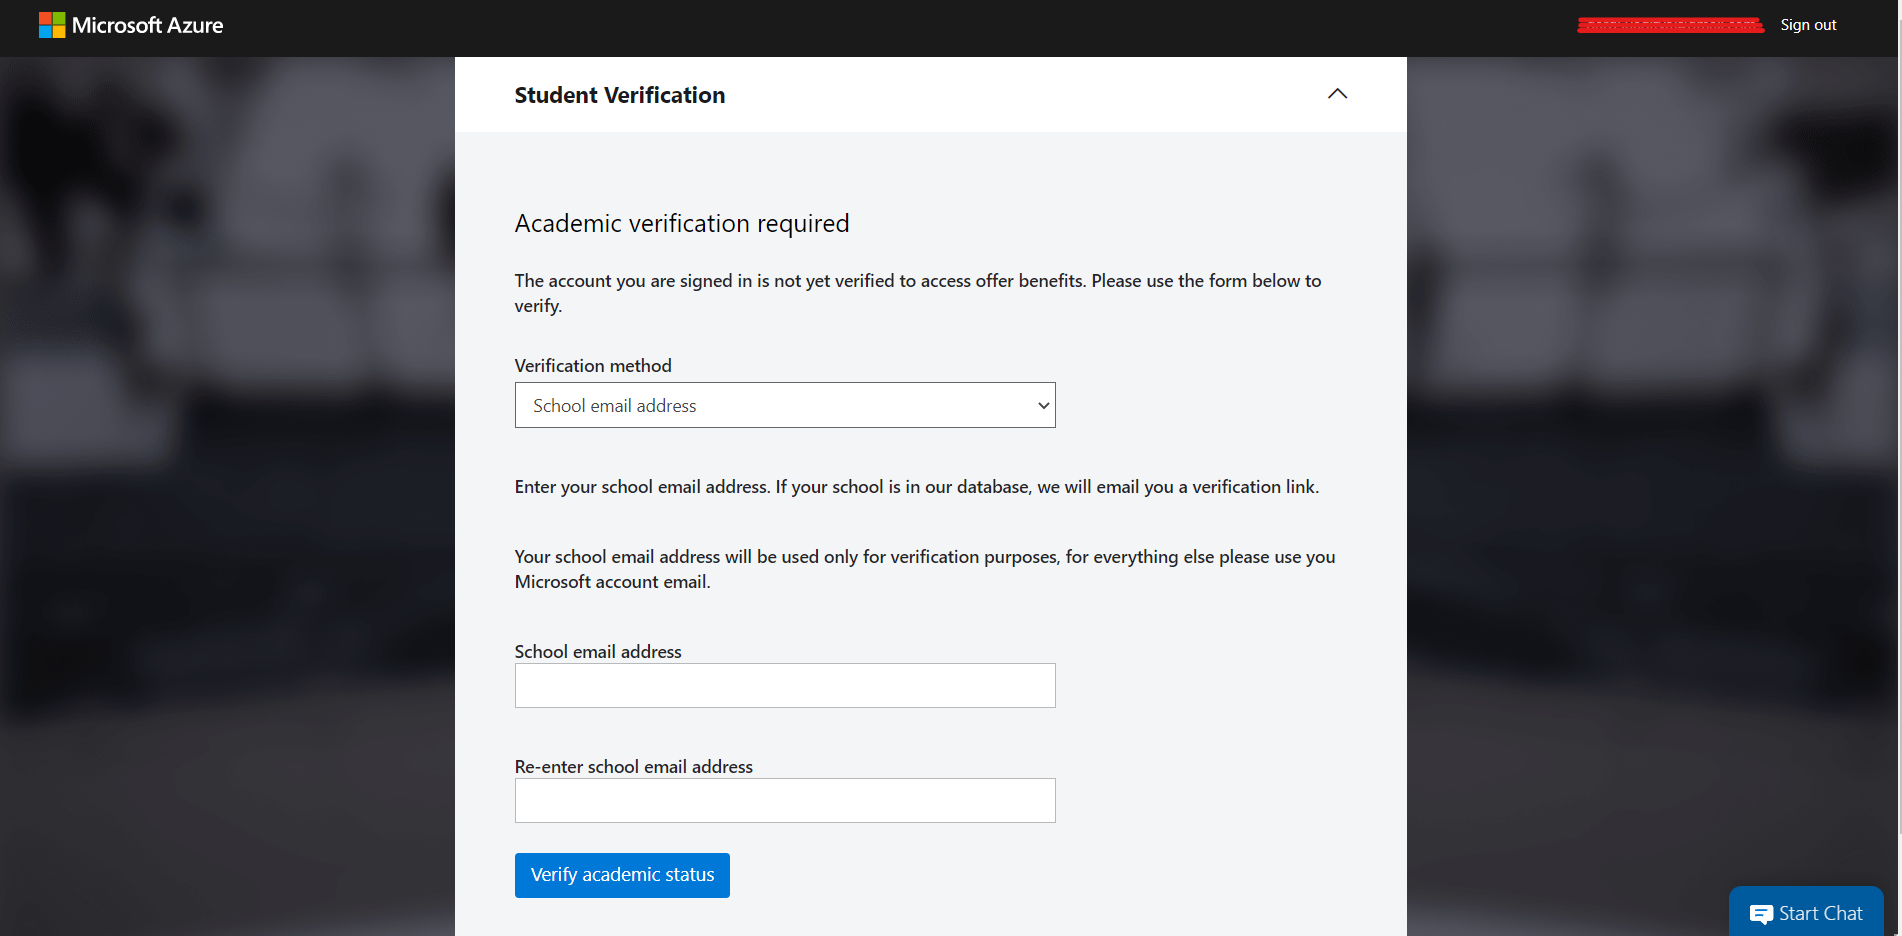
If your Work/Institution email is valid, you will receive an activation link on your Work/Institution email address to activate your account.
After activating the account, you will be automatically redirected to your Azure Portal. Or, you can also access your portal via that link.
It is what your Azure Portal looks like:
 Creating a Virtual Machine
In this section, we will create our Ubuntu Virtual machine on Microsoft Azure.
1. Click on the Virtual machines button on your portal.
2. Navigate to Create and then select Azure virtual machine. Refer to the image below.
3. Enter the VM Credentials
Navigate to the Basics tab and create a new Resource Group. Also, enter the Name and Region of the VM.
Note: Sometimes, you will face an issue with the availability of the VMs, that the VMs are not available in the selected region due to the high demand. It mainly occurs in the free tier accounts. If you don’t find any available region, leave that part empty and let Azure select a suitable region automatically.
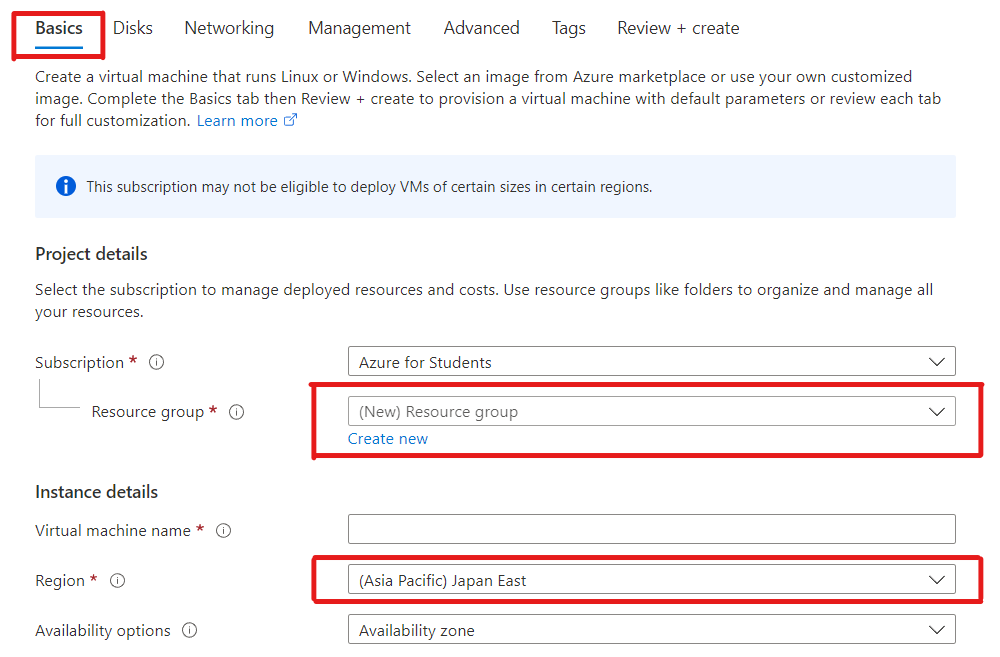
Now select the following:
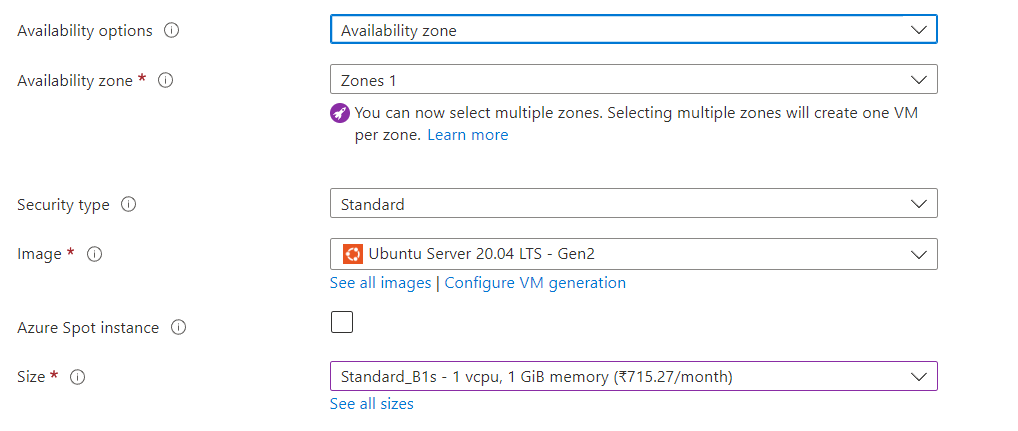
- Select Availability zone as Zones 1 because we want our server only in one zone. But you can also select multiple zones if you wish for higher availability and fewer downtimes.
- Then select the Operating System of your choice. In this tutorial, we have chosen a Ubuntu Server.
- Finally, please choose the size of the server. It depends on your budget and requirements.
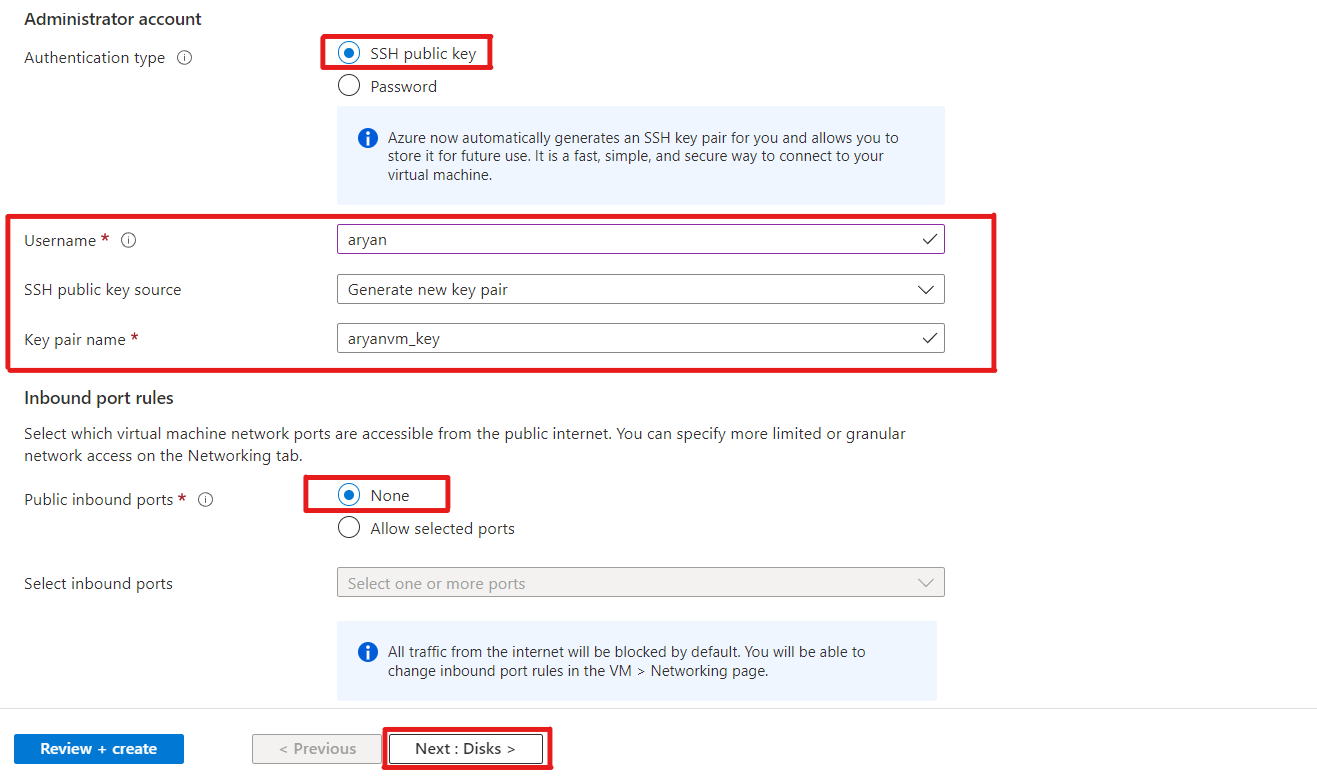
Then we will set an SSH Public Key to access our VM Remotely. Also, we will select the Inbound port rules to none. Inbound port rules are used to create the firewall settings, and we will make these settings later in the Networking section of the VM.
What is SSH?
SSH (Secure Shell) is a network protocol that enables a secure connection between two machines. It allows transferring files and data in a highly secure manner, using encryption algorithms to encrypt the data during the transfer.
By SSH, we will connect our Local Machine to that VM using a private-public key pair.
Now Navigate to the Disks section, where we will select the type and size of the Disk that we want to use with the VM.
You can select between an HDD or an SSD based on your budget.

Now, you have to create a disk of the particular size that you want to use.
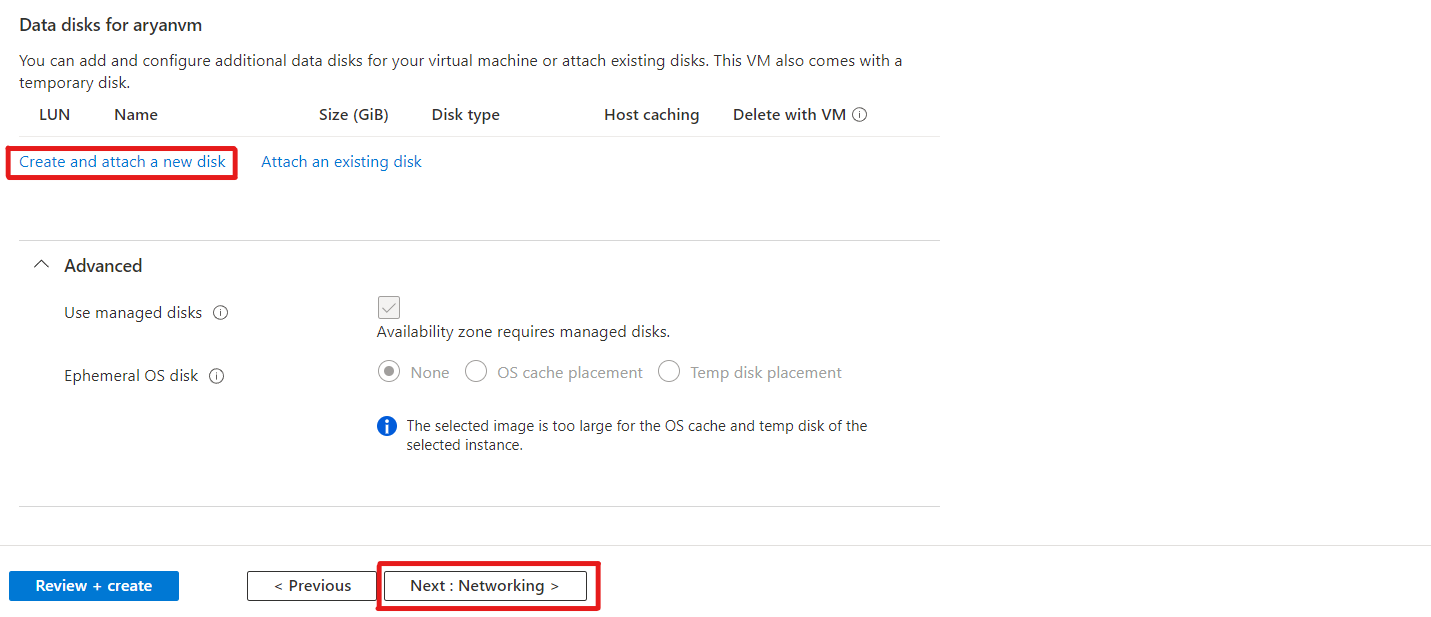
You can select the Size and Type of the Disk according to your requirement.

After creating the Disk, move next to the Networking section.
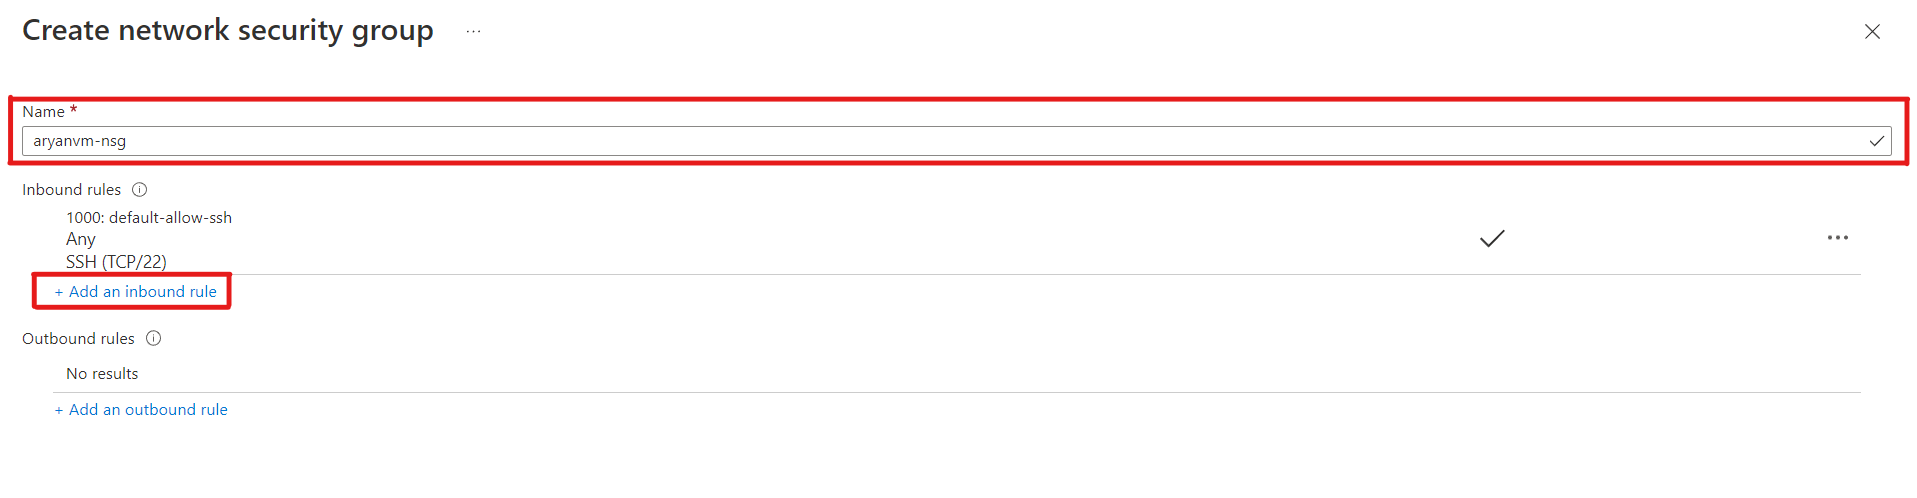
Select the Advanced networking and click on Create new button to create a new networking group.
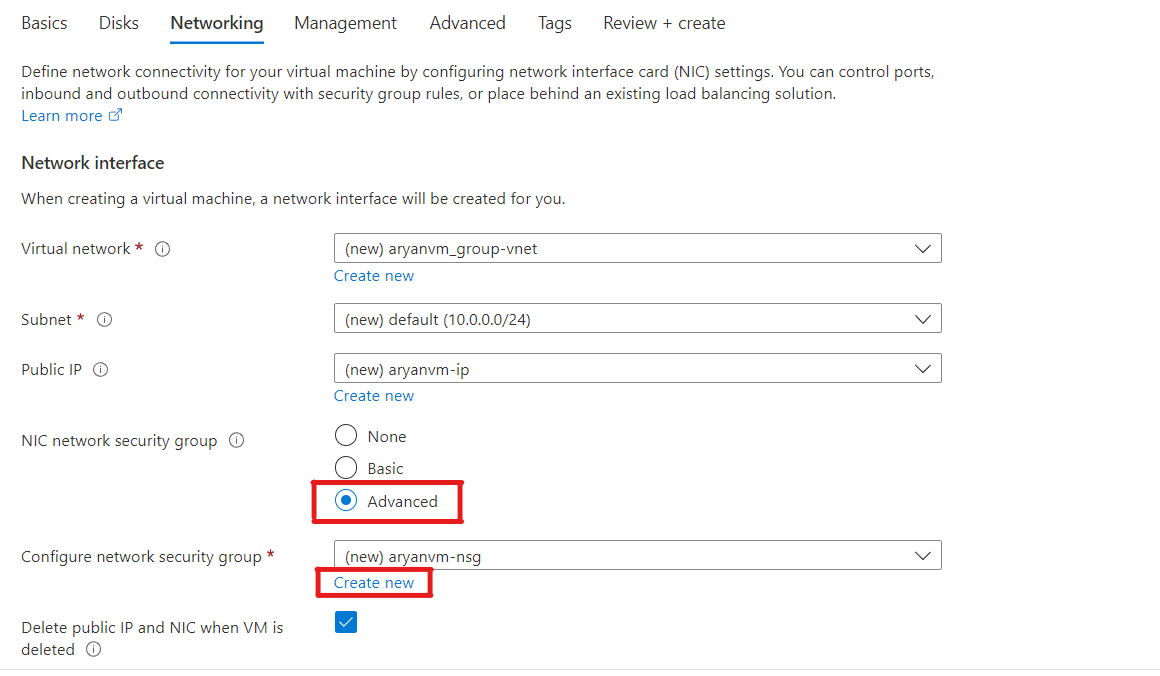
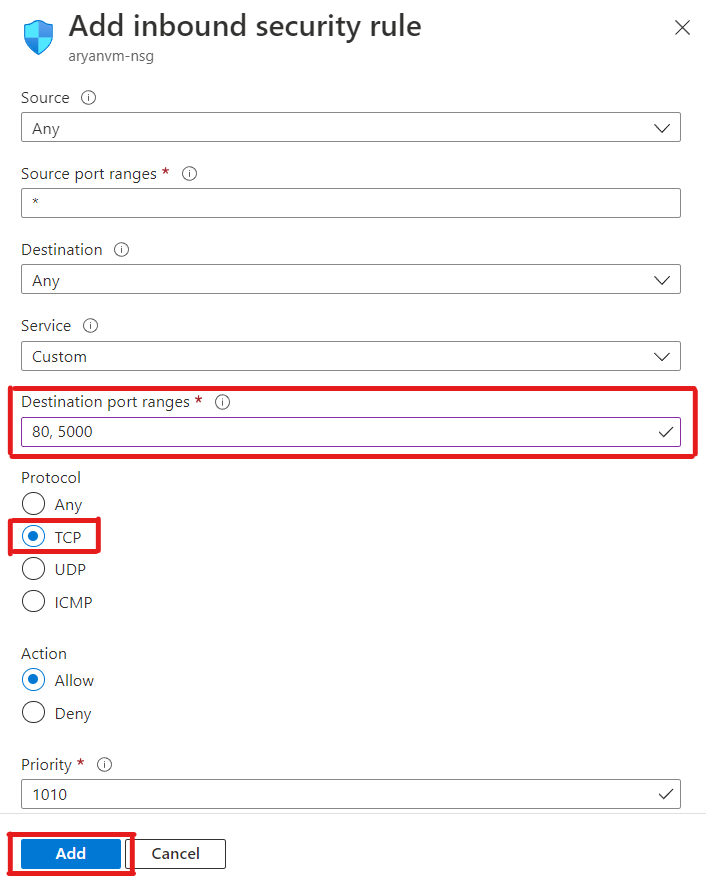
Now we will select the PORTs in which we want to listen to the requests. Also, please enter the name of your security group, and then we will add a new Inbound rule.
For the Source, we will select * to open all the ports. But for the Destination, we will select only some specific ports on which we can make our server listen to requests. In this tutorial, we will open default PORT 80 and PORT 5000.
Note: You must run your web server on PORT 80 or on PORT 5000 to access your web page publically.
Now go back to your Networking section.
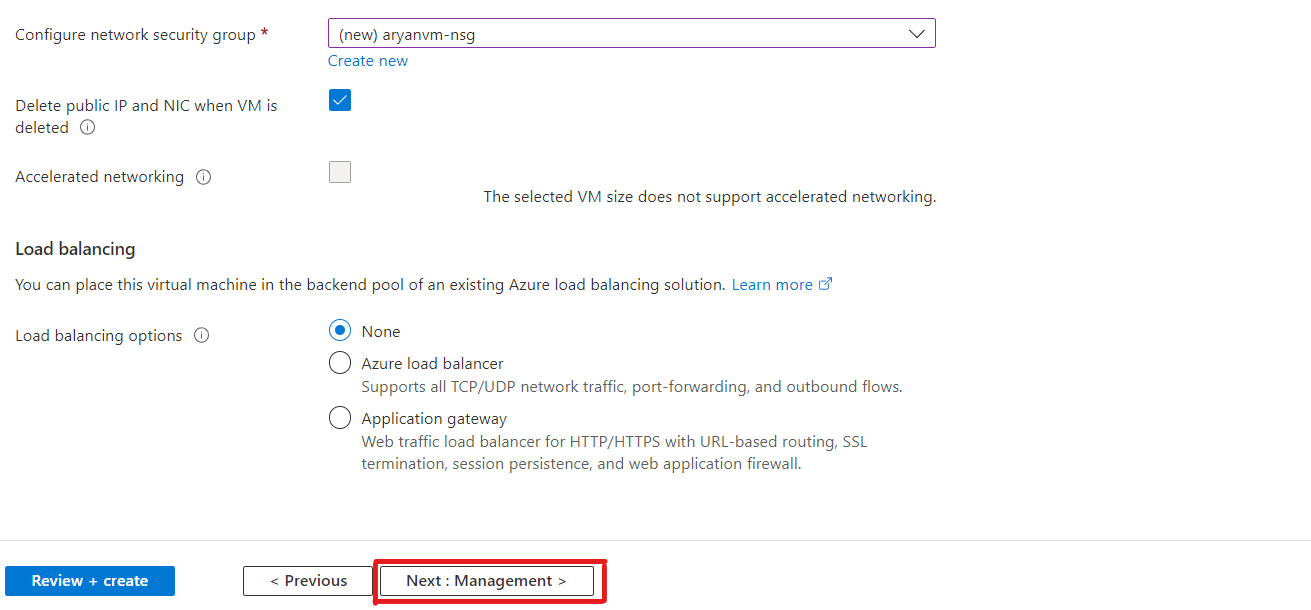
We will not use a Load Balancer at this time. It is used to distribute the traffic between many servers. If you want to know what is a load balancer and wants to create it. You can refer to my other article. In this, I have demonstrated how can we create a load balancer on the Google Cloud Platform.
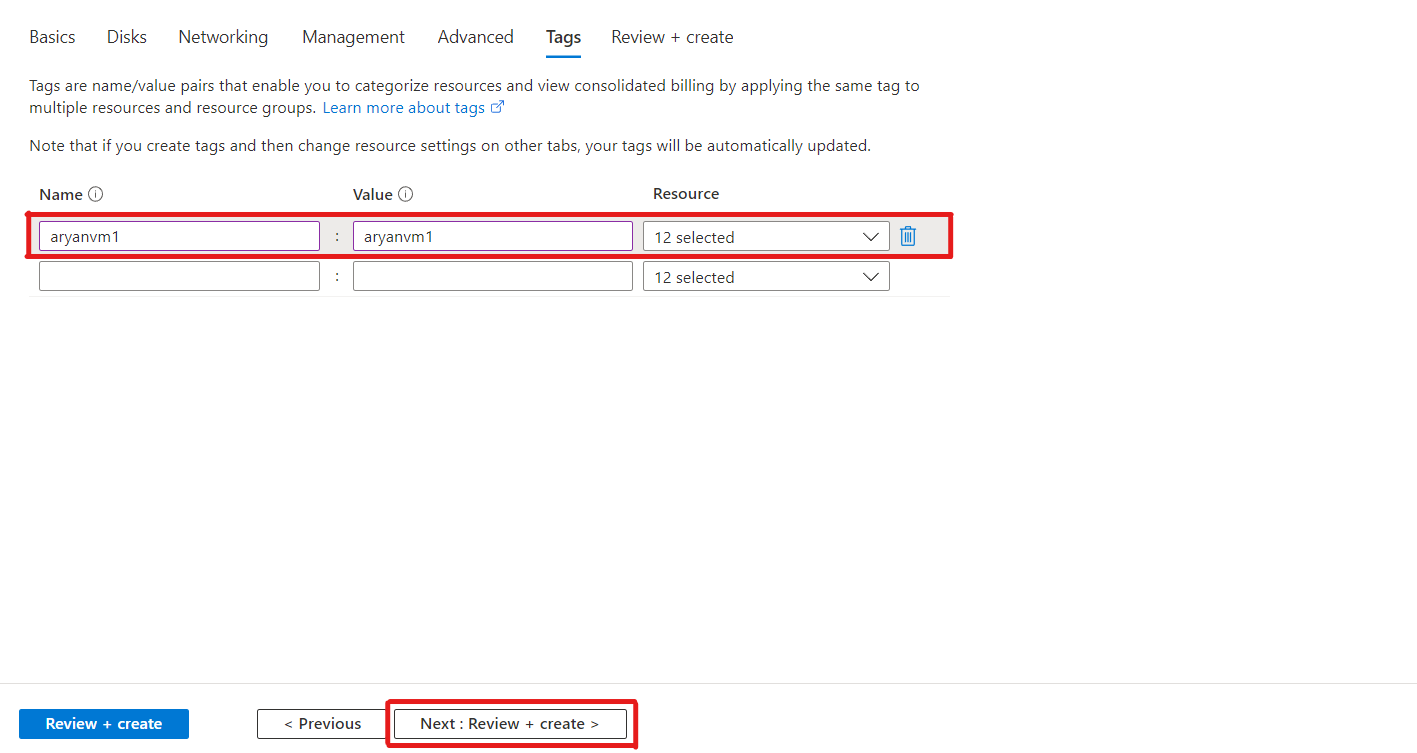
Now Navigate directly to the Tags section. We don’t have something to change in the Management and Advanced Section. But if you want to explore it, you can also explore it.
We will create a Tag name in the Tags section to categorize the resources.
After that, please review all the configurations of the VM before the final commitment.
Review all the configurations here
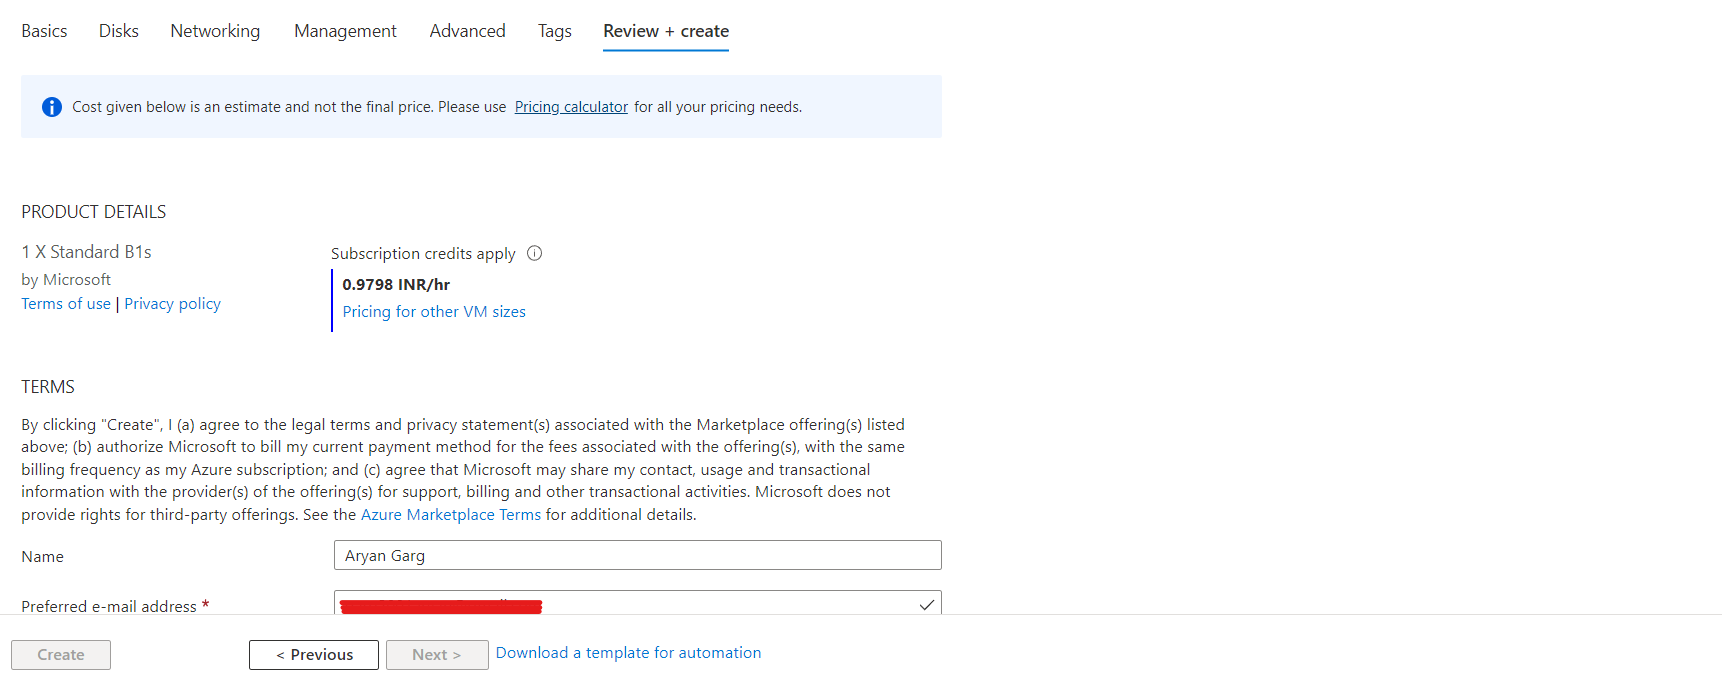
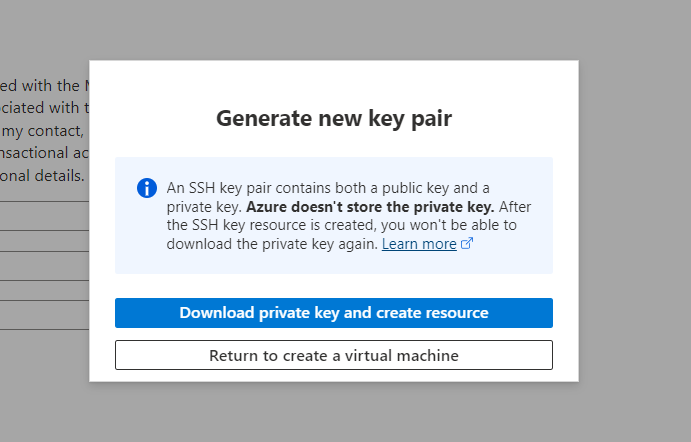
Finally, click on Create button. After that, it will download the Private SSH Key for you to access that VM remotely.
Note: Never share your Private key with anyone. Also, keep it with you because you cannot download it again.
Your downloaded private key must look like this:
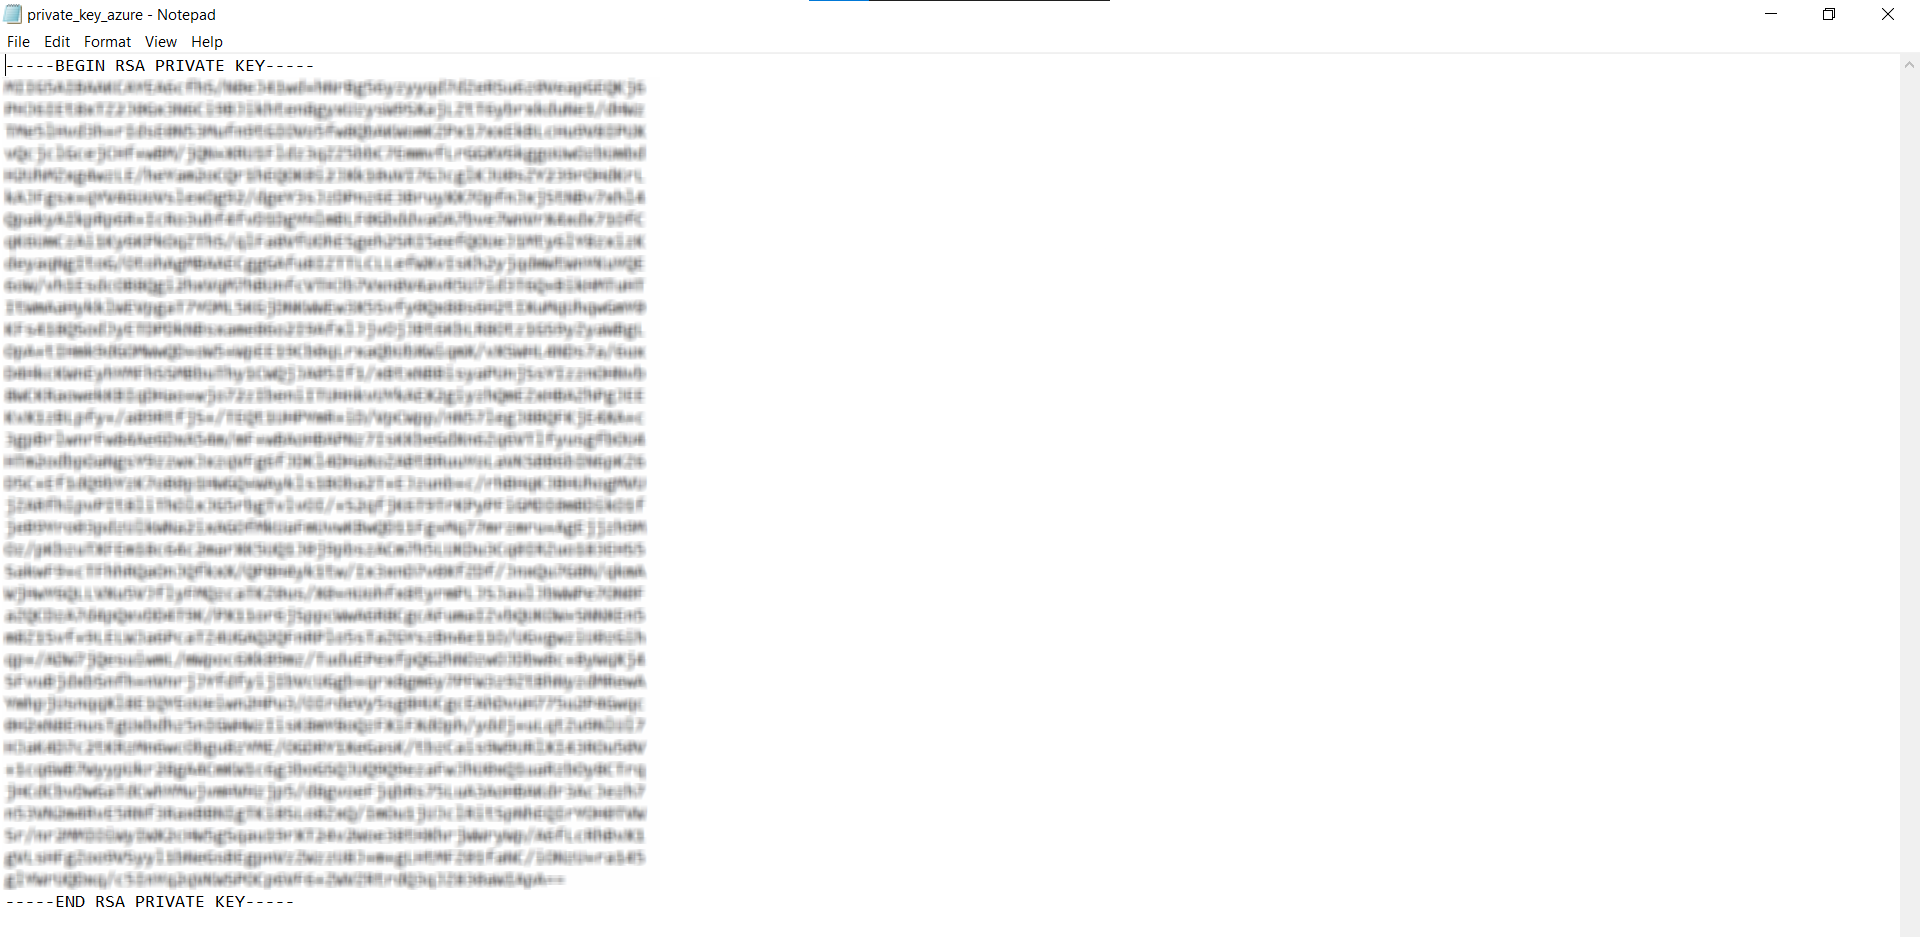
Save your private key. You don’t get it later on if you have deleted it. Now, you will be redirected to your VM instance.
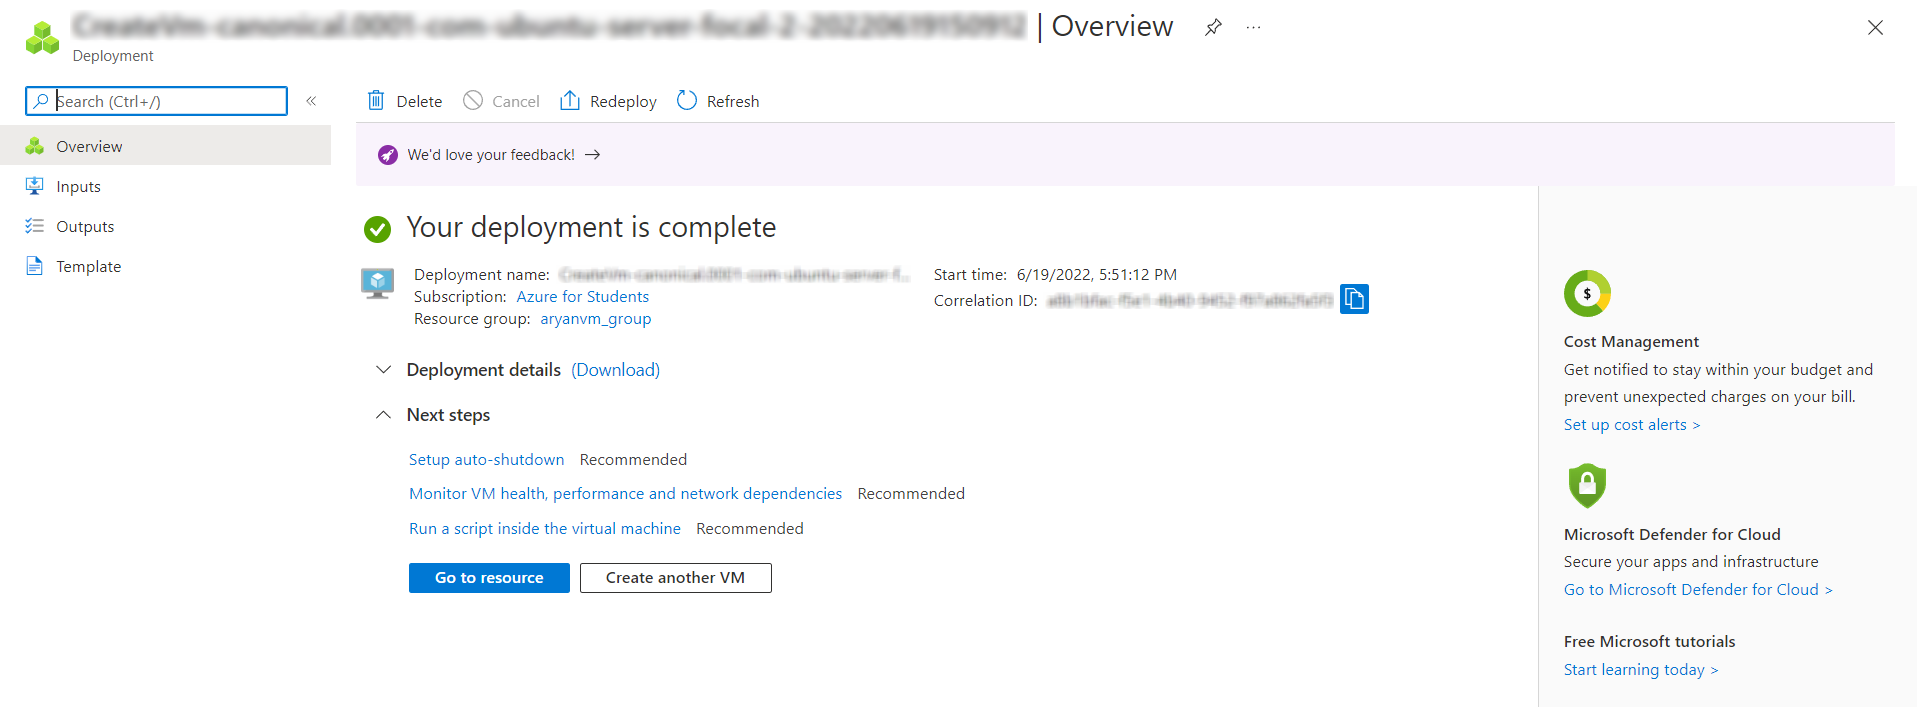
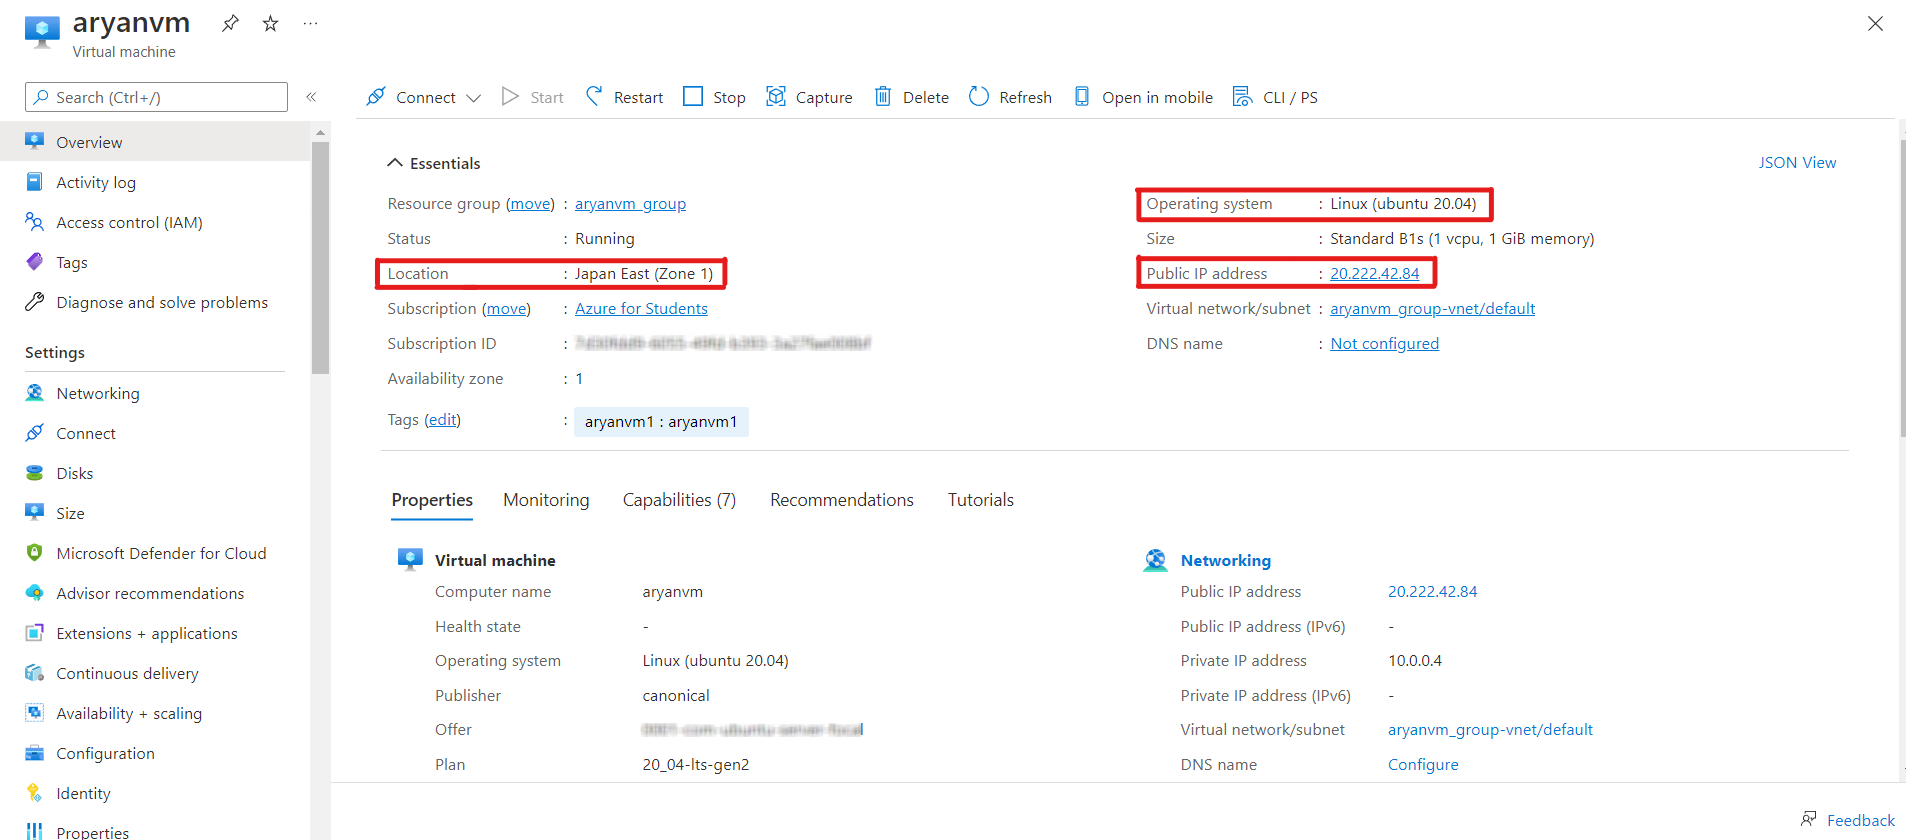
Now, click on Go to resource button to see all the configurations of your VM. You will also see your Public IP address, Server Location, OS, etc.
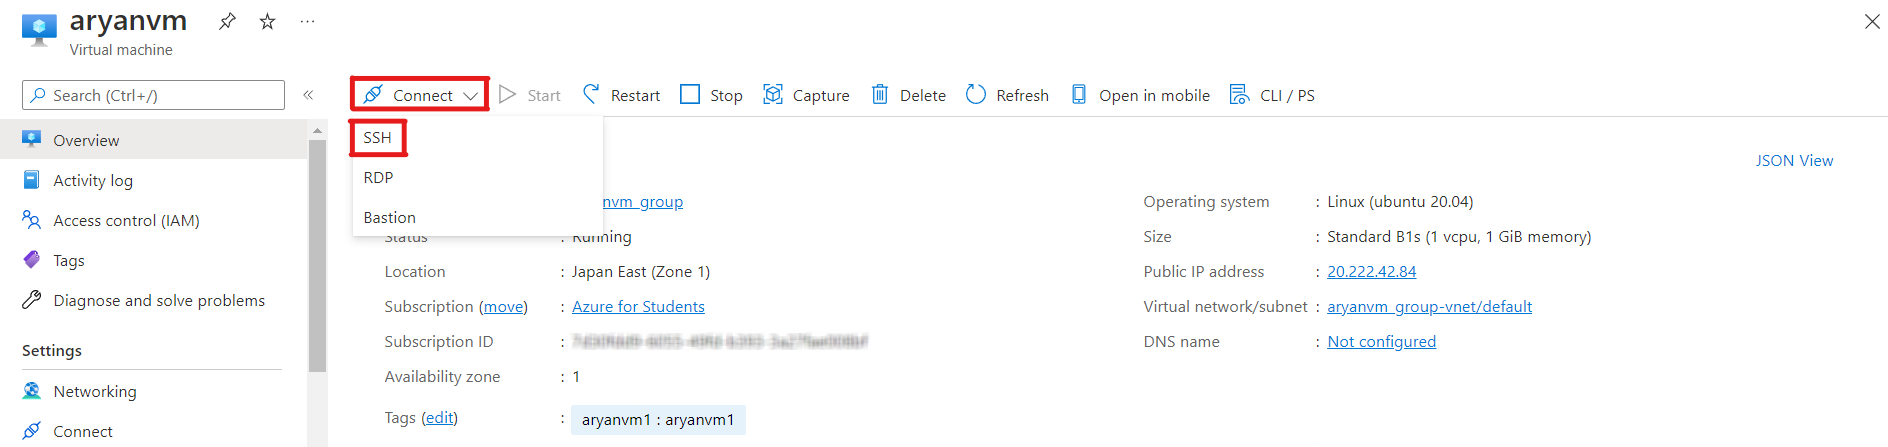
We will now establish a secure connection between our local machine and the VM instance we have just created.
Navigate to Connect>>SSH.
Put the below-highlighted code in your local machine terminal. The code which is shown below is different for your virtual machine.
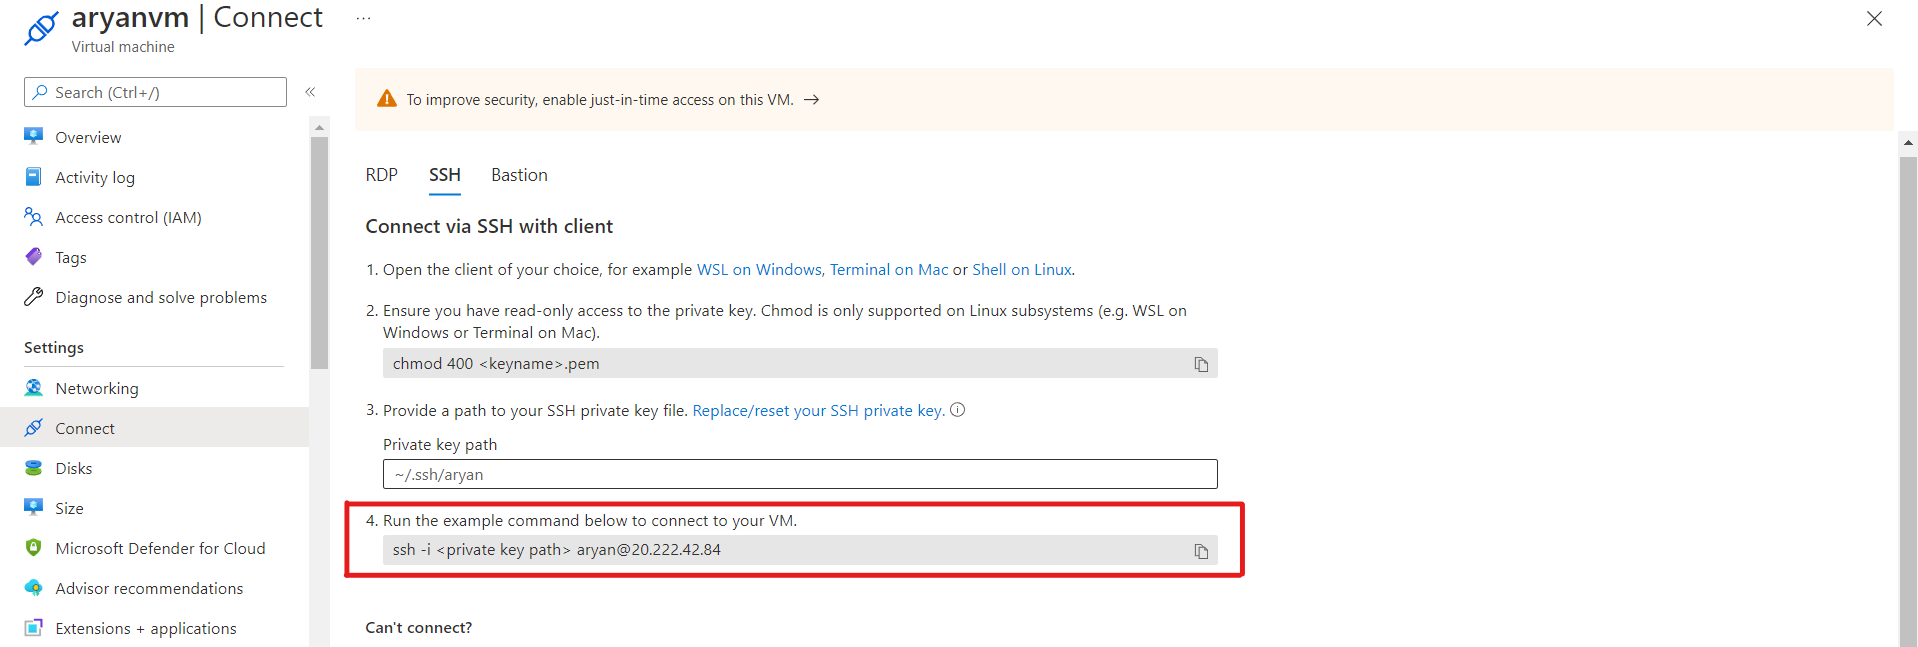
Now, open your command prompt and paste that code along with the path of the Private Key that you have downloaded previously.
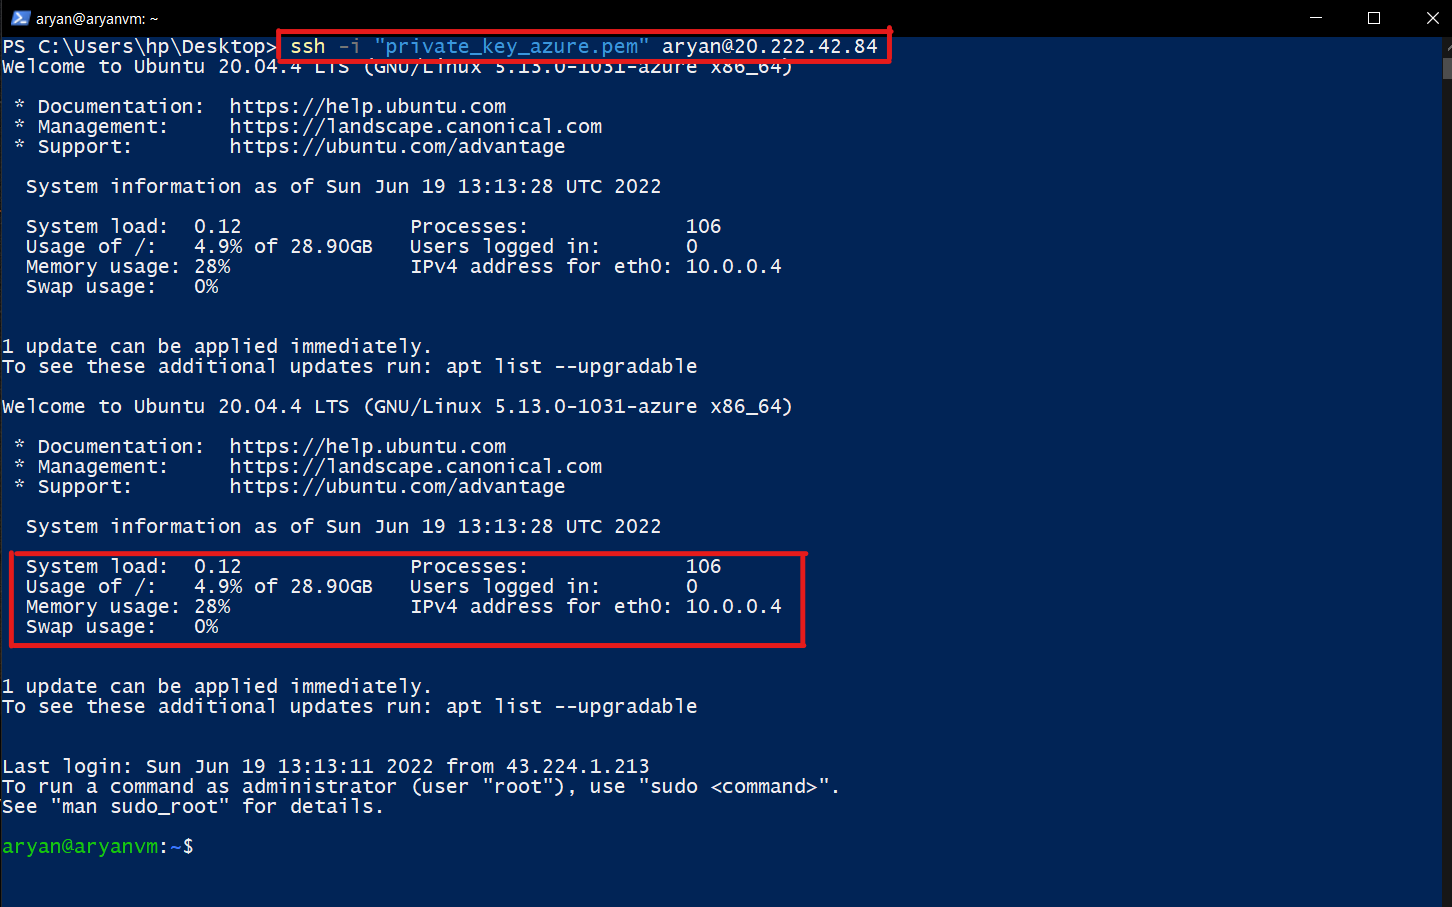
After authenticating successfully, you will be entered into your VM. You can also monitor the CPU usage, RAM usage and Disk Utilization.
Hurray🎉, now the VM is ready to deploy your web applications.
Conclusion
This tutorial discussed how we could create a free student account on Microsoft Azure. Generally, for the standard account, you need a valid credit card or a debit card to verify your payment details. Still, for students, you only need a valid student email address provided by your university or the institution in which you are studying. Microsoft also offers free 100USD for 12 months to try its services.
Instead of Microsoft Azure, you can also use other famous cloud platforms like Google Cloud or Amazon Web Services. They also provide similar services at a competing price. In the upcoming articles, I will try to cover more services of Microsoft Azure.
The key takeaways of this tutorial are:
1. Firstly, we created the student account on Azure using a university email address.
2. Then, we have selected the configurations of the VM instance like location, size, operating system, etc.
3. Further, we have created an HDD Disk and configured firewall settings to open PORT 80 and PORT 5000.
4. Finally, we have connected our local machine with the VM using the Private SSH Key.
It is all for today. I hope you have enjoyed the article. If you have any doubts or suggestions, feel free to comment below. Or you can also connect with me on LinkedIn. I will be delighted to get associated with you.
Do check my other articles also.
The media shown in this article is not owned by Analytics Vidhya and is used at the Author’s discretion.
I am currently pursuing my Bachelor of Technology (B.Tech.) in Electrical Engineering and Engineering from the Indian Institute of Technology Jodhpur(IITJ). I am very enthusiastic about Machine learning, and Software Development. Feel free to connect with me on Linkedin.


