If you’ve been told that, “you have to learn to code before you start with deep learning“, this blog post will prove such beliefs to be wrong. In this article, learn to build a Deep Learning network to classify handwritten digits (Figure 1) in the MNIST dataset using the codeless KNIME Analytics Platform.
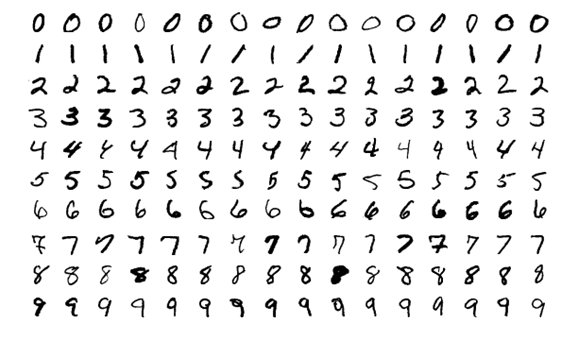
Figure 1: MNIST Handwritten Digits from 0 to 9
About KNIME Analytics Platform
KNIME Analytics Platform (KAP) is the open-source software for creating data science. It is intuitive – you create visual, task-specific workflows with a drag-and-drop-style interface, without the need for coding. These workflows are easy to understand and share with other users. (know more)
How is an image represented in digital format?
In a Grayscale digital image format, an image is represented as a numerical matrix of pixel values based on light intensity (0-1) where 1 represents the illuminated pixel (white), 0 the dark pixel (black), and the numbers in between all other levels of gray (Figure 2). The images in the MNIST dataset are provided in Grayscale format.

Figure 2: Image Representation as levels of grey between 0 and 1.
What is a Convolutional Neural Network (CNN)?
A CNN is a network with at least one Convolutional Layer (Figure 3). The task of a convolutional layer is to extract features from an image. In a CNN, usually, multiple Convolutional Layers are stacked on top of each other to extract a hierarchy of features. The first convolutional layers learn to extract low-level features, like spots and edges. These features are then used by the next Convolutional Layer to extract mid-level features, like parts of a digit in our case. These mid-level features are finally used to extract high-level features, like the digits themselves.
Other commonly used layers in CNN, besides Convolutional layers, are Pooling layers and Dense layers.

Figure 3: Convolutional Neural Network
How Does a Convolutional Layer Extract Features?
The goal of a convolutional layer is to learn to identify features in an image. To do so it uses a set of Kernels, also called Filters. Each Kernel is a matrix or tensor of weights, customized for the task of extracting a certain feature.
To apply a filter and extract the feature, the Kernel, which is much smaller than the image, is placed on top of an image patch. Then a convolution operation is calculated, and a nonlinear activation function is applied. This produces a high value if the feature is in the image patch and a small value if it is not in the image patch. The kernel moves over the entire image by shifting from patch to patch according to the stride length (Figure 4a).
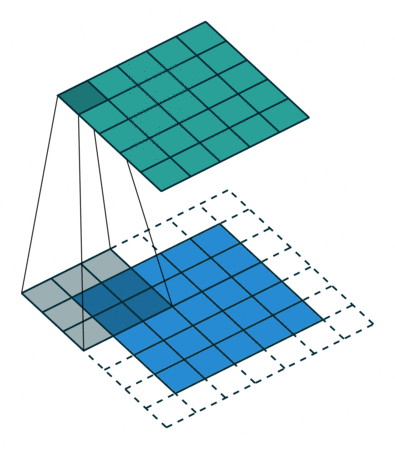
Figure 4: Left :(a) Convolution operation using a 3×3 kernel and stride=1 Right :(b) Max Pooling using a size 2,2 with stride 2
What is the Idea Behind Pooling?
A Convolutional layer is often followed by a Pooling layer. The Pooling layer is essential for extracting the dominant features while reducing the spatial size of the image. The Pooling layer also operates on patches of the input matrix where it applies either the Max pooling or the Average pooling operation. In the case of Max pooling (Figure 4b), only the maximum value of the patch is passed on to the output; in the case of Average pooling, the average of the patch is calculated and passed onto the output. The Pooling layer needs 2 parameters – patch/pool size and stride. Size refers to the size of the patch and stride to the step size when moving over to the next patch. Both parameters influence the reduction of the spatial size.
The Dense Layers as Classifiers
The dense layers are usually the last layers and implement the classifier, that is they learn to associate the class (in our case the digit) to their inputs according to a selected loss function.
Introducing the KNIME Deep Learning Keras Integration
The KNIME Deep Learning Keras Integration allows you to train Deep Learning models using the Keras libraries in the KNIME Analytics Platform. Drag the task-specific Deep Learning nodes and connect them into a pipeline to build workflows for your solutions.
The KNIME Deep Learning Keras integration is particularly powerful because it combines the ease of the KNIME GUI with the extensive coverage of the Keras deep learning libraries. We will use the nodes shown in Figure 5 to build a CNN.
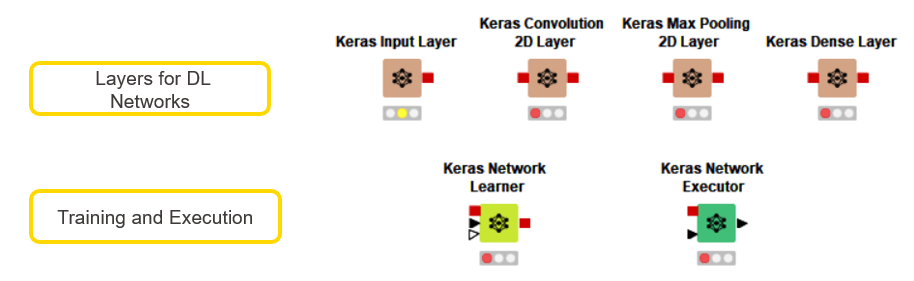
Figure 5: KNIME Keras Nodes to be used for this workflow
Perform MNIST Digit Classification with KNIME Analytics Platform
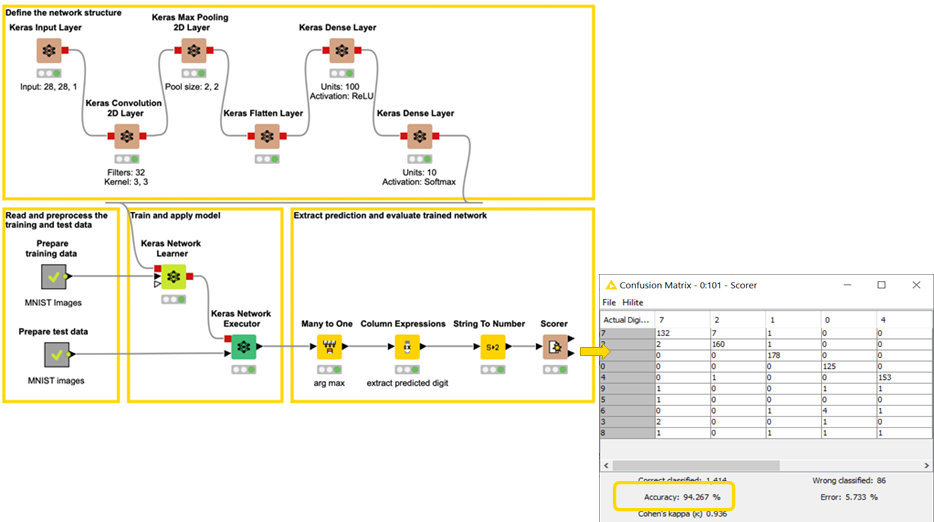
Let’s now start building a CNN for Digit Classification. In figure 6, you have a workflow with the architecture of a neural network. The nodes in the lower-left corner provide the images for the training and test set including the digit labels. The upper half of the workflow shows the architecture of the network: one Convolutional layer, one Max Pooling layer, one Flatten layer, and two dense layers for classification.
You can download this workflow, Simple CNN for Image Classification, from the KNIME Hub.
Here are a few more technical details about the network layers.
Layer Specifications
Convolutional layer : 32 kernel/filters , 3×3 kernel size, stride=1, ReLU activation function
Pooling Layer : Max Pooling, Patch size = 2,2 , stride = 2
Dense Layer Intermediate : 100 Units, ReLU activation function
Dense Layer Final: 10 Units, Softmax activation function
The Dense Layer Final has 10 units: one unit for each 0-9 digit. The Softmax function of each unit then represents the probability of the digit class. Indeed, the Softmax function outputs values in the range [0, 1] and all these values add up to 1. Hence, they can be used to form a probability distribution.
Configurations of the Keras Convolution 2D Layer node and of the Keras Max Pooling 2D Layer node are shown in Figures 7 and 8 respectively.
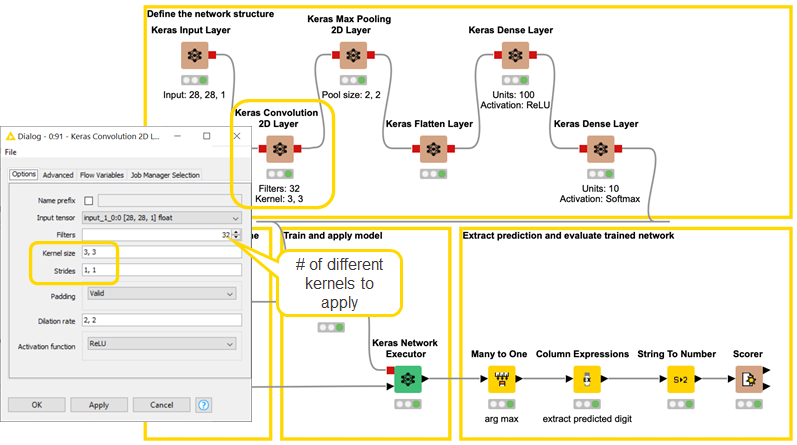
Figure 7: Configuring the Keras Convolution 2D Layer node

Figure 8: Configuring the Keras Max Pooling 2D Layer node
Training and Evaluation
The lower half of the workflow in Figure 6 shows the training and the evaluation of the network defined above. The Keras Network Learner node (Figure 9) trains the CNN on the training input images as per the batch size and epochs defined by the user. In this case, we have specified epochs as 10 and batch size as 200, which means each batch has 200 images.
The most important setting in this node is the loss function. In this case, we have chosen the categorical cross-entropy as the loss function and set the optimizer as Adadelta. This node also generates a view to monitoring the training accuracy (Figure 10).
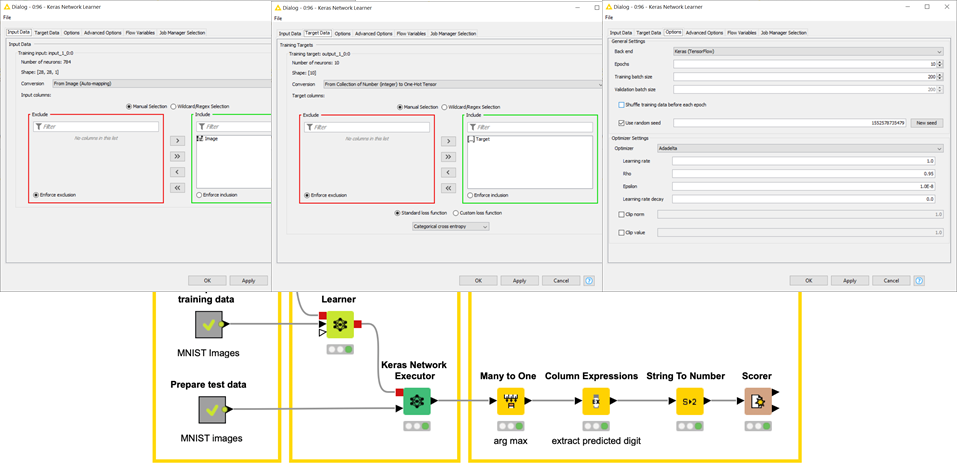
Figure 9: Configuring the Keras Network Learner node
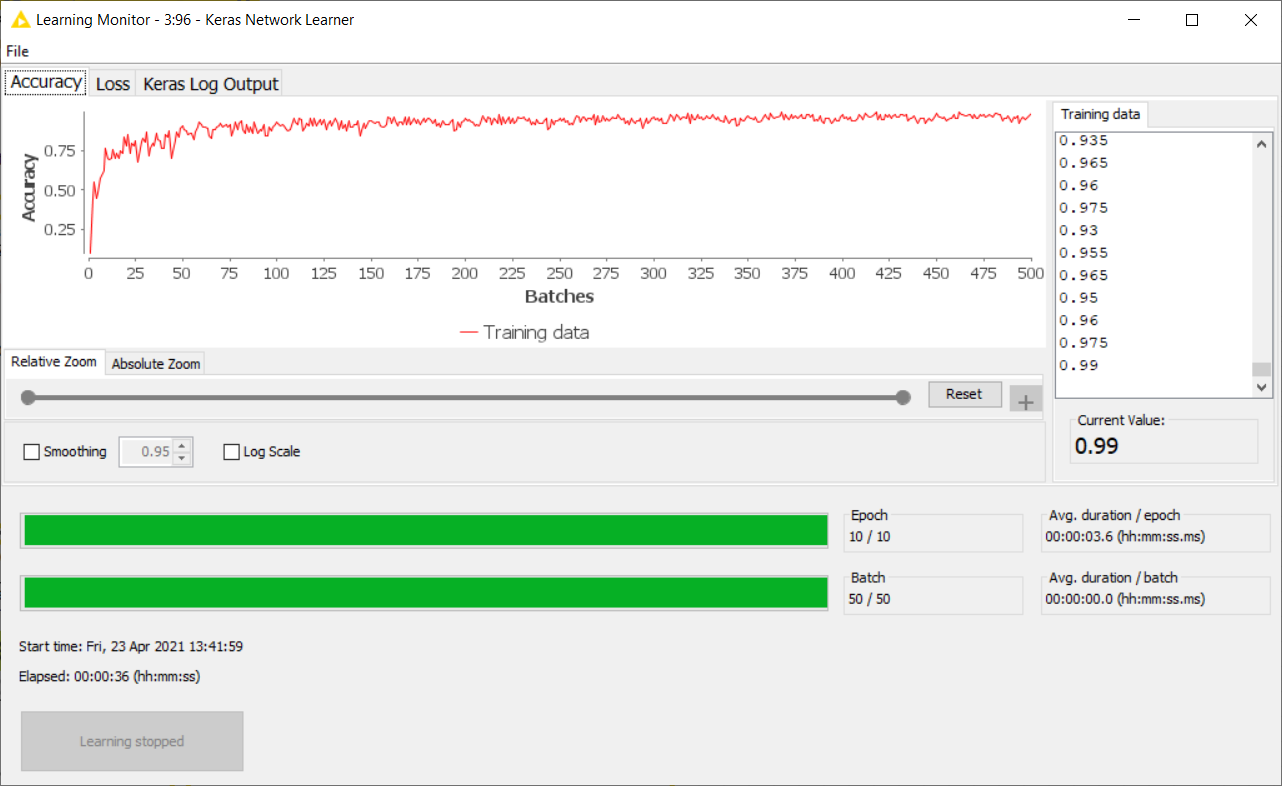
Figure 10: Monitoring the Training accuracy in the View of the Keras Network Learner node
Further, the trained network is fed as input into the Keras Network Executor node. The Keras Network Executor node receives the trained network and the test images and each image predicts the digit class. The Scorer node in the lower right corner of the workflow evaluates the network performances: The network attains 94.26% accuracy on the test set images.
Is it worth it to add one more Convolutional Layer?
Let’s add one more convolutional layer to the existing network. This means simply dragging and dropping another Keras Convolution 2D Layer node after the existing one. The network (Figure 11) is now trained for just 3 epochs and upon evaluating its performance on the test set, it attains an accuracy of 96.26% which is an improvement of 2% over the earlier network.
We could obtain even better performances by tuning different and more hyperparameters. With this example, we just wanted to show how easy it is to experiment and prototype with new architectures and new hyperparameters using a visual GUI and simply dragging and dropping the nodes into the workflow editor and establishing the connections amongst them.
Additionally, we also demonstrate the ease of assembling the pipeline of nodes to build the neural architecture, to prepare the data, and to train and evaluate the models for two different network structures.
Figure 11: CNN using 2 Convolutional layers
Explore more case studies about Deep Learning
There are plenty of case studies that can be solved using KNIME Deep Learning. This blog post is just the tip of the iceberg. Please refer to KNIME Hub and explore more such case studies and workflows.
Resources and References :
- Workflow 1 – Simple CNN for Image Classification (1 Convolutional layer)
- Workflow 2 – Building CNN from scratch with Keras Layer nodes (2 Convolutional layer )
- Grayscale Image
Acknowledgments:
The enclosed pictures are from the MNIST dataset (http://yann.lecun.com/exdb/mnist/)
The media shown in this article on Codeless Deep Learning are not owned by Analytics Vidhya and are used at the Author’s discretion.
About the Author:
I am pursuing a Master’s in Data Science from OVGU Magdeburg, Germany. Have worked as Data Scientist for 4 years and gained experience in Machine Learning, Interpretable ML, NLP, and Deep Learning.


Excellent blog and resources recommendations!