Introduction
After a year of embracing ChatGPT, the AI landscape welcomes Google’s highly anticipated Gemini—a formidable competitor. The Gemini series comprises three powerful language models: Gemini Pro, Gemini Nano, and the top-tier Gemini Ultra, which has demonstrated exceptional performance across various benchmarks, though it’s yet to be unleashed into the wild. Presently, Gemini Pro models offer performance comparable to gpt-3.5-turbo, providing an accessible and cost-effective solution for natural language understanding and vision tasks. These models can be applied to diverse real-world scenarios, including video narration, visual question-answering (QA), RAG (Retrieval-Augmented Generation), and more. In this article, we’ll look into the capabilities of Gemini Pro models and guide you through building a multi-modal QA bot using Gemini and Gradio.

Learning Objectives
- Explore Gemini models.
- Authenticate VertexAI to access Gemini models.
- Explore Gemini API and GCP Python SDK.
- Learn about Gradio and its Components.
- Build a functional multi-modal QA bot using Gemini and Gradio.
This article was published as a part of the Data Science Blogathon.
Table of contents
Before we start building our QA Bot using Gemini and Gradio, let’s understand the features of Gemini.
What is Google Gemini?
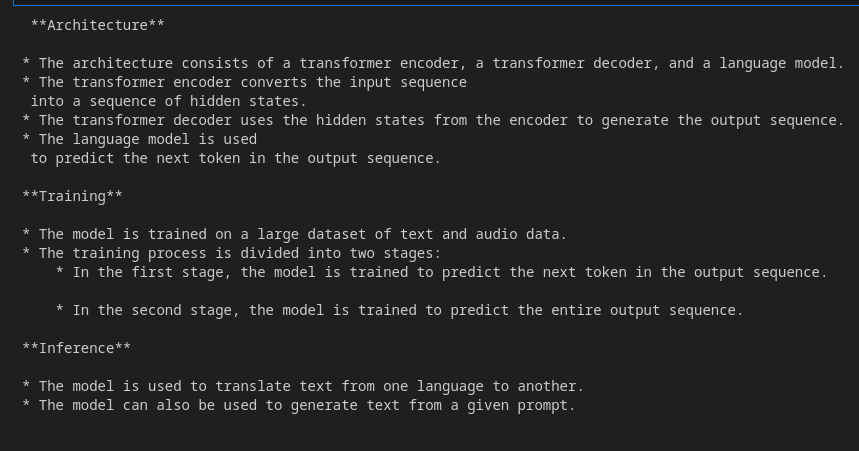
Similar to GPT, the Gemini family of models utilizes transformer decoders optimized for scale training and inferencing on Google’s Tensor Processing Units. These models undergo joint training across various data modalities, including text, image, audio, and video, to develop Large Language Models (LLMs) with versatile capabilities and a comprehensive understanding of multiple modes. The Gemini comprises three model classes—Gemini Pro, Nano, and Ultra—each fine-tuned for specific use cases.
- Gemini Ultra: The most performant from Google has shown state-of-the-art performance across tasks like math, reasoning, multi-modal capabilities, etc. As per the technical report from Google, Gemini Ultra has performed better than GPT-4 on many benchmarks.
- Gemini Pro: The pro model is optimized for performance, scalability, and low-latency inferencing. It is a capable model rivaling gpt-3.5-turbo with multi-modal capabilities.
- Gemini Nano: Nano has two smaller LLMs with 1.8B and 3B parameters. It is trained by distilling from larger Gemini models optimized for running on low and high-memory devices.
Dive into the future of AI with GenAI Pinnacle. From training bespoke models to tackling real-world challenges like PII masking, empower your projects with cutting-edge capabilities. Start Exploring.
You can access the models through GCP Vertex AI or Google AI Studio. While Vertex AI is suitable for production applications, it mandates a GCP account. However, with AI Studio, developers can create an API key to access Gemini models without a GCP account. We will explore both methods in this article but implement the VertexAI method. You can implement the latter with a few tweaks in the code.
Now, let’s begin with building QA bot using Gemini!
Accessing Gemini using VertexAI
The Gemini models can be accessed from VertexAI on GCP. So, to start building with these models, we need to configure Google Cloud CLI and authenticate with Vertex AI. First, install the GCP CLI and initialize with gcloud init.
Create an authentication credential for your account with the command gcloud auth application-default login. This will open a portal to sign into a Google and follow the instructions. Once done, you can work with Google Cloud from a local environment.
Now, create a virtual environment and install the Python library. This is the Python SDK for GCP for accessing Gemini models.
pip install --upgrade google-cloud-aiplatformNow that our environment is ready. Let’s understand the Gemini API.
Request Body to Gemini API
Google has released only the Pro and Pro vision models for public use. The Gemini Pro is a text-only LLM suitable for text generation use cases, like summarizing, Paraphrasing, Translation, etc. It has a context size of 32k. However, the vision model can process images and videos. It has a context size of 16k. We can send 16 image files or a video at a time.
Below is a request body to Gemini API:
{
  "contents": [
    {
      "role": string,
      "parts": [
        {
          // Union field data can be only one of the following:
          "text": string,
          "inlineData": {
            "mimeType": string,
            "data": string
          },
          "fileData": {
            "mimeType": string,
            "fileUri": string
          },
          // End of list of possible types for union field data.

          "videoMetadata": {
            "startOffset": {
              "seconds": integer,
              "nanos": integer
            },
            "endOffset": {
              "seconds": integer,
              "nanos": integer
            }
          }
        }
      ]
    }
  ],
  "tools": [
    {
      "functionDeclarations": [
        {
          "name": string,
          "description": string,
          "parameters": {
            object (OpenAPI Object Schema)
          }
        }
      ]
    }
  ],
  "safetySettings": [
    {
      "category": enum (HarmCategory),
      "threshold": enum (HarmBlockThreshold)
    }
  ],
  "generationConfig": {
    "temperature": number,
    "topP": number,
    "topK": number,
    "candidateCount": integer,
    "maxOutputTokens": integer,
    "stopSequences": [
      string
    ]
  }
}
In the above JSON schema, we have roles(user, system, or function), the text, file data for images or videos, and generation config for more model parameters and safety settings for altering the sensitivity tolerance of the model.
This is the JSON response from the API.
{
  "candidates": [
    {
      "content": {
        "parts": [
          {
            "text": string
          }
        ]
      },
      "finishReason": enum (FinishReason),
      "safetyRatings": [
        {
          "category": enum (HarmCategory),
          "probability": enum (HarmProbability),
          "blocked": boolean
        }
      ],
      "citationMetadata": {
        "citations": [
          {
            "startIndex": integer,
            "endIndex": integer,
            "uri": string,
            "title": string,
            "license": string,
            "publicationDate": {
              "year": integer,
              "month": integer,
              "day": integer
            }
          }
        ]
      }
    }
  ],
  "usageMetadata": {
    "promptTokenCount": integer,
    "candidatesTokenCount": integer,
    "totalTokenCount": integer
  }
}
As the response, we get a JSON with the answers, citations, safety ratings, and usage data. So, these are the JSON schemas of requests and responses to Gemini API. For more information, refer to this official documentation for Gemini.
You can directly communicate with API with JSON. Sometimes, it is better to communicate with API endpoints directly rather than depending on SDKs, as the latter often undergo breaking changes.
For simplicity, we will use the Python SDK we installed earlier to communicate with the models.
from vertexai.preview.generative_models import GenerativeModel, Image, Part, GenerationConfig
model = GenerativeModel("gemini-pro-vision", generation_config= GenerationConfig())
response = model.generate_content(
    [
        "Explain this image step-by-step, using bullet marks in detail",
        Part.from_image(Image.load_from_file("whisper_arch.png"))

        ],
)
print(response)
This will output a Generation object.
candidates {
  content {
    role: "model"
    parts {
      text: " * response
  }
  finish_reason: STOP
  safety_ratings {
    category: HARM_CATEGORY_HARASSMENT
    probability: NEGLIGIBLE
  }
  safety_ratings {
    category: HARM_CATEGORY_HATE_SPEECH
    probability: NEGLIGIBLE
  }
  safety_ratings {
    category: HARM_CATEGORY_SEXUALLY_EXPLICIT
    probability: NEGLIGIBLE
  }
  safety_ratings {
    category: HARM_CATEGORY_DANGEROUS_CONTENT
    probability: NEGLIGIBLE
  }
}
usage_metadata {
  prompt_token_count: 271
  candidates_token_count: 125
  total_token_count: 396
}
We can retrieve the texts with the following code.
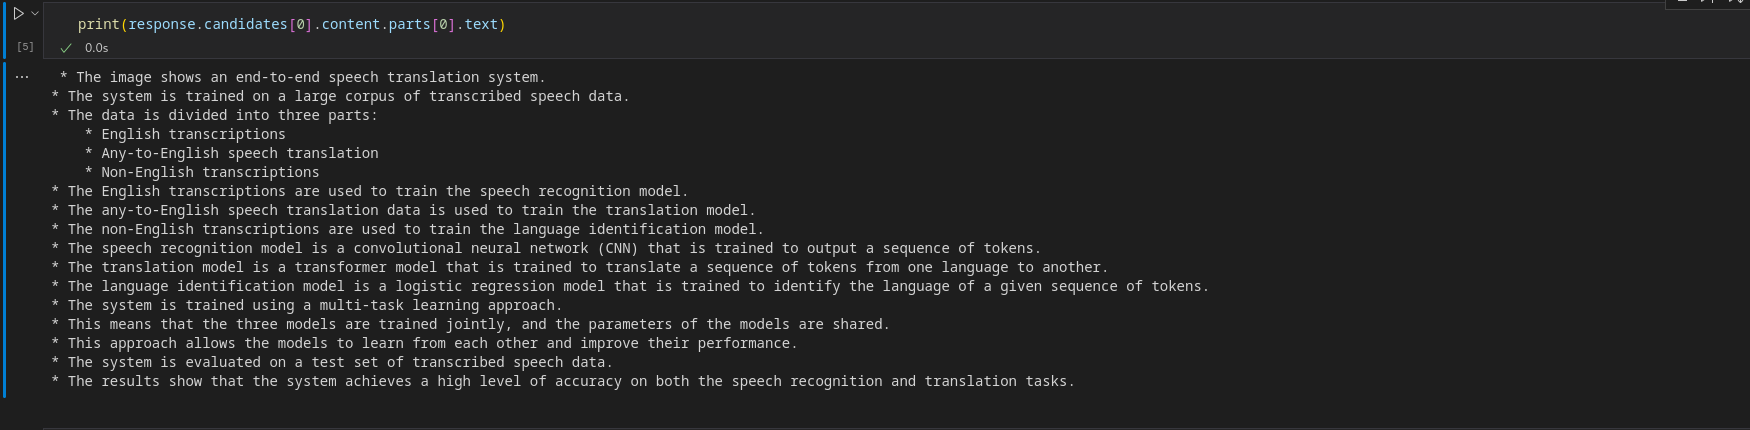
print(response.candidates[0].content.parts[0].text)Output
To receive a streaming object, turn streaming to True.
response = model.generate_content(
    [
        "Explain this image step-by-step, using bullet marks in detail?",
        Part.from_image(Image.load_from_file("whisper_arch.png"))

        ], stream=True
)
To retrieve chunks, iterate over the StreamingGeneration object.
for resp in response:
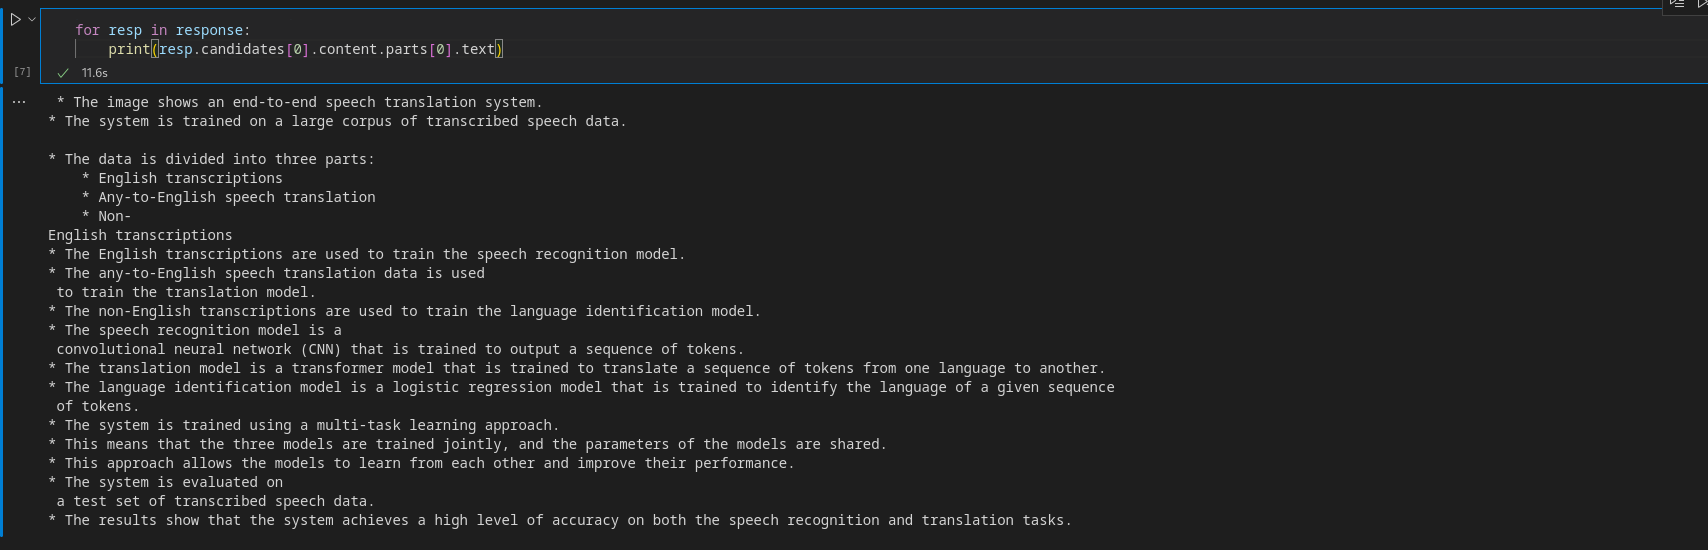
print(resp.candidates[0].content.parts[0].text)Output
Before building the app, let’s have a brief primer on Gradio.
Accessing Gemini using AI Studio
Google AI Studio lets you access Gemini models through an API. So, head over to the official page and create an API key. Now, install the following library.
pip install google-generativeaiConfigure the API key by setting it as an environment variable:
import google.generativeai as genai
api_key = "api-key"
genai.configure(api_key=api_key)
Now, inference from models.
model = genai.GenerativeModel('gemini-pro')
response = model.generate_content("What is the meaning of life?",)
The response structure is similar to the previous method.
print(response.candidates[0].content.parts[0].text)Output

Similarly, you can also infer from the vision model.
import PIL.Image

img = "whisper_arch.png"
img = PIL.Image.open(img)

model = genai.GenerativeModel('gemini-pro-vision')
response = model.generate_content(["Explain the architecture step by step in detail", img],
                                 stream=True)
response.resolve()

for resp in response:
    print(resp.text)
Output
Ai Studio is a great place to access these models if you do not want to use GCP. As we will use VertexAI, you may use this instead with a few modifications.
Let’s Start Building QA Bot using Gradio
Gradio is an open-source tool to build web apps in Python to share Machine Learning models. It has modular components that can be put together to create a web app without involving JavaScript or HTML codes. Gradio has Blocks API that lets you create web UIs with more customization. The backend of Gradio is built with Fastapi, and the front end is built with Svelte. The Python library abstracts away the underlying complexities and lets us quickly make a web UI. In this article, we will use Gradio to build our QA bot UI.
Refer to this article for a detailed walk-through guide for building a Gradio chatbot: Let’s Build Your GPT Chatbot with Gradio
Front End with Gradio
We will use Gradio’s Blocks API and other components to build our front end. So, install Gradio with pip if you haven’t already and import the library.
For the front end, we need a chat UI for Q&A, a text box for sending user queries, a file box for uploading Images/Videos and components like a slider, and a radio button for customizing model parameters, like temperature, top-k, top-p, etc.
This is how we can do it with Gradio.
# Importing necessary libraries or modules
import gradio as gr
with gr.Blocks() as demo:
with gr.Row():
with gr.Column(scale=3):
gr.Markdown("Chatbot")
# Adding a Chatbot with a height of 650 and a copy button
chatbot = gr.Chatbot(show_copy_button=True, height=650)
with gr.Row():
# Creating a column with a scale of 6
with gr.Column(scale=6):
# Adding a Textbox with a placeholder "write prompt"
prompt = gr.Textbox(placeholder="write your queries")
# Creating a column with a scale of 2
with gr.Column(scale=2):
# Adding a File
file = gr.File()
# Creating a column with a scale of 2
with gr.Column(scale=2):
# Adding a Button
button = gr.Button()
# Creating another column with a scale of 1
with gr.Column(scale=1):
with gr.Row():
gr.Markdown("Model Parameters")
# Adding a Button with the value "Reset"
reset_params = gr.Button(value="Reset")
gr.Markdown("General")
# Adding a Dropdown for model selection
model = gr.Dropdown(value="gemini-pro", choices=["gemini-pro", "gemini-pro-vision"],
label="Model", info="Choose a model", interactive=True)
# Adding a Radio for streaming option
stream = gr.Radio(label="Streaming", choices=[True, False], value=True,
interactive=True, info="Stream while responses are generated")
# Adding a Slider for temperature
temparature = gr.Slider(value=0.6, maximum=1.0, label="Temperature", interactive=True)
# Adding a Textbox for stop sequence
stop_sequence = gr.Textbox(label="Stop Sequence",
info="Stops generation when the string is encountered.")
# Adding a Markdown with the text "Advanced"
gr.Markdown(value="Advanced")
# Adding a Slider for top-k parameter
top_p = gr.Slider(
value=0.4,
label="Top-k",
interactive=True,
info="""Top-k changes how the model selects tokens for output:
lower = less random, higher = more diverse. Defaults to 40."""
)
# Adding a Slider for top-p parameter
top_k = gr.Slider(
value=8,
label="Top-p",
interactive=True,
info="""Top-p changes how the model selects tokens for output.
Tokens are selected from most probable to least until
the sum of their probabilities equals the top-p value"""
)
demo.queue()
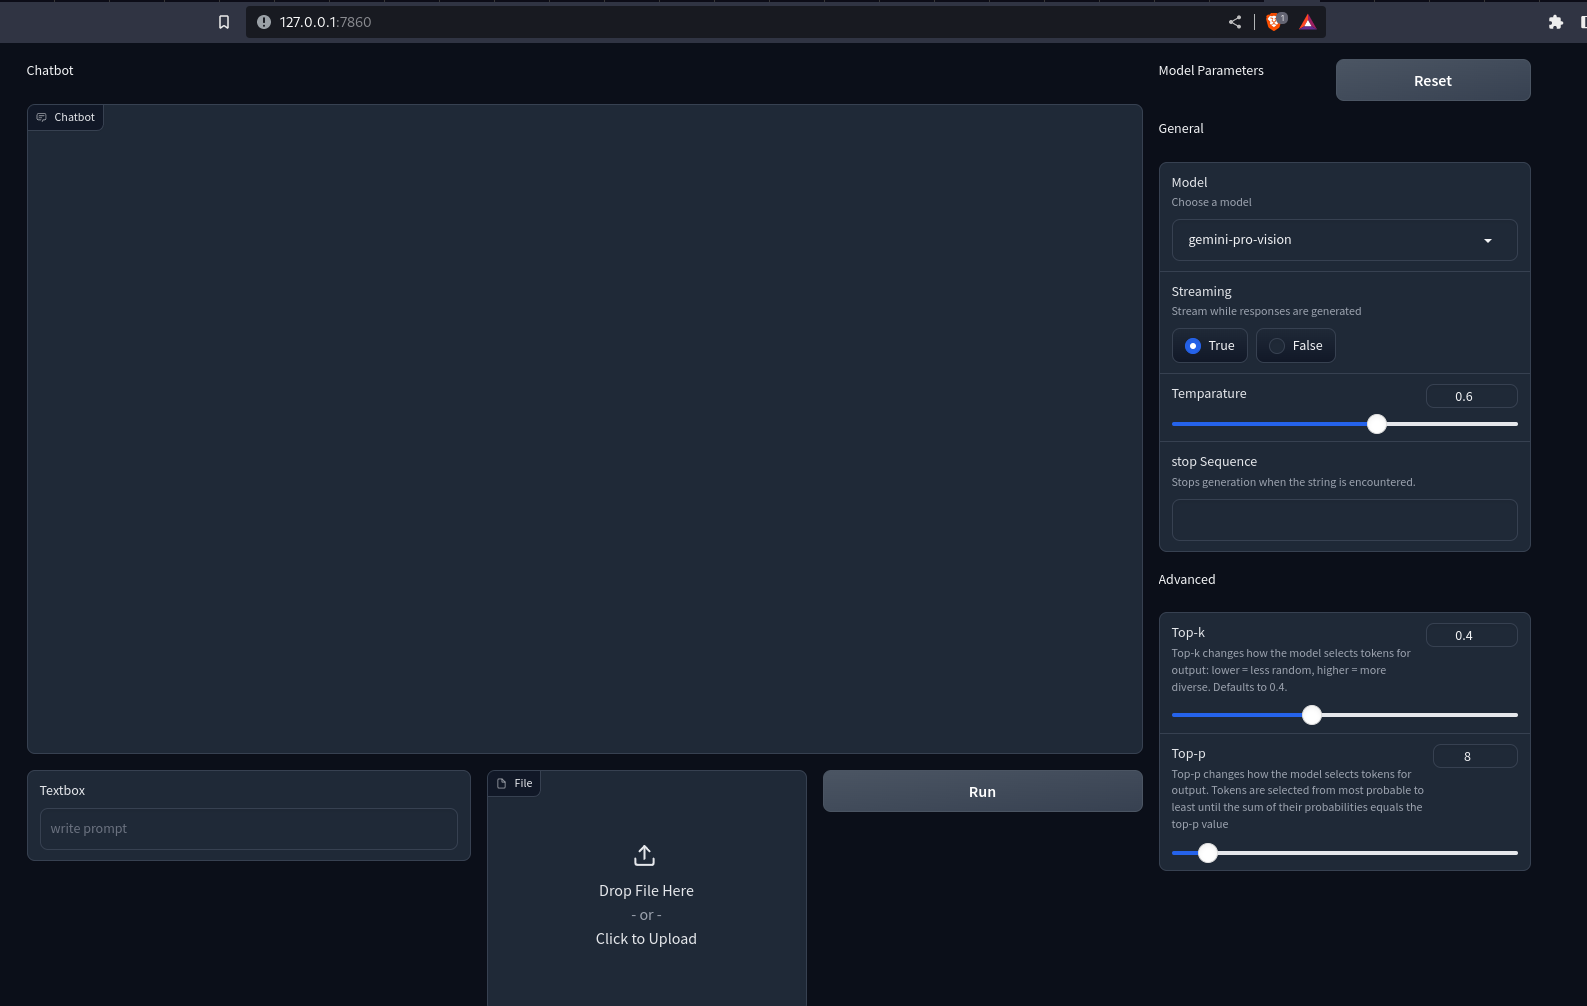
demo.launch()We have used Gradio’s Row and Column API for customizing the web interface. Now, run the Python file with the gradio app.py. This will open up a Uvicorn server at localhost:7860. This is what our app will look like.
Output
You notice nothing happens when pressing the buttons. To make it interactive, we need to define event handlers. Here, we need handlers for the Run and Reset buttons. This is how we can do it.
button.click(fn=add_content, inputs=[prompt, chatbot, file], outputs=[chatbot])\
    .success(fn = gemini_generator.run, inputs=[chatbot, prompt, file, model, stream,
                                     temparature, stop_sequence,
                                     top_k, top_p], outputs=[prompt,file,chatbot]
                                     )
reset_params.click(fn=reset, outputs=[model, stream, temparature,
                                          stop_sequence, top_p, top_k])
When the click button is pressed, the function in the fn parameter is called with all the inputs. The returned values of the function are sent to components in outputs. The success event is how we can chain together multiple events. But you notice that we haven’t defined the functions. We need to define these functions to make them interactive.
Building the Back End
The first function we will define here is add_content. This will render user and API messages on the chat interface. This is how we can do this.
def add_content(text:str, chatbot:Chatbot, file: str)->Chatbot:
    # Check if both file and text are provided
    if file and text:
        # Concatenate the existing chatbot content with new text and file content
        chatbot = chatbot + [(text, None), ((file,), None)]
    # Check if only text is provided
    elif text and not file:
        # Concatenate the existing chatbot content with a new text
        chatbot += [(text, None)]
    # Check if only the file is provided
    elif file and not text:
        # Concatenate the existing chatbot content with a new file content
        chatbot += [((file,), None)]
    else:
        # Raise an error if neither text nor file is provided
        raise gr.Error("Enter a valid text or a file")

    # Return the updated chatbot content
    return chatbot
The function receives the text, chatbot, and file path. The chatbot is a list of lists of tuples. The first member of the tuple is the user query, and the second is the response from the chatbot. To send multi-media files, we replace the string with another tuple. The first member of this tuple is the file path or URL, and the second is the alt text. This is the convention for displaying media in the chat UI in Gradio.
Now, we will create a class with methods for handling Gemini API responses.
from typing import Union, ByteString
from gradio import Part, GenerationConfig, GenerativeModel

class GeminiGenerator:
    """Multi-modal generator class for Gemini models"""

    def _convert_part(self, part: Union[str, ByteString, Part]) -> Part:
        # Convert different types of parts (str, ByteString, Part) to Part objects
        if isinstance(part, str):
            return Part.from_text(part)
        elif isinstance(part, ByteString):
            return Part.from_data(part.data, part.mime_type)
        elif isinstance(part, Part):
            return part
        else:
            msg = f"Unsupported type {type(part)} for part {part}"
            raise ValueError(msg)

    def _check_file(self, file):
        # Check if file is provided
        if file:
            return True
        return False

    def run(self, history, text: str, file: str, model: str, stream: bool, temperature: float,
            stop_sequence: str, top_k: int, top_p: float):
        # Configure generation parameters
        generation_config = GenerationConfig(
            temperature=temperature,
            top_k=top_k,
            top_p=top_p,
            stop_sequences=stop_sequence
        )

        self.client = GenerativeModel(model_name=model, generation_config=generation_config,)

        # Generate content based on input parameters
        if text and self._check_file(file):
            # Convert text and file to Part objects and generate content
            contents = [self._convert_part(part) for part in [text, file]]
            response = self.client.generate_content(contents=contents, stream=stream)
        elif text:
            # Convert text to a Part object and generate content
            content = self._convert_part(text))
            response = self.client.generate_content(contents=content, stream=stream)
        elif self._check_file(file):
            # Convert file to a Part object and generate content
            content = self._convert_part(file)
            response = self.client.generate_content(contents=content, stream=stream)

        # Check if streaming is True
        if stream:
            # Update history and yield responses for streaming
            history[-1][-1] = ""
            for resp in response:
                history[-1][-1] += resp.candidates[0].content.parts[0].text
                yield "", gr.File(value=None), history
        else:
            # Append the generated content to the chatbot history
            history.append((None, response.candidates[0].content.parts[0].text))
            return " ", gr.File(value=None), history
In the above code snippet, We have defined a class GeminiGenerator. The run() initiates a client with a model name and generation config. Then, we fetch responses from Gemini models based on the provided data. The _convert_part() converts the data into a Part object. The generate_content() requires data to be a string, Image, or Part. Here, we are converting each data to Part to maintain homogeneity.
Now, initiate an object with the class.
gemini-generator = GeminiGenerator()We need to define the reset_parameter function. This resets the parameters to the default values.
def reset() -> List[Component]:
        return [
            gr.Dropdown(value = "gemini-pro",choices=["gemini-pro", "gemini-pro-vision"],
                      label="Model",
            info="Choose a model", interactive=True),
            gr.Radio(label="Streaming", choices=[True, False], value=True, interactive=True,
            info="Stream while responses are generated"),
            gr.Slider(value= 0.6,maximum=1.0, label="Temparature", interactive=True),
            gr.Textbox(label="Token limit", value=2048),
            gr.Textbox(label="stop Sequence",
            info="Stops generation when the string is encountered."),
            gr.Slider(
                value=40,
                label="Top-k",
                interactive=True,
                info="""Top-k changes how the model selects tokens for output: lower = less
                random, higher = more diverse. Defaults to 40."""
                ),
            gr.Slider(
                value=8,
                label="Top-p",
                interactive=True,
                info="""Top-p changes how the model selects tokens for output.
                        Tokens are selected from most probable to least until
                        the sum of their probabilities equals the top-p value"""
                        )
            ]
Here, we are just returning the defaults. This resets the parameters.
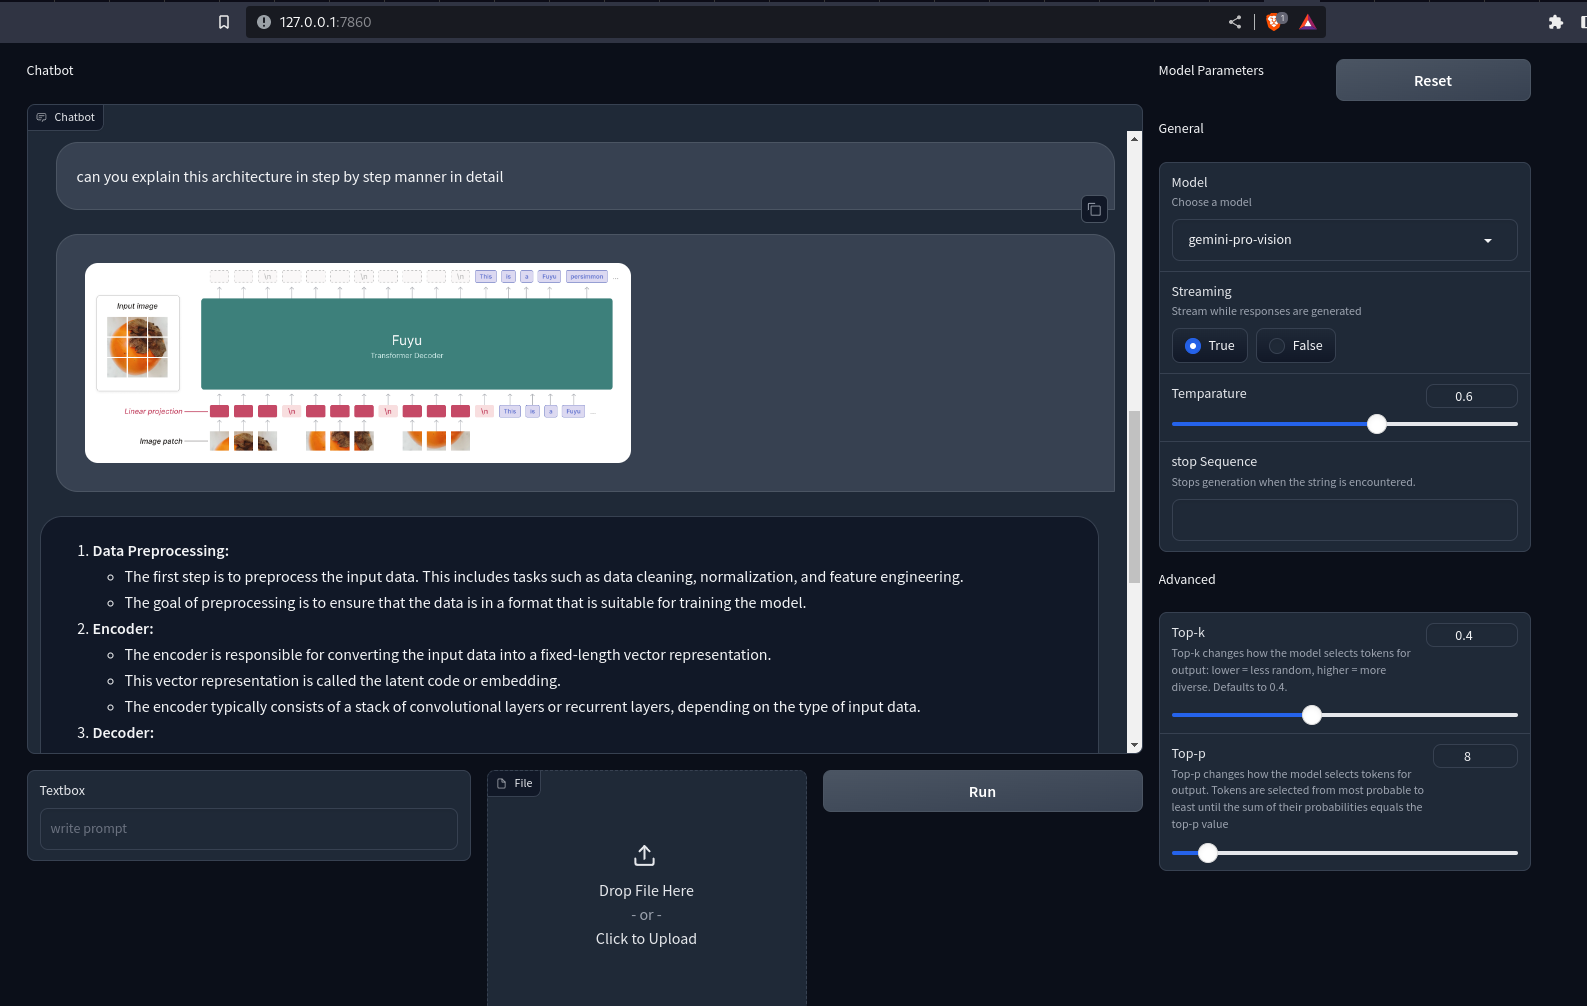
Now reload the app on localhost. You can now send text queries and images/videos to Gemini models. The responses will be rendered on the chatbot. If the stream is set to True, the response chunks will be rendered progressively one chunk at a time.
Output
Here is the GitHub repo for the Gradio app: sunilkumardash9/multimodal-chatbot
Conclusion
I hope you enjoyed building QA bot using Gemini and Gradio!
Google’s multi-modal model can be helpful for several use cases. A custom chatbot powered by it is one such use case. We can extend the application to include different features, like adding other models like GPT-4 and other open-source models. So, instead of hopping from website to website, you can have your own LLM aggregator. Similarly, we can extend the application to support multi-modal RAG, video narration, visual entity extraction, etc.
Key Takeaways
- Gemini is a family of models with three classes of models. Ultra, Pro, and Nano.
- The models have been trained jointly over multiple modalities to achieve state-of-the-art multi-modal understanding.
- While the Ultra is the most capable model, Google has only made the Pro models public.
- The Gemini Pro and vision models can be accessed from Google Cloud VertexAI or Google AI Studio.
- Gradio is an open-source Python tool for building quick web demos of ML apps.
- We used Gradio’s Blocks API and other features to build an interactive QA bot using Gemini models.
Take your AI innovations to the next level with GenAI Pinnacle. Fine-tune models like Gemini and unlock endless possibilities in NLP, image generation, and more. Dive in today! Explore Now
Frequently Asked Questions
Q1. Is Gemini better than Chatgpt?
A. While Google claims Gemini Ultra to be a better model, it has not been public yet. The publicly available models of Gemini are more similar to gpt-3.5-turbo in raw performance than GPT-4.
Q2. Can I use Gemini for free?
A. The Gemini Pro and Gemini Pro Vision models can be accessed for free on Google AI Studio for developers with 60 requests per minute.
Q3. What is a multi-modal chatbot?
A. A chatbot that can process and understand different modalities of data, such as texts, images, audio, videos, etc.
Q4. What is Gradio used for?
A. It is an open-source Python tool that lets you quickly share machine-learning models with anyone.
Q5. What is Gradio Interface?
A. The Gradio Interface is a powerful, high-level class that enables the swift creation of a web-based graphical user interface (GUI) with just a few lines of code.
The media shown in this article is not owned by Analytics Vidhya and is used at the Author’s discretion.
Meet your author Sunil kumar Dash, a developer and a writer. Has diverse interests in tech, pop culture, wellness, philosophy and Anime. Exploring underrated music is his hobby. And loves to doom scroll Twitter when bored.