In conclusion, I hope you learned useful stuff from this article. For more articles (coming soon), follow me on LinkedIn and Medium!
References
- YOLO v1 paper
- YOLO 9000 paper
- YOLO v3 paper
- YOLO v4 paper
- https://pjreddie.com/darknet/yolov1/
- Darknet
Object Detection is a computer vision task in which you build ML models to quickly detect various objects in images, and predict a class for them
For example, if I upload a picture of my pet dog to the model, it should output the probability that it detected a dog in the image, and a good model would show something along the lines of 99% Object Detection is a rapidly evolving field with research teams and scientists publishing thousands of interesting and intuitive research papers per year – each new paper improving upon its predecessor with increased accuracy and faster detection times.

But hey, we gotta start somewhere, right? In this article, I’ll show you how you can quickly start detecting objects in images of your own, using the YOLO v1 architecture on the Google Colab platform, in no time.
Did I mention you have free access to fast GPU computing power? Okay so let’s talk about the YOLO v1 model.
Note: Here is the notebook used in this article.
In 2014, Joseph Redmon and his team brought out the YOLO model for object detection in front of the world. Moreover, YOLO was designed to be a unified architecture in that. Unlike its predecessors, it would perform all the operations required in object detection (extracting features using CNNs, predicting bounding boxes around objects, scoring those bounding boxes using SVMs, etc.) using a single CNN model.
In addition, it would do this in real-time too. Models before YOLO didn’t have a high real-time detection speed. For example, Fast R-CNN, which claimed to be an improvement over the famous R-CNN model, only had a meager speed of 0.5 FPS (frames per second)
YOLO v1 not only has a speed of 45 FPS (90x faster than Fast R-CNN), it improves upon Fast R-CNN by making much less background false positive errors
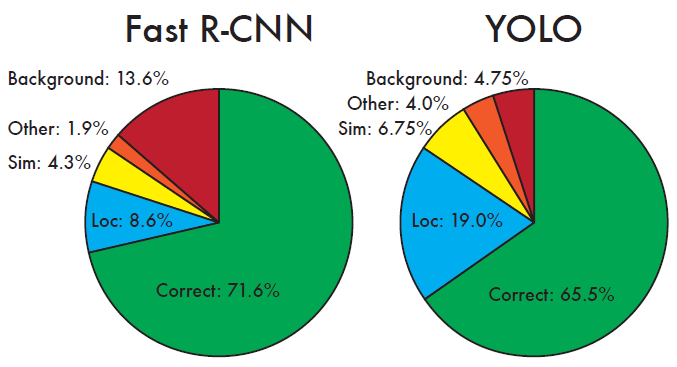
Comparison of YOLO v1 and Fast R-CNN on various error types (credits)
The following is the architecture of the YOLO v1 model-
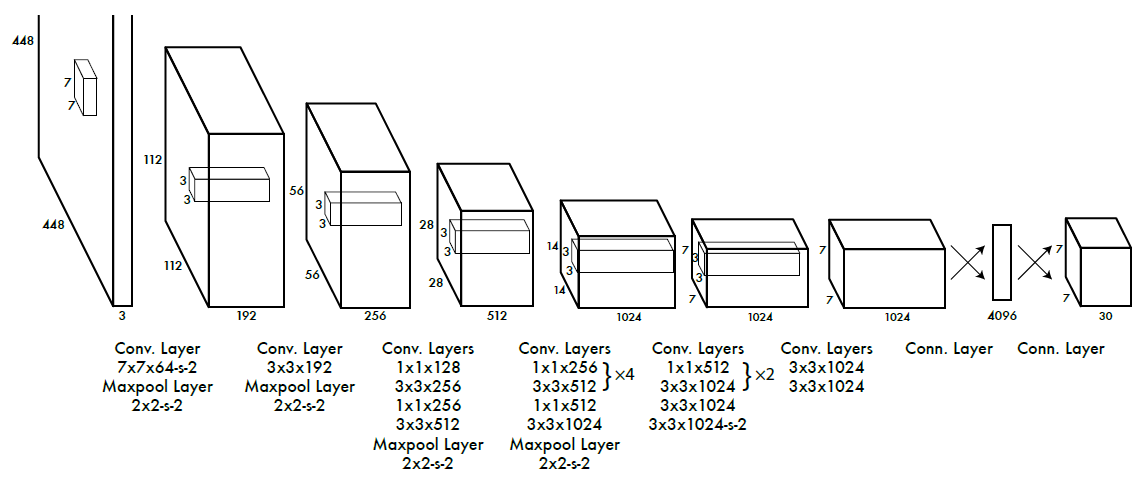 (credits)
💡 The model has 24 convolutional layers followed by 2 fully connected layers.
It takes in an input image of dimensions 224 x 224 and resizes it to 448 x 448 for the detection task. The output is a 7 x 7 x 30 tensor containing predictions which the model makes on the input image
Also, introduced in the same paper, Fast YOLO boasts of a blazingly quick real-time performance of 155 FPS. Even faster and more accurate versions of YOLO exist — YOLO 9000, YOLO v3, and the very recent YOLO v4
We’ll talk about the performance statistics of YOLO and its variants in future posts, let’s now get our hands dirty with YOLO v1 using Colab!
The following steps illustrate using if YOLO-
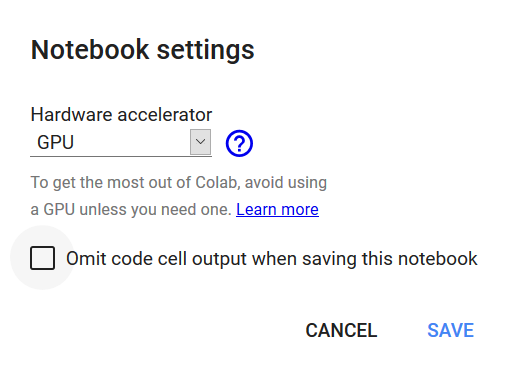
Firstly, let’s set our Colab runtime to use a GPU. You can do this by clicking on “Runtime”, then “Change Runtime type”, and choosing a GPU runtime
Darknet is a library created by Joseph Redmon which eases the process of implementing YOLO and other object detection models online, or on a computer system.
Further, on Colab, we install Darknet by first cloning the Darknet repository on Git, and changing our working directory to ‘darknet’ as follows
!git clone https://github.com/pjreddie/darknet.gitimport os
os.chdir("/content/darknet")
If the above steps work perfectly, you can see the contents of the folder by typing…
!ls
afterward, you should see the following-
cfg	  include	LICENSE.gen   LICENSE.mit  python     src
data	  LICENSE	LICENSE.gpl   LICENSE.v1   README.md
examples  LICENSE.fuck	LICENSE.meta  Makefile	   scripts
To install Darknet for our session, we fetch the Makefile and run the following
!sed -i 's/GPU=0/GPU=1/g' Makefile
!make
If you followed correctly till here, you should see something like this
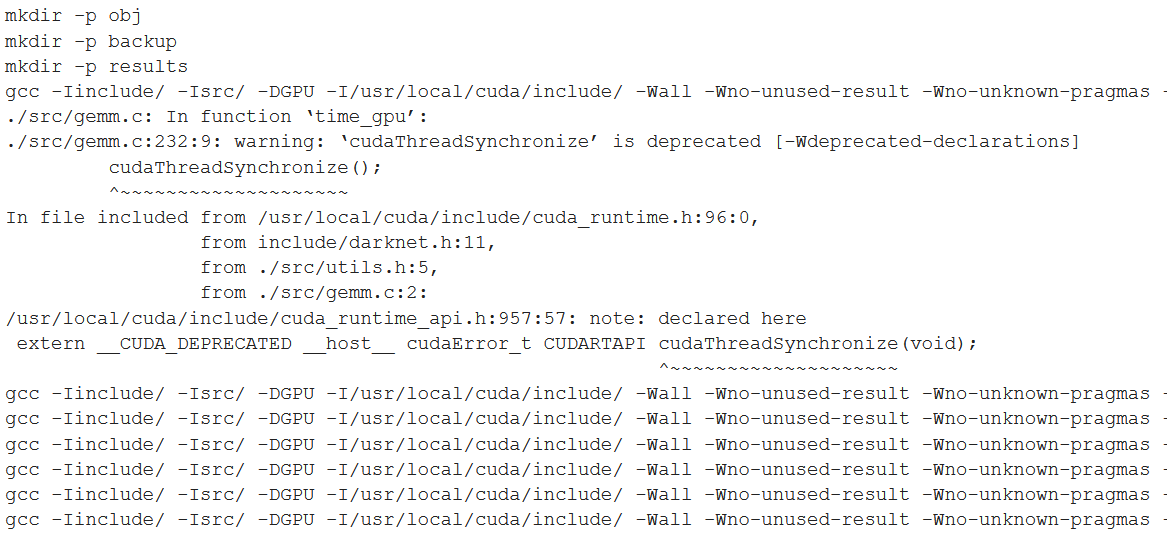
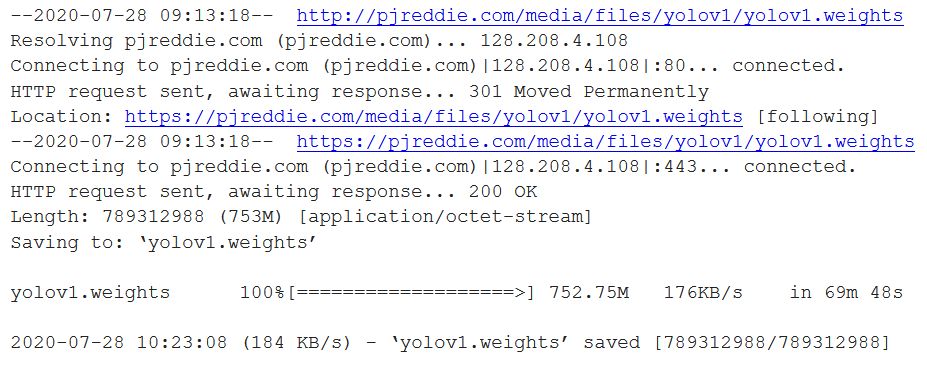
Then, we’ll download the YOLO v1 pre-trained model weights. We do this as follows —
NOTE: Depending on your internet connection, this should take a while, as it’s a 753 MB file. It took me around 70 minutes :/
!wget http://pjreddie.com/media/files/yolov1/yolov1.weights
The /content/darknet/data directory will have lots of images for you to play with. Let’s try dog.jpg first, this is what it looks like
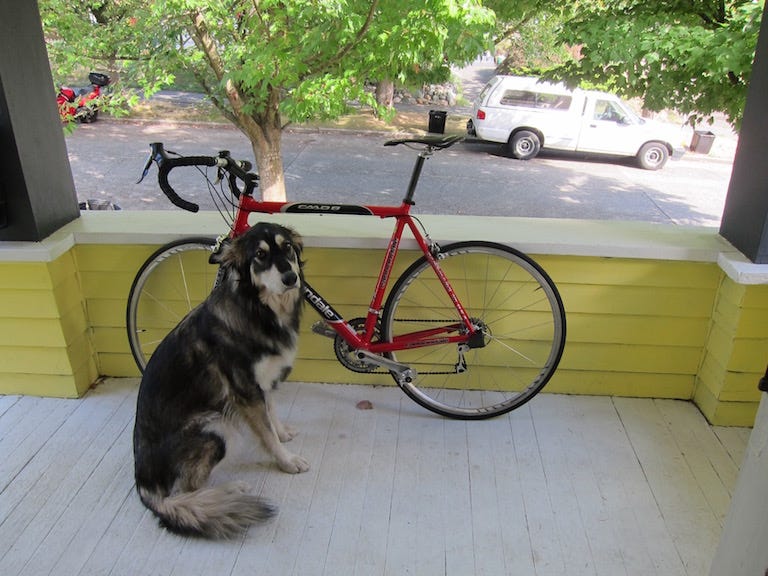
Let’s try and detect the objects in this image, and see what probabilities our model outputs
!./darknet yolo test /content/darknet/cfg/yolov1.cfg /content/yolov1.weights /content/darknet/data/dog.jpg
Consequently, you’ll see an output like this
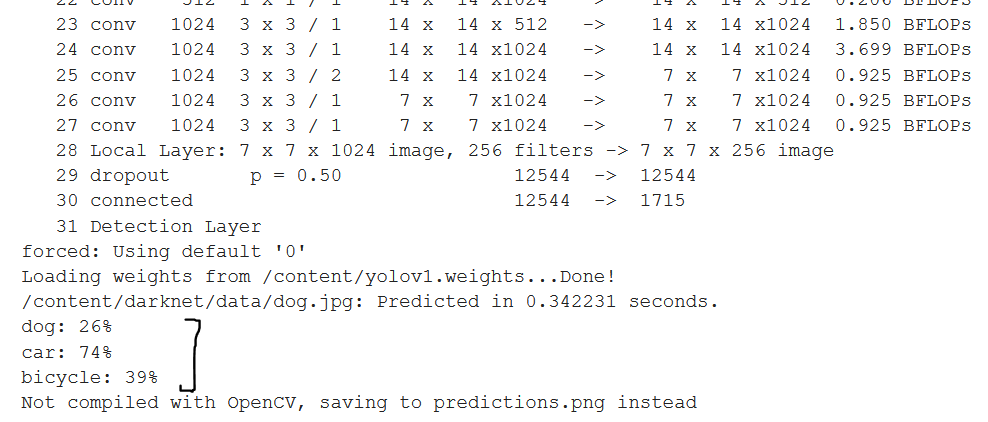
As you can see, our model detected a dog, a car, and a bicycle from the image with confidence scores of 26%, 74%, and 39% respectively.
The model saves the predictions to “predictions.jpg”, which you can view as follows
import cv2
import matplotlib.pyplot as plt
import os.pathfig,ax = plt.subplots()
ax.tick_params(labelbottom="off",bottom="off")
ax.tick_params(labelleft="off",left="off")
ax.set_xticklabels([])
ax.axis('off')file = '/content/darknet/predictions.jpg'if os.path.exists(file):
  img = cv2.imread(file)
  show_img = cv2.cvtColor(img, cv2.COLOR_BGR2RGB)
  plt.imshow(show_img)
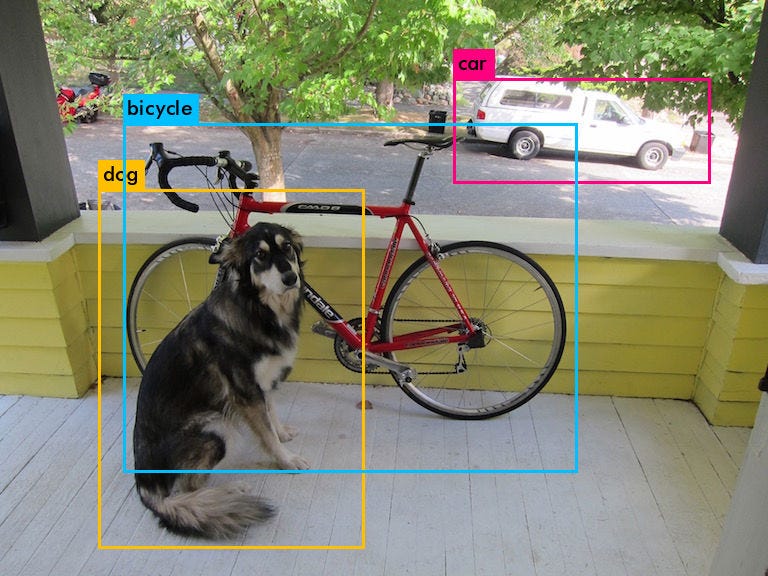
Awesome! You just made your first image detection using the YOLO v1 model. Let’s play some more.
We’ll try kite.jpg next
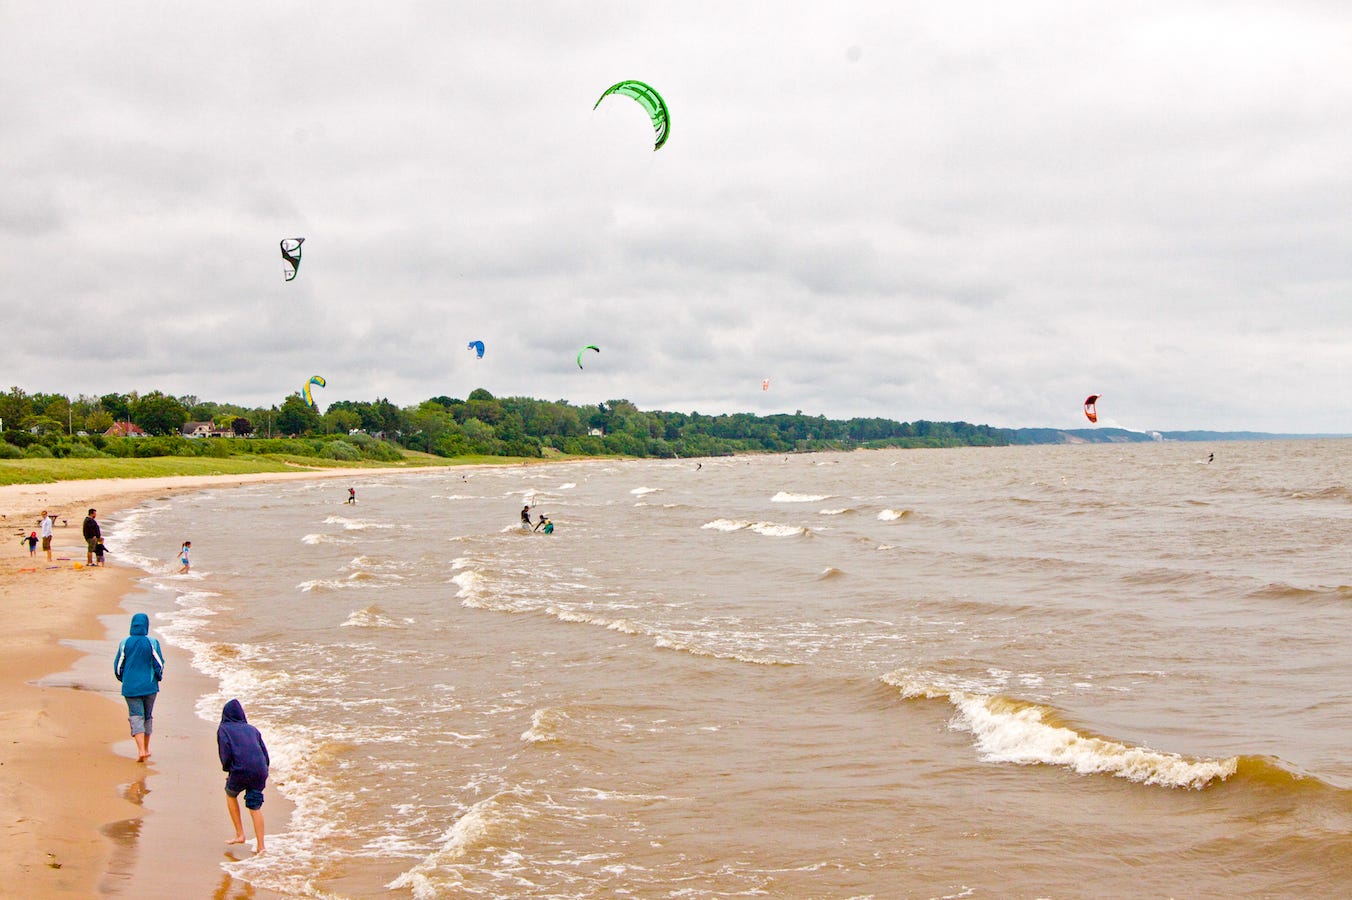
Let’s see what our model does on this one
!./darknet yolo test /content/darknet/cfg/yolov1.cfg /content/yolov1.weights /content/darknet/data/kite.jpgimport cv2
import matplotlib.pyplot as plt
import os.pathfig,ax = plt.subplots()ax.tick_params(labelbottom="off",bottom="off")
ax.tick_params(labelleft="off",left="off")
ax.set_xticklabels([])
ax.axis('off')file = '/content/darknet/predictions.jpg'if os.path.exists(file):
  img = cv2.imread(file)
  show_img = cv2.cvtColor(img, cv2.COLOR_BGR2RGB)
  plt.imshow(show_img)
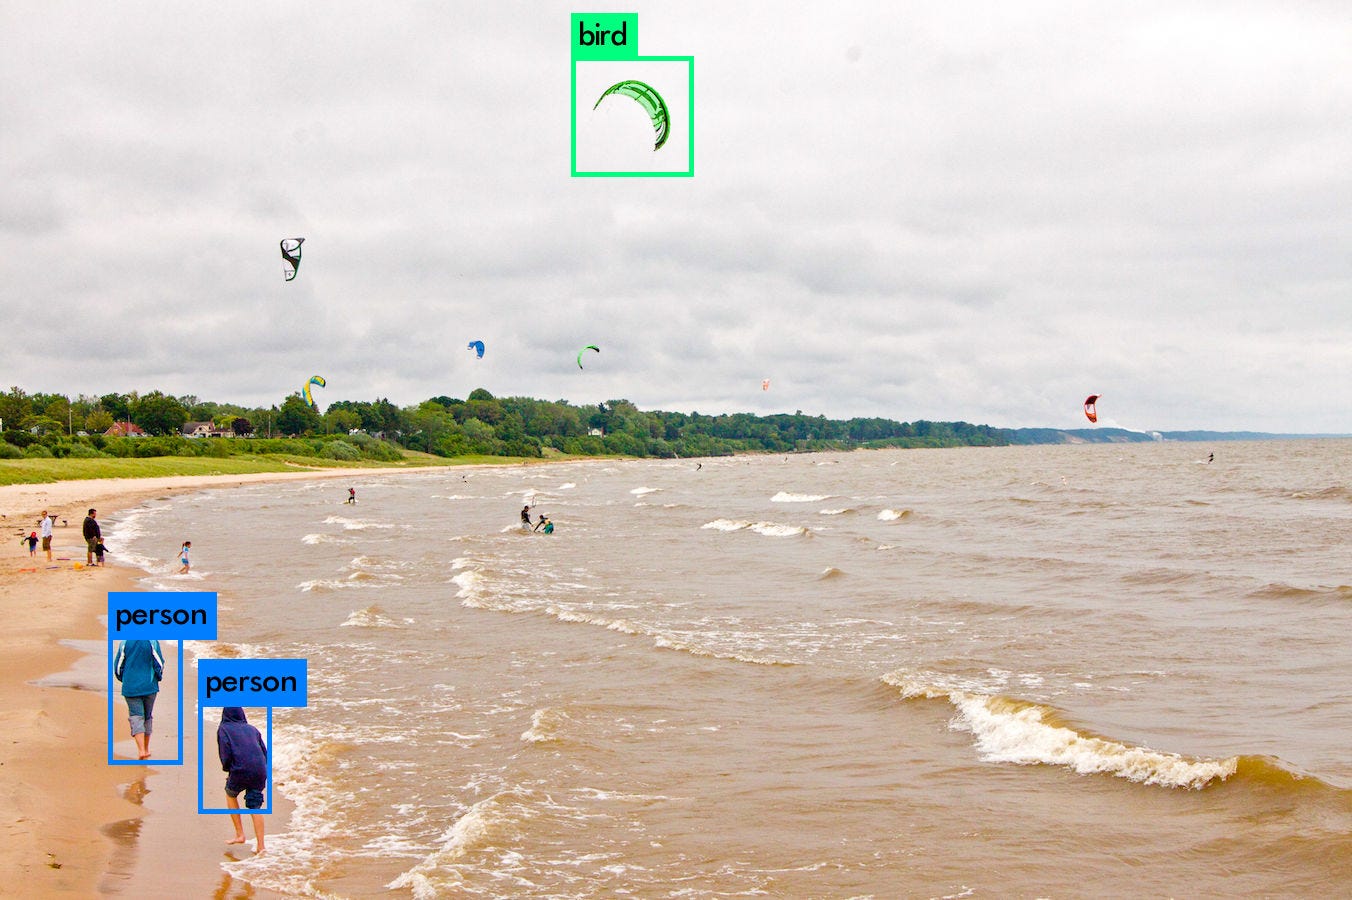
While it correctly detected 2 persons enjoying themselves on the beach, it mistook a glider for a bird.
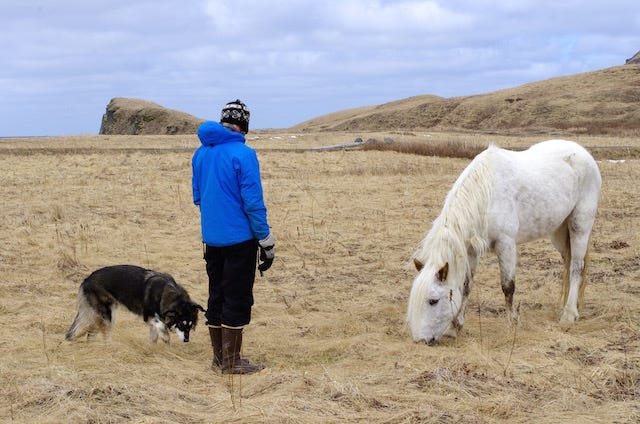
Then we have the following person.jpg-
Abracadabra
!./darknet yolo test /content/darknet/cfg/yolov1-tiny.cfg /content/darknet/tiny-yolov1.weights /content/darknet/data/person.jpg
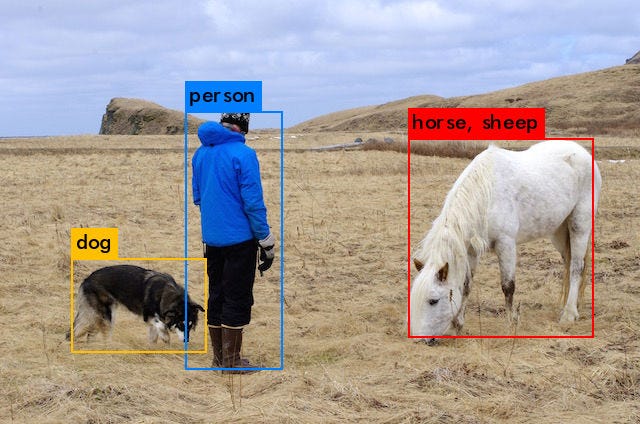
Dog, correct.
Person, correct.
Horse…and sheep? No model, it’s just Horse
In addition, along with YOLO v1, the authors also built a Fast YOLO model, which is designed to run at 155 FPS (more than 3 times faster than YOLO).
It also weighs considerably less — just 103 MB, compared to the 753 MB YOLO used.
This is partly because Fast YOLO has just 9 convolutional layers, instead of the 24 in YOLO, and those 9 layers use a lesser number of features.
To make detections using Fast YOLO, let’s download its weights
!wget http://pjreddie.com/media/files/yolov1/tiny-yolov1.weights
Let’s see what it does on person.jpg, whose objects YOLO didn’t quite correctly detect.
!./darknet yolo test /content/darknet/cfg/yolov1-tiny.cfg /content/darknet/tiny-yolov1.weights /content/darknet/data/person.jpgimport cv2
import matplotlib.pyplot as plt
import os.pathfig,ax = plt.subplots()ax.tick_params(labelbottom="off",bottom="off")
ax.tick_params(labelleft="off",left="off")
ax.set_xticklabels([])
ax.axis('off')file = '/content/darknet/predictions.jpg'if os.path.exists(file):
  img = cv2.imread(file)
  show_img = cv2.cvtColor(img, cv2.COLOR_BGR2RGB)
  plt.imshow(show_img)
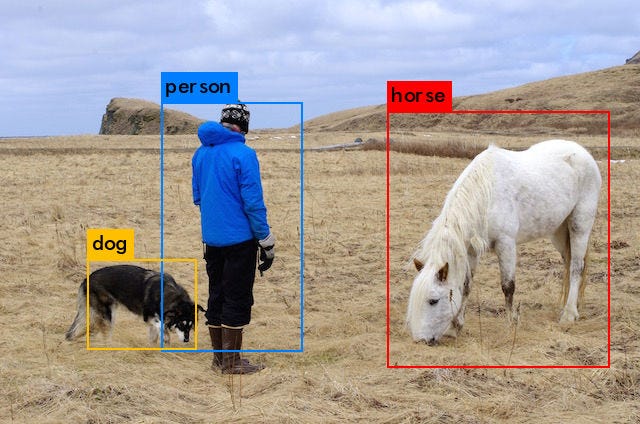
Wow. Fast YOLO did what YOLO couldn’t, and correctly detected the 3 objects along with their classes in the image.
Let’s upload a random image off the Internet and see what YOLO does on it. To upload any image to the Colab runtime, run the following code block
os.chdir("/content")from google.colab import files
uploaded = files.upload()
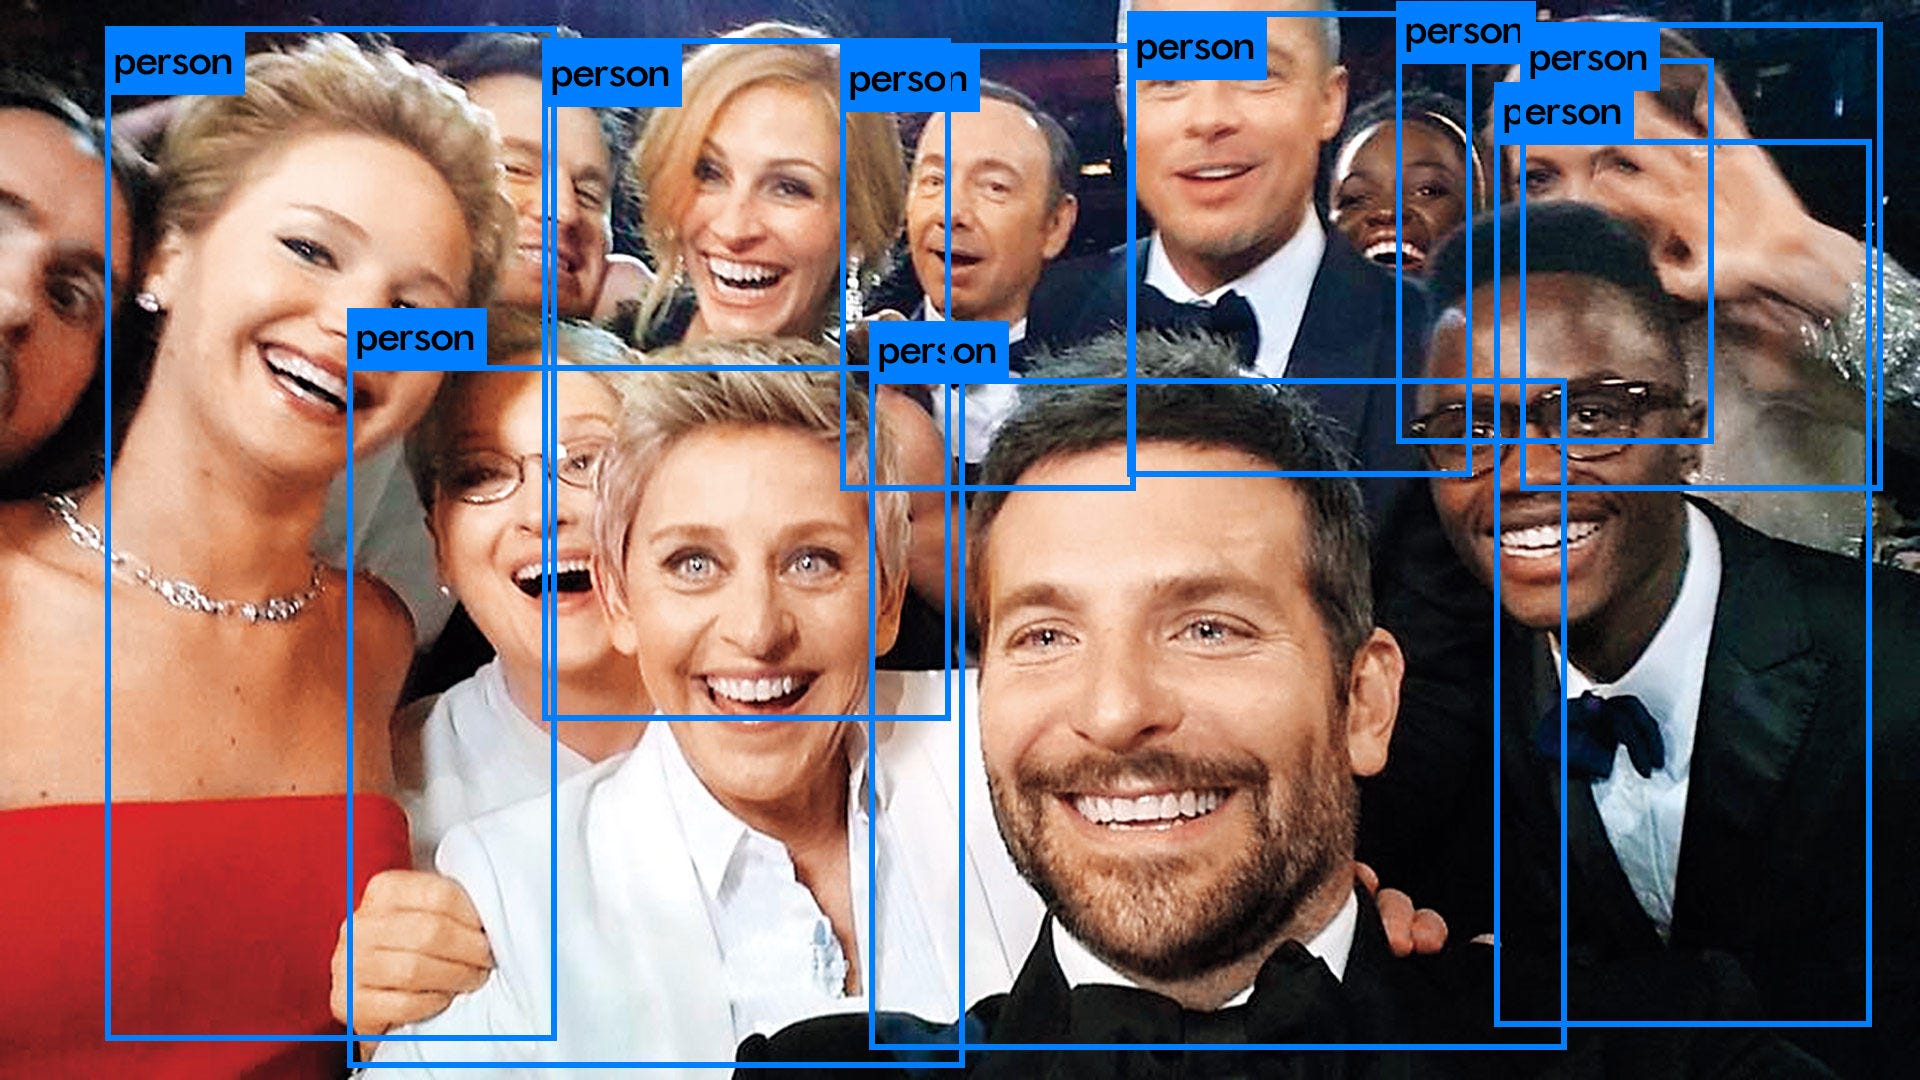
We use the following famous Oscar selfie-
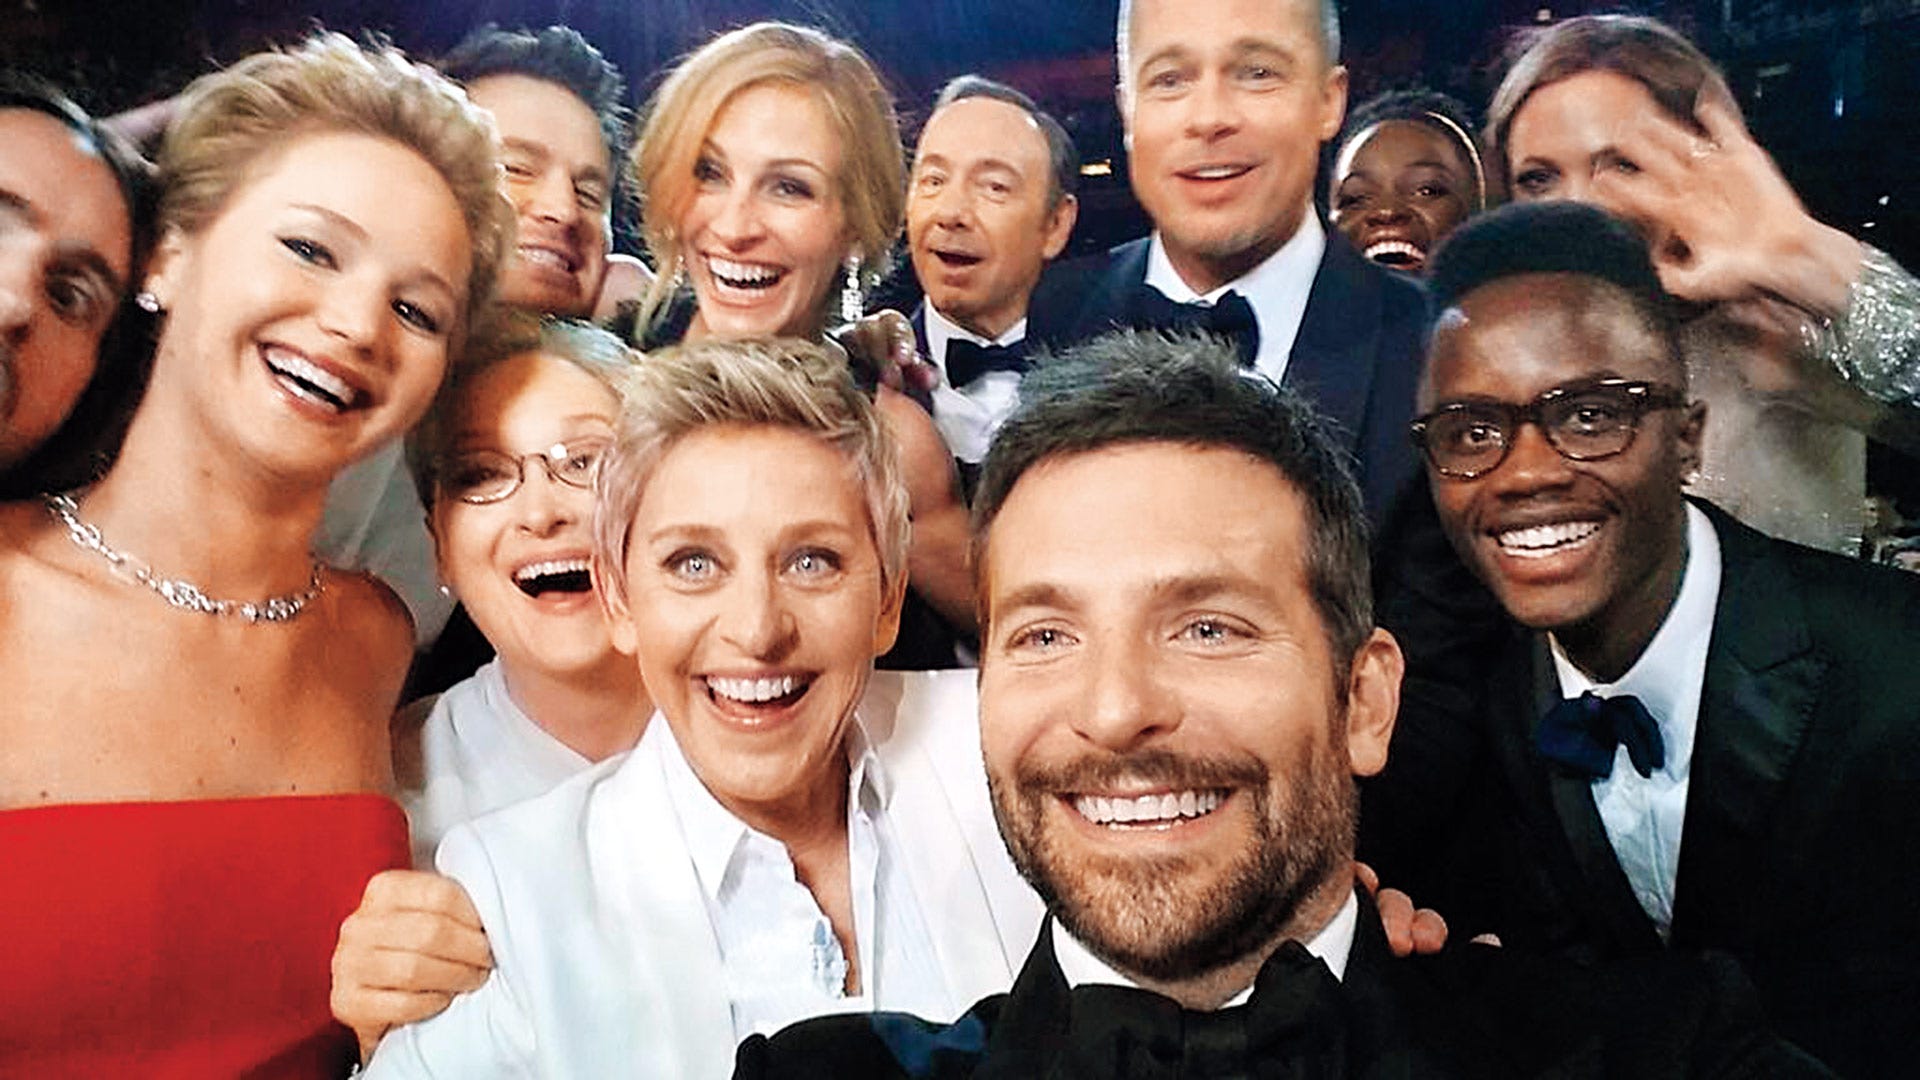 (credits)
And finally, when running on this image, we get the following output
os.chdir("/content/darknet/")!./darknet yolo test /content/darknet/cfg/yolov1-tiny.cfg /content/darknet/tiny-yolov1.weights /content/selfie.jpg
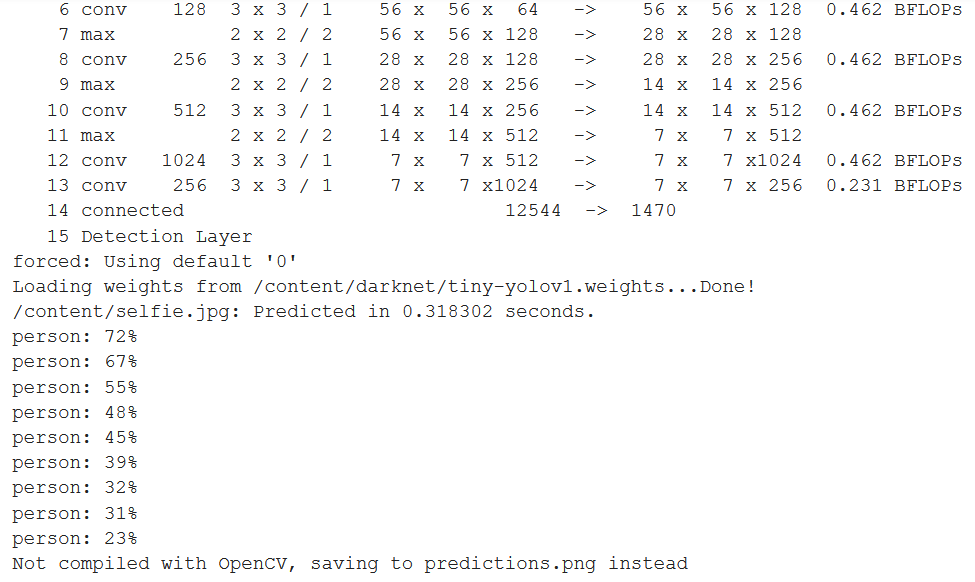
So we see, our model has identified 9 people from this image. Let’s view the detections

In conclusion, I hope you learned useful stuff from this article. For more articles (coming soon), follow me on LinkedIn and Medium!

Anamitra Musib – CS engineer
Prospective MS Data Science student. Loves Deep Learning, Computer Vision, and all that jazz
Lorem ipsum dolor sit amet, consectetur adipiscing elit,