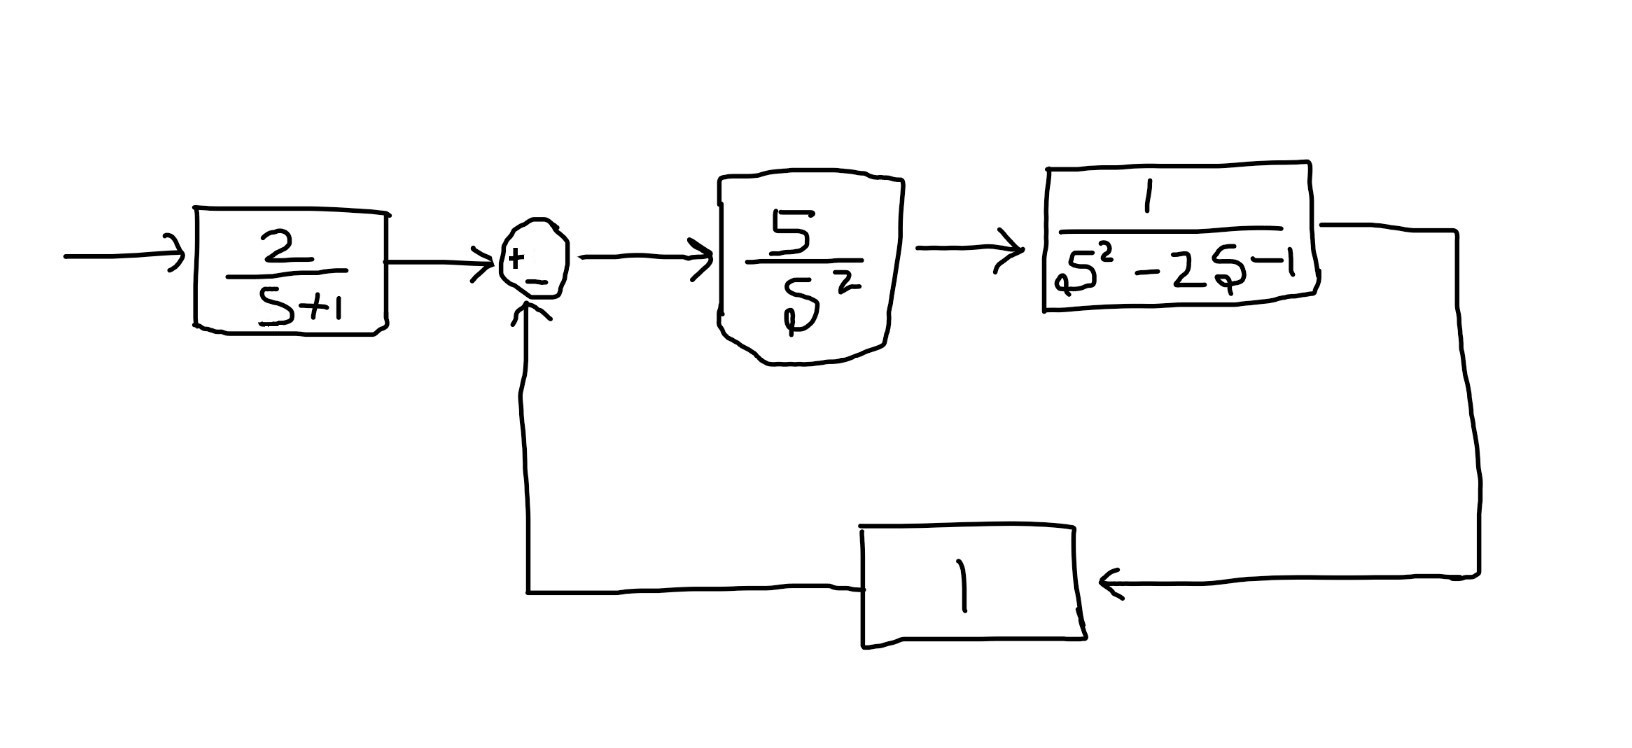
Hey Guys, This article is about computer vision with python in which we will be extracting enclosed figures from the hand-drawn images such as flow charts as shown below.
Broad Pipeline →
1. Binarization
2. Character and Noise Removal (Connected Component Analysis)
3. Filling
4. Rectangle Extraction
THEORY →
If you are in a hurry jump to the bottom of this article and copy the code. AND don’t forget to LIKE and COMMENT.
This tutorial will help you to get the location of all the enclosed figures from the given image. Once you get the location you can crop these figures and apply the Deep Learning model to get the text from these figures. In this way, you will extract text from the hand-drawn image.
If you have some predefined structure as we have in flowcharts from top to bottom or left to right. You can exploit that property to put text in the same format. or perform tasks accordingly.
1.a Given Sample Image
BINARIZATION →
The process of converting a multi-toneimage into a bi-tonal image (i.e. Black and White) is called Binarization.
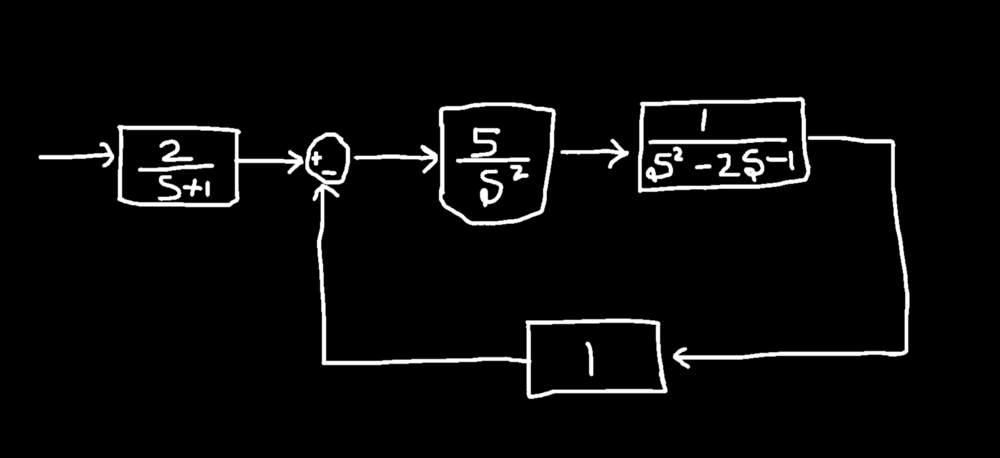
This technique is simple for images created in a computer with perfect pixel values of black and white like illustrated in 1.a. We have successfully binarized image 1.a to image 2.a below.
If you are using images clicked from a device you have to apply a different principle of thresholding. There are various techniques for thresholding in OpenCV. We are discussing only one here i.e.
Simple Thresholding –>
In this technique for every pixel, the same threshold value is applied. If the pixel value is smaller than the threshold, it is set to 0, otherwise, it is set to a maximum value (For our case it is 255).
DEEP DIVE IN OPENCV –> The function cv.threshold is used to apply the thresholding. The first argument is the source image, which should be a grayscale image. The second argument is the threshold value which is used to classify the pixel values. The third argument is the maximum value which is assigned to pixel values exceeding the threshold.
Reason for binarization (Suggestion: Come here after you read steps 2 and 3)→ We are binarizing our image so that our further processing in step2 and step3 of the above pipeline can become easy. Applying morphological fill algorithms to multi-tone images is quite hard and inefficient as compared to bi-tonal images.
2.a. Binarized Image
Character and Noise Removal →
As the name suggests in this part we are going to remove all the unnecessary data irrelevant for our figure detection such as background noise (caused due to lighting condition of the environment), which could be rough lines or dots. This part is a little bit tricky as if your figure is not enclosed then python will not be able to identify it properly. But yes you can fill small openings in your images by using dilation. Dilation → It is the process in which we broaden the edges or increase our image area.
** Dilation is not important when you have properly created figures.
Dilation –> Here a pixel element is ‘1’ if at least one pixel under the kernel is ‘1’. So it increases the white region in the image or the size of foreground object increases. Normally, in cases like noise removal, erosion is followed by dilation. Because, erosion removes white noises, but it also shrinks our object. So we dilate it. Since the noise is gone, our object area increases. It is also useful in joining broken parts of an object.
DEEP DIVE IN OPENCV –> cv2.dilate( img , kernel , iterations)
kernel –> a matrix of odd size
iterations –> how much you want to dilate
Connected Component Analysis →
It is a subpart to noise removal. In this step, we will be gaining only important information about enclosed figures from our image. This step is important as there is much unnecessary information for the detection of boxes such as characters, arrows, operators.
So we will be removing them and only attaining those figures which are imp.
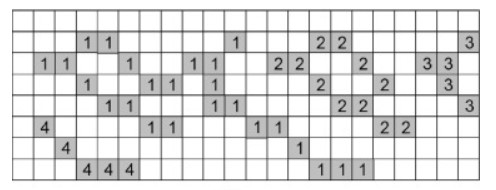
Connected Components –> these are the group of values in our image matrix which are the same.
In the above image we have 4 connected components (assuming black boxes have value in the matrix and white boxes have no value)
In Connected Component Analysis we are trying to obtain the total number of connected components that our image holds with their respective sizes. Once we gain this information we try to compare the size of these components with our threshold size in below described fashion
If calculated_size > threshold_size –> candidate
else: noise / remove()
We require this comparison to remove characters, arrows, and other connected components which do not provide meaning to our result.
Here in figure 3. we got certain arrows this happened because of two main reasons –>
1. Their size might be above threshold_size
2. They might be connected to some candidate figure. (We will be dealing with this in the next step)
DEEP DIVE IN OPENCV –>
nb_components, output, stats, centroids = cv.connectedComponentsWithStats(given_image, connectivity=8)
nb_components –> number of components found in given image
stats –> information like size of components is stored here
3.a. Noise Removed Image
Filling →
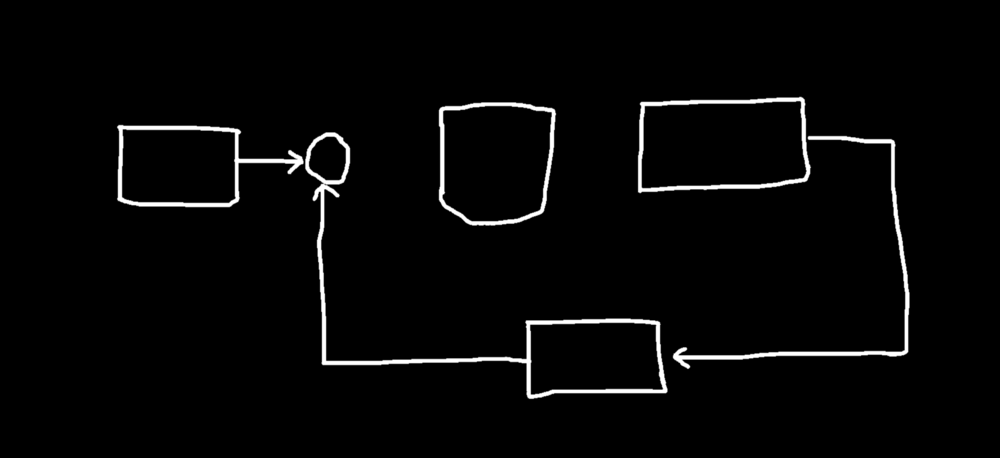
In this step, we will be filling our enclosed images with boundary color (white for our case). We will be using a morphological fill algorithm on the previously obtained image. We are using floodfill algorithm (You can also use some other) which can be understood as something similar to the bucket tool in Paint. Basically in this algorithm we pick a random point inside our component and fill all the surrounding pixels if they are not already colored, we continue to do this activity until all the pixels are colored. You can read about Floodfill –> HERE and HERE
This step was essential as it has removed all the unwanted arrows, lines and we are only left with our candidate figures.
DEEP DIVE IN OPENCV –>
retval, image, mask, rect=cv.floodFill(image, mask, seedPoint, newVal)
image –> image obatined from previous step
mask –> empty image of same size as given image
seedPoint –> starting point ( here (0,0) )
newVal –> new value to be filled ( here 255 )
POINTS TO KEEP IN MIND –> you need to know how many channels you are using and according to it, you should apply this algorithm.
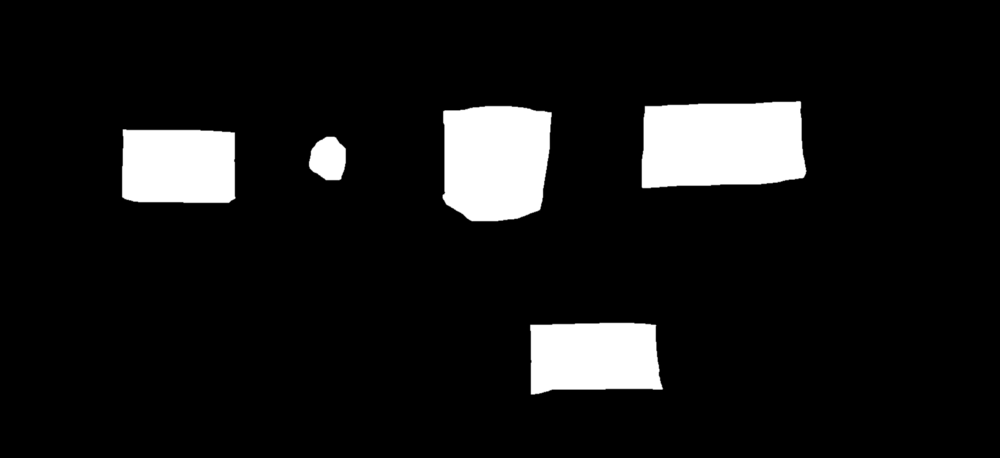
4.a. Flood Filled Image
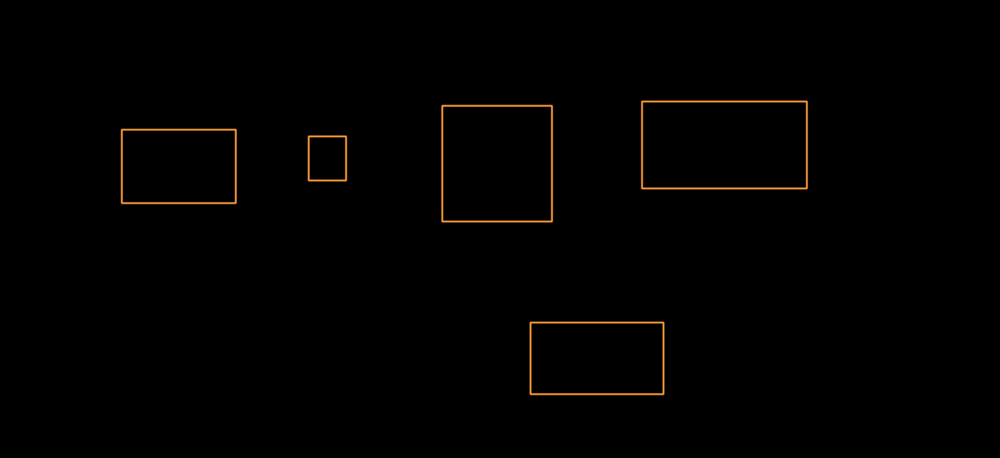
Enclosed Figure Extraction →
This is the last and longest coding step.
Till this step, we have filled all our candidate figures and removed all the noise so that we can easily apply the edge detection algorithm and obtain the location/coordinate for useful blocks.
Once we get the coordinates we can perform any operation like creating a bounding box or cropping the figure and extracting text from it using Text Recognition.
We are using Canny Edge Detection for edge detection. It is a multi-stage algorithm with low error rates. This is a simple and straightforward algorithm so if you are interested, You can read in-depth from Here. For sake of the word limit, I have omitted describing it here.
DEEP DIVE IN OPENCV –> For canny edge detection –> cv.Canny(given_img, threshold, threshold * 2) For countours –> contours, _ = cv.findContours(image,mode,method[, contours[, hierarchy[, offset]]] )
I am an enthusiastic experimenting programmer trying to learn and implement ways of python. I write what I do. I believe in implementing first and writing next. To make my viewers comfortable with my articles I try to keep them simple and reply to their queries really fast (You can try this). To know more about me you can surely ping me up and we might end up experimenting something cool with python.


Excellent work 👌! This blog helpful for my final year project. Great work @R-Sajal