This article was published as a part of the Data Science Blogathon
Introduction:
The ML models or machine learning models have been widely implemented across various industries for a specific business purpose in recent years and this trend is expected to continue in the future as well. As a result of this, a new set of challenges come to the fore.
For eg: ML models will have to be tracked regularly to ensure that model’s performance doesn’t dip, if the ML model is tightly coupled with the application then there are chances of application getting impacted due to frequent changes to the models or in some cases additional data such as transactional, sensor or log data are brought in to improve the model’s performance. One logical way to handle such scenarios is by de-coupling the model from the application.
In web development, various components are developed and built independently as services and each of these services interact with each other sharing the data in the defined format.
To add more, these components may be developed in different technologies and hosted on different servers. Taking a cue from this, can we build models as a service that takes input in a defined structure and gives out model results that can be consumed by external applications or other services for further processing?
Yes, we can by using APIs (Application Programming Interface) and we will explore more on this article with a use case.
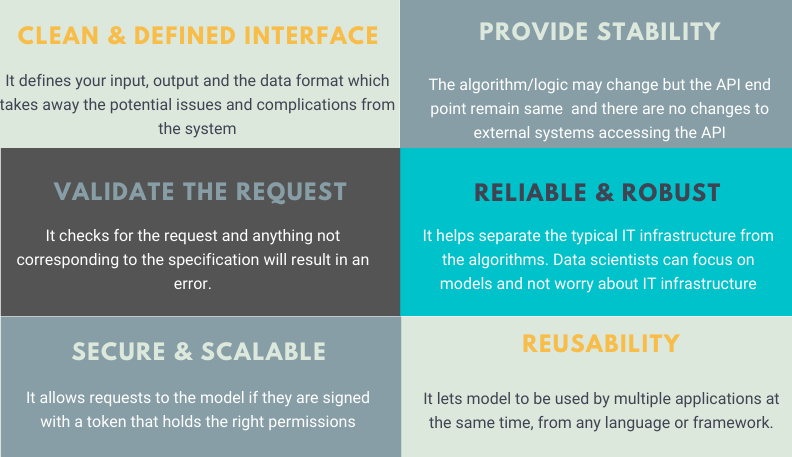
Benefits of using API:
Creating a simple web API using Flask:
The following code demonstrates Flask’s minimality in a nice way. The code is used to create a simple Web-API which upon receiving a particular URL produces a specific output.
from flask import Flask

app = Flask(__name__)

@app.route("/")
def hello():
    return "Our minimalistic API using Flask !!"

if __name__ == '__main__':
    app.run(debug=True)
Once executed, you can navigate to the browser with the URL: http://localhost:5000 and observe the result.
Creating an API from an ML model using Flask:
Now that you have a fair idea of what APIs are, let’s see how you can wrap a machine learning model (developed in Python) into an API in Python.
I will use the Breast Cancer Wisconsin (Diagnostic) Data Set. The objective of this ML project is to predict whether a person has a benign or malignant tumor. I will be using VSCode as my editor and note that we will be testing our service right within VSCode editor using Thunder Client.
Let’s get started !!
- We will first build our classification model – KNeighborsClassifier()
- Build our server file which will have logic for API in Flask framework.
- Finally, we will test our service with Thunder Client in VSCode.
Step 1: Classification Model
Load the libraries:
import pandas as pd
import numpy as np
from sklearn.model_selection import train_test_split
from sklearn.neighbors import KNeighborsClassifier
import pickle
import os
import yaml
Building a config file:
The config file is used to make the model building lifecycle more flexible and also helps in experimenting with various parameters during the fine-tuning stages without modifying the main code.
#INITIAL SETTINGS
data_directory: "./Data/"
data_name: "breast-cancer-wisconsin.csv"
drop_columns: ["id","Unnamed: 32"]
target_name: "diagnosis"
test_size: 0.3
random_state: 123
model_directory: "./Model"
model_name: KNN_classifier.pkl
#kNN parameters
n_neighbors: 3
weights: uniform
algorithm: auto
leaf_size: 15
p: 2
metric: minkowski
n_jobs: 1
Load the config file:
# folder to load config file
CONFIG_PATH = "../Configs"
# Function to load yaml configuration file
def load_config(config_name):
    with open(os.path.join(CONFIG_PATH, config_name)) as file:
        config = yaml.safe_load(file)
    return config
config = load_config("config.yaml")
Data load and preprocessing:
#path to the dataset
filename = "../../Data/breast-cancer-wisconsin.csv"
#load data
data = pd.read_csv(filename)
#replace "?" with -99999
data = data.replace('?', -99999)
# drop id column
data = data.drop(config["drop_columns"], axis=1)
# Define X (independent variables) and y (target variable)
X = np.array(data.drop(config["target_name"], 1))
y = np.array(data[config["target_name"]])
Split the data set into train and test:
X_train, X_test, y_train, y_test = train_test_split(
    X, y, test_size=config["test_size"], random_state= config["random_state"])
Build model:
We will build a KNeighborsClassifier() model
# call our classifier and fit to our data
classifier = KNeighborsClassifier(
    n_neighbors=config["n_neighbors"],
    weights=config["weights"],
    algorithm=config["algorithm"],
    leaf_size=config["leaf_size"],
    p=config["p"],
    metric=config["metric"],
    n_jobs=config["n_jobs"],
)
# training the classifier
classifier.fit(X_train, y_train)
# test our classifier
result = classifier.score(X_test, y_test)
print("Accuracy score is. {:.1f}".format(result))
Save the model to disk:
We will use the pickle library to save the model in Models folders with the name KNN_model.pkl to the disk using the dump() function. Later in the server file, we will use the load() function to load the model into our environment for prediction.
# Saving model to disk
pickle.dump(classifier, open('../../Flask/Models/KNN_model.pkl','wb'))
Now that we have the model building completed let’s move on to building API with Flask framework. You can find the entire code model.py on Github
Step 2: Build API using Flask
Load the libraries: One of the main libraries in the Flask and we import request which is used to receive the incoming queries, jsonify is to convert to json format, the exchange of information between systems happen in the json format. Learn more about Flask
import numpy as np
from flask import Flask, request, jsonify
import pickle
import json
Create a Flask app object: We will create a Flask object by name app. You can name it anything but ensure it is consistent throughout the file.
# creating a Flask app
app = Flask(__name__)
Load the saved KNN model: We had saved our model to disk in our previous section under the Models folder. We will use the pickle library to load the model from the disk. In short, every time the service is called rather than building a model we simply load the pre-trained model and make the prediction.
# Load the model
model = pickle.load(open('../../Flask/Models/KNN_model.pkl','rb'))
Write a routing function and return the Json: We will create a POST request and an end point “/Predict” and in the end return a json object.
@app.route('/predict', methods = ['POST'])
def pred():
    # Get the data from the POST request.
    data = request.get_json(force=True)
    varList = []
    for val in data.values():
        varList.append(val)
    # Make prediction from the saved model
    prediction = model.predict([varList])
    # Extract the value
    output = prediction[0]
    #return the output in the json format
    return jsonify(output)
Write a driver function: The driver function mainly runs the service on port 81. If the port is already in use then it would throw an error saying the port is not available. In that case, switch to the available port.
# driver function
if __name__ == '__main__':
    app.run(debug = False, port = 81)
Putting it all together: Our server.py file will be as below. You can access the entire code from Github
import numpy as np
from flask import Flask, request, jsonify
import pickle
import json
# creating a Flask app
app = Flask(__name__)
# Load the model
# model = pickle.load(open('../Models/KNN_model.pkl','rb'))
model = pickle.load(open('../../Flask/Models/KNN_model.pkl','rb'))
@app.route('/predict', methods = ['POST'])
def pred():
    # Get the data from the POST request.
    data = request.get_json(force=True)
    varList = []
    for val in data.values():
        varList.append(val)
    # Make prediction from the saved model
    prediction = model.predict([varList])
    # Extract the value
    output = prediction[0]
    #return the output in the json format
    return jsonify(output)
# driver function
if __name__ == '__main__':
    app.run(debug = False, port = 81)
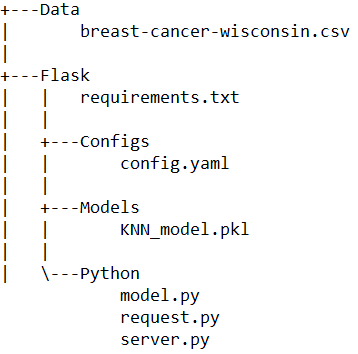
At this stage, our project folder structure is as below.
Let’s test the server.py file once before proceeding. In vscode, run the file and you should be able to see the below output in the terminal. Note the service is running on port 81 as we had defined.

Testing our API:
In our earlier section, we built a simple API where on hitting the http://localhost:5000 on browser we got an output message “Our minimalistic API using Flask”. This is fine as long as the output is simpler and there is input from the user or system is expected. But, we are building a model as a service where we send data as input for the model to predict. In such a case, we will need a better to and easier way to test it.
A good programmer is someone who looks both ways before crossing a one-way street – Doug Linder
We will explore two approaches one using request.py and the other using Thunder Client.
Using request.py:
We will create a json file with all the variables and respective values to be fed into the model for prediction.
Step 1: Run the server.py file in a terminal so that it can take our requests and return the predicted output.
Step 2: Run the request.py in the other terminals. The output should be either M or B and the result will be printed in the vscode terminal. Let’s try this.
import requests
url = 'http://127.0.0.1:81/predict'
r = requests.post(url,json={
  "radius_mean": 13.54,
  "texture_mean": 14.36,
  "perimeter_mean": 87.46,
  "area_mean": 566.3,
  "smoothness_mean": 0.09779,
  "compactness_mean": 0.08129,
  "concavity_mean": 0.06664,
  "concave points_mean": 0.04781,
  "symmetry_mean": 0.1885,
  "fractal_dimension_mean": 0.05766,
  "radius_se": 0.2699,
  "texture_se": 0.7886,
  "perimeter_se": 2.058,
  "area_se": 23.56,
  "smoothness_se": 0.008462,
  "compactness_se": 0.0146,
  "concavity_se": 0.02387,
  "concave points_se": 0.01315,
  "symmetry_se": 0.0198,
  "fractal_dimension_se": 0.0023,
  "radius_worst": 15.11,
  "texture_worst": 19.26,
  "perimeter_worst": 99.7,
  "area_worst": 711.2,
  "smoothness_worst": 0.144,
  "compactness_worst": 0.1773,
  "concavity_worst": 0.239,
  "concave points_worst": 0.1288,
  "symmetry_worst": 0.2977,
  "fractal_dimension_worst": 0.07259
})
print(r.json())
You should be able to see the output as B as in “benign” in the vscode terminal.
Using Thunder Client:
There are tools like Postman, Swagger, etc. which are very popular and I have been using them for a long time. One of the issues that I face is constantly switching between the postman (test result output) and vscode (code) window. I was looking for a tool that would be used within the vscode to make life easier and Thunder Client just does that.
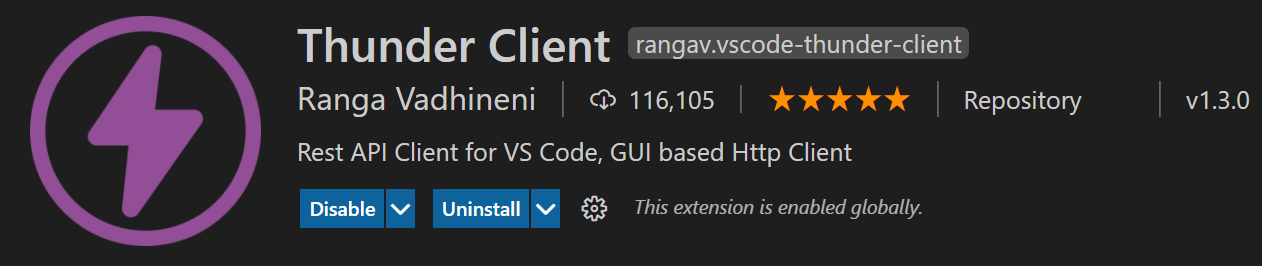
Let’s use Thunder Client – Hand-crafted lightweight Rest Client for Testing APIs. Please navigate to extensions and install the thunder client. Here is the snapshot.
Step 1: Run the server.py file in vscode.
Step 2: Press ctrl + shift + p and select the Thunder Client: New Request
Step 3: Enter relevant details as shown below and click send. The output from the model can be seen in the response tab which in this specific case is “B“
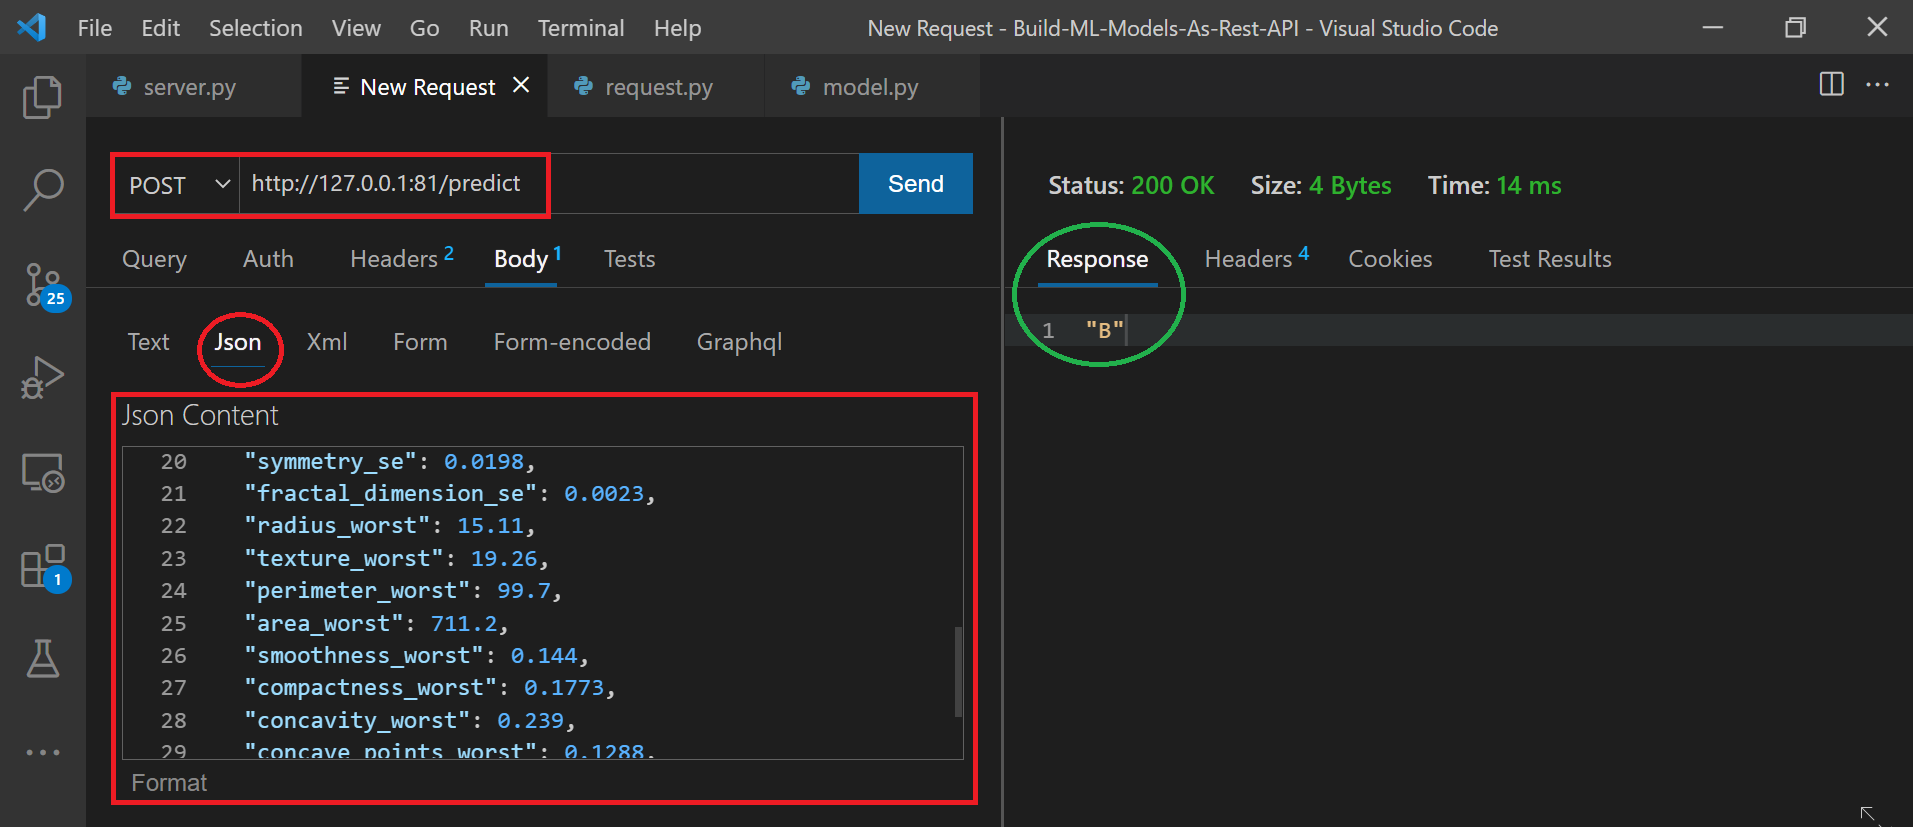
Step 4: Keep changing the value in json and hit send to see the output in the Response tab on the right panel.
Closing Note:
We built a very simple classification model and converted that into a service using the Flask framework. Some of the other frameworks that can be used are Django, FastAPI, Azure, etc. I hope this article was useful and you learned something new.
You can connect with me – Linkedin
You can find the code for reference – Github
References:
https://www.thunderclient.io/
https://marketplace.visualstudio.com/items?itemName=rangav.vscode-thunder-client
https://unsplash.com/
The media shown in this article are not owned by Analytics Vidhya and is used at the Author’s discretion.
I am a Data Science enthusiast with experience in building predictive models, data processing, and data mining algorithms to solve challenging business problems. Involved in open source community and passionate about building data apps.


