This article was published as a part of the Data Science Blogathon
Dimensionality Reduction
Dimensionality Reduction is the process of reducing the number of dimensions in the data either by excluding less useful features (Feature Selection) or transform the data into lower dimensions (Feature Extraction). Dimensionality reduction prevents overfitting. Overfitting is a phenomenon in which the model learns too well from the training dataset and fails to generalize well for unseen real-world data.
Types of Feature Selection for Dimensionality Reduction,
- Recursive Feature Elimination
- Genetic Feature Selection
- Sequential Forward Selection
Types of Feature Extraction for Dimensionality Reduction,
- AutoEncoders
- Principal Component Analysis (PCA)
- Linear Determinant Analysis (LDA)
In this post, let us elaborately see about AutoEncoders for dimensionality reduction.
AutoEncoders
AutoEncoder is an unsupervised Artificial Neural Network that attempts to encode the data by compressing it into the lower dimensions (bottleneck layer or code) and then decoding the data to reconstruct the original input. The bottleneck layer (or code) holds the compressed representation of the input data.
In AutoEncoder the number of output units must be equal to the number of input units since we’re attempting to reconstruct the input data. AutoEncoders usually consist of an encoder and a decoder. The encoder encodes the provided data into a lower dimension which is the size of the bottleneck layer and the decoder decodes the compressed data into its original form.
The number of neurons in the layers of the encoder will be decreasing as we move on with further layers, whereas the number of neurons in the layers of the decoder will be increasing as we move on with further layers. There are three layers used in the encoder and decoder in the following example. The encoder contains 32, 16, and 7 units in each layer respectively and the decoder contains 7, 16, and 32 units in each layer respectively. The code size/ the number of neurons in bottle-neck must be less than the number of features in the data.
Before feeding the data into the AutoEncoder the data must definitely be scaled between 0 and 1 using MinMaxScaler since we are going to use sigmoid activation function in the output layer which outputs values between 0 and 1.
When we are using AutoEncoders for dimensionality reduction we’ll be extracting the bottleneck layer and use it to reduce the dimensions. This process can be viewed as feature extraction.
The type of AutoEncoder that we’re using is Deep AutoEncoder, where the encoder and the decoder are symmetrical. The Autoencoders don’t necessarily have a symmetrical encoder and decoder but we can have the encoder and decoder non-symmetrical as well.
Types of AutoEncoders available are,
- Deep Autoencoder
- Sparse Autoencoder
- Under complete Autoencoder
- Variational Autoencoder
- LSTM Autoencoder
Hyperparameters of an AutoEncoder
- Code size or the number of units in the bottleneck layer
- Input and output size, which is the number of features in the data
- Number of neurons or nodes per layer
- Number of layers in encoder and decoder.
- Activation function
- Optimization function
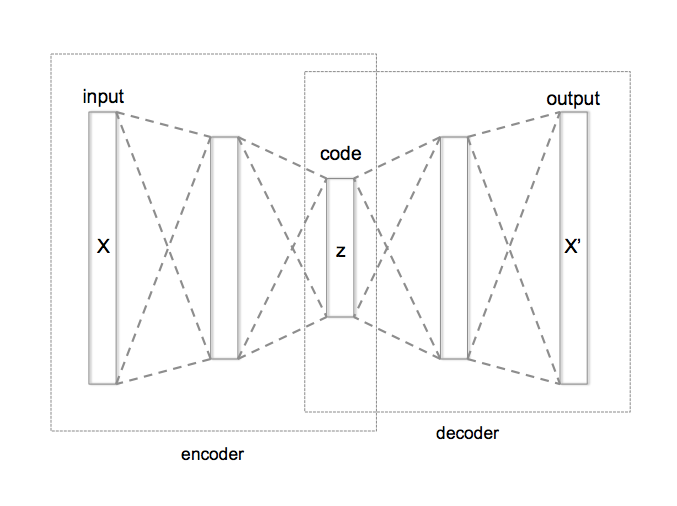
Source: https://commons.wikimedia.org/wiki/File:Autoencoder_structure.png
Applications of AutoEncoders
- Dimensionality reduction
- Anomaly detection
- Image denoising
- Image compression
- Image generation
In this post let us dive deep into dimensionality reduction using autoencoders.
Dimensionality Reduction using AutoEncoders
Import the required libraries and split the data for training and testing.
import math
import pandas as pd
import tensorflow as tf
import kerastuner.tuners as kt
import matplotlib.pyplot as plt
from tensorflow.keras import Model
from tensorflow.keras import Sequential
from sklearn.preprocessing import StandardScaler
from tensorflow.keras.layers import Dense, Dropout
from sklearn.model_selection import train_test_split
from tensorflow.keras.losses import MeanSquaredLogarithmicError

# data in google colab
TRAIN_DATA_PATH = '/content/sample_data/california_housing_train.csv'
TEST_DATA_PATH = '/content/sample_data/california_housing_test.csv'
TARGET_NAME = 'median_house_value'

train_data = pd.read_csv(TRAIN_DATA_PATH)
test_data = pd.read_csv(TEST_DATA_PATH)

x_train, y_train = train_data.drop(TARGET_NAME, axis=1), train_data[TARGET_NAME]
x_test, y_test = test_data.drop(TARGET_NAME, axis=1), test_data[TARGET_NAME]
Scale the dataset using MinMaxScaler.
from sklearn.preprocessing import MinMaxScaler

def scale_datasets(x_train, x_test):
  """
  Standard Scale test and train data
  """
  standard_scaler = MinMaxScaler()
  x_train_scaled = pd.DataFrame(
      standard_scaler.fit_transform(x_train),
      columns=x_train.columns
  )
  x_test_scaled = pd.DataFrame(
      standard_scaler.transform(x_test),
      columns = x_test.columns
  )
  return x_train_scaled, x_test_scaled

x_train_scaled, x_test_scaled = scale_datasets(x_train, x_test)
Train the autoencoder with the training data.
class AutoEncoders(Model):
def __init__(self, output_units):
super().__init__()
self.encoder = Sequential(
[
Dense(32, activation="relu"),
Dense(16, activation="relu"),
Dense(7, activation="relu")
]
)
self.decoder = Sequential(
[
Dense(16, activation="relu"),
Dense(32, activation="relu"),
Dense(output_units, activation="sigmoid")
]
)
def call(self, inputs):
encoded = self.encoder(inputs)
decoded = self.decoder(encoded)
return decoded
auto_encoder = AutoEncoders(len(x_train_scaled.columns))
auto_encoder.compile(
loss='mae',
metrics=['mae'],
optimizer='adam'
)
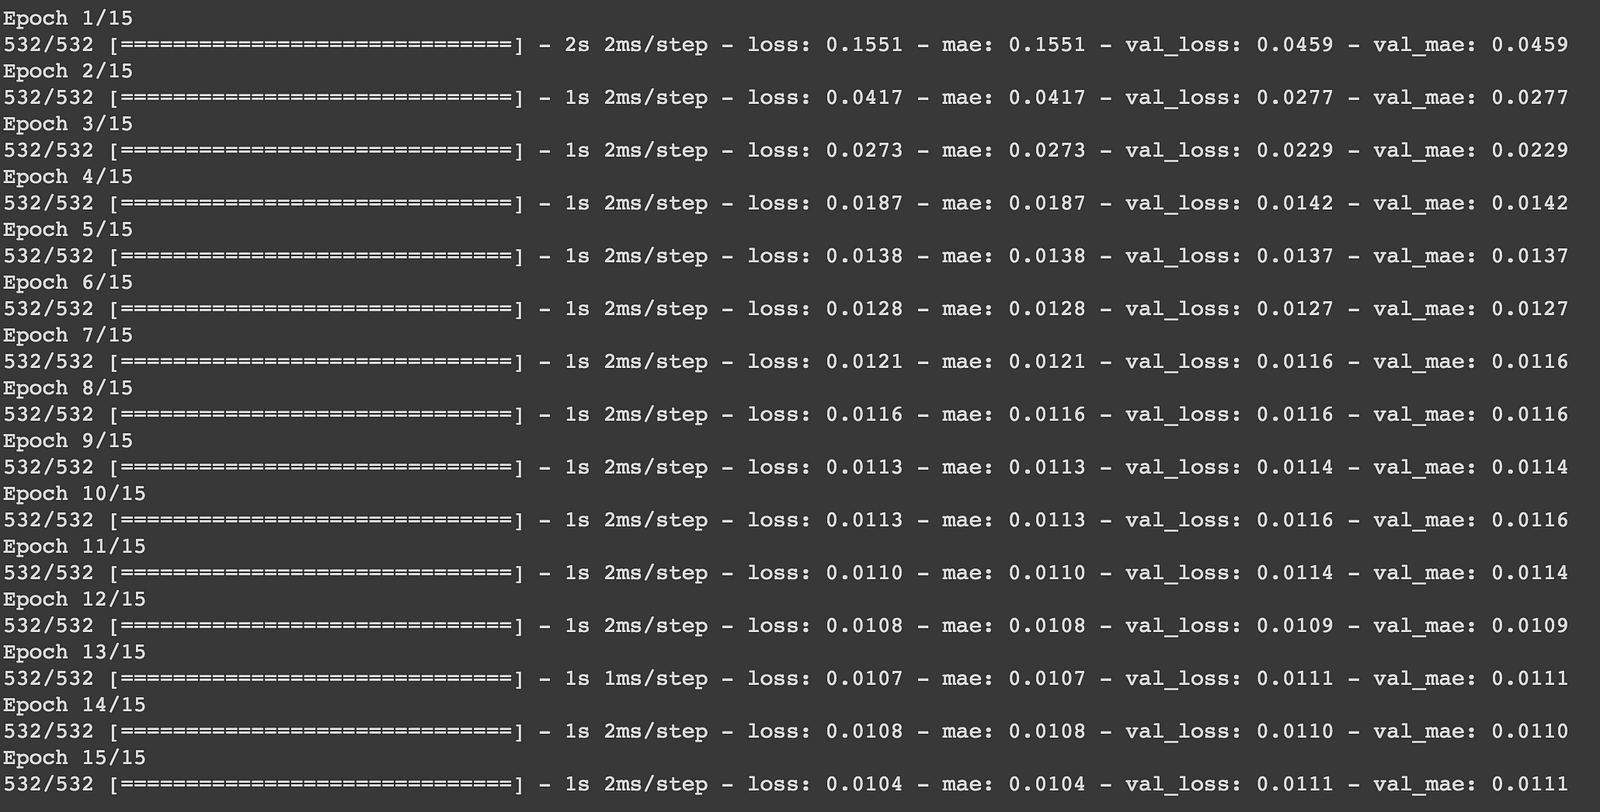
history = auto_encoder.fit(
x_train_scaled,
x_train_scaled,
epochs=15,
batch_size=32,
validation_data=(x_test_scaled, x_test_scaled)
)
Here we have defined the autoencoder model by subclassing the Model class in Tensorflow and we compile the AutoEncoder model with mean absolute error and adam optimization function. We split the data into batches of 32 and we run it for 15 epochs.
Get the encoder layer and use the method predict to reduce dimensions in data. Since we have seven hidden units in the bottleneck the data is reduced to seven features.
encoder_layer = auto_encoder.get_layer('sequential')
reduced_df = pd.DataFrame(encoder_layer.predict(x_train_scaled))
reduced_df = reduced_df.add_prefix('feature_')
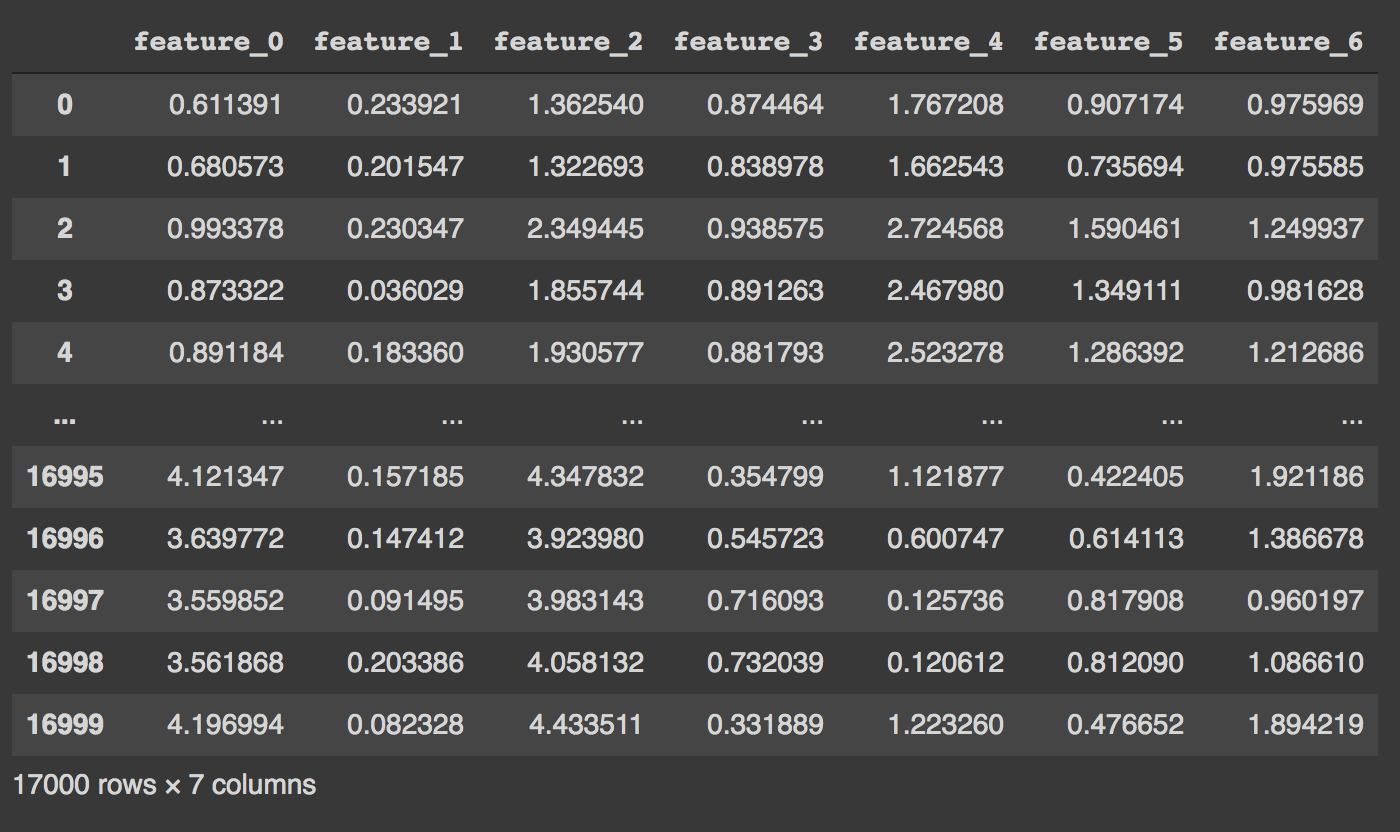
In this way, AutoEncoders can be used to reduce dimensions in data.
References
[1] Applications of Autoencoders [2] Intro to Autoencoders
Thank you!
The media shown in this article are not owned by Analytics Vidhya and are used at the Author’s discretion.
Srivignesh R
26 Oct, 2021
Machine Learning Engineer @ Zoho Corporation


The article is garbage. Every line breaks. The dataset is not included, and no pointer is given to where it can be found. When I hunt down the dataset, it contains 9 features not 32, so the NN breaks. The decoder definition references a variable that has not been assigned. When I give it the correct value (=7) then the order of the layers is wrong. When I fix that, it still breaks because dimensionality is wrong. And finally the layer to encode: encoder_layer = auto_encoder.get_layer('sequential') This breaks as well because the layer does not exist.
Sorry for my rude response earlier. I am up until 4AM tonight and very tired. There were a few bugs in your code, but I understand it better now, and I made my own mistakes! Thank you!
Hi there, I hope you are fine. Your code helped me a lot. I just want to take help in on the matter, that how to print the number of extracted features along with the name of those extracted features.
Hi there, I hope you are fine. Your code helped me a lot. I just want to take help in on the matter, that how to print the number of extracted features along with the name of those extracted features.
h it is really good explained. kindly if you can tell can we see which features are selected by autoencoder. does autoencoder returns the name of features it has selected? thanks
Suggestions - Never forget to add versions of packages you are using - Always add the link to data source