Learn How to Implement Face Recognition Using OpenCV with Python!
Pre-requisites
- Basic understanding of Image Classification
- Knowledge of Python and Deep Learning
- Conceptual understanding of various modules from deep learning
Introduction
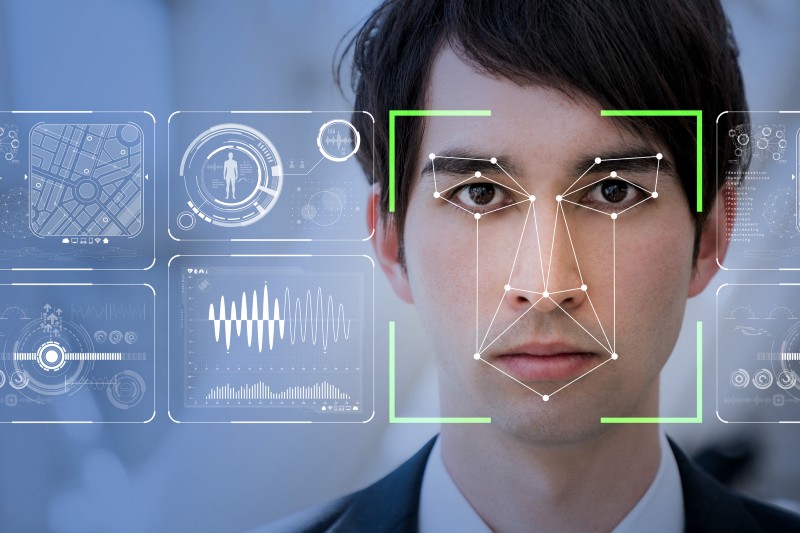
In this article, we are going to see what face recognition is. How is it different from face detection? We will understand briefly the theory of face recognition and then jump to the coding section!! At the end of this article, you can develop a face recognition program for recognizing faces in images!!!
Agenda of this Article
- Overview of Face Detection
- Overview of Face Recognition
- Understand what is OpenCV
- Implementation using Python

Table of contents
This article was published as a part of the Data Science Blogathon
Overview of Face Detection
What if the machine can detect objects automatically in an image without human involvement? Let us see: Face detection can be such a problem where we detect human faces in an image. There might be slight differences in human faces, but after all, it is safe to say that specific features are associated with all human faces. Various face detection algorithms are available, but the Viola-Jones algorithm is the oldest method that is still used today.
Face detection is generally the first step towards face-related applications like face recognition or face verification. But face detection has beneficial applications. One of the most successful face detection applications is probably “photo-taking”.
Example: When you click a photo of your friends, the camera in which the face detection algorithm has built-in detects where the faces are and adjusts focus accordingly.
Overview of Face Recognition
Our algorithms can detect faces, but can we also recognize whose faces are there? And what if an algorithm can recognize faces?
Generally, Face Recognition is a method of identifying or verifying an individual’s identity by using their face. Various algorithms are there for face recognition, but their accuracy might vary. Here I am going to discuss with you that how we can do face recognition using deep learning.
Now, let us understand how we can recognize faces using deep learning. Here, we use face embeddings to convert every face into a vector. Converting the face into a vector is called deep metric learning. Let me divide this process into three simple steps for better and easier understanding:
Face Detection
The first task we perform is detecting faces in the image(photograph) or video stream. Now we know that the exact coordinates/location of the face, so we extract this face for further processing.
Feature Extraction
Now we have cropped out the face from the image, so we extract specific features from it. Here, we will see how to use face embeddings to extract these features of the face. As we know, a neural network takes an image of the face of the person as input and outputs a vector that represents the most important features of a face! In machine learning, this vector is nothing but called embedding, and hence, we call this vector face embedding. Now, how will this help in recognizing the faces of different people?
When we train the neural network, the network learns to output similar vectors for faces that look similar. For example, if I have multiple images of faces within different timelapse, it’s obvious that some features may change but not too much. So, in this problem, the vectors associated with the faces are similar, or we can say they are very close in the vector space.
Up to this point, we learned how this network works; let us see how to use this network on our data. Here, we pass all the images in our data to this pre-trained network to get the respective embeddings and save these embeddings in a file for the next step.
Comparing Faces
We have face embeddings for each face in our data saved in a file; the next step is to recognize a new image not in our data. Hence, the first step is to compute the face embedding for the image using the same network we used earlier and then compare this embedding with the rest of our embeddings. We recognize the face if the generated embedding is closer or similar to any other embedding.
Understand What is OpenCV
Computer Vision is one of the most interesting and challenging tasks in the Artificial Intelligence field. Computer Vision acts as a bridge between Computer Software and visualizations. Computer Vision allows computer software to understand and learn about the visualizations in the surroundings.
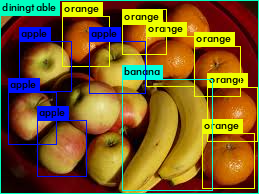
Let us understand an example: Based on the shape, color, and size that determines the fruit. This task is very easy for the human brain. Still, in the Computer Vision pipeline, we first need to gather the data, perform the data processing operations, and then train and teach the model to distinguish between the fruits based on their size, shape, and color.
Various packages are available to perform machine learning, deep learning, and computer vision problems. So far, computer vision is the best module for such complex problems. OpenCV is an open-source library. It is supported by different programming languages such as R, Python, etc. It runs on most platforms like Windows, Linux, and macOS.
Advantages of OpenCV
- Open CV is free of cost and an open-source library.
- Open CV is fast as it is written in C/C++ language as compared to others
- With less system RAM, OpenCV works better.
- It supports most operating systems like Windows, Linux, and macOS.
Implementation
In this section, we will implement face recognition using OpenCV and Python.
First, let us see what libraries we will need and how to install them:
- OpenCV
- dlib
- Face_recognition
OpenCV is a video and image processing library used for image and video analysis, like facial detection, license plate reading, photo editing, advanced robotic vision, and many more.
The dlib library contains our implementation of ‘deep metric learning’ used to construct our face embeddings for the actual recognition process.
The face recognition library is super easy to work with, and we will be using this in our code. First, remember to install dlib library before you install face_recognition.
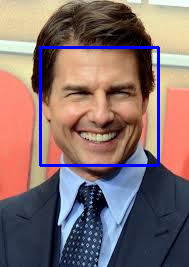
The output of any face recognition applications using OpenCV will be like this:-
To install OpenCV, dlib, and face recognition type the following snippets in the command prompt.
pip install opencv-python
conda install -c conda-forge dlib
pip install face_recognition
Now, let’s do code!
Extracting features from Face
First, you need a dataset or even create one of your own. Just make sure to arrange all images in folders, each containing images of just one person.
Or you can download the dataset from this link.
Now, save the dataset in a folder the same as you are going to make the file. Here is the code and I have added comments wherever it is required:
fromimutilsimportpaths #imutils includes opencv functionsimportface_recognitionimportpickleimportcv2importos
#get paths of each file in folder named Images#Images here that contains data(folders of various people)imagePath=list(paths.list_images('Images'))kEncodings=[]kNames=[]
# loop over the image pathsfor(i, ip)inenumerate(imagePath):# extract the person name from the image pathname=ip.split(os.path.sep)[-2]# load the input image and convert it from BGRimage=cv2.imread(ip)rgb=cv2.cvtColor(image, cv2.COLOR_BGR2RGB)
boxes=face_recognition.face_locations(rgb,model='hog')# compute the facial embedding for the any faceencodings=face_recognition.face_encodings(rgb, boxes)# loop over the encodingsforencodinginencodings:kEncodings.append(encoding)kNames.append(name)
#save emcodings along with their names in dictionary datadata={"encodings": kEncodings,"names": kNames}#use pickle to save data into a file for later usef=open("face_enc","wb")f.write(pickle.dumps(data))#to open file in write modef.close()#to close file
Having stored the facial embeddings in a file named ‘face_enc’, we can utilize them for face recognition tasks in images (photographs), live video streams, webcam feeds, and video captures.
The next part is that we are going to see how to recognize faces from images.
How to Recognize Face in Images
The following script is for detecting and recognizing faces in images. I have given comments next to the code wherever it is required. So you will be able to understand code efficiently.
import face_recognition
import imutils #imutils includes opencv functions
import pickle
import time
#use opencv
import cv2
import os
#to find path of xml file containing haarCascade file
cfp = os.path.dirname(cv2.__file__) + "/data/haarcascade_frontalface_alt2.xml"
# load the harcaascade in the cascade classifier
fc = cv2.CascadeClassifier(cfp)
# load the known faces and embeddings saved in last file
data = pickle.loads(open('face_enc', "rb").read())#Find path to the image you want to detect face and pass it here
#loading a face image(eg.:image.jpg or image.png)
#Path-to-img - image filename or image file path
image = cv2.imread(Path-to-img)
#image-numpy array of image dimension
rgb = cv2.cvtColor(image, cv2.COLOR_BGR2RGB)
#convert image to Grayscale for HaarCascade
gray = cv2.cvtColor(image, cv2.COLOR_BGR2GRAY)
faces = fc.detectMultiScale(gray,
scaleFactor=1.1,
minNeighbors=6,
minSize=(60, 60),
flags=cv2.CASCADE_SCALE_IMAGE)# Perform facial recognition on the input image
# the exteracting facial embeddings using face recognition model
encodings = face_recognition.face_encodings(rgb)
names = []
# loop over the facial embeddings incase
# we have multiple embeddings for multiple fcaes
for encoding in encodings:
#Compare encodings with encodings in data["encodings"]
#Matches contain array with boolean values True and False
matches = face_recognition.compare_faces(data["encodings"],
encoding)
#set name =unknown if no encoding matches
name = "Unknown"
# check to see if we have found a match
if True in matches:
#Find positions at which we get True and store them
matchedIdxs = [i for (i, b) in enumerate(matches) if b]
count = {}
# loop over the matched indexes and maintain a count for
# each recognized face face
for i in matchedIdxs:
#Check the names at respective indexes we stored in matchedIdxs
name = data["names"][i]
#increase count for the name we got
count[name] = count.get(name, 0) + 1
#set name which has highest count
name = max(count, key=count.get)
# will update the list of names
names.append(name)# do loop over the recognized faces
for ((x, y, w, h), name) in zip(faces, names):
# rescale the face coordinates
# draw the predicted face name and bounding box on the image
cv2.rectangle(image, (x, y), (x + w, y + h), (0, 255, 0), 2)
cv2.putText(image, name, (x, y), cv2.FONT_HERSHEY_SIMPLEX,
0.75, (0, 255, 0), 2)
cv2.imshow("Frame", image)
cv2.waitKey(0)Output
Conclusion
In conclusion, this tutorial provides a comprehensive guide on implementing face recognition using OpenCV with Python. It covers the basics of face detection, the theory behind face recognition, and the practical implementation using OpenCV, dlib, and face_recognition libraries. The tutorial emphasizes the importance of feature extraction, encoding, and the use of deep metric learning. By following the steps outlined, readers can develop their own face recognition programs for images and videos, gaining a solid understanding of computer vision applications.
Now you can see this lead us to the end of this tutorial where we learned all about face recognition. Hope you liked this article. Thank You!
Key Takeaways from FaceRecognition
- OpenCV for Image and Video Processing: OpenCV is a versatile library for image and video analysis, offering functionalities like facial detection, license plate reading, and more.
- dlib for Deep Metric Learning: Recognize that the dlib library provides implementations for deep metric learning, which is crucial for constructing face embeddings used in face recognition.
- Easy Integration with face_recognition Library: Note that the face_recognition library simplifies face-recognition tasks in Python, leveraging pre-existing functionalities for ease of use.
- Feature Extraction and Encoding: Understand the process of extracting features from faces and encoding them for recognition using the face_recognition library and OpenCV.
- Face Recognition in Images and Videos: Explore how to perform face recognition in real-time on images and videos using OpenCV, with step-by-step code explanations and integration with face_recognition library for efficient recognition.
Frequently Asked Questions
Ans. OpenCV face recognition is a technology that detects and identifies human faces in images or video streams, often utilized in security systems and biometric authentication applications.
Ans. To implement real-time face recognition using OpenCV in Python, first, detect faces using a pre-trained model like Haar cascades. Then, extract facial features and encode them. Finally, compare the encodings with known faces and display recognition results in the video stream.
Ans. For efficient real-time face detection in OpenCV, the Haar Cascade classifier is commonly used, while deep learning models like SSD or YOLO offer better accuracy. Additionally, face detection can also be achieved through object detection algorithms.
Ans. OpenCV face recognition systems, integrating deep learning models and face detectors, can achieve high accuracy, yet performance is influenced by factors such as image quality and lighting conditions. With rigorous training and optimization, reliable results can be attained.
The media shown in this article are not owned by Analytics Vidhya and are used at the Author’s discretion.
I am data science enthusiastic, tech savvy and traveller.


Awesome post, thanks for sharing.
Hey! so I was trying the code and I get this error "expected an indented block" from this line of code " name = ip.split(os.path.sep)[-2]" Can you help me get over this error? And thank you.
which algorithm is used