Introduction
If you’re here, chances are you’re already immersed in the world of Machine Learning or Deep Learning, so I won’t delve into the basics. Let’s kick things off with a brief introduction to our topic. Object Detection entails identifying specific objects within images or videos. Over the past few years, numerous models have emerged for this task. In this article, you’ll explore YOLOv5 and learn about its capabilities firsthand.
Learning Objectives
- Understand the importance of data in generating actionable information.
- Explore the concept of Object Detection and its relevance in image and video analysis.
- Gain familiarity with the YOLOv5 model and its capabilities in efficient object detection.
- Learn the process of setting up a virtual environment and installing dependencies for YOLOv5 training.
- Master the creation of annotations for custom datasets using the VIA tool.
- Acquire skills in converting annotations to the COCO format required by the YOLOv5 model.
This article was published as part of Data Science Blogathon!
Table of contents
- What is You Only Look Once v5?
- Origin and Evolution of YOLOv5: Extending YOLOv3 PyTorch
- An Overview of the YOLOv5 Architecture
- You Only Look Once Training Procedures
- Tutorial Steps for Object Detection
- Cloning Repository & Installing Dependencies
- Data Annotation Process Using VIA Tool
- Convert CSV Annotations to COCO Format
- Creating YAML File for training
- Yolov5 Object Detection Training
- YoloV5 Inferencing
- YOLOv5 vs YOLOv6 vs YOLOv7 vs YOLOv8
- Frequently Asked Questions
What is You Only Look Once v5?
YOLOv5 (You Only Look Once) is renowned for its real-time object detection and image classification capabilities, offering exceptional speed and accuracy. Explore its features and learn how to harness its power for your projects, regardless of your system’s GPU or CPU configuration. Stay tuned for insights into leveraging YOLOv5, including object detection and image classification tasks, with practical guidance for achieving optimal results.
Also Read: Top 10 Machine Learning Algorithms to Use in 2024
Origin and Evolution of YOLOv5: Extending YOLOv3 PyTorch
The inception of YOLOv5 stems from the YOLOv3 PyTorch repository developed by Glenn Jocher. Initially serving as a platform to convert YOLOv3 Darknet weights to PyTorch, it gained popularity among developers, including Roboflow’s vision team, for its user-friendly interface and deployment capabilities.
Upon successfully replicating YOLOv3’s model architecture and training process, Ultralytics embarked on enhancing research and repository design. Their objective: empower developers worldwide to train and deploy custom object detectors for diverse real-world applications, aligning with Roboflow’s mission.
Although initially referred to as YOLOv4, Ultralytics renamed the project YOLOv5 to avoid version conflicts with the Darknet’s YOLOv4 release. Despite initial debates surrounding the name, the shift signified a pivotal moment in the project’s evolution.
The continuous evolution of YOLOv5 is evident through ongoing research advancements and discussions, showcasing its dynamic nature and potential for further enhancements. As YOLOv5 progresses, it remains a work in progress, subject to continuous refinement and innovation, allowing developers to harness the power of trained models for robust object detection applications.
An Overview of the YOLOv5 Architecture
Object detection, a primary application of YOLOv5, involves extracting features from input images. These features undergo prediction to delineate object boundaries and ascertain their respective classes.
The YOLOv5 model encompasses three key components:
- Backbone: A convolutional neural network that aggregates image features across various scales.
- Neck: A sequence of layers for fusing and refining image features before passing them for prediction.
- Head: Utilizes features from the neck to execute box and class predictions.
YOLOv5 integrates advancements from different areas of computer vision, building upon previous versions like YOLOv4 to enhance object detection capabilities.
For those interested, implementation and customization can be done through tools like Google Colab notebooks and custom methods.
Also Read: Top 11 Generative AI GitHub Repositories to Revisit in 2024
You Only Look Once Training Procedures
Training procedures significantly influence the performance of object detection systems. In YOLOv5, two primary procedures are vital:
- Data Augmentation: Augmenting data introduces variations to the training set, enhancing the model’s exposure to diverse semantic variations.
- Loss Calculations: YOLO computes a total loss function incorporating GIoU, obj, and class losses, meticulously designed to optimize mean average precision.
Also Read: Getting Started with RESTful APIs and Fast API
Tutorial Steps for Object Detection
The steps that we are going to discuss in this tutorial are as follows:
- Optional: Creating a Virtual Environment for Training
Create a virtual environment to manage dependencies and isolate project-specific packages, essential for controlling hyperparameters and ensuring compatibility, with Python 3.6 recommended for YOLOv5 training.
- Cloning Repository and Installing Dependencies for YOLOv5
Clone the YOLOv5 PyTorch repository from GitHub, an open-source project. Install dependencies like OpenCV from requirements.txt. Pretrained weights aid faster convergence.
- Create Annotations for a Custom Dataset Using the VIA ToolUtilize the VIA tool for image annotation, customizing it to meet specific needs for efficient labeling. OpenCV can aid in image preprocessing and visualization tasks.
- Convert Annotations to COCO FormatTransform annotations to COCO format for YOLOv5 PyTorch training compatibility, evaluating metrics like mAP to ensure quality throughout the conversion process.
- Creating YAML File for TrainingConfigure a YAML file to specify dataset paths, classes, and hyperparameters, defining evaluation metrics like loss and accuracy during training; leverage pretrained models for weight initialization.
- YOLOv5 TrainingTrain the YOLOv5 model with specified hyperparameters and dataset, monitoring metrics like loss and mAP to assess performance, and adjust hyperparameters for optimization and fine-tuning.
- YOLOv5 InferenceUtilize the trained YOLOv5 model for real-time object detection, employing OpenCV for efficient image and video processing, and evaluate inference speed and accuracy metrics for performance analysis.
- Python 3.6 Recommended for TrainingEnsure compatibility with YOLOv5 PyTorch and its dependencies, preferring Python 3.6 for open-source compatibility; optimize inference speed based on real-time object detection needs.
Also Read: Top 4 Pre-Trained Models for Image Classification with Python Code
Creating a Virtual Environment
Let’s start with creating a virtual environment, this step is optional, if you want to install packages in the root environment you can skip this otherwise if you want to keep this setup separate you can follow it along to create a virtual environment. Start with installing virtualenv package which helps in creating the virtual environment.
$ pip install virtualenvOnce the package is installed you can go ahead and create the virtual environment for YoloV5 training:
$ virtualenv yolov5_training_envThe output of the command would look like this:
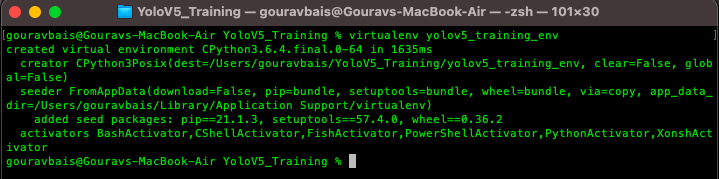
After creating an environment you will have to activate the same to install the required packages.
Activating the Virtual Environment
Unix:
$ source yolov5_training_env/bin/activateWindows:
$ yolov5_training_envScriptsactivateOutput:

Also Read: TensorFlow for Beginners With Examples and Python Implementation
Cloning Repository & Installing Dependencies
To begin with, we need to clone the official YoloV5 repository, if you have git already installed then the following command can be used to clone the repository.
$ git clone https://github.com/ultralytics/yolov5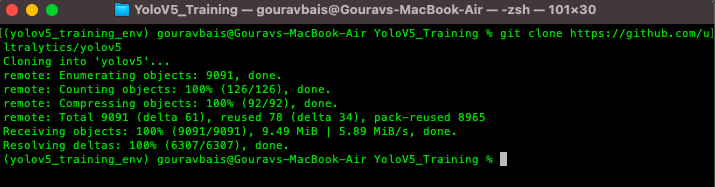
Otherwise, you can directly download the code from the following website:
YoloV5 Code: https://github.com/ultralytics/yolov5
This yolov5 repository comes up with a “requirements.txt” file which contains all the required libraries for training the model. One thing to remember here is the torch library which would be different for both GPU and CPU environments, so we will have to remove torch and torchvision from the requirements files and install the other libraries. To install other libraries from the “requirements.txt” file following command is used.
$ pip install -r requirements.txt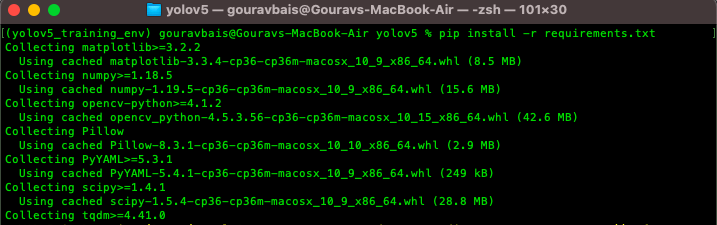
after installing other libraries we will install torch and torchvision which are the backbone for training.
Torch CPU version installation:
Python package management system (pip) can be used to install torch and torchvision for CPU.
Windows & Linux:
$ pip install torch==1.7.0+cpu torchvision==0.8.0+cpu torchaudio==0.7.0
-f https://download.pytorch.org/whl/torch_stable.html
Mac:
$ pip install torch==1.7.0 torchvision==0.8.0 torchaudio==0.7.0Torch GPU version installation:
Conda is preferable for installing GPU-based torch and torchvision libraries as it already compiles it with CUDA. Also if facing any issue with conda installation you can use pip installation. Before installations make sure you are installing the CUDA compatible torch version which you can find here https://pytorch.org/get-started/previous-versions/.
Windows & Linux:
$ conda install pytorch==1.7.0 torchvision==0.8.0 torchaudio==0.7.0 cudatoolkit=10.1 -c pytorchor
$ pip install torch==1.7.0+cu101 torchvision==0.8.0+cu101 torchaudio==0.7.0 -f https://download.pytorch.org/whl/torch_stable.htmlMac:
$ conda install pytorch==1.7.0 torchvision==0.8.0 torchaudio==0.7.0 -c pytorchor
$ pip install torch==1.7.0 torchvision==0.8.0 torchaudio==0.7.0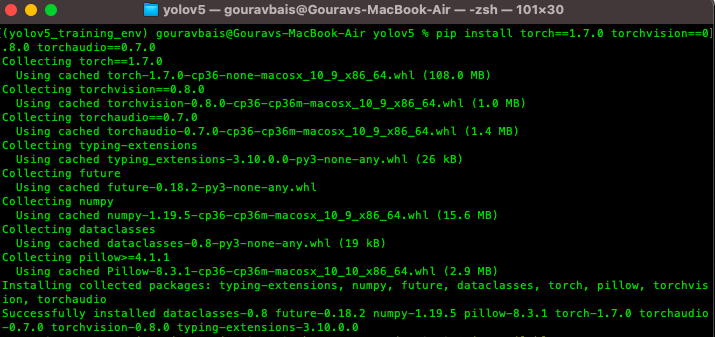
Make sure this installation is done right otherwise there would be a lot of compatibility issues.
We need to download the pre-trained weights also in order to use the model for custom data. Weights can be downloaded from the following:
link https://github.com/ultralytics/yolov5/releases. Once downloaded the weights we need to create a folder “Yolov5/weights” and paste the weights file there. You can download any of the models based on your usecase (recommended: yolov5x.pt or yolov5x6.pt).
Also Read: Understand Random Forest Algorithms With Examples (Updated 2024)
Data Annotation Process Using VIA Tool
The heart of training any object detection model is data annotation (preparing data for training). Data Annotation is a technique where we create different geometrical shapes on the objects which we want our object detection model to detect. There are several data annotation tools available but the one which I find easy to use is VIA (VGG Image Annotator) tool. I have made some changes to the tool so that you can use it on your own objects. You can download the tool from here.
This tool is just a simple HTML page that provides you with multiple annotations types like COCO data format, CSV format, etc. Tool page looks like this:
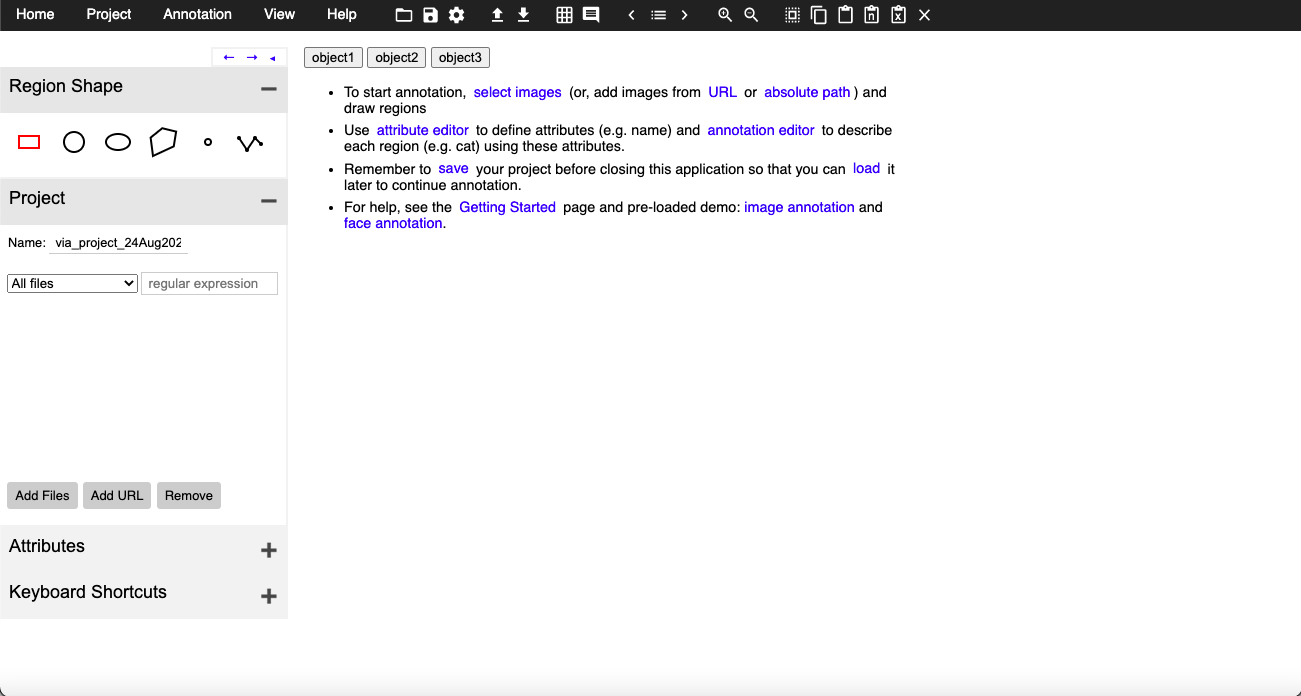
Here if you see, there are 3 buttons which are for objects one, two, and three are actually customizable i.e. you can change those buttons as per your object names, to do so you will have to open the HTML file in editable mode and find the following lines:

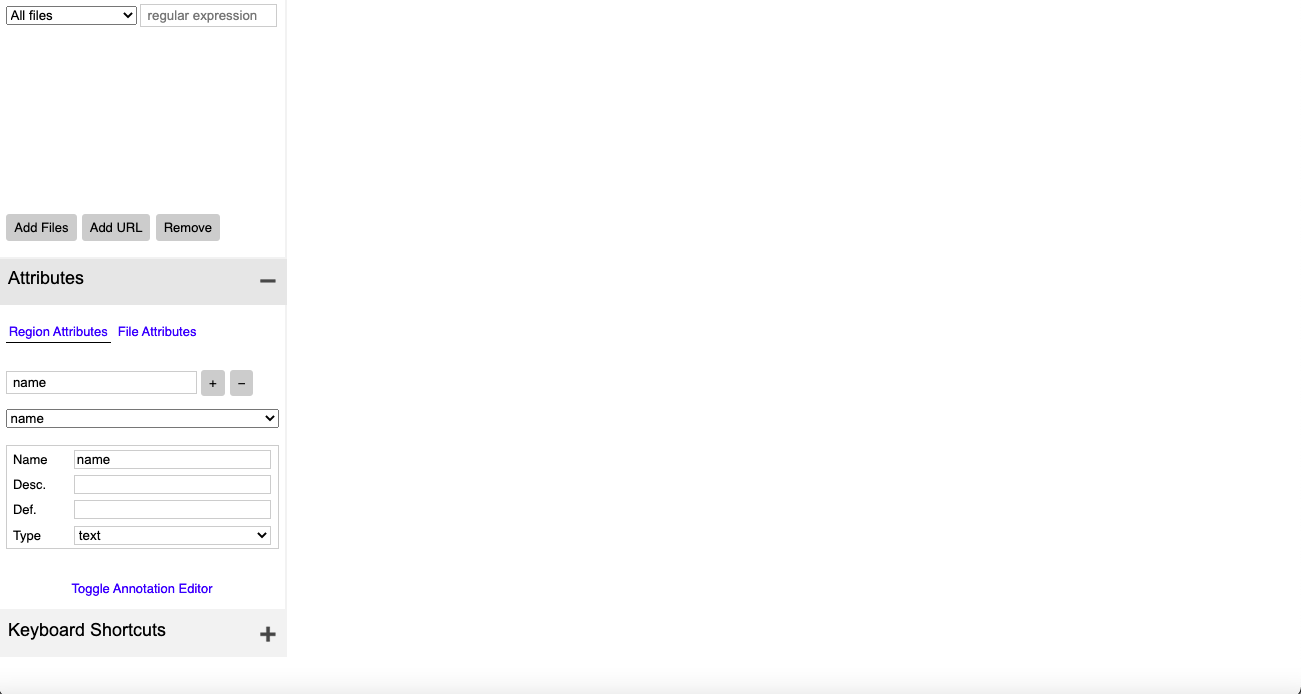
These object names you can have as your custom objects like car, person, etc. Once you have your tool ready you need to click on the attribute button you see on the left side panel and create a name attribute that would look something like this:
Once you have done setting up, you can load the images using the “Add Files” button and can start annotations by selecting the object and clicking on the button with the object name accordingly.
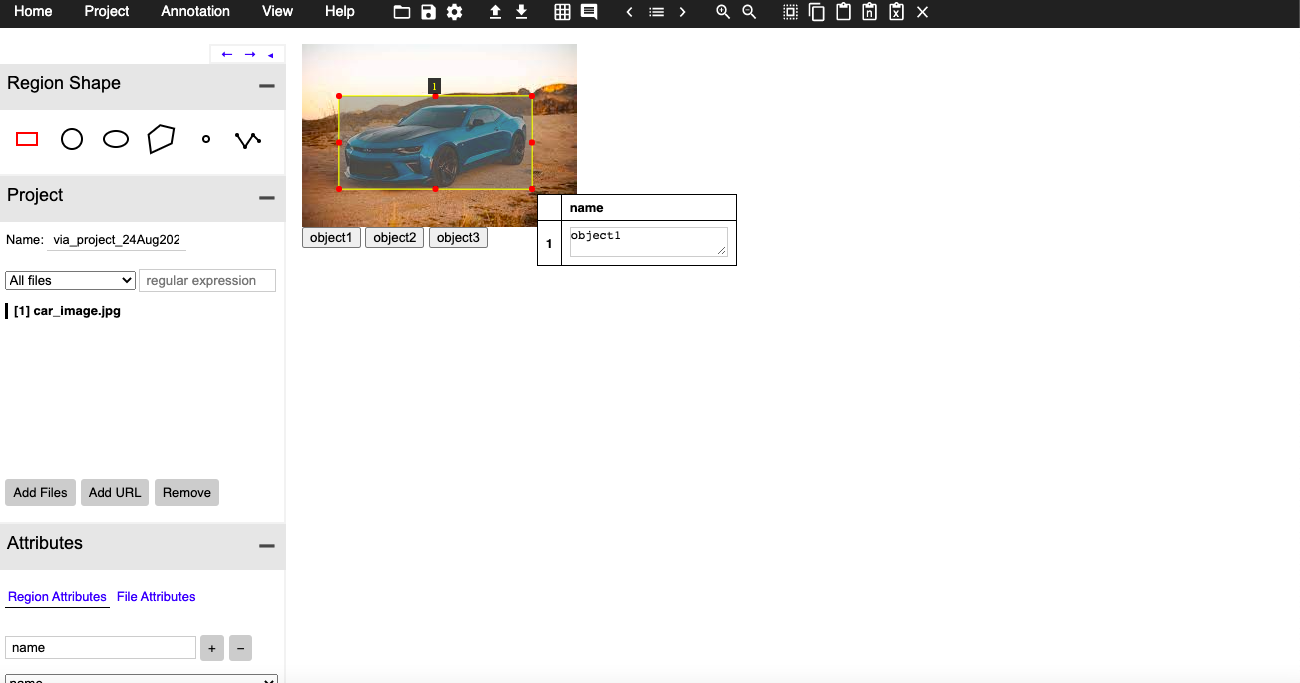
Once all the annotations are done you can export them in CSV format at your desired location.
Also Read: Selecting the Right Bounding Box Using Non-Max Suppression (with implementation)
Convert CSV Annotations to COCO Format
YoloV5 model requires data to be in coco format:
To convert CSV annotations to COCO format you can use the following code chunk:
Start with importing dependencies to create COCO dataset.
import os
import numpy as np
import pandas as pd
import shutil as sh
from PIL import Image
from tqdm.auto import tqdm
Once all the dependencies are imported we need to create some required columns for the COCO dataset.
data_path = '/Users/gouravbais//Final_Cleaned_Dataset/'
df = pd.read_csv(data_path+'train/via_region_export.csv')
## create x, y, w, h columns
x, y, w, h = [], [], [], []
for row in df['region_shape_attributes']:
    row = row.replace('{}', '').replace('}', '')
    row = row.split(',')
    x.append(int(row[1].split(':')[-1]))
    y.append(int(row[2].split(':')[-1]))
    w.append(int(row[3].split(':')[-1]))
    h.append(int(row[4].split(':')[-1]))
## calculating x, y, width and height coordinates
df['x'], df['y'], df['w'], df['h'] = x, y, w, h
## creating a column name image_id having images names as id
df['image_id'] = [name.split('.')[0] for name in df['filename']]
## creating two columns for storing x and y center values
df['x_center'] = df['x'] + df['w']/2
df['y_center'] = df['y'] + df['h']/2
## define number of classes
labels = df['region_attributes'].unique()
labels_to_dict = dict(zip(lables, range(0, len(labels))))
print('Lables Directory:', labels_to_dict)
df['classes'] = df['region_attributes']
df.replace({'classes':labels_to_dict}, inplace=True)
df = df[['image_id','x', 'y', 'w', 'h','x_center','y_center','classes']]
## set index of images
index = list(set(df.image_id))
and finally creating the dataset by copying images and creating text files.
source = 'train'
if True:
    for fold in [0]:
        val_index = index[len(index)*fold//5:len(index)*(fold+1)//5]
        for name,mini in tqdm(df.groupby('image_id')):
            if name in val_index:
                path2save = 'val2017/'
            else:
                path2save = 'train2017/'
            if not os.path.exists('convertor/fold{}/labels/'.format(fold)+path2save):
                os.makedirs('convertor/fold{}/labels/'.format(fold)+path2save)
            with open('convertor/fold{}/labels/'.format(fold)+path2save+name+".txt", 'w+') as f:
                row = mini[['classes','x_center','y_center','w','h']].astype(float).values
                imagename = data_path+"/{}/{}.jpg".format(source,name)
                check_image_width_height = Image.open(imagename)
                img_width, img_height = check_image_width_height.size
                for r in (row):
                    r[1] = r[1]/img_width
                    r[2] = r[2]/img_height
                    r[3] = r[3]/img_width
                    r[4] = r[4]/img_height
                row = row.astype(str)
                for j in range(len(row)):
                    print(row[j], 'n')
                    row[j][0] = str(int(float(row[j][0])))
                    text = ' '.join(row[j])
                    f.write(text)
                    f.write("n")
            if not os.path.exists('convertor/fold{}/images/{}'.format(fold,path2save)):
                os.makedirs('convertor/fold{}/images/{}'.format(fold,path2save))
            sh.copy(data_path+"/{}/{}.jpg".format(source,name),'convertor/fold{}/images/{}/{}.jpg'.format(fold,path2save,name))
The following code would generate a folder named “converter/fold0” which contains Images and Labels folders that you need to copy, and paste inside cloned YoloV5 repository “YoloV5/coco/” folder.
Creating YAML File for training
Once dependencies are installed and data is ready now we need to configure a YAML file to train the model. For that, you open any text editor and create a file “coco.yml” inside the folder “YoloV5/data/”. The content of the file would be like this:
# train and val data as 1) directory: path/images/, 2) file: path/images.txt, or 3) list: [path1/images/, path2/images/]
train: /Users/gouravbais/yolov5/coco/images/train2017
val: /Users/gouravbais/yolov5/coco/images/val2017

# number of classes

nc: 3

# class names

names: ['object1', 'object2', 'object3']
please keep the classes in the same order that you get while converting the CSV dataset to COCO dataset.
Yolov5 Object Detection Training
After setting up the YAML file, proceed to execute the training command within the YOLOv5 repository. Navigate to the YOLOv5 folder in the terminal or Anaconda prompt and input the following command:
$ python train.py --img 416 --batch 12 --epochs 50 --data ./data/coco.yml --weights ./weights/yolov5x.ptHere’s the breakdown of the command:
train.py: Python script for training the model.img: Image size, defaulted to 640, adaptable based on GPU or CPU memory.batch: Batch size, determined by available memory resources.data: Path to your YAML file containing dataset information.weights: Path to the downloaded weights file from step 1.
Upon execution, the model training commences. The training script automatically detects GPU availability for accelerated training; no explicit GPU or CPU coding is required.
Upon completion, the trained weights can be located in the “YoloV5/runs/train” directory, comprising “best.pt” and “last.pt” files, with “best.pt” recommended for use. Transfer the selected weight file to the “YoloV5/weights” folder. Monitor loss; if it continues decreasing after 50 epochs, consider extending training based on dataset characteristics.
Ensure to validate the model’s performance through techniques like tensorboard visualization and rigorous validation to assess accuracy and efficacy in real-world scenarios.
YoloV5 Inferencing
In conclusion, to test your custom model on testing data, utilize the “YoloV5/detect.py” script found alongside “train.py”. Execute the following command:
$ python detect.py --img 416 --source ./detect/test_data --weights ./weights/best.pt --conf-thres 0.4Here’s the command breakdown:
detect.py: Python script for inferencing.img: Image size matching the training image size.source: Path to the testing data or testing image file.weights: Path to the trained weights file.conf-thres: Confidence threshold for object detection.
Executing this command generates a “YoloV5/runs/detect” folder containing all resultant files from the model’s execution.
Also Read: Image Segmentation | Types Of Image Segmentation
YOLOv5 vs YOLOv6 vs YOLOv7 vs YOLOv8
| Feature | YOLOv5 | YOLOv6 | YOLOv7 | YOLOv8 |
|---|---|---|---|---|
| Official Developer | Ultralytics | Megvii | Ultralytics | Ultralytics |
| Current Version | 6.1 | v3.0 | v1.0 | v1.0 |
| Release Date | June 2020 | June 2023 | November 2023 | January 2024 |
| Focus | Balance of speed and accuracy | High accuracy and efficiency | Improved speed and accuracy | Enhanced performance and scalability |
| AP (mAP) | Up to 56.7% | Up to 61.2% | Up to 60.5% | Up to 63.4% |
| Speed (FPS) | Up to 140 FPS | Up to 210 FPS | Up to 180 FPS | Up to 320 FPS |
| Model Size | Varies depending on model | Smaller than YOLOv5 | Smaller than YOLOv5 | Smaller than YOLOv5 |
| Ease of Use | User-friendly interface | Limited documentation and community support | Limited documentation and community support | User-friendly interface |
| Supported Frameworks | PyTorch, TensorFlow | PyTorch | PyTorch | PyTorch |
| Main Strengths | Well-established community, good balance of performance and ease of use | High accuracy and efficiency, faster than YOLOv5 | Improved speed over YOLOv5, balanced accuracy | Fastest among all, improved accuracy over YOLOv5 |
| Main Weaknesses | Lower accuracy than YOLOv6 | Limited documentation and community support | Limited documentation and community support | Newer model, less tested in real-world applications |
Conclusion
In this extensive guide, we delved into the process of training YOLOv5 for custom object detection. Covering each step from setting up a virtual environment to conducting inference, we provided a thorough walkthrough. With a focus on custom detection, we emphasized the importance of tailoring models to specific use cases. By mastering the techniques outlined here, you’ll be equipped to train YOLOv5 on your own datasets, unlocking its full potential in real-world applications. Whether you’re a seasoned practitioner or a newcomer to the field, this guide serves as a valuable resource for advancing your skills in training YOLOv5 and achieving accurate custom detection.
Key Takeaways
- Data forms the cornerstone for deriving meaningful insights, highlighting its intrinsic relationship with information generation.
- YOLOv5 emerges as a powerful solution for object detection tasks, offering a balance between speed and accuracy.
- Setting up a virtual environment and installing dependencies are crucial initial steps in effectively training YOLOv5 models.
- Annotation is a vital step in preparing custom datasets, and tools like VIA simplify this process.
- Conversion of annotations to COCO format facilitates seamless integration with the YOLOv5 training pipeline.
- YAML files play a pivotal role in configuring training parameters, allowing for customization to meet specific project needs.
Frequently Asked Questions
Frequently Asked Questions
Q1. What is the YOLOv5 model?
A. YOLOv5 is a state-of-the-art object detection model known for its speed and accuracy in identifying objects within images or videos, making it a popular choice among practitioners.
Q2. Why should we use YOLOv5?
A. YOLOv5 should be used for its impressive performance, offering both speed and accuracy in object detection tasks, making it suitable for various applications in computer vision.
Q3. What is Yolo V5 algorithm?
A. The YOLOv5 algorithm is based on the You Only Look Once (YOLO) architecture, utilizing deep learning techniques to detect objects in images or videos in real-time with high accuracy.
Q4. What are the disadvantages of YOLOv5?
A. Some disadvantages of YOLOv5 include potential issues with small object detection, sensitivity to varying lighting conditions, and the need for extensive data annotation and augmentation for optimal performance.
Q5. What is YOLOv8 model?
A. YOLOv8, the latest addition to the YOLO algorithm series, continues the legacy of pioneering object detection and classification models in Computer Vision (CV). This newest version maintains the tradition by delivering state-of-the-art performance for image and video analytics within a user-friendly framework
The media shown in this article are not owned by Analytics Vidhya and are used at the Author’s discretion.
Gourav Singh
20 Feb, 2024
Applied Machine Learning Engineer skilled in Computer Vision/Deep Learning Pipeline Development, creating machine learning models, retraining systems and transforming data science prototypes to production-grade solutions. Consistently optimizes and improves real-time systems by evaluating strategies and testing on real world scenarios.


You have explain every thing well.. But you have not explain how to use this trained model with new image..? could you please explain how to implement this traned model with new image to check trained model is working fine or not?