This article was published as a part of the Data Science Blogathon.
Introduction
In this article, we will be getting our hands dirty with PySpark using Python and understand how to get started with data preprocessing using PySpark. This particular article’s whole attention is to get to know how PySpark can help in the data cleaning process for data engineers and even for data analysts along with some basic operations of PySpark (which is the Spark distribution for Python) we will also discuss some functional thing about Apache Spark.

What is Apache Spark?
Apache Spark is a sort of engine which helps in operating and executing the data analysis, data engineering, and machine learning tasks both in the cloud as well as on a local machine, and for that, it can either use a single machine or the clusters i.e distributed system.
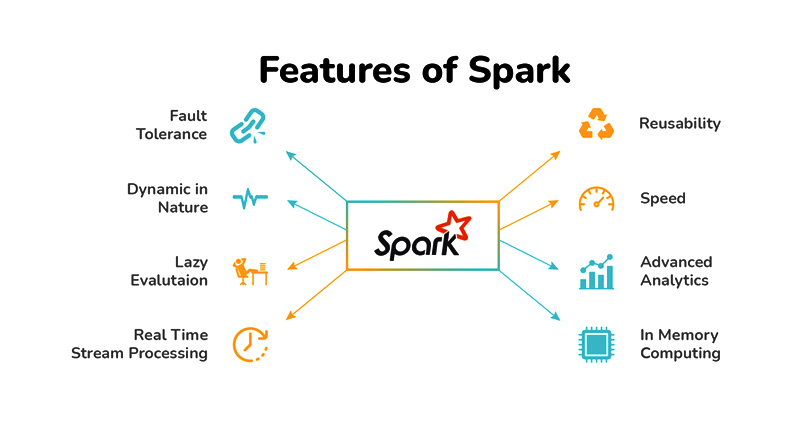
Features of Apache Spark
We already have some relevant tools available in the market which can perform the data engineering tasks so in this section we will discuss why we should choose Apache Spark over its other alternatives.
- Streaming data: When we say streaming the data it is in the form of
batch streamingand in this key feature Apache Spark will be able to stream our data in real-time by using our preferred programming language.
- Increasing Data science scalability: Apache Spark is one of the widely used engines for scalable computing and to perform Data science task which requires high computational power Apache Spark should be the first choice.
- Handling Big Data projects: As previously mentioned that it has high computational power so for that reason it can handle Big data projects in cloud computing as well using the distributed systems/clusters when working with the cloud, not on the local machines.
Installing PySpark Library using “pip”
!pip install pyspark
Output:
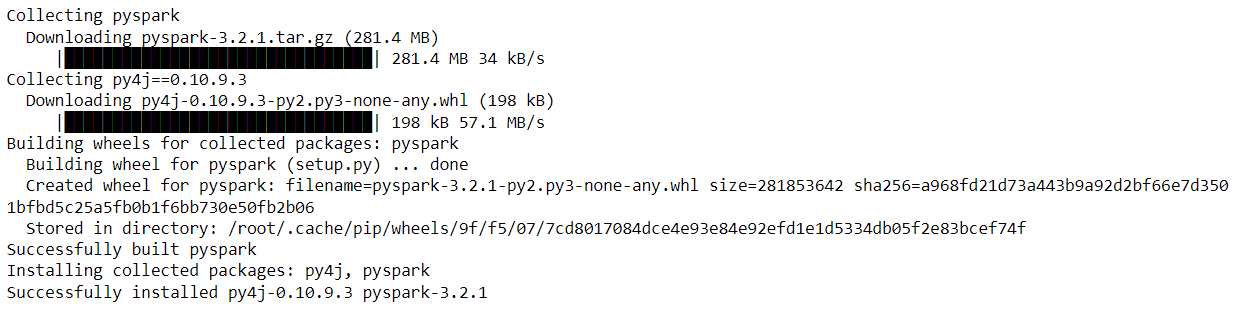
After successfully installing PySpark

Importing PySpark Library
import pyspark
Reading the Dataset
Just before reading the dataset let me tell you that we will be working on the California House Price dataset and as I have worked on the Collab for handling PySpark operations so I got this dataset from the sample section.
import pandas as pd
data = pd.read_csv('sample_data/california_housing_test.csv')
data.head()
Output:

Now as we have imported the dataset and also have a look at it so now let’s start working with PySpark. But before getting real work with PySpark we have to start the Spark’s Session and for that, we need to follow some steps which are mentioned below.
- Importing the Spark Session from the Pyspark’s SQL object
- After importing the Spark session we will build the Spark Session using the builder function of the SparkSession object.
from pyspark.sql import SparkSession
spark_session = SparkSession.builder.appName('PySpark_article').getOrCreate()
Inference: Now as we can see that with the help of builder the function we have first called the appName class to name our session (here I have given *”PySpark_article”* as the session name) and at the last, for creating the session we have called getOrCreate() function and store it in the variable named spark_session.
spark_session
Output:
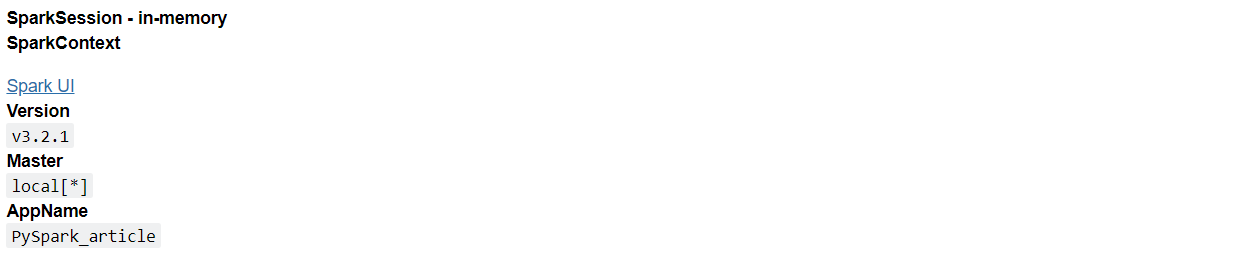
Inference: Now when we see what our spark session will hold it will return the above output which has the following components:
- About the spark session: In memory
- Spark context:
- Version: It will return the current version of the spark which we are using – v3.2.1
- Master: Interesting thing to notice here is when we will be working in the cloud then we might have different
clustersas well like first, there will be a master and then a tree-like structure (cluster_1, cluster_2… cluster_n) but here as we are working on a local system and not the distributed one so it is returninglocal. - AppName: And finally the name of the app (spark session) which we gave while declaring it.
Reading the Data using Spark
df_spark = spark_session.read.csv('sample_data/california_housing_train.csv')
Inference:
In the above code, we can see that spark uses the Spark session variable to call the read.csv() function to read the data when it is in CSV format now if you remember when we need to read the CSV file in padas we used to call read_csv().
According to me when we are learning something new which has stuff related to previous learning then it is good to compare both the stuff so in this article, we will also compare the pandas’ data processing with spark’s data processing.
df_spark
Output:
DataFrame[_c0: string, _c1: string, _c2: string, _c3: string, _c4: string, _c5: string, _c6: string, _c7: string, _c8: string]
Inference: Now if we look at the output so it shows that it has returned the DataFrame in which we can see the dictionary like setup where (c0, c1, c2…..c_n) is the number of columns and corresponding to each column index we can see the type of that column i.e. String.
PySpark’s show() function
df_spark.show()
Output:
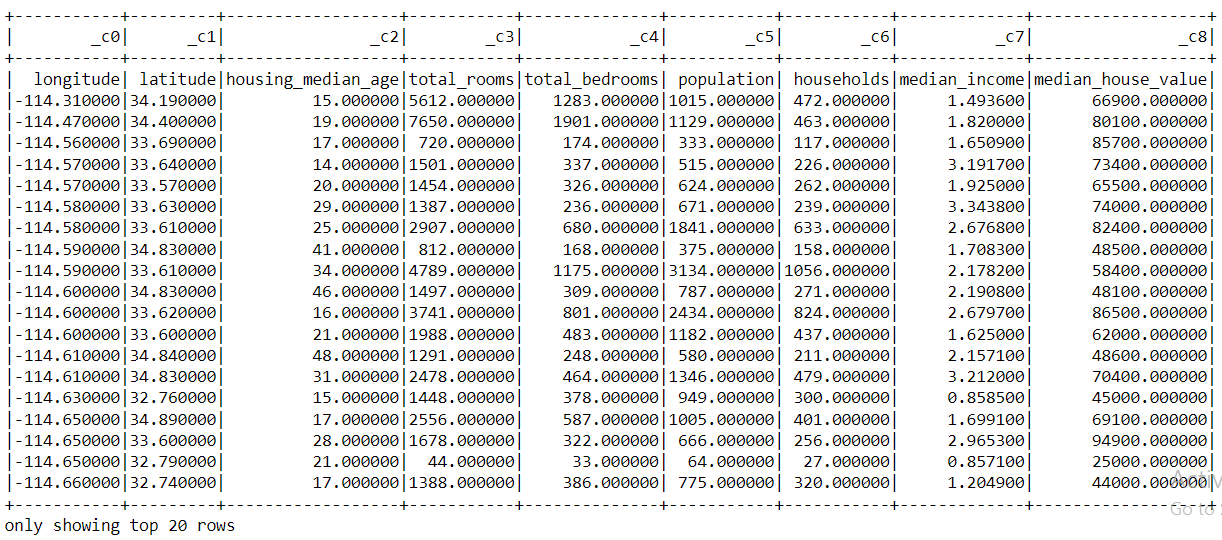
Inference: From the above output, we can compare the PySpark’s show() function with the pandas head() function.
- In the head() function, we can see the top 5 records (unless we don’t specify it in the arguments) whereas in the show() function it returns the top 20 records which are mentioned too at the last.
- Another difference that we can notice is the appearance of the tabular data that we can see using both the function one can compare it as in the start of the article I’ve used head() function.
- One more major difference that one can point out which is also a drawback of PySpark’s show() function i.e. when we are looking at the column names it is showing (c0, c1, c2…..c_n), and the exact column names are shown as the first tuple of records but we can fix this issue as well.
So let’s fix it!
df_spark_col  = spark_session.read.option('header', 'true').csv('sample_data/california_housing_train.csv')
df_spark_col
Output:
DataFrame[longitude: string, latitude: string, housing_median_age: string, total_rooms: string, total_bedrooms: string, population: string, households: string, median_income: string, median_house_value: string]
Inference: Okay! so now just after looking at the output, we can say that we have fixed that problem (we will still confirm that later) as in the output instead of (c0,c1,c2….c_n) in the place of column name now we can see the actual name of the columns.
Let’s confirm it by looking at the complete data with records.
df_spark = spark_session.read.option('header', 'true').csv('sample_data/california_housing_train.csv').show()
df_spark
Output:
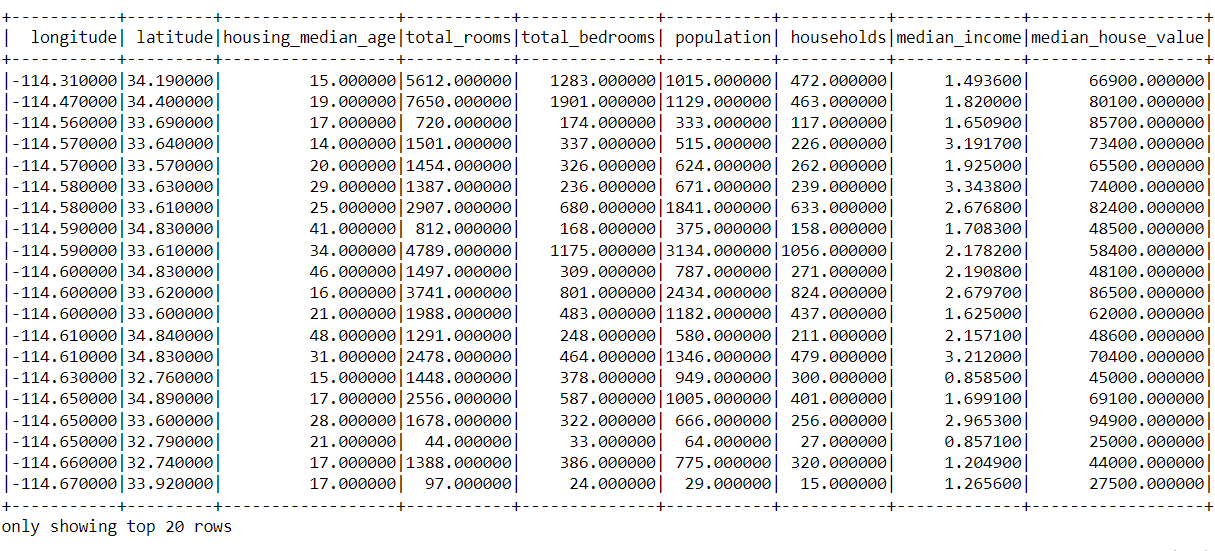
Inference: Yes! Now we can see that in the place of the columns we can now see the actual name of the column instead that indexing formatting.
Difference Between PySparks’ Type and Pandas’ Type
type(df_spark_col)
Output:
pyspark.sql.dataframe.DataFrame
Here you can see that PySpark’s data frame belongs to PySpark’s main class
type(data)
Output:
pandas.core.frame.DataFrame
Inference: And you guessed that right, similarly, Pandas’s data frame is of pandas type
Note: One interesting fact about PySpark’s data frame is that it can work on both head and show functions while pandas don’t work on the show function only for the head function.
PySpark Head() Function
df_spark_col.head(10)
Output:
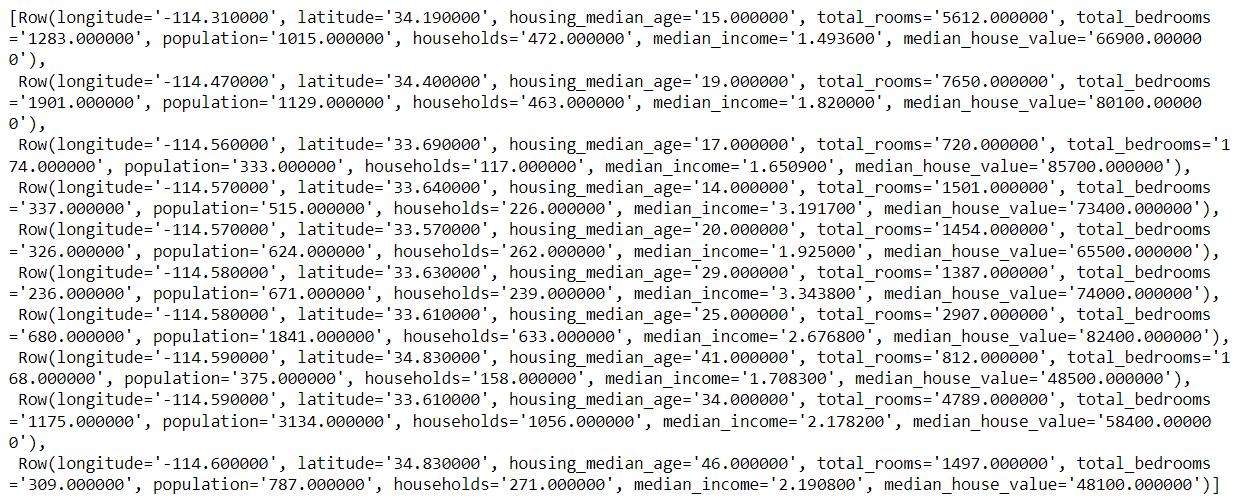
Inference: As we can see that we get the output but it is not in the Tabular format which we can see in the pandas’ head function instead it returns the output in the classical CSV format that’s why it can work for both show and head function still we should use the show function for better readability of the output
Does Pyspark have the alternative to Pandas’s info() function?
The answer is Yes! Let’s have a look at printSchema() the function of PySpark.
PySpark PrintScehma() Function
df_spark_col.printSchema()
Output:
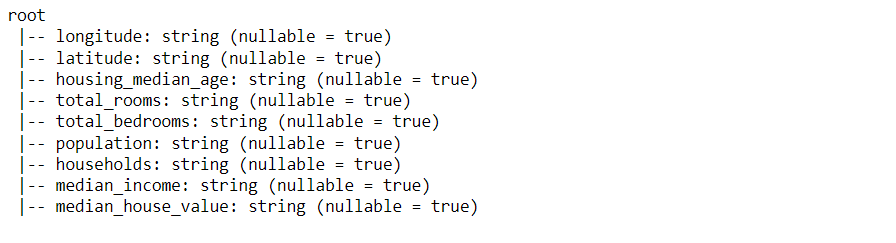
Inference: If we can distinguish well then we can easily figure out from the above output that it is returning the name of the column, type of the data each column is holding, and are there any null values in each column (nullable = True – Yes it have null values) just like our old friend – info().
Conclusion on PySpark
Finally, we have come to the last section of this article where we will sum up all the things that we have covered so far in a short description.
- In the very first segment, we learned about Apache Spark and its benefits over other alternatives.
- Then we saw how to install the PySpark library which is the Python distribution of Apache Spark.
- Then down to 3rd segment of the article, we got our hands dirty when we implement those basic functions and operations by which we get started to do data preprocessing using the PySpark library.
Here’s the repo link to this article. Hope you liked my article on the Getting started with PySpark using Python. If you have any opinions or questions, then comment below.
Connect with me on LinkedIn for further discussion.
The media shown in this article is not owned by Analytics Vidhya and is used at the Author’s discretion.


%202.jpg)