Introduction on RAPIDS
How often has it happened that you had to wait for hours staring blankly at your screen, waiting for your ML Model to get trained? Quite often, I guess. Like Data Science enthusiasts, we all have found ourselves prolonged model training processes. When it comes to Data Science and Machine Learning, python provides an abundance of libraries that make model building and training a relatively simple deal. With these in-built functions available at hand, speed boils down to the efficiency of data science workflows.
In cases where datasets are large and computational times need to be minimised, NVIDIA’s RAPIDS offers an efficient way to enhance the speed of data science procedures. In this guide, we will be diving deep into what is NVIDIA’s RAPIDS and how RAPIDS libraries help increase the rate of various data science processes to quite an impressive level.
The betterment in the speed of operations in RAPIDS is due to GPU acceleration. While Python libraries run on CPU, RAPIDS libraries run on GPUs (Graphics Processing Unit). Earlier, the usage of GPUs was confined to the processing of graphics and animations, but, given the extensive amount of data one, at times, encounters in ML processes, researchers realised the potential of GPUs in boosting the speed while dealing with such data. Hereafter, the following sections will explore the very idea of RAPIDS, its requirements and practical applications.
.png)
What is RAPIDS?
RAPIDS is a suite of open-source software that runs on GPUs and allows users to run end-to-end data science pipelines at high speed.
Now, one may get deterred by the thought that one needs to get accustomed to the syntax of new libraries in trade for increased speed. But worry not! NVIDIA has been kind enough to take care of it. Most of the RAPIDS libraries mirror the APIs/functions of the Python libraries, making the shift from Python modules to GPU-backed RAPIDS relatively smooth. The following table summarises the analogy between Python libraries and RAPIDS libraries for the most imperative ML operations:
|
|
|
| Mathematical/Matrix Operations | NumPy | CuPy |
| Data Handling | Pandas | CuDF |
| ML Model Building | Sklearn | CuML |
Though there are many other valuable libraries that RAPIDS mirrors, in this guide, we’ll limit discussions to the most commonly used ones that are tabulated above.
System Requirements for Running RAPIDS
Your system must include carter to the following pre-requisites to run RAPIDS based libraries on it:
- CUDA 11.0+
- NVIDIA driver 450.80.02+
- Ubuntu 18.04/20.04 or CentOS 7/8 with gcc/++ 9.0+
- Pascal architecture or better (Compute Capability >=6.0)
- Conda
You can visit the official RAPIDS documentation at: rapids.ai for more information.
Running RAPIDS on Google Collaboratory and Kaggle Notebooks
If one’s system doesn’t fulfil the abovementioned requirements, one can still run RAPIDS libraries on two of the most popular notebook platforms amongst data science enthusiasts: Google Colaboratory and Kaggle.
Google Colaboratory:
While using Google Colaboratory, one needs to follow the following steps:
1. In the top bar, click Runtime – a dropdown menu appears on the screen.
2. Click Change Runtime Type and the following box appears on the screen.
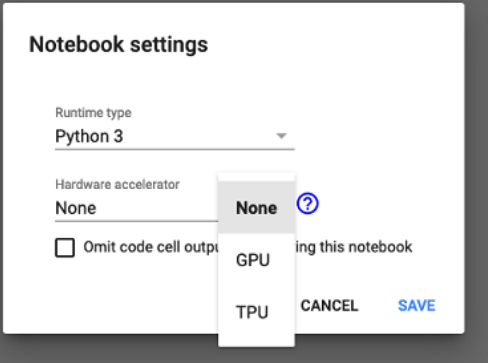
3. Under the Hardware Accelerator, click GPU.
Now GPU is enabled on your notebook. But the grind doesn’t end here. In Google Colab, Tesla T4, P4, or P100 are the only RAPIDS compatible GPUs. So, if you are allocated a GPU other than these, you’ll have to keep changing the runtime type to GPU until you are issued on the RAPIDS compatible GPUs. Besides, when working on colab, you’ll have to install RAPIDS and the necessary libraries every time you run the GPU.
Kaggle Notebooks:
Running GPU on Kaggle Notebooks is fairly simple. Just follow these steps:
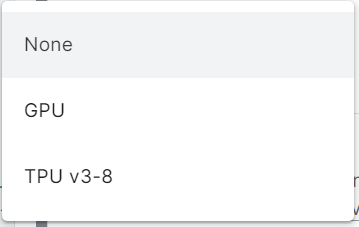
1. Open a new Kaggle Notebook and on the right-hand panel, click accelerator.
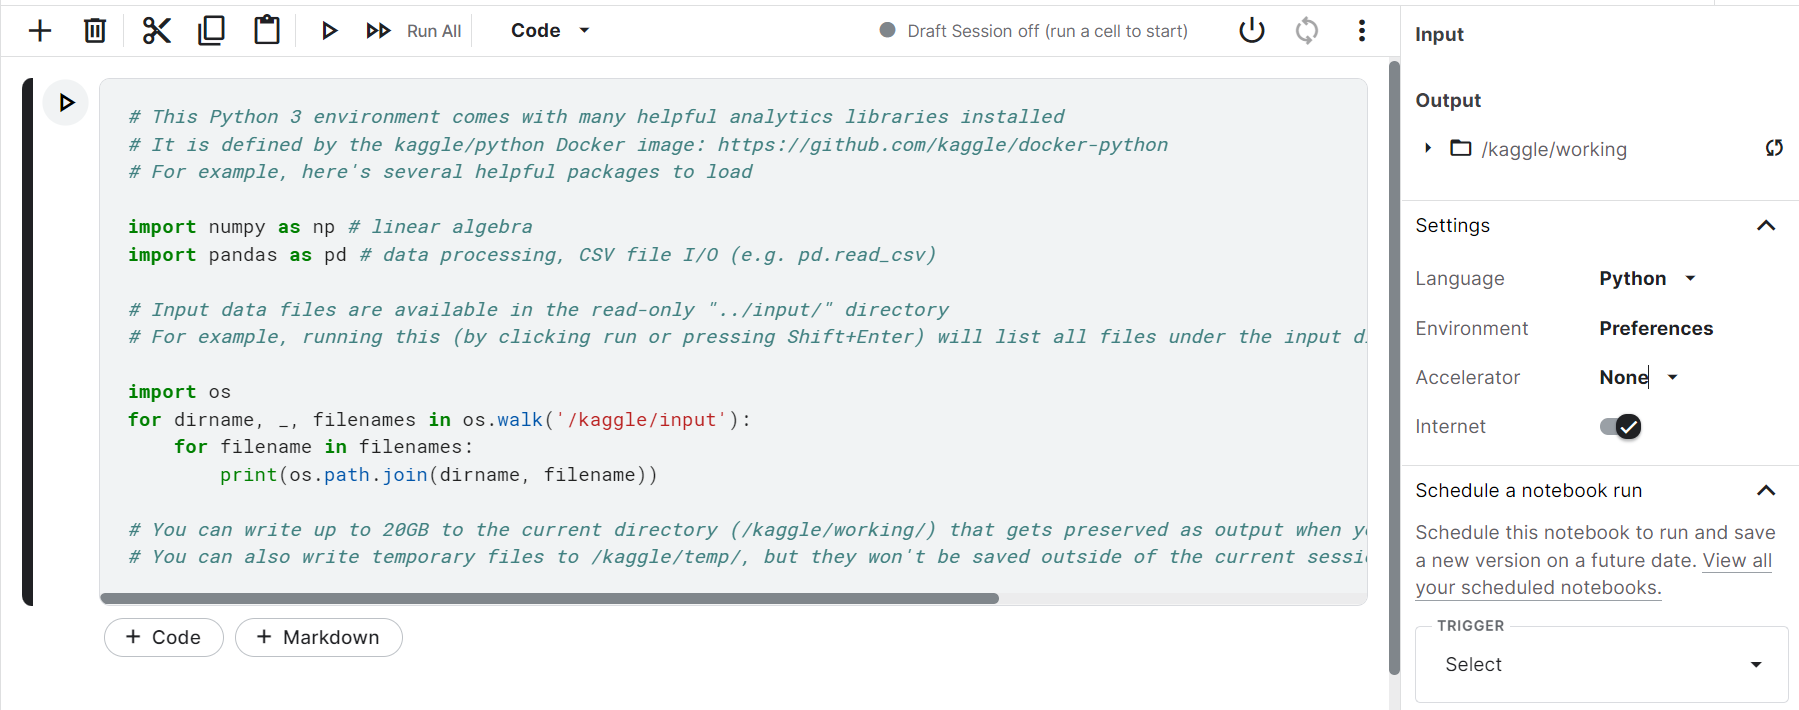
2. A drop-down appears, select and click GPU.
Now your notebook is ready to run any RAPIDS library. No installation or setup as such is required.
Note: For all the demonstrations, Kaggle Notebooks have been used.
Accelerating Mathematical/Matrix Operations: NumPy vs CuPy
Although NumPy is a step up from the usual python lists and helps perform complex matrix operations with ease, its speed stills prove slow when dealing with big data or iterative workflows. CuPy is RAPIDS based library that implements NVIDIA’s CUDA GPU acceleration on NumPy. As stated earlier CuPy mirrors Numpy’s functions which means all NumPy functions remain the same in CuPy.
Comparing NumPy with Cupy:
# Comparing NumPy vs CuPy
import time
# Numpy (CPU)
import numpy as np
start_cpu = time.time()
matrix_cpu = np.ones((1000,100,100))
matrix_cpu *= 5
matrix_cpu *= matrix_cpu
end_cpu = time.time()
cpu_time = end_cpu - start_cpu
print("CPU Time:", cpu_time)
# CuPy (GPU)
import cupy as cp
start_gpu = time.time()
matrix_gpu = cp.ones((1000,100,100))
matrix_gpu *= 5
matrix_cpu *= matrix_cpu
end_gpu = time.time()
gpu_time = end_gpu - start_gpu
print("GPU Time:", gpu_time)
print("CPU Time/GPU Time:", cpu_time/gpu_time)
Output:
CPU Time: 0.0343780517578125
GPU Time: 0.007659196853637695
CPU Time/GPU Time: 4.488466926070039
From the output of the above code, it is pretty apparent that using CuPy speeds up the standard NumPy matrix operations by almost 5 times.
Accelerating Data Handling Operations: Pandas vs CuDF
CuDF (read as CUDA DF) is a RAPIDS library that accelerates the loading, manipulating and processing of data frames in Python. It mirrors a Pandas-like API that makes its usage easy for those accustomed to using pandas. CuDF is based on the apache arrow columnar layout, one of the most significant reasons for CuDF’s blazing speed. Before we move on to the comparison, let us decipher the columnar memory layout and how it helps speed up data frame operation.
Apache Arrow Columnar Memory Layout
So CuDF uses Apache Arrow Columnar Memory Layout as an in-memory columnar memory layout to represent structured data. Compared to the traditional memory layout, this columnar memory layout provides fast access to data and increases the overall efficiency of data frame operations.
Shown below is a comparison in storage patterns of Traditional Memory Buffer versus the Apache Arrow Columnar Memory Layout:
.png)
In Traditional Memory Buffer, the data is stored in contiguous memory locations in row-major format. In contrast, in Apache Arrow Columnar Memory Layout, the information is stored in adjacent memory locations in column-major form.
Comparing Pandas with CuPy:
Now, let’s compare the computational times of panadas and cudf. We will load a dataset using both pandas and cudf and then compare the execution time in both cases.
# Comparing Pandas with CuDF
import time
# Pandas (CPU)
import pandas as pd
start_cpu = time.time()
df_cpu = pd.read_csv("../input/powerlifting-database/openpowerlifting.csv")
end_cpu = time.time()
cpu_time = end_cpu - start_cpu
print("CPU Time:", cpu_time)
# CuDF (GPU)
import cudf
start_gpu = time.time()
df_cpu = cudf.read_csv("../input/powerlifting-database/openpowerlifting.csv")
end_gpu = time.time()
gpu_time = end_gpu - start_gpu
print("GPU Time:", gpu_time)
print("CPU Time/GPU Time:", cpu_time/gpu_time)
Output:
CPU Time: 0.5915985107421875
GPU Time: 0.044222116470336914
CPU Time/GPU Time: 13.37788776208884
It can be seen that the cudf has escalated the speed of pandas operation (loading the data frame) by more than 13 times!
Note: The dataset that has been used for demonstration in the above code has been obtained from Kaggle and can be found here .
Accelerating Model Building and Training: Sklearn vs CuML
CuML (as CUDA ML) is a RAPIDS GPU-backed library that accelerates machine learning model building and training workflows. As for all other libraries discussed, CuML mirrors Python’s standard library sklearn’s API and functions.
Comparing Sklearn with CuML
Now, let’s train a KNN (K-Nearest Neighbour) model using both sklearn and CuML and compare the computational times in both cases.
# KNN Using sklearn
# Import necessary modules
import time
from sklearn.neighbors import KNeighborsClassifier
import pandas as pd
#cudf is NVIDIA's GPU accelerated Pandas-like library
start = time.time()
# Loading the training data
Data_train = pd.read_csv('../input/mnist-digit-recognition-using-knn/train_sample.csv')
# Create feature and target arrays for training data
X_train = Data_train.iloc[:,:-1]
Y_train = Data_train.iloc[:,-1]
# Loading the testing data
Data_test = pd.read_csv('../input/mnist-digit-recognition-using-knn/test_sample.csv')
# Create feature and target arrays for testing data
X_test = Data_test.iloc[:,:-1]
Y_test = Data_test.iloc[:,-1]
knn = KNeighborsClassifier(n_neighbors=7)
knn.fit(X_train, Y_train)
# Predict on dataset which model has not seen before
Y = knn.predict(X_test)
end = time.time()
CPU_time = end-start
print("Time taken on CPU = ",CPU_time)
# KNN Using cuml
# Import necessary modules
import time
from cuml.neighbors import KNeighborsClassifier
import cudf
#cudf is NVIDIA's GPU accelerated Pandas-like library
start = time.time()
# Loading the training data
Data_train = cudf.read_csv('../input/mnist-digit-recognition-using-knn/train_sample.csv')
# Create feature and target arrays for training data
X_train = Data_train.iloc[:,:-1]
Y_train = Data_train.iloc[:,-1]
# Loading the testing data
Data_test = cudf.read_csv('../input/mnist-digit-recognition-using-knn/test_sample.csv')
# Create feature and target arrays for testing data
X_test = Data_test.iloc[:,:-1]
Y_test = Data_test.iloc[:,-1]
knn = KNeighborsClassifier(n_neighbors=7)
knn.fit(X_train, Y_train)
# Predict on dataset which model has not seen before
Y = knn.predict(X_test)
end = time.time()
GPU_time = end-start
print("Time taken on GPU = ",GPU_time)
# Comparing sklearn and cuml processing times
print("CPU Time to GPU time ratio: ",CPU_time/GPU_time)
Output:
Time taken on CPU = 8.159586906433105
Time taken on GPU = 0.7302286624908447
CPU Time to GPU time ratio: 11.174016202815658
Note: The dataset that has been used for demonstration in the above code has been obtained from Kaggle and can be found here.
From the above code, it is clear that for the KNN that we’ve trained here, cuML can speed up model training by more than 11 times!
Conclusion
With data being generated in overwhelming amounts every second, speeding up data science workflows to handle such data has become imperative. NVIDIA’s RAPIDS provides a solution to the problem at hand by employing GPU-based libraries that are incredibly similar to traditional python libraries. From the demonstrations in this guide, we have seen how RAPIDS can boost the speed of operations to as high as 13 times. And these we just basic examples; upon further exploration, we can see that RAPIDS can even achieve a boost of 50 times in speed! Thus, RAPIDS is a boon to the Data Science industry that can accomplish otherwise time-consuming results in a split second. Now that we’ve become familiar with RAPIDS, here’s a quick recap:
- RAPIDS help us accelerate data science and machine learning workflows with its set of GPU-backed libraries.
- To run RAPIDS Libraries, specific system requirements must be fulfilled. However, these libraries can also be run on Google Colab or Kaggle.
- These RAPIDS Libraries mirror the API of traditional Python libraries – making the shift to RAPIDS effortless for Data Scientists and ML Engineers.
The media shown in this article is not owned by Analytics Vidhya and is used at the Author’s discretion.
I'm Suvrat Arora, a Computer Science graduate. Enthusiastic about AI, Data Science, ML and NLP - I believe that storytelling is a significant aspect of life which has led me to develop a practice of documenting, organizing, and disseminating knowledge across domains, making me an active contributor on multiple platforms.


