Performing Neural Style Transfer in 5 minutes
This article was published as a part of the Data Science Blogathon.
Introduction
Neural style transfer is a way of generating an image by blending two different images. In other words, it uses two images to develop a new image that retains the core structure of one image while styling it using the other image. It is a generative model that is very popular for creating high-quality realistic art. They are also useful in gaming and virtual reality which is a trending topic because of Meta.
This article will not explore the workings and architecture of the neural style transfer model in-depth. However, we will have a basic overview. The model is built using two networks, namely the feature extractor and the style transfer network. Convolutional Neural Networks perform extremely well on image datasets as they are capable of capturing spatial information and extracting the low-level and high-level features present in images by performing convolution over the images using a filter or a kernel. This is one of the main reasons for the exceptional performance of CNN on image classification task when compared to other neural networks architectures.
The feature extraction model is usually a pre-trained deep CNN like Xception, ResNet50, VGG16, VGG19, etc. Using a pre-trained deep CNN as a feature extractor works on the fact that some layers learn to extract the contents in an image while some layers learn the texture feature present in the images. The style transfer network is usually an autoencoder and has the encoder-decoder architecture as it accepts an image input and returns an image as output. Refer to this article, to learn more about autoencoders and how they can be built in TensorFlow.
Fortunately, there are many trained models for various tasks like classification, regression, time series analysis, etc. available in the TensorFlow Hub, which is a repository for high-quality trained models maintained by TensorFlow. These production-ready models can be accessed and fine-tuned with just a few lines of code. In this article, we will be making use of a trained style transfer model that is available in the TensorFlow hub to perform neural style transfer.
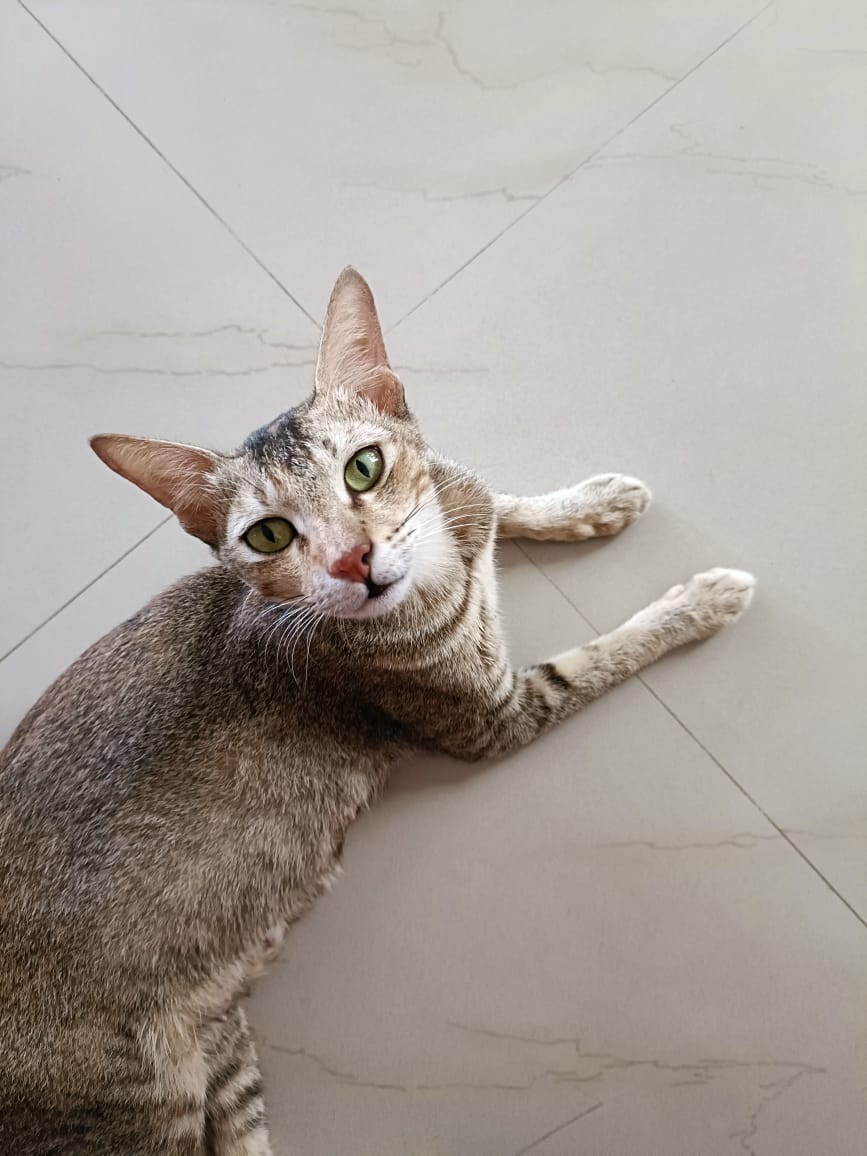
As mentioned earlier, two images will be used in performing neural style transfer. One image is known as the content image while the other is known as the style image. The content image is the image on which we want to apply the texture or style. The style image is the image from which the texture or texture is extracted and transferred over to the content image to produce a stylized image as output.
We will be using a picture of my pet as the content image in this article, but it could be anything like your selfie, a picture of your parents, or anything in general.
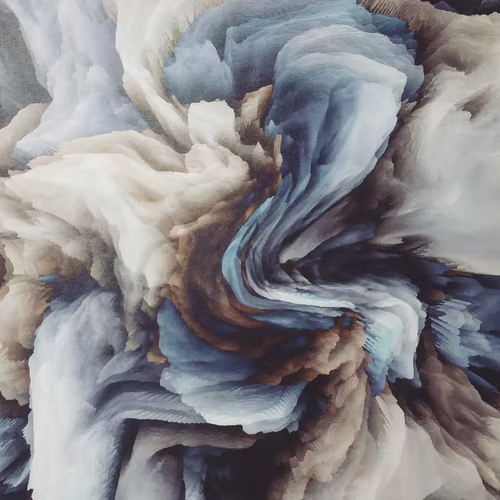
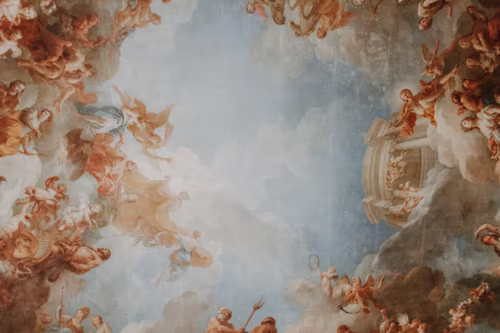
These are the style images that we will be using to extract the texture and apply it to the content image to generate the stylized image. I downloaded these images from Unsplash as they provide free-to-use high-quality stock images.
Installing TensorFlow Hub
TensorFlow Hub is required for accessing the trained models. TensorFlow Hub can be installed like any other python package on your local machine.
!pip install --upgrade tensorflow_hub
Importing Modules
These are the modules that will be used for implementing the neural style transfer model in this article. OpenCV will be used for image loading and basic image processing in this article.
import tensorflow_hub as hub
import tensorflow as tf
import cv2
import numpy as np
import matplotlib.pyplot as plt
from tensorflow.python.ops.numpy_ops import np_config; np_config.enable_numpy_behavior()
Using the Neural Style transfer model from TensorFlow Hub
As mentioned earlier, we will be using a trained neural style transfer model from TensorFlow Hub. Using trained models from TensorFlow Hub is extremely simple and easy. You can either download the trained model from TensorFlow Hub and use it by loading it from your disk, or you can directly provide the URL for the trained model. We will be using the URL for loading the trained model. Alternatively, you can download the neural style transfer model from here.
model = hub.load('https://tfhub.dev/google/magenta/arbitrary-image-stylization-v1-256/2')
Loading and Preprocessing Content and Style Image
We will be using OpenCV to read and preprocess the images. OpenCV uses BGR color format instead of the traditional RGB color format and so it is necessary to change the color format to RGB. We will also normalize the image array to reduce computational complexity.
def load_img(path):
    img = cv2.imread(path)
    img = cv2.cvtColor(img, cv2.COLOR_BGR2RGB)
    img = img/255.
    return img
content_image = load_img('content.jpeg')
style_1 = load_img('style_1.png')
style_2 = load_img('style_1.png')
Performing Neural Style Transfer
The trained neural style transfer model accepts images as tensors of the float-32 data type only. It is necessary to perform this transformation on both the content and the style image. The trained model works best when the style image is a square image with 256 pixels on both sides, as it was the dimension of each image while the model was being trained. So, we will resize the style image to the specified dimension and transform it into a float-32 type tensor. The trained model accepts the content and the style image as input parameters and returns the output image after performing neural style transfer on the content image using the style image.
def apply_style(content_image, style):
  content_image = content_image.reshape(1, content_image.shape[0], content_image.shape[1], content_image.shape[2]).astype('float32')
  content_image = tf.convert_to_tensor(content_image)
  style = cv2.resize(style, (256,256))
  style = style.reshape(1, style.shape[0], style.shape[1], style.shape[2]).astype('float32')
  outputs = model(tf.constant(content_image), tf.constant(style))
  stylized_image = outputs[0]
  return stylized_image
Let’s visualize the output image after performing neural style transfer using matplotlib. Alternatively, you can save the generated picture to your local disk as a png or a jpg file.
img = apply_style(content_image, style_1)
plt.xticks([])
plt.yticks([])
plt.grid(False)
plt.imshow(img[0])
plt.show()
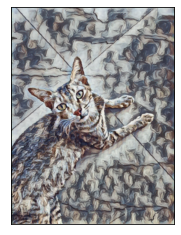
This is the output image using the first style image.
img = apply_style(content_image, style_2)
plt.xticks([])
plt.yticks([])
plt.grid(False)
plt.imshow(img[0])
plt.show()
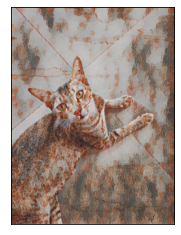
This is the output image using the second style image.
Conclusion
In this article, we explored the following concepts.
- Overview of Neural Style Transfer
- Introduction to TensorFlow Hub
- Installing TensorFlow Hub
- Loading a Neural Style Transfer model from TensorFlow Hub
- Performing Neural Style Transfer using the trained model from TensorFlow Hub
We used a trained neural style transfer model directly to get the job done. Refer to this article if you wish to manually build a neural style transfer model using a pre-trained deep CNN.
We can perform this to generate unique high-quality pictures. These generated pictures can then be sold as an NFT on NFT marketplaces like OpenSea, or SuperRare.
Hope you enjoyed reading this article and learned something new. Thanks for reading and happy learning!
The media shown in this article is not owned by Analytics Vidhya and is used at the Author’s discretion.


