This article was published as a part of the Data Science Blogathon.
Introduction
If you are a beginner or have little time, configuring the environment for your application may be too complicated and time-consuming. You need to consider monitoring, logs, security groups, VMs, backups, etc. You can make a mistake that compromises your application and makes it vulnerable to various attacks. The service can help you with all this. Sit back and enjoy a hands-on Elastic Beanstalk tutorial.
.png)
In today’s article, learn more about a service that provides a solution to most of the problems you might have with deploying applications on AWS. What exactly is that?
What is an elastic beanstalk?
Elastic Beanstalk (EB) can prepare an entire AWS environment for you. This way, you can deploy your application and prepare the environment for it in minutes. EB will prepare EC2 instances, RDS database, auto-scaling load balancer, health checks, HTTPS certificates, logging, and much more. Just choose one of the available predefined templates (among them Go, Java, Python, PHP, Nodejs, and Docker), decide how you want the environment to behave, and you’re good to go. You can also easily deploy a new version of your app.
Under the hood, EB is a special agent that uses predefined CloudFormation templates to set up a new environment and maintain control over it.
Benefits of the Elastic Beanstalk
There are several reasons why EB may be the optimal choice for you:
- automates the creation of infrastructure, taking into account AWS best practices guidelines, so you don’t have to click through many different AWS services,
- all the required configurations are in one place, so it is easy to find the ones you need to change,
- you can automate this even more with the EB CLI console tool,
- EB supports plugins that you can save along with your code. Plugins can contain configurations for various services, including EB itself. This allows you to start your journey with infrastructure as code (IaC) before moving on to more advanced solutions such as CloudFormation or Terraform,
- you can easily create many environments for one application (dev, staging, prod, etc.),
- it’s free (but you have to pay for the resources it created),
- it’s PAAS (platform-as-a-code), so you don’t have to worry about security patches and updates to infrastructure elements.
- Sounds good, right? Let’s get to the real Elastic Beanstalk tutorial!
- Check out the TSH Node.js development standard, which includes support for deployment with Elastic Beanstalk.
- With this standard, you can build scalable Node.js applications faster.
Getting started with Elastic Beanstalk
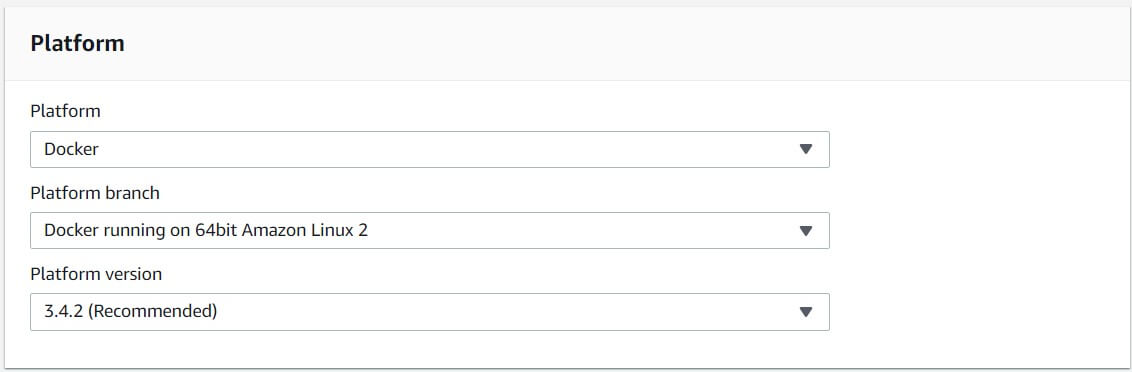
Just log into your AWS console and search for Elastic Beanstalk. When you get to the EB welcome page, click on the “Create Application” button. An EB application is a representation of your code. Next, you need to enter a name for the application and select a template that the application will rely on.
https://docs.aws.amazon.com
This is relevant because Amazon Linux 2 allows you to use the docker-compose.yml file and build Docker images directly. If you chose the first version, you would have to use the dockerrun.aws.json files, which requires additional work and knowledge.
It’s usually a good idea to use the recommended version in the Platform Version field (EB keeps its templates updated regularly).
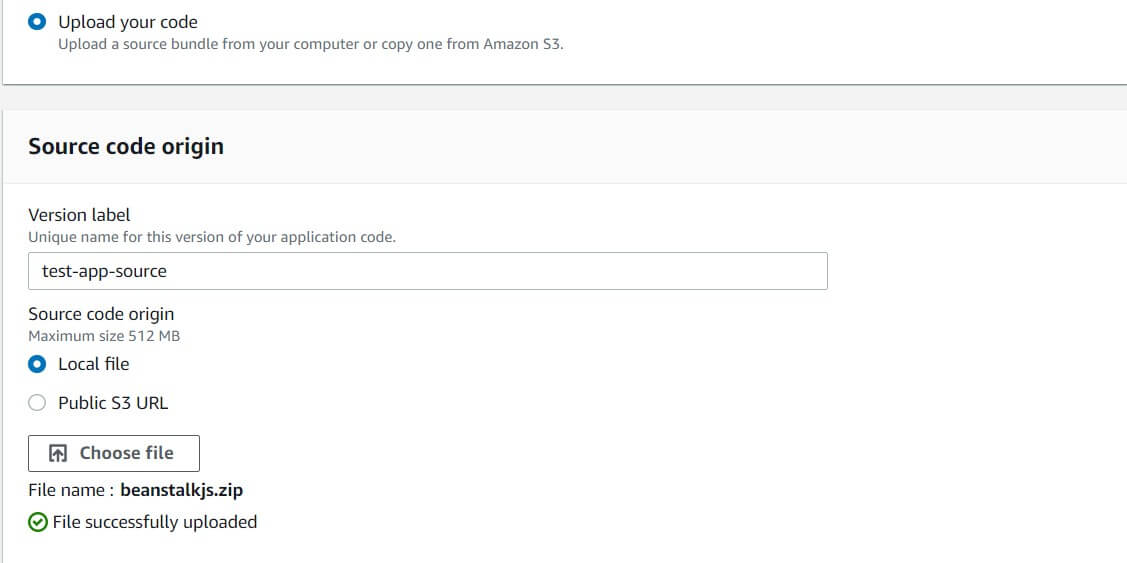
Below you should select the code you want to run in the new environment. If you don’t have anything ready, you can choose the Demo app. After that, a straightforward code will be uploaded, so you can start experimenting with EB immediately. Here is some code ready for you to use in this tutorial.
https://docs.aws.amazon.com
This application creates random data, stores it in a database, and then lists all the records created (one record is created per request).
Now you can click the “Create App” button, and you’re ready. Well… that’s not it. There are still a few things to configure, but Elastic Beanstalk makes it easy. For now, you should go to the “Configure more options” button.
https://docs.aws.amazon.com
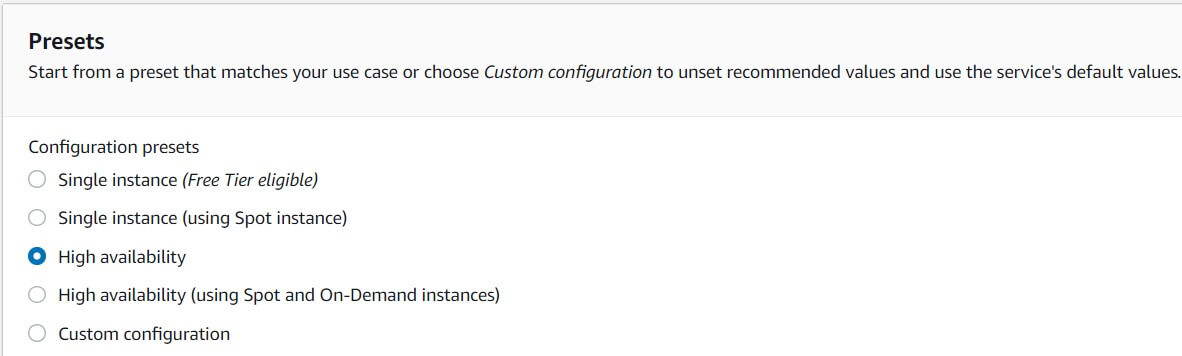
You can select one of the presets. This tutorial uses the High Availability preference. Below you can see 12 modules that can be configured. After selecting a preset, some of them will be updated. What’s in them? Quite a few highlights:
- Software – here, you can enable rotatable logging and choose a proxy server if needed. You can also set environment properties that will be passed to the application as environment variables.
- Instance – here, you can specify the type of storage you want to use along with EC2 security groups if you want to use any previously created ones.
- Capacity – here, you can enable load balancing and specify autoscaling parameters for your environment (how many instances you want to use and which metric determines their addition/removal).
- Load balancer – here, you can choose the type of load balancer, figure listeners, and processes for it. You can also enable logging.
- Continuous Updates and Deployment – here, you can specify the deployment policy for our auto-scaling application.
- Security – You can edit EC2 security stuff (EC2 key pair, IAM instance profile).
- Monitoring – here, you can configure reports on the status of your application and log them to CloudWatch.
- Managed Updates – You can specify if and when you want to update the version of the EB platform if AWS prepares a new version.
- Notifications – Here, you can enter an email address to be notified of critical environment events such as crashes.
- VPC – You can configure your EB environment to be part of a VPC.
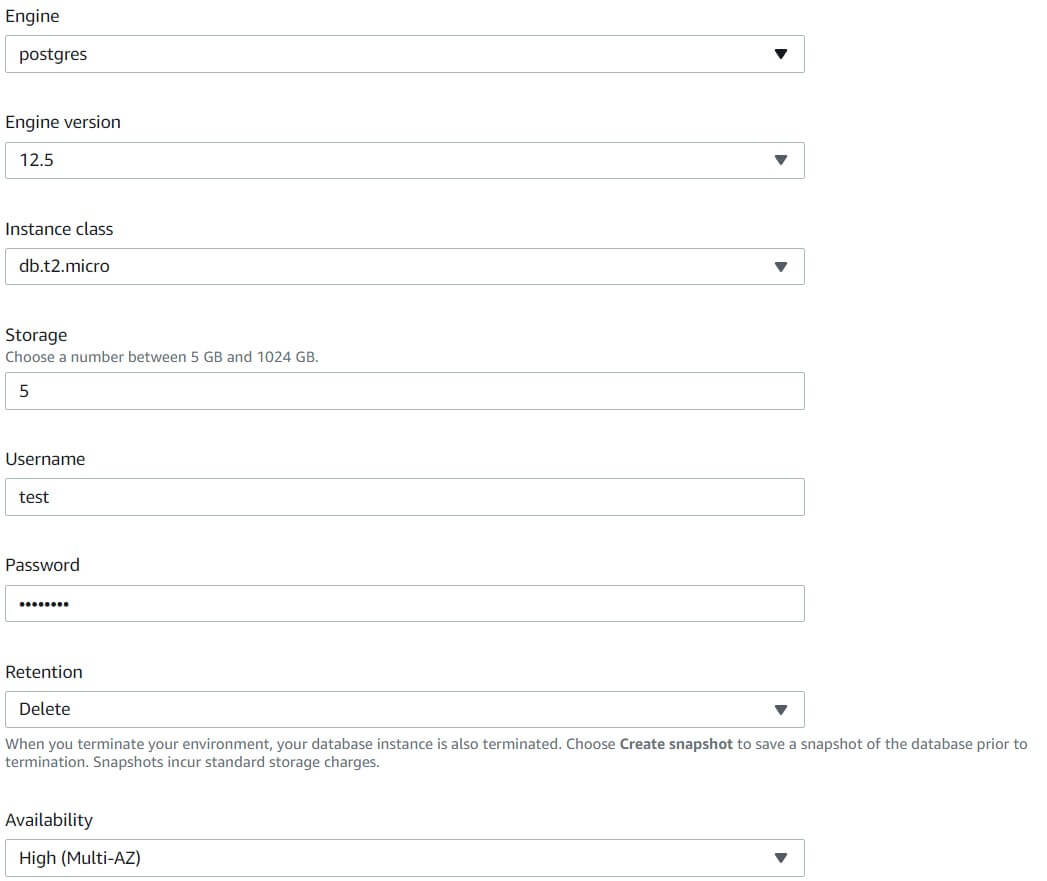
- Database – EB can create a database for you and send connectivity options to your application via environment parameters (but they won’t be visible in the Software module).
- Tags – You can add some tags to make your environment easier to find.
As you can see, there is a lot. Only a few of these modules will be modified in this tutorial. First, you should get a Postgres database where the data will be stored. For this, it is necessary to modify the Database module. Here are the selected options:
https://docs.aws.amazon.com
As mentioned earlier, connection parameters will be available as environment parameters. Here’s an example of how you can access them in Nest.js.
import { Module } from '@nestjs/common';
import { TypeOrmModule } from '@nestjs/typeorm';
import { AppController } from './app.controller';
import { AppService } from './app.service';
import { Product } from './product.model';
@Module({
import: [
TypeOrmModule.forRoot({
type: 'Postgres',
host: process.env.RDS_HOSTNAME,
port: parseInt(process.env.RDS_PORT),
username: process.env.RDS_USERNAME,
password: process.env.RDS_PASSWORD,
database: process.env.RDS_DB_NAME,
entities: [Product],
sync: true
}),
TypeOrmModule.forFeature([Product]),
],
controllers: [AppController],
providers: [AppService],
})
export class AppModule {}
view rawapp.module.ts hosted with ❤ on GitHub
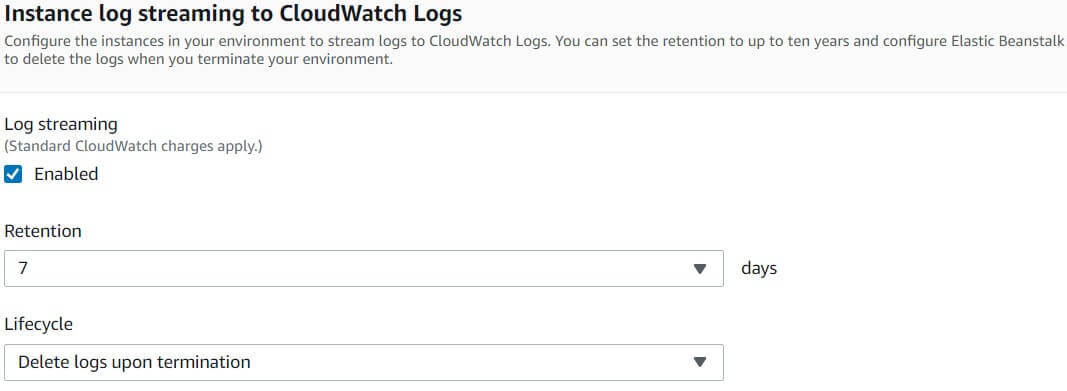
After saving the database changes, it’s time for the Software section. In the Container Options section, None is selected because the sample application does not need a proxy. Additionally, logging is enabled.
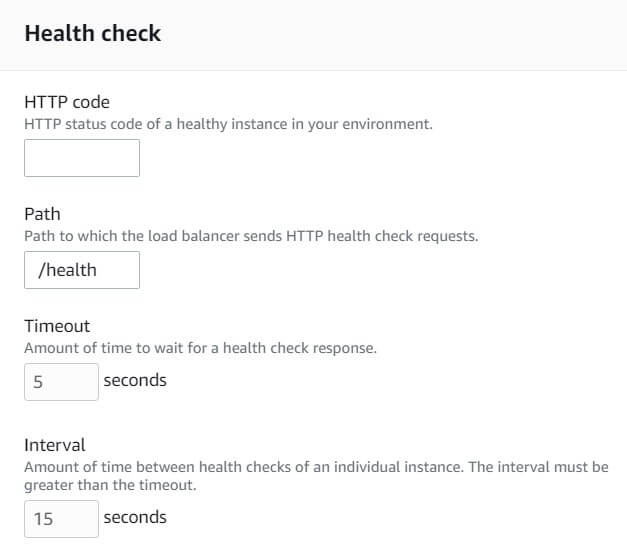
You will need to modify the default process to change the status check path.
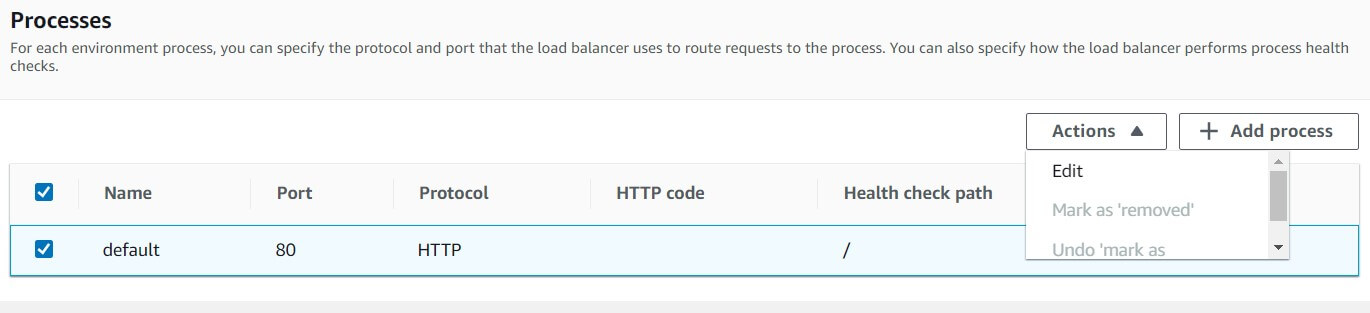
Change it to /health.
Now you need to click on the Create App button. You will be able to track the application deployment progress.
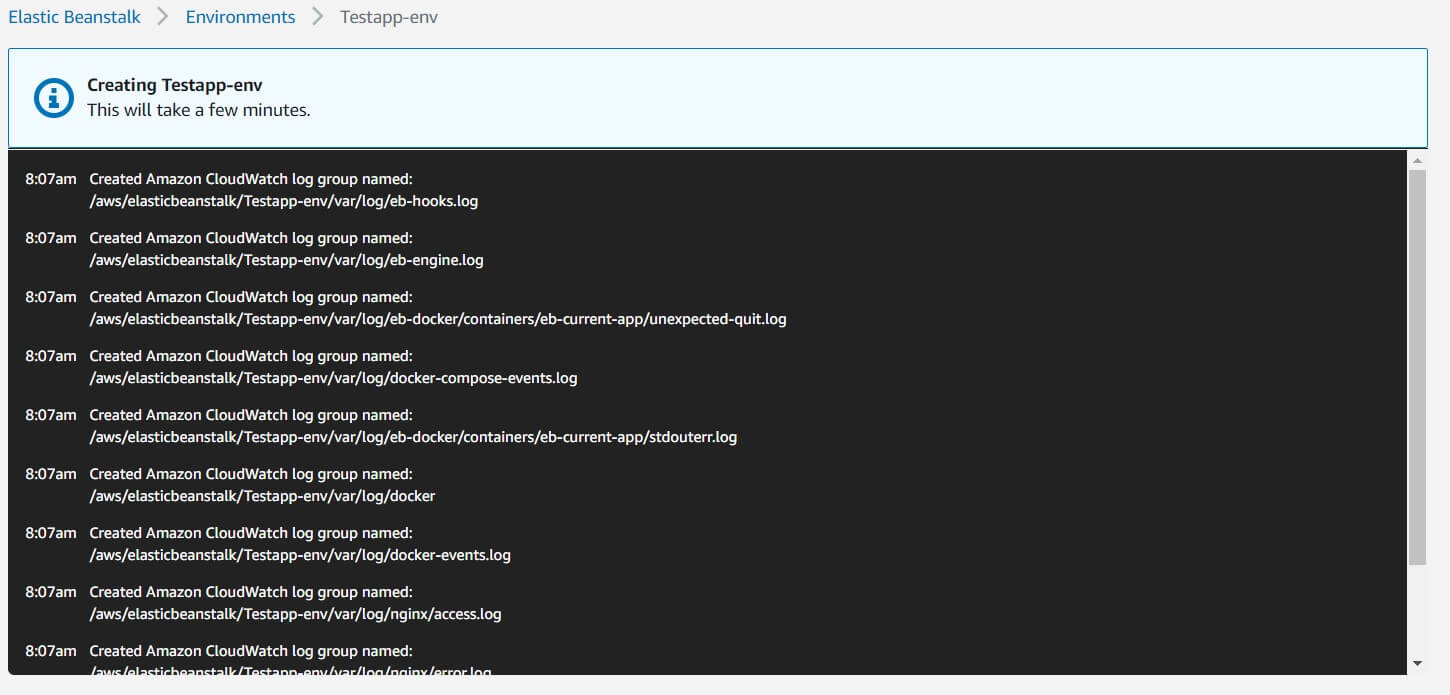
Creating an environment shouldn’t take more than 10 minutes unless you have a time-consuming image creation process or AWS is very busy with other things. As you can see from the log, EB creates all the required things like security and log groups. Subsequently, the RDS, load balancer, and EC2 instances are created and configured.
Once the entire process is complete, you should be automatically redirected to the dashboard of the new environment.
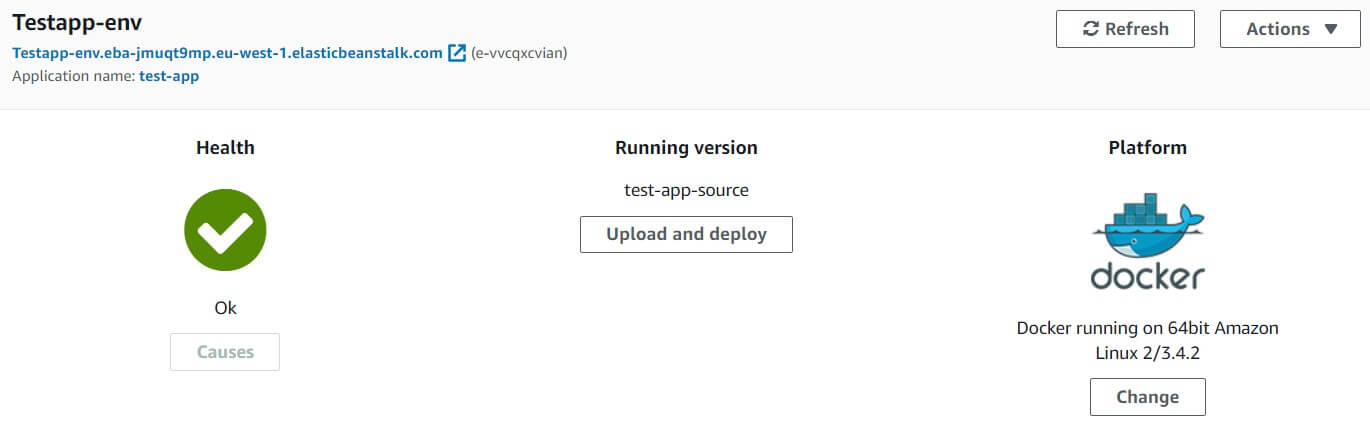
As you can see, the environment is healthy, and you can now use it with the provided URL. Everything is working!
Conclusion
As you can see, deploying an application to a well-prepared AWS environment is relatively easy and time-saving. I’d like to introduce you to the EB CLI, extensions, and a few other highlights, but let’s save that for another time. For homework, please look at the application I deployed today.
Let’s Recap What we have learned till now.
- EB supports plugins that you can save along with your code. Plugins can contain configurations for various services, including EB itself. This allows you to start your journey with infrastructure as code (IaC) before moving on to more advanced solutions such as CloudFormation or Terraform.
- Elastic Beanstalk (EB) can prepare an entire AWS environment for you. This way, you can deploy your application and prepare the environment for it in minutes. EB will prepare EC2 instances, RDS database, auto-scaling load balancer, health checks, HTTPS certificates, logging, and more.
- Amazon Linux 2 allows you to use the docker-compose.yml file and build Docker images directly. If you chose the first version, you would have to use the dockerrun.aws.json files, which requires additional work and knowledge.
The media shown in this article is not owned by Analytics Vidhya and is used at the Author’s discretion.
I am a Machine Learning Enthusiast. Done some Industry level projects on Data Science and Machine Learning. Have Certifications in Python and ML from trusted sources like data camp and Skills vertex. My Goal in life is to perceive a career in Data Industry.


