Introduction
Histograms are a powerful tool in data visualization that allows us to understand the distribution of a dataset. They provide a visual representation of the frequency or count of values within specified intervals, known as bins. In this section, we will explore the matplotlib.pyplot.hist() function in Python, which enables us to plot histograms with ease.

Table of contents
Understanding Histograms
Histograms are particularly useful when dealing with numerical data, as they allow us to identify patterns, outliers, and the overall shape of the distribution. By dividing the range of values into bins and counting the number of occurrences within each bin, we can visualize the distribution of the data.
To create a histogram using matplotlib.pyplot.hist(), we need to provide the data we want to plot and specify the number of bins. The function then calculates the frequency of values falling within each bin and plots a bar for each bin, representing the count.
Want to learn Python for FREE? Enroll in our Introduction to Python Program today!
Basic Syntax of Matplotlib.pyplot.hist()
The basic syntax of the Matplotlib.pyplot.hist() function in Python is used to plot histograms, which are graphical representations of the distribution of a dataset.
To use the Matplotlib.pyplot.hist() function, we first need to import the matplotlib.pyplot module. This module provides a collection of functions that are used to create various types of plots, including histograms.
The basic syntax of the Matplotlib.pyplot.hist() function is as follows:
Code:
matplotlib.pyplot.hist()Parameters of Matplotlib.pyplot.hist()
- `x`: This parameter represents the input data. It can be a single array or a sequence of arrays.
- `bins`: This parameter specifies the number of bins to use in the histogram. It can be an integer or a sequence of bin edges.
- `range`: This parameter specifies the range of the data. It can be a tuple of two values representing the minimum and maximum values of the range.
- `density`: This parameter determines whether the histogram should be normalized or not. If set to True, the area under the histogram will sum to 1.
- `weights`: This parameter specifies an array of weights for the values in `x`.
- `cumulative`: This parameter determines whether to compute a cumulative histogram or not.
- `bottom`: This parameter specifies the baseline value for the histogram.
- `histtype`: This parameter determines the type of histogram to plot. It can be ‘bar’, ‘barstacked’, ‘step’, ‘stepfilled’, or ‘step’.
- `align`: This parameter determines the alignment of the bars in the histogram. It can be ‘left’, ‘mid’, or ‘right’.
- `orientation`: This parameter determines the orientation of the histogram. It can be ‘vertical’ or ‘horizontal’.
- `rwidth`: This parameter specifies the relative width of the bars in the histogram.
- `log`: This parameter determines whether to use a logarithmic scale for the y-axis or not.
- `color`: This parameter specifies the color of the bars in the histogram.
- `label`: This parameter specifies the label for the histogram.
- `stacked`: This parameter determines whether to stack the bars in the histogram or not.
- `normed`: This parameter is deprecated and will be removed in future versions. Use `density` instead.
These are the basic parameters of the Matplotlib.pyplot.hist() function. By adjusting these parameters, you can customize the appearance of the histogram according to your requirements.
Customizing Histogram Appearance
Histograms are a powerful tool for visualizing the distribution of data. In this section, we will explore various ways to customize the appearance of histograms using the `matplotlib.pyplot.hist()` function in Python.
Adjusting Bin Size and Range
Bins are the intervals into which the data is divided in a histogram. By default, the `hist()` function automatically determines the number and width of the bins based on the input data. However, you can customize the bin size and range to better suit your needs.
To specify the number of bins, you can use the `bins` parameter. For example, to create a histogram with 10 bins, you can modify the code as follows:
Code:
import matplotlib.pyplot as plt

data = [1, 2, 3, 4, 5, 6, 7, 8, 9, 10]

plt.hist(data, bins=10)

plt.show()
Output:

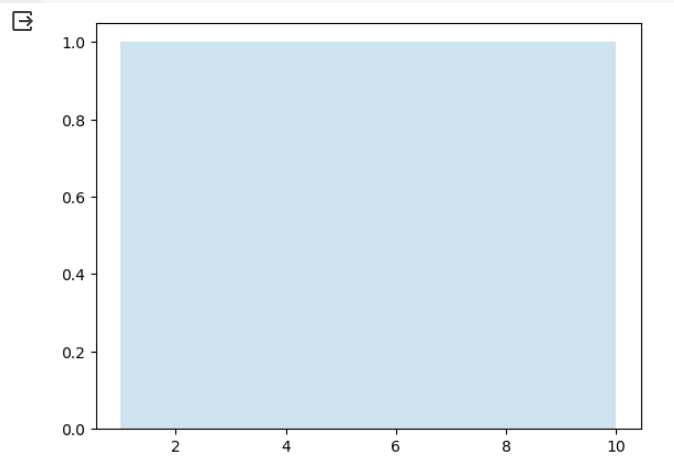
To adjust the range of the bins, you can use the `range` parameter. For instance, if you want to focus on a specific range of values, you can set the range accordingly:
Code:
import matplotlib.pyplot as plt

data = [1, 2, 3, 4, 5, 6, 7, 8, 9, 10]

plt.hist(data, bins=5, range=(0, 10))

plt.show()
Output:

Modifying Bar Color and Transparency
You can customize the color and transparency of the histogram bars to make them visually appealing. The `color` parameter allows you to specify the color of the bars. You can use named colors or hexadecimal color codes. Here’s an example:
Code:
import matplotlib.pyplot as plt

data = [1, 2, 3, 4, 5, 6, 7, 8, 9, 10]

plt.hist(data, color='red')

plt.show()
Output:

To adjust the transparency of the bars, you can use the `alpha` parameter. A value of 0.0 represents fully transparent, while 1.0 represents fully opaque. Here’s an example:
Code:
import matplotlib.pyplot as plt

data = [1, 2, 3, 4, 5, 6, 7, 8, 9, 10]

plt.hist(data, alpha=0.5)

plt.show()
Output:
Adding Labels and Titles
Labels and titles provide important information about the histogram. You can add a label to the x-axis using the `xlabel()` function, and a label to the y-axis using the `ylabel()` function. Additionally, you can add a title to the histogram using the `title()` function. Here’s an example:
Code:
import matplotlib.pyplot as plt

data = [1, 2, 3, 4, 5, 6, 7, 8, 9, 10]

plt.hist(data)

plt.xlabel('Value')

plt.ylabel('Frequency')

plt.title('Histogram')

plt.show()
Output:

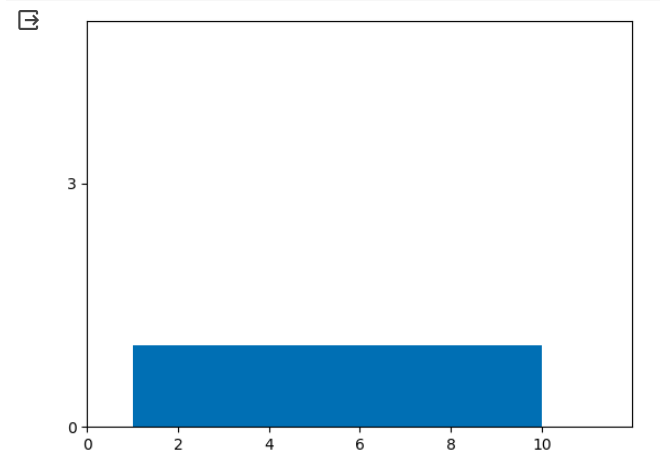
Changing Axis Limits and Ticks
You can modify the limits and ticks of the x-axis and y-axis to better visualize the histogram. The `xlim()` function allows you to set the limits of the x-axis, while the `ylim()` function allows you to set the limits of the y-axis. You can also customize the ticks using the `xticks()` and `yticks()` functions. Here’s an example:
Code:
import matplotlib.pyplot as plt

data = [1, 2, 3, 4, 5, 6, 7, 8, 9, 10]

plt.hist(data)

plt.xlim(0, 12)

plt.ylim(0, 5)

plt.xticks(range(0, 12, 2))

plt.yticks(range(0, 6, 3))

plt.show()
Output:
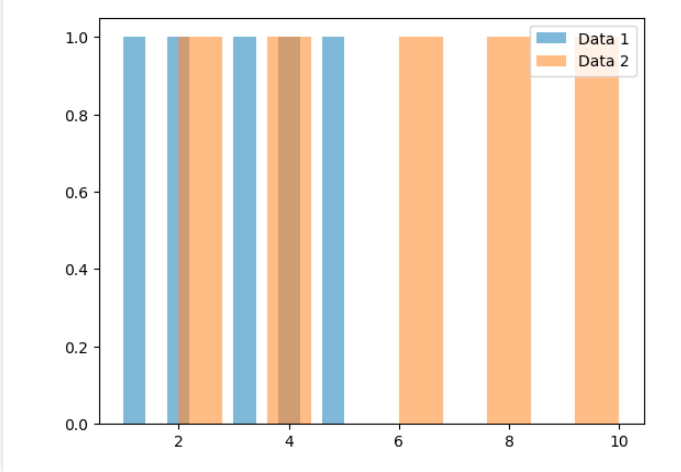
Creating Multiple Histograms on the Same Plot
You can plot multiple histograms on the same plot to compare different datasets. To do this, you can call the `hist()` function multiple times with different datasets. Here’s an example:
Code:
import matplotlib.pyplot as plt

data1 = [1, 2, 3, 4, 5]

data2 = [2, 4, 6, 8, 10]

plt.hist(data1, alpha=0.5, label='Data 1')

plt.hist(data2, alpha=0.5, label='Data 2')

plt.legend()

plt.show()
Output:
Overlaying Histograms with Other Plots
You can overlay histograms with other plots to visualize the relationship between variables. For example, you can overlay a scatter plot or a line plot on top of a histogram. Here’s an example of overlaying a scatter plot:
Code:
import matplotlib.pyplot as plt

data = [1, 2, 3, 4, 5]

x = [1, 2, 3, 4, 5]

y = [2, 4, 6, 8, 10]

plt.hist(data, alpha=0.5)

plt.scatter(x, y, color='red')

plt.show()
Conclusion
The `matplotlib.pyplot.hist()` function in Python is a powerful tool for creating histograms. It allows you to visualize the distribution of data and gain insights into its underlying patterns. By specifying the data and the number of bins, you can generate a histogram that accurately represents the data distribution.
In this article, we explored the various parameters of the `hist()` function and learned how to customize the appearance of the histogram. We discussed the importance of choosing the right number of bins and demonstrated how to adjust the bin size to achieve the desired level of detail.
Overall, the `matplotlib.pyplot.hist()` function is a versatile tool for visualizing data distributions in Python. With its numerous customization options, it allows you to create informative and visually appealing histograms.
So go ahead and start exploring your data with histograms using Matplotlib!
Want to learn Python for FREE? Enroll in our Introduction to Python Program today!
Seasoned AI enthusiast with a deep passion for the ever-evolving world of artificial intelligence. With a sharp eye for detail and a knack for translating complex concepts into accessible language, we are at the forefront of AI updates for you. Having covered AI breakthroughs, new LLM model launches, and expert opinions, we deliver insightful and engaging content that keeps readers informed and intrigued. With a finger on the pulse of AI research and innovation, we bring a fresh perspective to the dynamic field, allowing readers to stay up-to-date on the latest developments.


