Introduction
How difficult is it to build a machine learning model on R or Python?
For beginners, it’s a Herculean task. For intermediates and experts, it’s just a matter of system capacity, problem understanding and a little time. Machine Learning models sometime face the issue of system incompatibility. Specially, when the data set is huge. In such cases, either the model takes longer to compute or the system crashes. Hence, for beginners and experts, the use of machine learning offers untimely challenges as well.
The good news is, machine learning has become a lot easier is last few years. As a beginner in machine learning, you can kick start your machine learning journey with Microsoft AzureML.
In this article, I’ll impart the necessary information to get you started with Machine Learning. Also, I’ve demonstrated a step by step tutorial to create a machine learning model using this software.
The speed of computation on Microsoft AzureML is comparable to R or Python. Hence, I’d say its worth trying for experts also.
What is AzureML?
 AzureML is a GUI implementation of machine learning algorithm by Microsoft. Using this tool, implementation of such algorithm becomes exceptionally easy. If you are versed with E-Miner, than understanding this tool wouldn’t be difficult. I found this tool more resourceful and more graphical than E-Miner.
What are the resources available on AzureML?
Let’s talk about various resources available with this tool.
- Sample Data sets : I love to test tools which have many in-built data sets. It makes the process easier and convenient to test the power of tool. AzureML comes with a long list of inbuilt data sets. Here are the details of available data sets: List of Data Sets
- Machine Learning Tools : Azure ML has almost every machine learning algorithm and evaluation metrics formulation.
- Data transformation : It has all the filtering options, transformation options, summarization options and matrix calculation options.
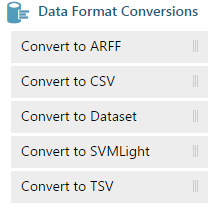
- Data Format Conversion Options: What if you want to add your own dataset? AzureML has a handful of options to read data sets from your local system. Here are these options :
Building a Model
Now, you know the potential of AzureML. Let’s now focus on the ways of using them. I will take up an easy to understand example to demonstrate the same. I’d suggest you to practice these steps with me to get a better understanding of this tutorial.
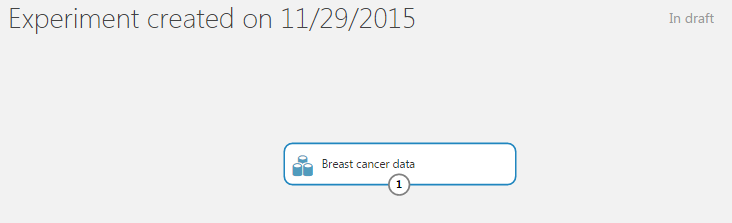
This is where you start – (By clicking on create a new experiment)
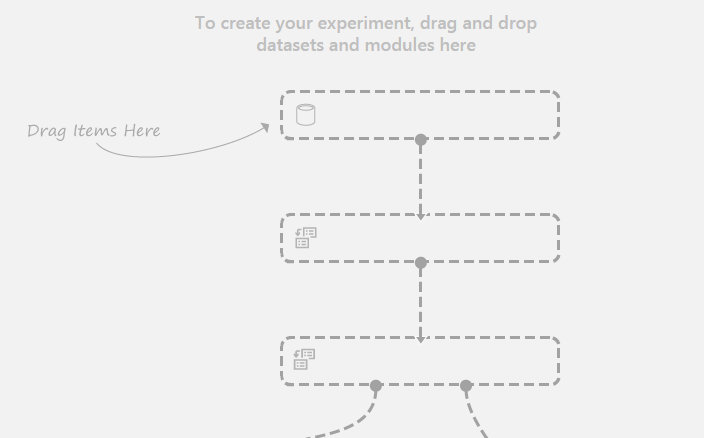
You get an empty experiment table :
Now you can choose a pallete:
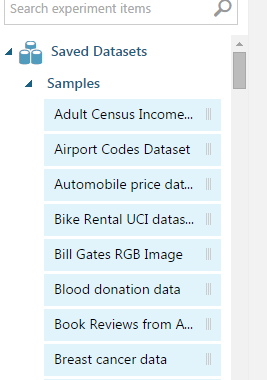
Step 1 : Choose the Data set – This can be your sample data or you can upload also. In this tutorial, I’ll use “Breast Cancer data” from the in-built data sets. Just drag and drop this data in the main window.
Step 2: Choose a sampling tool: You can use search option from pallette to find the “split data” option. Place this below your data set and join.
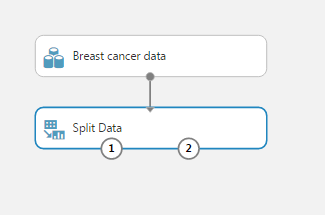
You now see two touch points at the split data node. This basically means that you have two data sets ready to be taken forward. Towards the right side, you have the freedom to choose the type of split.
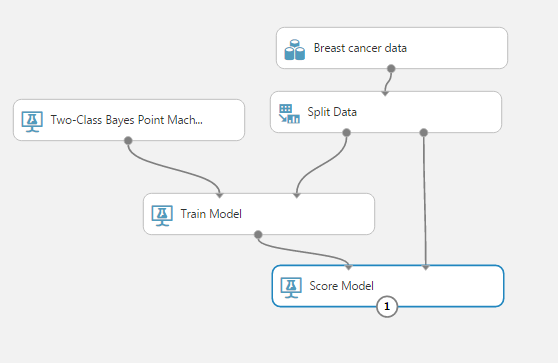
Step 3 : Train a machine learning model : You will need two nodes for this step. Firstly, it will be the type of model you want to build. Secondly, it will be the train model node. You can refer to the following figure :
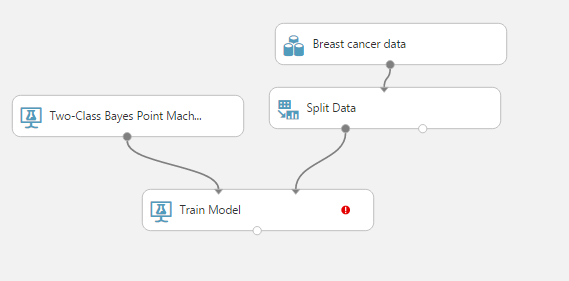
You can still notice an exclamation mark in the train model node. It suggests that you need to specify the target variable. Let’s choose the target variable by clicking the mark. Now, you would see a window on right side. Now choose “Launch column slector”.
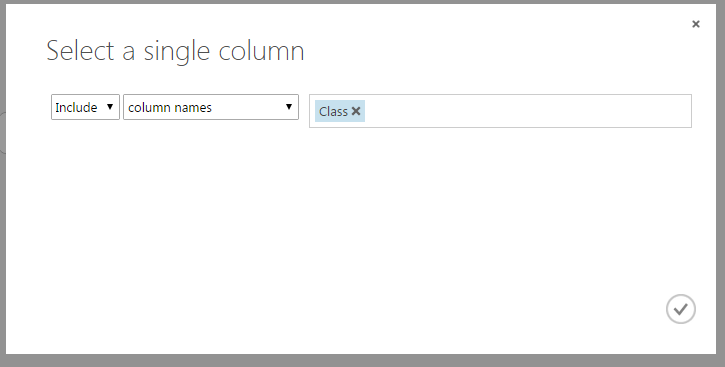
Here I have chosen “Class” as the target variable.
Step 4: Now you score: Refer to the following figure
Step 5: Finally evaluate
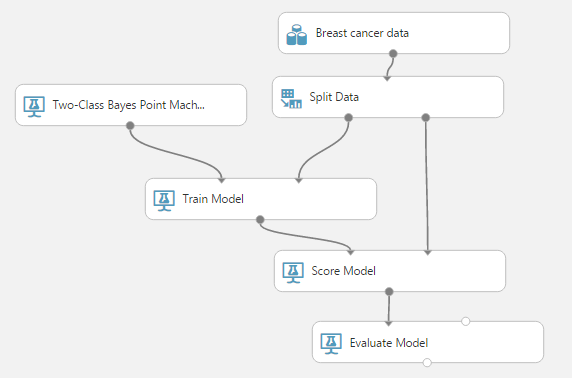
And RUN the model!
Visualizing the Data Set and Output
To visualize any node, you simply go to node, press right click, then click visualize.
Here is how visual data looks like in our case :
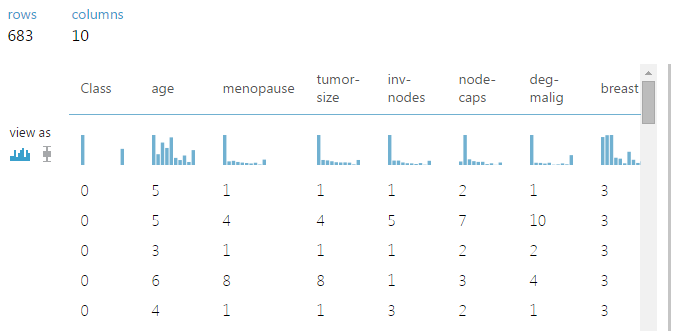
As you can see, Class variable only has two values as expected. This tool neatly draws distribution for each variable and allows you to check normality as well.
Here is how the scored model looks like :

As clearly visible, the estimated probabilities are mostly near zero and one. The cumulative distribution stays almost flat in between. Hence, the model outputs highly segregated values.
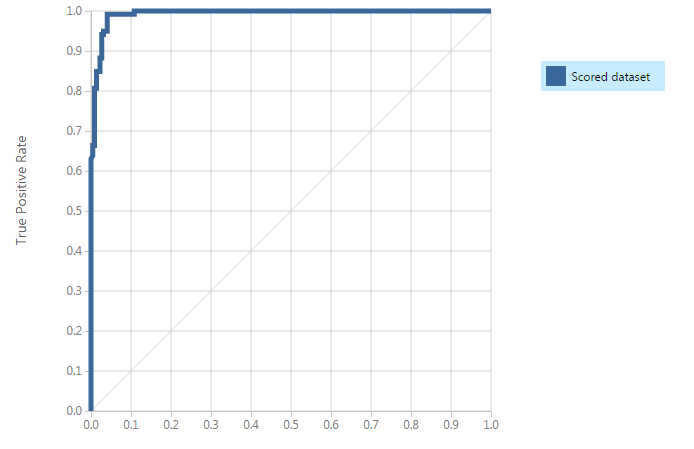
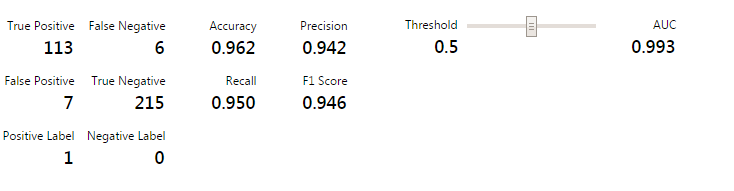
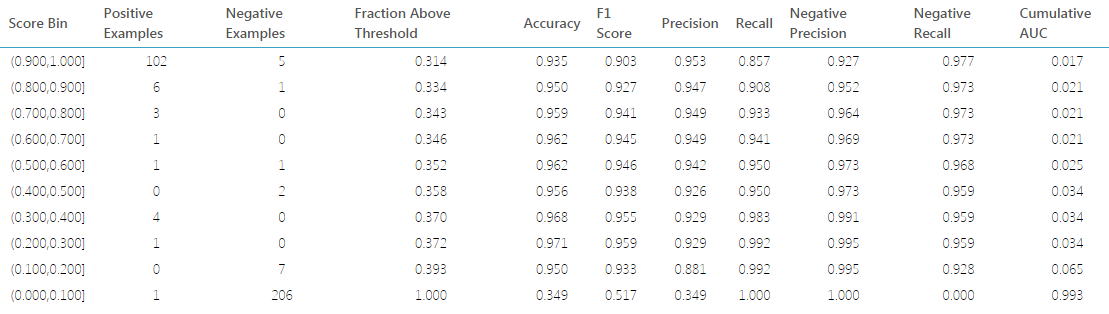
Finally, here is how the evaluation graphs look like :
End Notes
As you can see, the model was highly efficient and it took me less than a minute to build and execute. The evaluation matrices computed is quite exhaustive and probably has the number you were looking for. I loved the tool because of the time efficiency and the user ease it provides.
Did you find this article helpful ? Share with us your experience with Azure ML. I’d love to hear you.
If you like what you just read & want to continue your analytics learning, subscribe to our emails, follow us on twitter or like our facebook page.
Tavish Srivastava, co-founder and Chief Strategy Officer of Analytics Vidhya, is an IIT Madras graduate and a passionate data-science professional with 8+ years of diverse experience in markets including the US, India and Singapore, domains including Digital Acquisitions, Customer Servicing and Customer Management, and industry including Retail Banking, Credit Cards and Insurance. He is fascinated by the idea of artificial intelligence inspired by human intelligence and enjoys every discussion, theory or even movie related to this idea.


Hi Tavish, Thank you for demonstrating AzureML tool. It is amazing how fast one can build a model using this tool.. It`s quite helpful. Thanks
Hi Tavish, Thanks for this informative article. .As a beginner in machine learning it helped me alot.
Hey Tavish, Thank you for sharing such valuable informations, your posts always brings something new for newbies like me. By the way is there any way to use free trial of Azure without providing payment information?
Oh yes ! You have a trial period of 8 minutes where you can enter as a guest. No credit card details required.