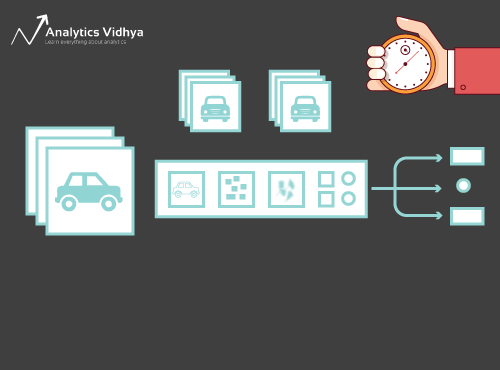
13 minutes
Build a deep learning image classification model in a few minutes without the hassle of lengthy training. No need for a powerful machine! I’ve heard this countless times from aspiring data scientists who shy away from building deep learning models on their own machines.
You don’t need to be working for Google or other big tech firms to work on deep learning datasets! It is entirely possible to build your own neural network from the ground up in a matter of minutes without needing to lease out Google’s servers. Fast.ai’s students designed a model on the Imagenet dataset in 18 minutes – and I will showcase something similar in this article, focusing on image classification.
Deep learning is a vast field so we’ll narrow our focus a bit and take up the challenge of solving an Image Classification project. Additionally, we’ll be using a very simple deep learning architecture to achieve a pretty impressive accuracy score.
You can consider the Python code we’ll see in this article as a benchmark for building Image Classification models. Once you get a good grasp on the concept, go ahead and play around with the code, participate in competitions and climb up the leaderboard!
Checkout 4 Pre-Trained Models for Image Classification
If you’re new to deep learning and are fascinated by the field of computer vision (who isn’t?!), do check out the ‘Computer Vision using Deep Learning’ course. It’s a comprehensive introduction to this wonderful field and will set you up for what is inevitably going to a huge job market in the near future.
Project to apply Image ClassificationProblem StatementMore than 25% of the entire revenue in E-Commerce is attributed to apparel & accessories. A major problem they face is categorizing these apparels from just the images especially when the categories provided by the brands are inconsistent. This poses an interesting computer vision problem that has caught the eyes of several deep learning researchers. Fashion MNIST is a drop-in replacement for the very well known, machine learning hello world – MNIST dataset which can be checked out at ‘Identify the digits’ practice problem. Instead of digits, the images show a type of apparel e.g. T-shirt, trousers, bag, etc. The dataset used in this problem was created by Zalando Research. |
Table of Contents
What Is Image Classification?
You will have instantly recognized it – it’s a (swanky) car. Take a step back and analyze how you came to this conclusion – you were shown an image and you classified the class it belonged to (a car, in this instance). And that, in a nutshell, is what image classification is all about.
Here is the article about image classification using Machine learning
There are potentially n number of categories in which a given image can be classified. Manually checking and classifying images is a very tedious process. The task becomes near impossible when we’re faced with a massive number of images, say 10,000 or even 100,000. How useful would it be if we could automate this entire process and quickly label images per their corresponding class? This is where deep learning models for image classification come into play. They offer a solution to this challenge by leveraging advanced algorithms to automatically categorize images based on their content.
Self-driving cars are a great example to understand where image classification is used in the real-world. To enable autonomous driving, we can build deep learning models for image classification that recognize various objects, such as vehicles, people, moving objects, etc. on the road. We’ll see a couple more use cases later in this article but there are plenty more applications around us. Use the comments section below the article to let me know what potential use cases you can come with up!
Now that we have a handle on our subject matter, let’s dive into how an image classification model is built, what are the prerequisites for it, and how it can be implemented in Python.
Read all about for Image Classification on Custom Datasets
Setting Up the Structure of Our Image Data
Our data needs to be in a particular format in order to solve an image classification problem. We will see this in action in a couple of sections but just keep these pointers in mind till we get there.
You should have 2 folders, one for the train set and the other for the test set. In the training set, you will have a .csv file and an image folder:
- The .csv file contains the names of all the training images and their corresponding true labels
- The image folder has all the training images.
The .csv file in our test set is different from the one present in the training set. This test set .csv file contains the names of all the test images, but they do not have any corresponding labels. Can you guess why? Our model will be trained on the images present in the training set and the label predictions will happen on the testing set images
If your data is not in the format described above, you will need to convert it accordingly (otherwise the predictions will be awry and fairly useless).
Breaking Down the Process of Model Building
Before we deep dive into the Python code, let’s take a moment to understand how an image classification model is typically designed. We can divide this process broadly into 4 stages. Each stage requires a certain amount of time to execute:
- Loading and pre-processing Data – 30% time
- Defining Model architecture – 10% time
- Training the model – 50% time
- Estimation of performance – 10% time
Let me explain each of the above steps in a bit more detail. This section is crucial because not every model is built in the first go. You will need to go back after each iteration, fine-tune your steps, and run it again. Having a solid understanding of the underlying concepts will go a long way in accelerating the entire process.
Stage 1: Loading and pre-processing the data
Data is gold as far as deep learning models are concerned. Your image classification model has a far better chance of performing well if you have a good amount of images in the training set. Also, the shape of the data varies according to the architecture/framework that we use.
Hence, the critical data pre-processing step (the eternally important step in any project). I highly recommend going through the ‘Basics of Image Processing in Python’ to understand more about how pre-processing works with image data.
But we are not quite there yet. In order to see how our model performs on unseen data (and before exposing it to the test set), we need to create a validation set. This is done by partitioning the training set data.
In short, we train the model on the training data and validate it on the validation data. Once we are satisfied with the model’s performance on the validation set, we can use it for making predictions on the test data.
Time required for this step: We require around 2-3 minutes for this task.
Stage 2: Defining the model’s architecture
This is another crucial step in our deep learning model building process. We have to define how our model will look and that requires answering questions like:
- How many convolutional layers do we want?
- What should be the activation function for each layer?
- How many hidden units should each layer have?
And many more. These are essentially the hyperparameters of the model which play a MASSIVE part in deciding how good the predictions will be.
How do we decide these values? Excellent question! A good idea is to pick these values based on existing research/studies. Another idea is to keep experimenting with the values until you find the best match but this can be quite a time consuming process.
Time required for this step: It should take around 1 minute to define the architecture of the model.
Stage 3: Training the model
For training the model, we require:
- Training images and their corresponding true labels
- Validation images and their corresponding true labels (we use these labels only to validate the model and not during the training phase)
We also define the number of epochs in this step. For starters, we will run the model for 10 epochs (you can change the number of epochs later).
Time required for this step: Since training requires the model to learn structures, we need around 5 minutes to go through this step.
And now time to make predictions!
Stage 4: Estimating the model’s performance
Finally, we load the test data (images) and go through the pre-processing step here as well. We then predict the classes for these images using the trained model.
Time required for this step: ~ 1 minute.
Setting Up the Problem Statement and Understanding the Data
We will be taking on a fascinating challenge to grasp image classification. The task involves constructing a model capable of categorizing a set of images based on apparel types like shirts, trousers, shoes, socks, etc. This particular problem is a common challenge for many e-commerce retailers, adding an extra layer of intrigue to this computer vision problem
This challenge is called ‘Identify the Apparels’ and is one of the practice problems we have on our DataHack platform. You will have to register and download the dataset from the above link.

We have a total of 70,000 images (28 x 28 dimension), out of which 60,000 are from the training set and 10,000 from the test one. The training image Classification are pre-labelled according to the apparel type with 10 total classes. The test images are, of course, not labelled. The challenge is to identify the type of apparel present in all the test images.
We will build our model on Google Colab since it provides a free GPU to train our models.
Steps to Build Our Model
Time to fire up your Python skills and get your hands dirty. We are finally at the implementation part of our learning!
- Setting up Google Colab
- Importing Libraries
- Loading and Preprocessing Data – (3 mins)
- Creating a validation set
- Defining the model structure – (1 min)
- Training the model – (5 min)
- Making predictions – (1 min)
Let’s look at each step in detail.
Steps to Build Image Classification
Step 1: Setting up a Google Colab
Since we’re importing our data from a Google Drive link, we’ll need to add a few lines of code in our Google Colab notebook. Create a new Python 3 notebook and write the following code blocks:
!pip install PyDriveThis will install PyDrive. Now we will import a few required libraries:
import os
from pydrive.auth import GoogleAuth
from pydrive.drive import GoogleDrive
from google.colab import auth
from oauth2client.client import GoogleCredentials
Next, we will create a drive variable to access Google Drive:
auth.authenticate_user()
gauth = GoogleAuth()
gauth.credentials = GoogleCredentials.get_application_default()
drive = GoogleDrive(gauth)
To download the dataset, we will use the ID of the file uploaded on Google Drive:
download = drive.CreateFile({'id': '1BZOv422XJvxFUnGh-0xVeSvgFgqVY45q'})
Replace the ‘id’ in the above code with the ID of your file. Now we will download this file and unzip it:
download.GetContentFile('train_LbELtWX.zip')
!unzip train_LbELtWX.zip
You have to run these code blocks every time you start your notebook.
Step 2 : Import the libraries we’ll need during our model building phase.
import keras
from keras.models import Sequential
from keras.layers import Dense, Dropout, Flatten
from keras.layers import Conv2D, MaxPooling2D
from keras.utils import to_categorical
from keras.preprocessing import image
import numpy as np
import pandas as pd
import matplotlib.pyplot as plt
from sklearn.model_selection import train_test_split
from keras.utils import to_categorical
from tqdm import tqdm
Step 3: Recall the pre-processing steps we discussed earlier. We’ll be using them here after loading the data.
train = pd.read_csv('train.csv')Next, we will read all the training images, store them in a list, and finally convert that list into a numpy array.
# We have grayscale images, so while loading the images we will keep grayscale=True, if you have RGB images, you should set grayscale as False
train_image = []
for i in tqdm(range(train.shape[0])):
    img = image.load_img('train/'+train['id'][i].astype('str')+'.png', target_size=(28,28,1), grayscale=True)
    img = image.img_to_array(img)
    img = img/255
    train_image.append(img)
X = np.array(train_image)
As it is a multi-class classification problem (10 classes), we will one-hot encode the target variable.
y=train['label'].values
y = to_categorical(y)
Step 4: Creating a validation set from the training data.
X_train, X_test, y_train, y_test = train_test_split(X, y, random_state=42, test_size=0.2)Step 5: Define the model structure.
We will create a simple architecture with 2 convolutional layers, one dense hidden layer and an output layer.
model = Sequential()
model.add(Conv2D(32, kernel_size=(3, 3),activation='relu',input_shape=(28,28,1)))
model.add(Conv2D(64, (3, 3), activation='relu'))
model.add(MaxPooling2D(pool_size=(2, 2)))
model.add(Dropout(0.25))
model.add(Flatten())
model.add(Dense(128, activation='relu'))
model.add(Dropout(0.5))
model.add(Dense(10, activation='softmax'))
Next, we will compile the model we’ve created.
model.compile(loss='categorical_crossentropy',optimizer='Adam',metrics=['accuracy'])Step 6: Training the model.
In this step, we will train the model on the training set images and validate it using, you guessed it, the validation set.
model.fit(X_train, y_train, epochs=10, validation_data=(X_test, y_test))
Step 7: Making predictions!
We’ll initially follow the steps we performed when dealing with the training data. Load the test images and predict their classes using the model.predict_classes() function.
download = drive.CreateFile({'id': '1KuyWGFEpj7Fr2DgBsW8qsWvjqEzfoJBY'})
download.GetContentFile('test_ScVgIM0.zip')
!unzip test_ScVgIM0.zip
Let’s import the test file:
test = pd.read_csv('test.csv')Now, we will read and store all the test images:
test_image = []
for i in tqdm(range(test.shape[0])):
    img = image.load_img('test/'+test['id'][i].astype('str')+'.png', target_size=(28,28,1), grayscale=True)
    img = image.img_to_array(img)
    img = img/255
    test_image.append(img)
test = np.array(test_image)
# making predictions
prediction = model.predict_classes(test)We will also create a submission file to upload on the DataHack platform page (to see how our results fare on the leaderboard).
download = drive.CreateFile({'id': '1z4QXy7WravpSj-S4Cs9Fk8ZNaX-qh5HF'})
download.GetContentFile('sample_submission_I5njJSF.csv')
# creating submission file
sample = pd.read_csv('sample_submission_I5njJSF.csv')
sample['label'] = prediction
sample.to_csv('sample_cnn.csv', header=True, index=False)Download this sample_cnn.csv file and upload it on the contest page to generate your results and check your ranking on the leaderboard. This will give you a benchmark solution to get you started with any Image Classification problem!
You can try hyperparameter tuning and regularization techniques to improve your model’s performance further. I ecnourage you to check out this article to understand this fine-tuning step in much more detail – ‘A Comprehensive Tutorial to learn Convolutional Neural Networks from Scratch’.
How to build Image Classification Model?

- Install Libraries:
Install TensorFlow, NumPy, and Matplotlib.
pip install tensorflow numpy matplotlib - Prepare Data:
Collect labeled images, split into training and testing sets. - Build Model:
Create a Convolutional Neural Network (CNN) using Keras.
from tensorflow.keras import layers, models
model = models.Sequential()
… (add convolutional and dense layers)
model.compile(optimizer=’adam’, loss=’categorical_crossentropy’, metrics=[‘accuracy’]) - Train Model:
Train the model using your training data.
model.fit(train_images, train_labels, epochs=num_epochs, validation_data=(val_images, val_labels))
- Evaluate and Predict:
Evaluate the model on the test set and make predictions.
test_loss, test_acc = model.evaluate(test_images, test_labels)
predictions = model.predict(test_images) - Optional: Data Augmentation and Fine-Tuning:
Use data augmentation for variety, and fine-tune as needed.
Optional: Data Augmentation
datagen = ImageDataGenerator(…)
model.fit(datagen.flow(training_data, training_labels, batch_size=batch_size), epochs=num_epochs)
Optional: Fine-Tuning
Adjust hyperparameters or architecture based on performance.
New Practice Problem

Let’s test our learning on a different dataset. We’ll be cracking the ‘Identify the Digits’ practice problem in this section. Go ahead and download the dataset. Before you proceed further, try to solve this on your own. You already have the tools to solve it – you just need to apply them! Come back here to check your results or if you get stuck at some point.
In this challenge, we need to identify the digit in a given image. We have a total of 70,000 images – 49,000 labelled ones in the training set and the remaining 21,000 in the test set (the test images are unlabelled). We need to identify/predict the class of these unlabelled images.
Ready to begin? Awesome! Create a new Python 3 notebook and run the following code:
# Setting up Colab
!pip install PyDrive
import os
from pydrive.auth import GoogleAuth
from pydrive.drive import GoogleDrive
from google.colab import auth
from oauth2client.client import GoogleCredentialsauth.authenticate_user()
gauth = GoogleAuth()
gauth.credentials = GoogleCredentials.get_application_default()
drive = GoogleDrive(gauth)# Replace the id and filename in the below codes
download = drive.CreateFile({'id': '1ZCzHDAfwgLdQke_GNnHp_4OheRRtNPs-'})
download.GetContentFile('Train_UQcUa52.zip')
!unzip Train_UQcUa52.zip# Importing libraries
import keras
from keras.models import Sequential
from keras.layers import Dense, Dropout, Flatten
from keras.layers import Conv2D, MaxPooling2D
from keras.utils import to_categorical
from keras.preprocessing import image
import numpy as np
import pandas as pd
import matplotlib.pyplot as plt
from sklearn.model_selection import train_test_split
from keras.utils import to_categorical
from tqdm import tqdmtrain = pd.read_csv('train.csv')
# Reading the training images
train_image = []
for i in tqdm(range(train.shape[0])):
    img = image.load_img('Images/train/'+train['filename'][i], target_size=(28,28,1), grayscale=True)
    img = image.img_to_array(img)
    img = img/255
    train_image.append(img)
X = np.array(train_image)
# Creating the target variable
y=train['label'].values
y = to_categorical(y)# Creating validation set
X_train, X_test, y_train, y_test = train_test_split(X, y, random_state=42, test_size=0.2)# Define the model structure
model = Sequential()
model.add(Conv2D(32, kernel_size=(3, 3),activation='relu',input_shape=(28,28,1)))
model.add(Conv2D(64, (3, 3), activation='relu'))
model.add(MaxPooling2D(pool_size=(2, 2)))
model.add(Dropout(0.25))
model.add(Flatten())
model.add(Dense(128, activation='relu'))
model.add(Dropout(0.5))
model.add(Dense(10, activation='softmax'))# Compile the model
model.compile(loss='categorical_crossentropy',optimizer='Adam',metrics=['accuracy'])# Training the model
model.fit(X_train, y_train, epochs=10, validation_data=(X_test, y_test))download = drive.CreateFile({'id': '1zHJR6yiI06ao-UAh_LXZQRIOzBO3sNDq'})
download.GetContentFile('Test_fCbTej3.csv')
test_file = pd.read_csv('Test_fCbTej3.csv')test_image = []
for i in tqdm(range(test_file.shape[0])):
img = image.load_img('Images/test/'+test_file['filename'][i], target_size=(28,28,1), grayscale=True)
img = image.img_to_array(img)
img = img/255
test_image.append(img)
test = np.array(test_image)prediction = model.predict_classes(test)download = drive.CreateFile({'id': '1nRz5bD7ReGrdinpdFcHVIEyjqtPGPyHx'})
download.GetContentFile('Sample_Submission_lxuyBuB.csv')sample = pd.read_csv('Sample_Submission_lxuyBuB.csv')
sample['filename'] = test_file['filename']
sample['label'] = prediction
sample.to_csv('sample.csv', header=True, index=False)Submit this file on the practice problem page to get a pretty decent accuracy number. It’s a good start but there’s always scope for improvement. Keep playing around with the hyperparameter values and see if you can improve on our basic model.
Read how you can Create Your Own Image Classification Model Using Python
Conclusion
Who said image classification models required hours or days to train? My aim here was to showcase that you can come up with a pretty decent image classification model in double-quick time. You should pick up similar challenges and try to code them from your end as well. There’s nothing like learning by doing!
The top data scientists and analysts have these codes ready before a Hackathon even begins. They use these codes to make early submissions before diving into a detailed analysis. Once they have a benchmark solution, they start improving their model using different techniques.
Frequently Asked Questions
Q1. What is image classification?
A. Image classification is how a model classifies an image into a certain category based on pre-defined features or characteristics.
Q2. Which model is best for image classification?
A. The most popular image classification model is Convolutional Neural Network (CNN).
Q3.What are the different types of image classification?
Different types of image classification include binary classification (dividing images into two categories), multi-class classification (dividing images into more than two categories), and object detection (identifying and locating multiple objects within an image).
Q4.What are the CNN models used for image classification?
CNN (Convolutional Neural Network) models commonly used for image classification include AlexNet, VGGNet, ResNet, Inception, and MobileNet
Q5. Which model is best for image classification?
The best model for image classification depends on various factors such as the specific task, the size and nature of the dataset, computational resources, and performance requirements. Generally, deeper and more complex models like ResNet and Inception tend to perform well, but the “best” model can vary based on the context of the problem.
My research interests lies in the field of Machine Learning and Deep Learning. Possess an enthusiasm for learning new skills and technologies.


Hi Pulkit, This is a great article and timely as far as I am concerned. Off late, I have been trying to get some guidance on how to beat the computational power issue when building models on huge datasets. Using google as mentioned in your article is exactly the concept I was wanting to get some guidance on. And not just for Deep Learning models, this will be handy for other typical ML model exercises like RF, SVM and even text mining where after creating the DTM, data size explodes. I have faced difficulties in ensuring the model training completion because my laptop memory can be just as much. However I have been a R practitioner and not quite gone into Python so much as yet. Would it possible to give the exact same codes in R. If yes, it will be very helpful.
Hi Pranov, Glad to hear that you found it helpful! Regarding the codes in R, I don't have much knowledge about R but I will look for the codes in R and will share resources with you.
Hi Pranov, same here. I also use R pretty often. I am not sure but I found that Keras has also support for R, but I never tried.
Hi, I have tried with the above mentioned code. I am getting an error for downloading the test data set. While downloading training data there was no error and model got trained well. However, while dowloading test data it is giving me an error "data not found". It may because of wrong file ID. Please mention how to find a correct file ID to download the testing data set?
Hi Charanteja, You have to upload the test file on your drive and from there you will get the ID for that file. Paste that ID in the code and it should work.
from google.colab import files file = files.upload() #upload the test zip !unzip test_ScVgIM0.zip
Hi Pulkit, Thanks for the great article, it is very helpful. When I am trying to run this line: from google.colab import auth, I get this error: No module named 'google.colab'
Hi Nouman, You should run these codes in google colab instead of using your own system. The codes are designed to run on colab which provides free GPU to run your model. So, use google colab for training your model.