Overview
- New to working with image data? The skimage module in Python is an ideal starting point
- Learn 8 simple yet powerful tricks for image processing in Python using skimage
- We have included the Python code for each skimage trick – so get started today!
Introduction
What’s the first thing that comes to your mind when you hear “image preprocessing”? I received a few quizzical looks when I asked this question to a group of data science enthusiasts. If you’re wondering what this is, read on!
We’re pretty familiar with the preprocessing steps for structured (tabular) data. You find and plug in any missing values, detect and deal with outliers, etc. This helps us build better and more robust machine learning models. But how does that work when we’re working with image data?
As it turns out, the preprocessing step is a crucial one in the world of computer vision (images, videos, and so on). skimage, part of the scikit-learn family, is a really helpful library to get us started.
In this article, we will look at some simple yet powerful preprocessing techniques for images using skimage in Python. This is a good starting point for your computer vision journey so happy learning!
And if computer vision is your career of choice, or you want to learn more about how to work with images, build object detection models and more, check out the below course:
Table of Contents
- What is skimage and Why Should We Use it?
- Reading Images in Python using skimage
- Resizing Images
- Upscale / Downscale Images
- Rotate by different angles
- Horizontal and Vertical Flip
- Image Cropping
- Altering Image Brightness
- Using Filters
What is skimage and Why Should We Use it?
There are multiple libraries and frameworks in Python that let us work with image data. So why should we use skimage? It’s a fair question so let me answer that here before we dive into the article.
Scikit-image, or skimage, is an open source Python package designed for image preprocessing.
If you have previously worked with sklearn, getting started with skimage will be a piece of cake. Even if you are completely new to Python, skimage is fairly easy to learn and use.
What I really like about skimage is that it has a well-structured documentation that lists down all the modules, sub-modules and functions provided within skimage. Here is the list of all the sub-modules and functions within the skimage package: API Reference.
1. Reading Images in Python using skimage
Let’s start with the basics. The very first step is learning how to import images in Python using skimage.
An image is made up of multiple small square boxes called pixels. The image I’ve shown below is a perfect example of this. The small squares you see here are the pixels:

We can see that this image has 22 pixels along the vertical line and 16 pixels horizontally. Hence, the size of this image would be 22 x 16.
When we read or load an image using scikit-image (or any other package for that matter), we see that the image is stored in the form of numbers. These numbers are called pixel values and they represent the intensity of each pixel in the image.
Loading Images from skimage
Within the scikit-image package, there are several sample images provided in the data module. Let’s say we want to load a single image to perform a few experiments. Instead of using an external image, we can simply load one of the images provided within the package!
Here is the Python code to do this:
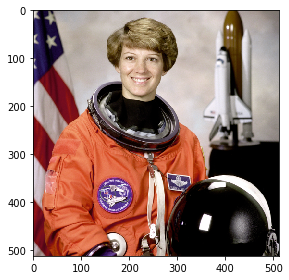
Notice that I have used the imshow function here to view the image in the notebook itself. Simple, right?
What if you want to load an image from your machine instead of the ones provided in the package? I’m sure that’s what you’ll want to do eventually. For this, we can use the imread function from skimage.
We can read images in two formats – colored and grayscale. We will see both of these in action and understand how they’re different.
Reading Images from our System using skimage
The imread function has a parameter “as_gray” which is used to specify if the image must be converted into a grayscale image or not. We will start with reading an image in grayscale format, by setting the parameter to true:
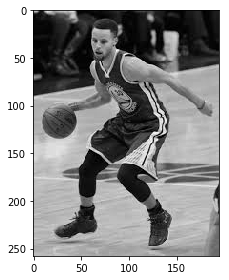
We are easily able to view the image using the imshow function. But is that really how the image is stored? Let us check what we have in the variable image_gray:
(258, 195)
[[0.73586314 0.77115725 0.7907651  ... 0.11822745 0.11822745 0.11430588]
 [0.65743176 0.70056902 0.72017686 ... 0.11822745 0.11430588 0.11430588]
 [0.41401176 0.45714902 0.48067843 ... 0.11430588 0.11430588 0.11038431]
 ...
 [0.73491725 0.73491725 0.73491725 ... 0.42055725 0.42055725 0.42055725]
 [0.72594314 0.72986471 0.72986471 ... 0.41750667 0.41750667 0.41750667]
 [0.72594314 0.72986471 0.72986471 ... 0.41750667 0.41750667 0.41750667]]
The variable stores the image in the form of a matrix of numbers. As you can see, the shape of the matrix is 259 x 195. These numbers are called pixel values and they denote the intensity of the pixels in the images.
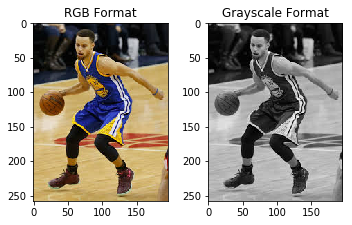
Now, we’ll load the image in the original color format. For this, we will have to set the parameter ‘as_gray’ to False:
(258, 195, 3)

Nice! We have the same image here in a colored format. Now you might be wondering what is the difference between the two and which format should you use? Good questions – so let’s address them one by one.
Did you notice the shape of the image in this case? It is (258, 195, 3) while previously the shape was (258, 195). The three dimensions here represent the number of channels in the image. For a colored image, the most popular format for storing images is RGB (Red-Green-Blue).
But which format should we use? The colored images have more information as compared to the grayscale images but the size of the images is very large. The number of pixels in RGB is 3 times more. This can present quite a challenge when we’re restricted by low compute power.
Hence, grayscale images are often used to reduce the computational complexity. So if the size of your dataset is very large, you can choose to go for grayscale over colored.
2. Changing Image Format
In the last section we discussed about two important formats in which we can load the images – RGB and grayscale. In this section we will learn how to convert an image from one format to another. To start with, we will read an image in RGB format and convert it into the grayscale format. The function we will use here is rgb2gray–
Other two popular formats are HSV (hue, saturation, value) and HSL (hue, saturation, lightness) which are alternative representations of the RGB format. Let me briefly explain what each of these terms mean.
- Hue is a degree on the color wheel where 0 is for red, 120 is green, 240 is blue and again 360 would be red.
- Saturation represents the percentage of that color, where 0 is white and 100 is the full color.
- Value denotes the mixture of the colors with varying amounts of black or white paint.
- Lightness is another way to show the shade of the image where 0 is black and 1 is white.
The image shown below will make your understanding more clear-

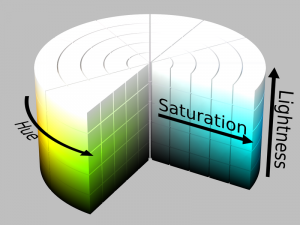
Source: Wikipedia
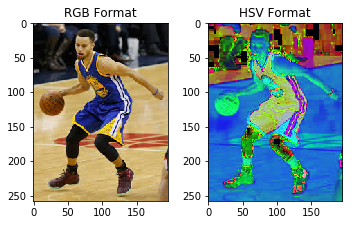
Changing the image to any of these formats will be the same as we did for converting to grayscale. We can use the functions rgb2hsl and rgb2hsv to convert into HSL and HSV format respectively. Here I have demonstrated the conversion of image to HSV format.
3. Resizing Images using skimage
One of the biggest challenges in computer vision is that we require a huge amount of data for training our model. The data we collect is often from different sources which might result in variation in the size of the images. This might be a problem while extracting features from the images, or using the same for data augmentation.
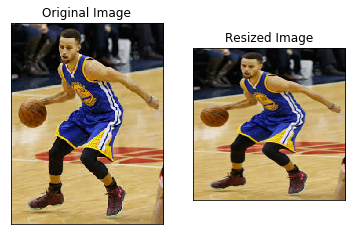
Ideally, the size of the images should be the same when we’re building our model. If we’re using a pre-trained model, it is important to resize and normalize the input data to the same format over which the network was originally trained. This is why resizing images is an important image preprocessing step.
Here, we are going to use the resize function from skimage. The input to this function will be the image we want to update and the required dimensions for the new image:
4. Rescaling (Upscale/Downscale) Images using skimage
Rescaling images is another common computer vision technique. This implies scaling the images by a particular factor. For example – reducing the size of each image by half (downscale) or increasing the size of images by a factor of 2 (upscale).
You might argue that we can simply use the resize function for this task, what is the difference?
If the original size of all the images is the same, say (300, 300), we can directly use the resize function and specify the required dimensions (150, 150). But if the size of the images is different (like the images shown below), the resize function cannot be used. This is because the ‘half’ of each image would be different.
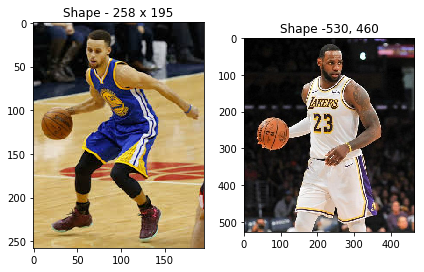
And this is a use case you will encounter a lot in your computer vision journey.
So here, we can use the rescale function and specify the scaling factor. All the images will be scaled by this factor, based on the original size of the image. Here is an example:

5. Rotate an Image by Different Angles using skimage
So far we have looked at resizing and rescaling the images. Let’s turn our focus and see how we can change the orientation of images. But before we dive into that, we should discuss why we need to change the image orientation in the first place.
Consider the below images. The first image is slightly tilted (which may be due to the camera orientation).
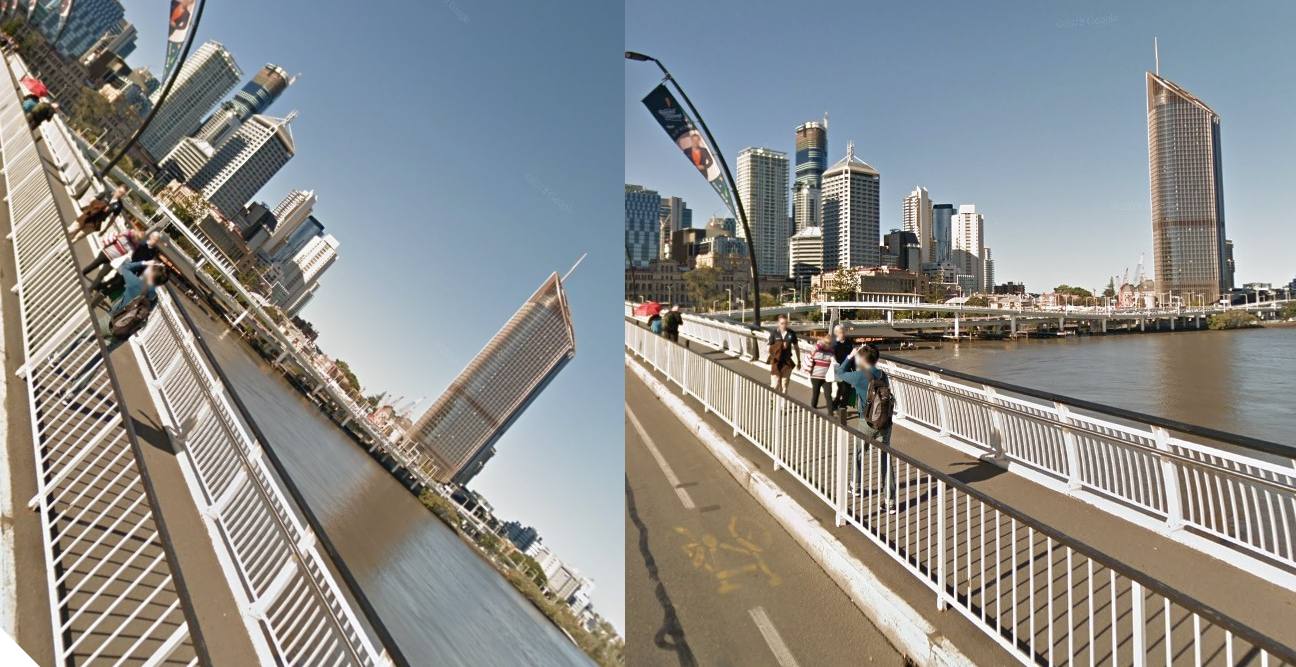
To fix this orientation problem, we will need to rotate the image by a certain angle. We can use the rotate function of skimage and specify the angle by which we need the image to be rotated:
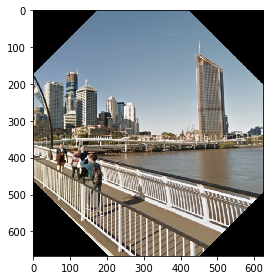
This looks great! The orientation problem is all fixed. But if you look closely, the picture is cropped around the corners. This is because, during the rotation, the size of the image remains the same causing the area around the corner to get cropped.
We are not losing any important information in this scenario but that might not always be the case. This obstacle is taken care of by the resize parameter in the rotate function (by default the parameter value is False):

We can also use the rotation concept for data augmentation. For those who are not familiar with the term, Data Augmentation is a technique of generating more samples for training the model, using the available data.
Say you are building an image classification model to identify images of cats and dogs. Take a look at the sample images shown below. Both the images on the left would be classified as ‘dog’ and the images on the right would be classified as ‘cat’:

What did we change here? We simply rotated the images by 180 degrees and generated the new images. Think about it – you can double the size of the training data by simply adding one new image against every image in the existing data!
6. Flip Images Horizontally and Vertically
We can flip an image both horizontally and vertically. This creates a mirror image along the horizontal/vertical axis. We can use this technique for both image preprocessing and image augmentation.
Although there is no direct function for this in skimage, we can use NumPy to perform this task.
NumPy provides functions flipud and fliplr for flipping the images across the horizontal and vertical axis respectively.
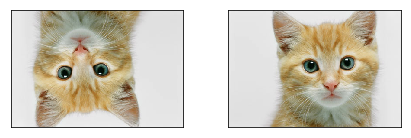
The internal working of the function is very simple. For a horizontal flip, the rows remain intact while the entries in the columns are reserved. Let us take the same cat/dog example and use the flip function on it:

Looking good!
7. Crop Images
You must have used the cropping function on your phone a gazillion times. I do it way too often!
You can crop images inside your Python notebook as well using skimage. We crop images to remove the unwanted portion of the image or to focus on a particular part of the image.
Let’s say we have the below image from a basketball match (left image). In its current form, the shape of the image is 1067 x 1600. Now, I want to remove 100 pixels from all 4 sides of the image. This would mean that we remove 100 pixels from the top, bottom, left and right of the image, thus focusing on the object at the center:
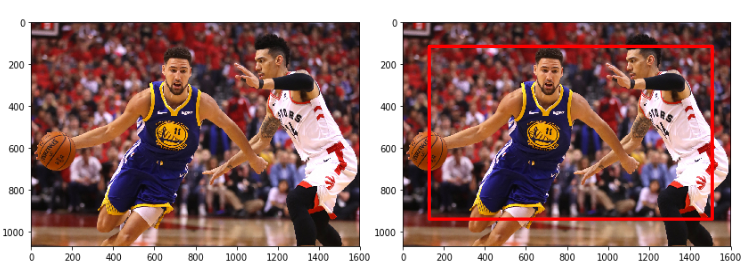
There are two ways to achieve this:
- First, simply specify the new image shape you want. For this example, it would be image [100:967, 100:1500]. This will work fine for a single image. What if we have multiple images? We would have to mention the new image shape for every image (not ideal).
- Another way could be to calculate the cropped image dimension using the current image shape, which can be determined using the command image.shape. So the height of the new image would be [100:img.shape[0]-100] and the width will be [100:img.shape[1]-100].
So, let’s crop the above image using the second method:

8. Altering Image Brightness using skimage
How often do you fiddle around with the brightness of an image you took in a bad light? Despite the recent advances in how cameras function, low light imaging is a headache. skimage will fix that for us.
Images with different brightness can be used to make our computer vision model robust to changes in lighting conditions.
This is important for systems that work in outdoor lighting, for instance, CCTV cameras on traffic signals.
The brightness of images can be changed using the adjust_gamma function in skimage, which uses a method called gamma correlation. For any given image, the pixel values are first normalized between 0 – 1 and then multiplied by a specified gamma value. The resulting pixel values are scaled back to the range 0-255.
For gamma greater than 1, the output image will be darker than the input image. While for gamma less than 1, the output image will be brighter than the input image.

9. Using Filters in skimage
We can use Filters to modify or enhance an image’s features. You’ll be pretty familiar with filters if you’ve ever played around with images on social media platforms.
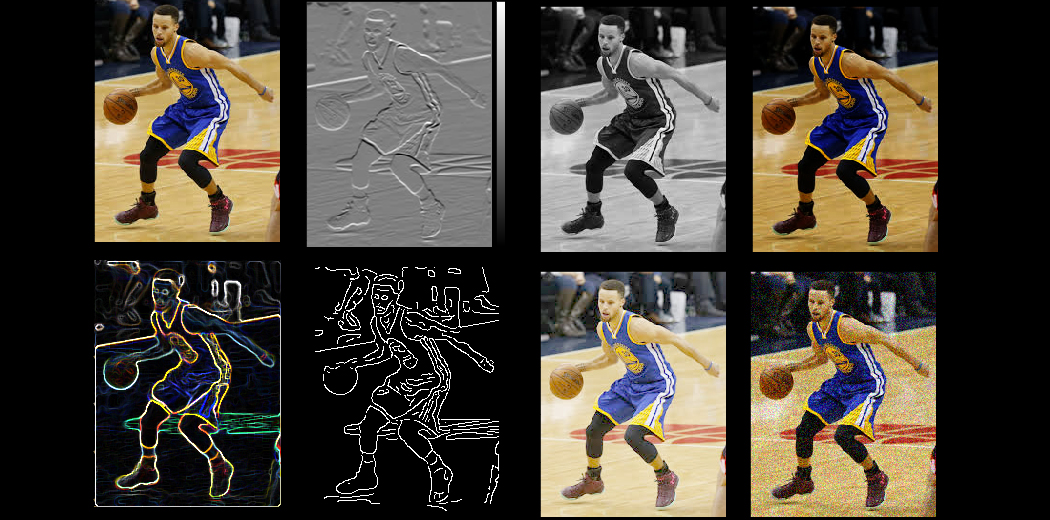
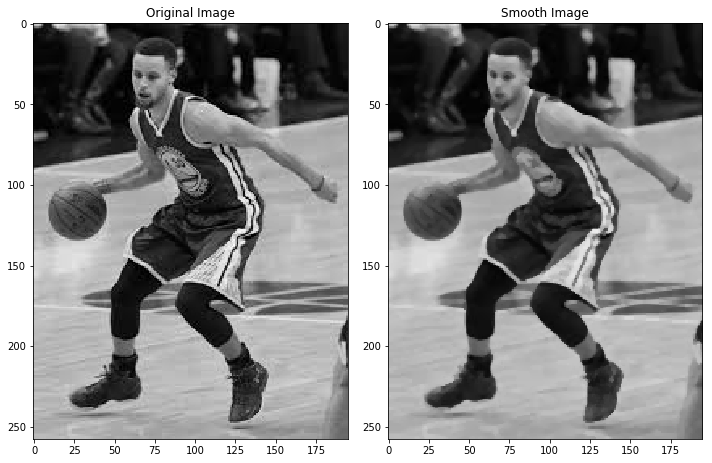
We can use filters for various purposes, such as smoothing and sharpening the image, removing noise, highlighting features and edges in the image, etc.
When we apply a filter on an image, every pixel value is replaced by a new value generated using surrounding pixel values. The simplest filter is the median filter, where the pixel values are replaced with the median of neighboring pixels.
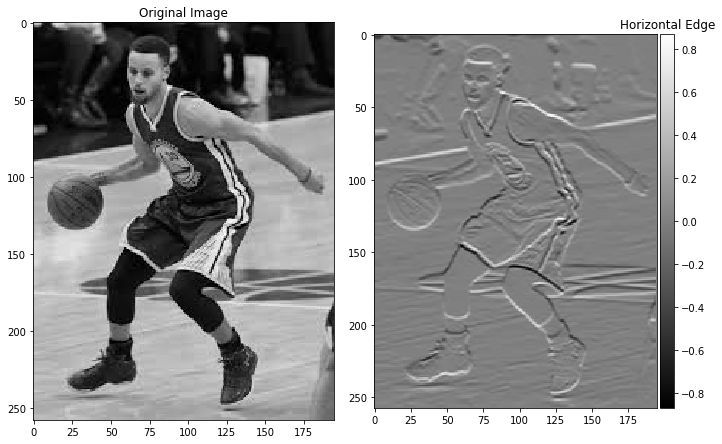
Another popular filter is the sobel filter. We use this when we want to highlight the edges in an image. If you want to learn in detail about how the filter works, you can refer to this article.
End Notes
Congratulations on taking your first step in computer vision! It can appear to be a daunting field initially, but if you have a structured thinking mindset and a good grasp on how machine learning algorithms work, you’ll quickly pick up the nuances of working with image and video data.
There are other things we can do using skimage, such as extracting the edges from an image, or adding noise to an image, among other things. I want you to take these two up for starters, and try them out in Python. That’s how you learn new concepts!
And as I mentioned at the start of the article, you should check out our comprehensive course on computer vision:
I look forward to hearing your thoughts and feedback on this article. Connect with me in the comments section below!
An avid reader and blogger who loves exploring the endless world of data science and artificial intelligence. Fascinated by the limitless applications of ML and AI; eager to learn and discover the depths of data science.


