This article was published as a part of the Data Science Blogathon
Everyone using Social Media must have tried out filters at some point or other. Be it on Instagram, Snapchat, Facebook or even on Picsart. With just a few clicks and adjustments you can modify your images. But have you ever thought of creating filters on your own?
What is an Image Filter?
An Image Filter is a method or process through which colours, shade, hue, saturation, texture and other characteristics of an image are modified. Filters are used to visually modify images for commercial, artistic or aesthetic needs.
Image filters are very common in social media these days. Instagram has a wide variety of filters, so does Facebook. Editings apps like Picsart also provide a number of filters. Filters can give a new visual effect to an image and make it look different. People use filters to give the desired effects they want, to their photos.
What is the use of OpenCV here?
OpenCV is a free to use Python library that can be used for computer vision tasks. It has a lot of features and methods which can be used to perform a variety of tasks. I am going to apply some image transformation methods to obtain the filters and create the desired effects.
Let us proceed by making the required imports.
import cv2
import numpy as np
import scipy
We shall be needing mainly NumPy and OpenCV, SciPy will be needed later. Let us now read the image file.

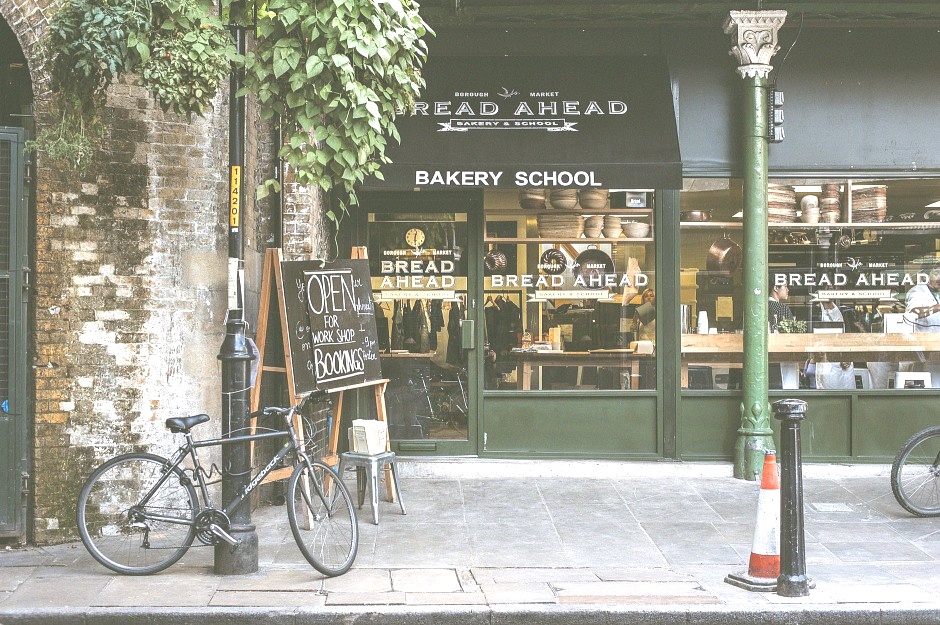
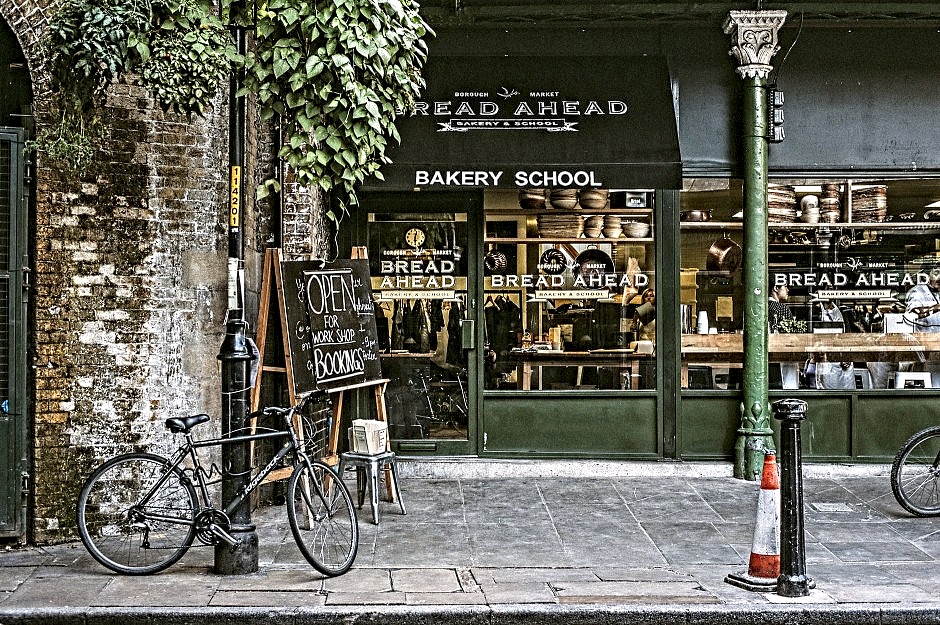
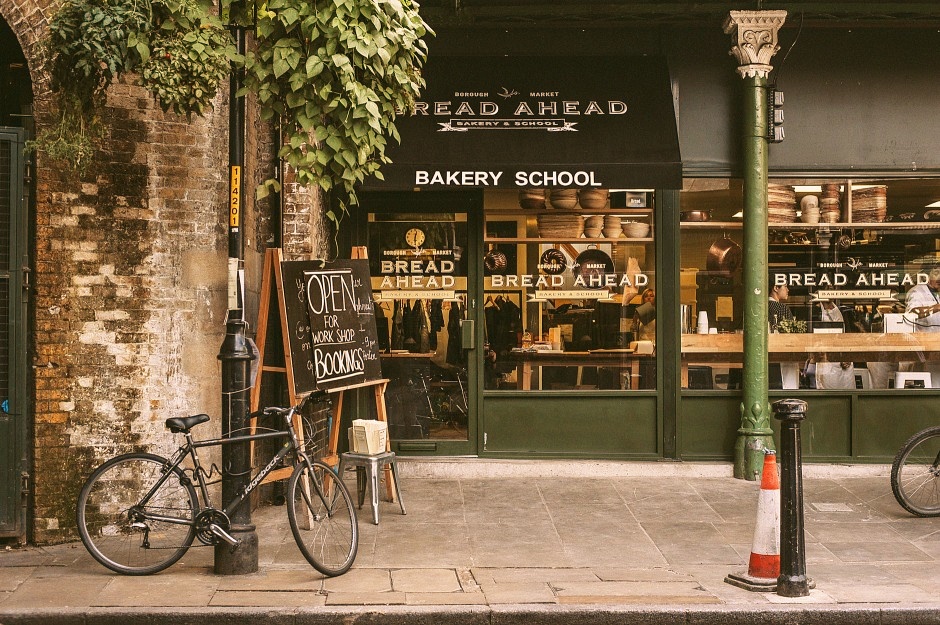
This is the image file we shall be using.
( Source: https://www.pexels.com/photo/black-steel-lamp-post-1070945/)
#Read the image
image = cv2.imread('shop.jpg')
Now, we can proceed with implementing the filters.
GreyScale Filter
We start by implementing the most basic and widely used filter. The greyscale filter is used to give a Black and White effect to images. Basically coloured components from the image are removed. We shall implement the cv2.cvtColor() to convert the image to greyscale.
#greyscale filter
def greyscale(img):
    greyscale = cv2.cvtColor(img, cv2.COLOR_BGR2GRAY)
    return greyscale
Now, apply the function to our image.
#making the greyscale image
a1 = greyscale(image)
Now, we save the image as a file.
filename = 'greyscale.jpg'
# Using cv2.imwrite() method
# Saving the image
cv2.imwrite(filename, a1)
Output:
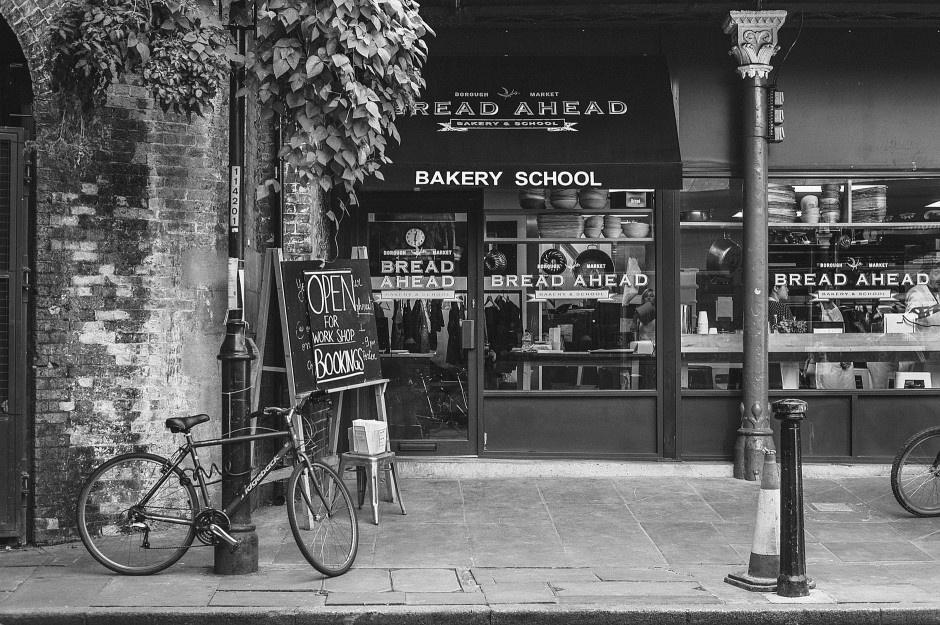
Thus, we can see that the image is successfully converted to greyscale. Next, let’s try another one.
Brightness Adjustment
Often, we have seen filters that make the image a lot brighter, others reduce the brightness. These are results of brightness adjustment filters. We shall use the cv2.convertScaleAbs() for this purpose. The beta value can be changed to get the appropriate results.
# brightness adjustment
def bright(img, beta_value ):
    img_bright = cv2.convertScaleAbs(img, beta=beta_value)
    return img_bright
The function is defined, now the beta value will give the appropriate results. A positive value indicates a bright image and a negative value indicates a darker image.
#making the  more bright image
#positive beta value
a2 = bright(image, 60)
Now, we save the image.
filename = 'more_bright.jpg'
# Using cv2.imwrite() method
# Saving the image
cv2.imwrite(filename, a2)
Output:
As we can see, the image is now brighter. Now, let us make a darker image.
#making the  less bright image
#negative beta value
a3 = bright(image, -60)
A negative beta value is used. Now, let us save the image.
filename = 'less_bright.jpg'
# Using cv2.imwrite() method
# Saving the image
cv2.imwrite(filename, a3)
Output:
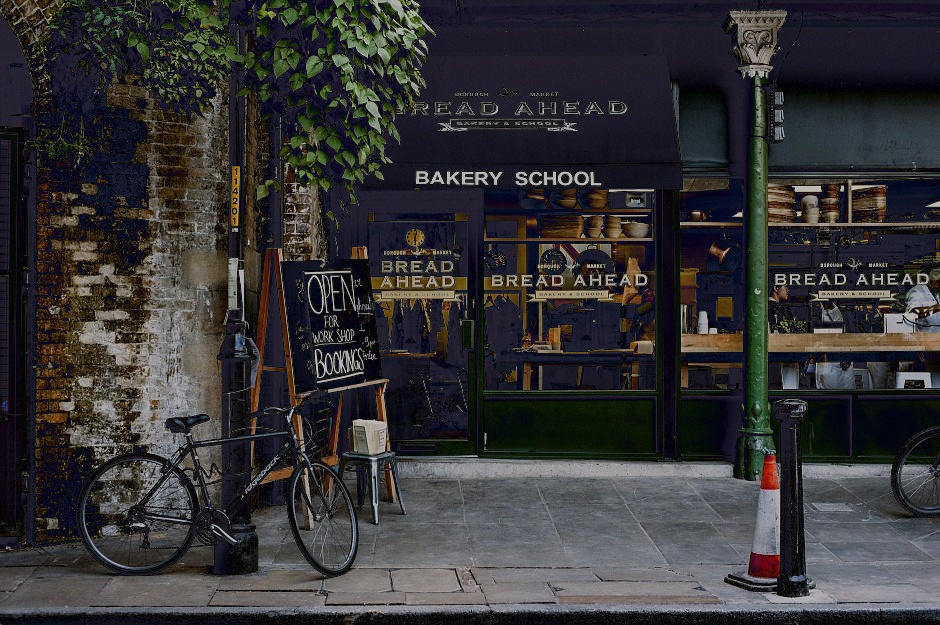
We can see the image is now less bright.
Sharp Effect
Sharp effects are also used a lot. We shall use the filter2D method from OpenCV to make the appropriate edits.
The kernel for the sharpening effect will be : [[-1, -1, -1], [-1, 9.5, -1], [-1, -1, -1]]
Let us proceed with the code:
#sharp effect
def sharpen(img):
    kernel = np.array([[-1, -1, -1], [-1, 9.5, -1], [-1, -1, -1]])
    img_sharpen = cv2.filter2D(img, -1, kernel)
    return img_sharpen
Now, let us save the image.
#making the sharp image
a4 = sharpen(image)
filename = 'sharpen.jpg'
# Using cv2.imwrite() method
# Saving the image
cv2.imwrite(filename, a4)
Output:

As we can see, the image is now sharper.
Sepia Filter
Sepia is one of the most commonly used filters in image editing. Sepia adds a warm brown effect to photos. A vintage, calm and nostalgic effect is added to images. Let us implement sepia in Python.
We shall be using the cv2.transform() function for this purpose. Proceeding with the code.
#sepia effect
def sepia(img):
    img_sepia = np.array(img, dtype=np.float64) # converting to float to prevent loss
    img_sepia = cv2.transform(img_sepia, np.matrix([[0.272, 0.534, 0.131],
                                    [0.349, 0.686, 0.168],
                                    [0.393, 0.769, 0.189]])) # multipying image with special sepia matrix
    img_sepia[np.where(img_sepia > 255)] = 255 # normalizing values greater than 255 to 255
    img_sepia = np.array(img_sepia, dtype=np.uint8)
    return img_sepia
Let us implement the function and save the image.
#making the sepia image
a5 = sepia(image)
filename = 'sepia.jpg'
# Using cv2.imwrite() method
# Saving the image
cv2.imwrite(filename, a5)
Output:
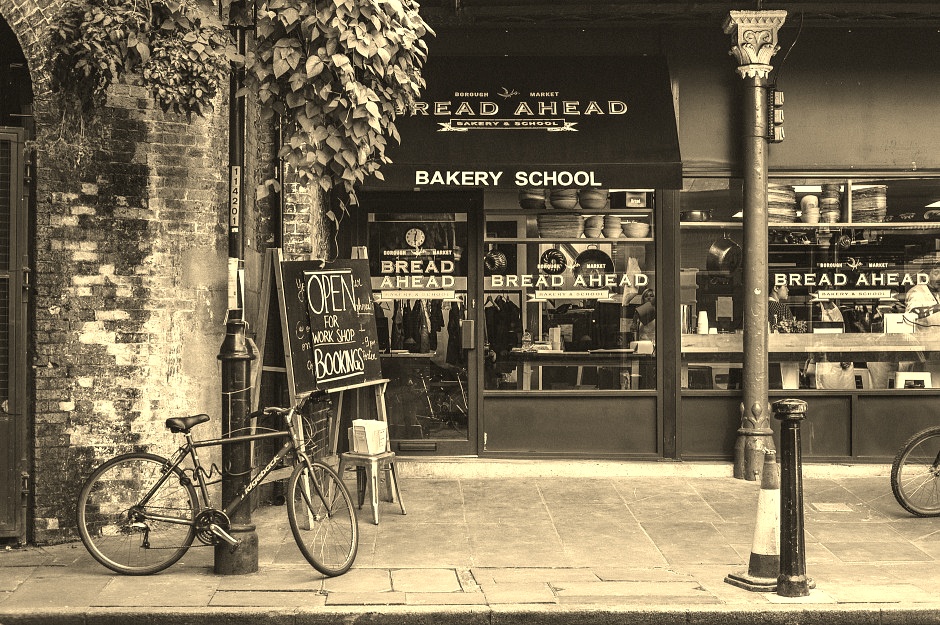
The effect looks marvellous. The filter is implemented perfectly.
Pencil Sketch Effect: GreyScale
Let us implement a greyscale pencil sketch effect. In fact, it is very easy to implement as there is an inbuilt function to implement it.
#grey pencil sketch effect
def pencil_sketch_grey(img):
    #inbuilt function to create sketch effect in colour and greyscale
    sk_gray, sk_color = cv2.pencilSketch(img, sigma_s=60, sigma_r=0.07, shade_factor=0.1)
    return  sk_gray
Now, we apply the function and save the image.
#making the grey pencil sketch
a6 = pencil_sketch_grey(image)
filename = 'pencil_grey.jpg'
# Using cv2.imwrite() method
# Saving the image
cv2.imwrite(filename, a6)
Output:
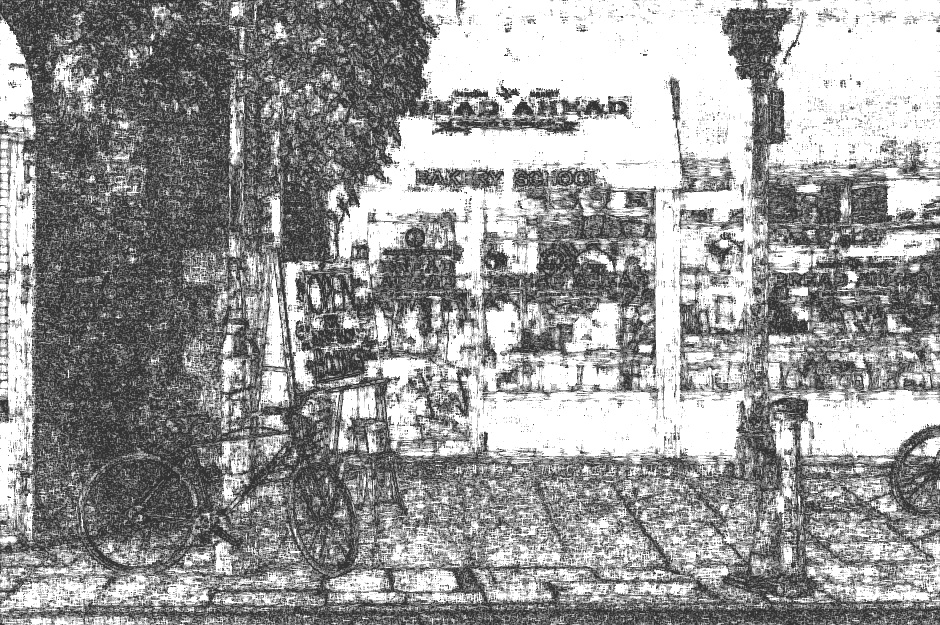
True, the image seems like a rough pencil sketch. Now, it’s time to implement a colour version.
Pencil Sketch Effect: Colour
Now, we implement the coloured version of the pencil sketch effect.
#colour pencil sketch effect
def pencil_sketch_col(img):
    #inbuilt function to create sketch effect in colour and greyscale
    sk_gray, sk_color = cv2.pencilSketch(img, sigma_s=60, sigma_r=0.07, shade_factor=0.1)
    return  sk_color
We apply the function and save the image.
#making the colour pencil sketch
a7 = pencil_sketch_col(image)
filename = 'pencil_col.jpg'
# Using cv2.imwrite() method
# Saving the image
cv2.imwrite(filename, a7)
Output:
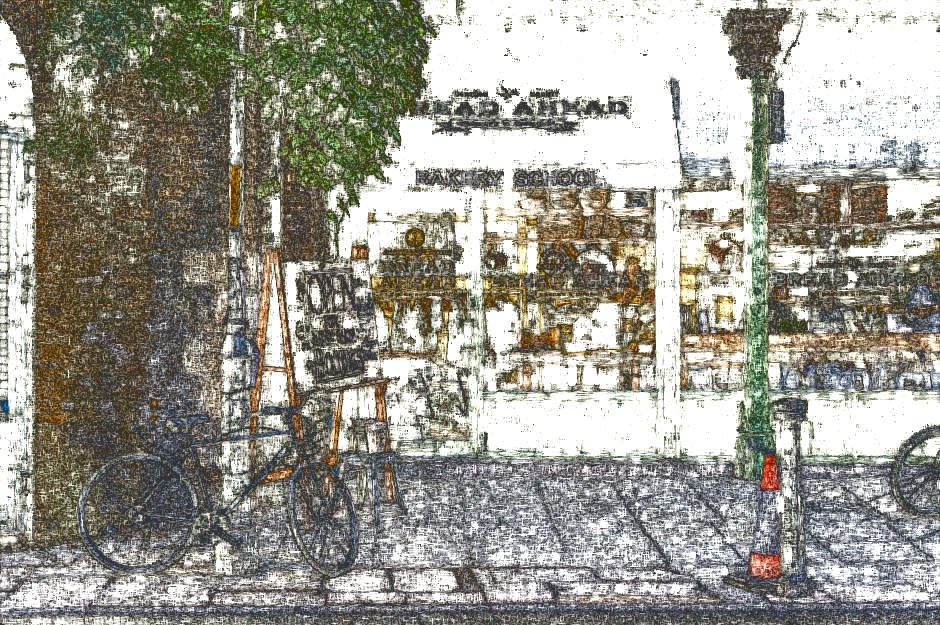
The effect is quite interesting. There are bits of colour here and there and overall, a pencil sketch effect is implemented.
HDR effect:
The HDR effect is used a lot as it increases the level of detail in images. I shall use the cv2.detailEnhance() to implement this.
#HDR effect
def HDR(img):
    hdr = cv2.detailEnhance(img, sigma_s=12, sigma_r=0.15)
    return  hdr
Now, we apply the function.
#making the hdr img
a8 = HDR(image)
Now, we save the image.
filename = 'HDR.jpg'
# Using cv2.imwrite() method
# Saving the image
cv2.imwrite(filename, a8)
Output:
Invert Filter
Invert filter is actually very easy to implement. Everyone has used this filter at some point or the other to make their hair turn white. ( LOL )
All, we have to do is basically invert the pixel values. This can be done by subtracting the pixel values by 255. In python, we can use the cv2.bitwise_not() function for this purpose.
# invert filter
def invert(img):
    inv = cv2.bitwise_not(img)
    return inv
Now, let us apply the function and save the image.
#making the invert img
a9 = invert(image)
filename = 'invert.jpg'
# Using cv2.imwrite() method
# Saving the image
cv2.imwrite(filename, a9)
Output:
Looks like something from a different world, right? Well, the invert filter sure is fun.
Now we will try a summer and winter effect filter.
But, for that, we need a lookup table. But creating a lookup table from scratch is a big process. We can use a SciPy function to implement this.
#defining a function
from scipy.interpolate import UnivariateSpline
def LookupTable(x, y):
  spline = UnivariateSpline(x, y)
  return spline(range(256))
Now, that the function is defined, let’s proceed.
Summer Effect Filter
Let us implement a summer effect filter, it basically increases the warmth of an image. To implement this, we are going to increase the values in the red channel and decrease the values in the blue channel.
#summer effect
def Summer(img):
    increaseLookupTable = LookupTable([0, 64, 128, 256], [0, 80, 160, 256])
    decreaseLookupTable = LookupTable([0, 64, 128, 256], [0, 50, 100, 256])
    blue_channel, green_channel,red_channel  = cv2.split(img)
    red_channel = cv2.LUT(red_channel, increaseLookupTable).astype(np.uint8)
    blue_channel = cv2.LUT(blue_channel, decreaseLookupTable).astype(np.uint8)
    sum= cv2.merge((blue_channel, green_channel, red_channel ))
    return sum
As we can see, the red values are increased and the blue values are decreased.
Now, saving the image.
#making the summer img
a11 = Summer(image)
filename = 'Summer.jpg'
# Using cv2.imwrite() method
# Saving the image
cv2.imwrite(filename, a11)
Output:
The summer effect filter is implemented.
Now, we implement the winter effect filter.
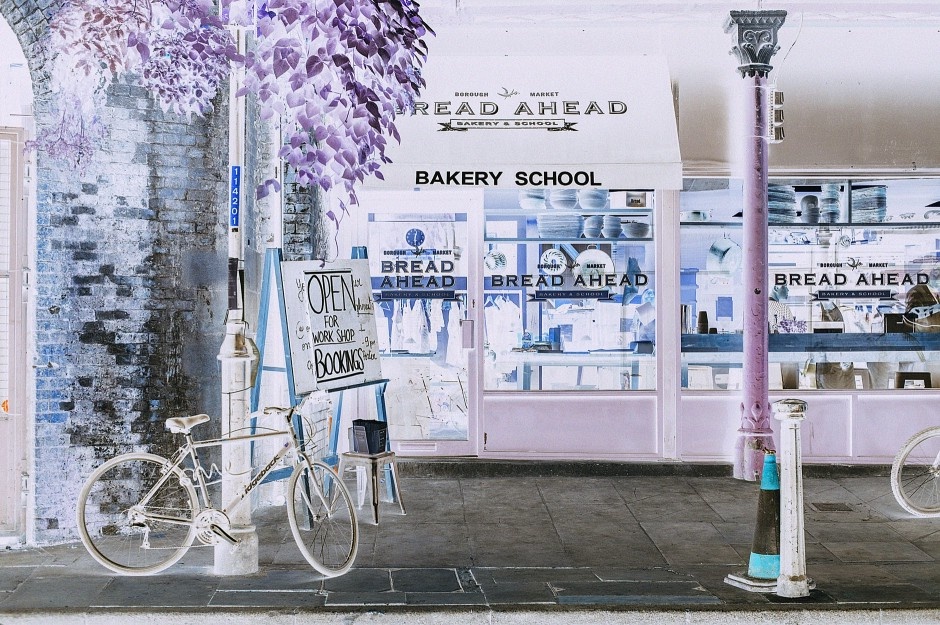
Winter Effect Filter:
In, the winter effect filter, the opposite will be done. The warmth of the image will be reduced. The values in the red channel will be reduced and values in the blue channel will be increased.
#winter effect
def Winter(img):
    increaseLookupTable = LookupTable([0, 64, 128, 256], [0, 80, 160, 256])
    decreaseLookupTable = LookupTable([0, 64, 128, 256], [0, 50, 100, 256])
    blue_channel, green_channel,red_channel = cv2.split(img)
    red_channel = cv2.LUT(red_channel, decreaseLookupTable).astype(np.uint8)
    blue_channel = cv2.LUT(blue_channel, increaseLookupTable).astype(np.uint8)
    win= cv2.merge((blue_channel, green_channel, red_channel))
    return win
The code is implemented. So, now we save the image.
#making the winter img
a10 = Winter(image)
filename = 'Winter.jpg'
# Using cv2.imwrite() method
# Saving the image
cv2.imwrite(filename, a10)
Output:
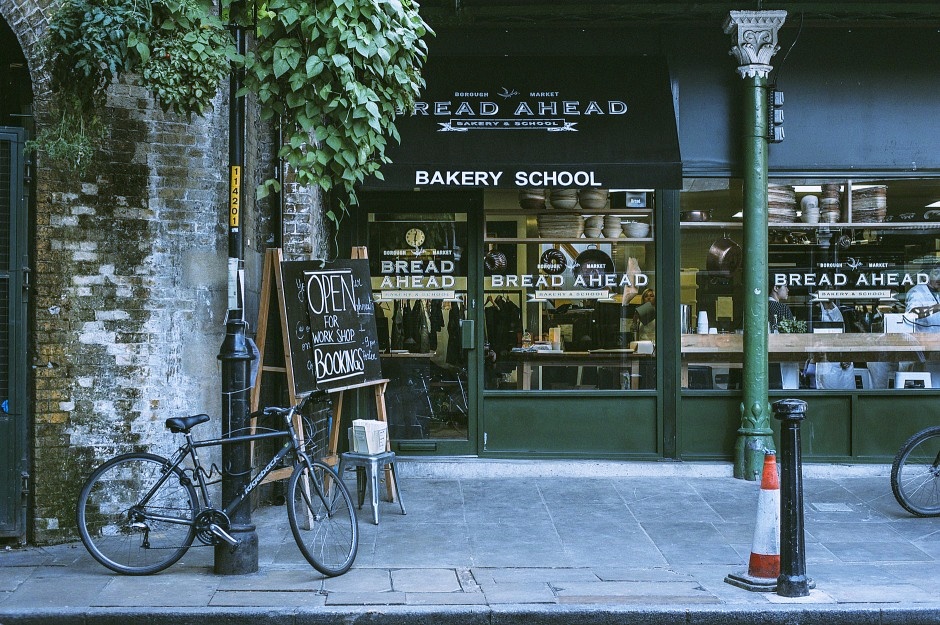
The effect is implemented. The image warmth is reduced and a chilly effect is given.
To check the code and image files, check this link.
Applying effects to filters are very common and people use it all the time. With a bit of math and code, we are able to apply desired effects to images. Beautiful image transformations are obtained.
Try out the code, it will surely be a fun weekend project.
About me:
Prateek Majumder
Data Science and Analytics | SEO | Content Creation
Connect with me on Linkedin.
My other articles on Analytics Vidhya: Link.
Thank You.
Prateek is a dynamic professional with a strong foundation in Artificial Intelligence and Data Science, currently pursuing his PGP at Jio Institute. He holds a Bachelor's degree in Electrical Engineering and has hands-on experience as a System Engineer at TCS Digital, where he excelled in API management and data integration. Prateek also has a background in product marketing and analytics from his time with start-ups like AppleX and Milkie Way, Inc., where he was involved in growth campaigns and technical blog management. Recognized for his structured thinking and problem-solving abilities, he has received accolades like the Dr. Sudarshan Chakraborty Award for Best Student Performance. Fluent in multiple languages and passionate about technology, Prateek continues to expand his expertise in the rapidly evolving AI and tech landscape.


Hello, this article is a great read for me. But I want to do all these things in JavaScript. I did some of them. But, how do I do pencilSketch()? OpenCV.js does not have a function with that name...