This article was published as a part of the Data Science Blogathon
Who doesn’t like spicing up their pictures with some cool effects and quirky filters? Be it a silly dog face filter or a huge mustache, a cowboy hat or a pair of cool goggles, even the most boring pictures can turn into the most hilarious ones with the right filters and stickers. The love for filters is quite evident by the increasing popularity of Snapchat and Instagram filters among all netizens!
What if you could build a cool filter just like that completely on your own?
Yes, you can easily build one and customize it according to your choice!
Sounds interesting, right! So let’s get started. We shall make our very own filter with the help of OpenCV. In this blog, we shall build a Snapchat-like filter to give Miss Hermione Granger a cool pair of sunglasses!
What is OpenCV?
So before we dive into the code, let us understand what OpenCV is.
OpenCV is an extremely useful open-sourced python library that primarily deals with real-time Computer Vision, Machine learning, and Image Processing. OpenCV has numerous functions that can be used to identify objects, recognize facial features, process images, and videos and even modify them.
Some of the numerous fields in which OpenCV finds its application are:
- Face Detection
- Image/Video search and retrieval
- Navigation of Driver-less car
- Medical image analysis
- Interactive art installations
Alohomora! You have now unlocked the doors to the world of Computer Vision using OpenCV! Time to explore further. In order to build our Snapchat filter, we shall focus on the Detection of Facial Features using OpenCV with Haar Cascade Classifiers.
Let us get started with the code. We will need three main libraries: Numpy, Matplotlib, and OpenCV.
Importing Libraries
import numpy as np
import matplotlib.pyplot as plt
import cv2
Now we are going to use some Haar Cascades.
What are Haar Cascades?
Haar Cascades is one of the most popular object detection algorithms. It makes use of various features such as Edge Features, Line Features, and Centre-Surround Features to locate similar patterns in the images and hence identify objects. For example, the edges of the lips are generally distinct with the side of the lips being darker than the skin, thus a horizontal Edge feature may be used. Similarly, a vertical edge feature may be used to detect the bridge of the nose.
Some Haar Features are shown below:
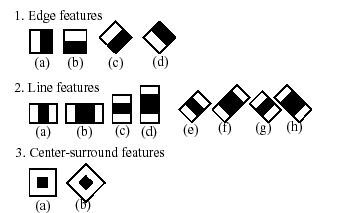
( Image Source: link )
Now that we know what Haar Cascades are, let us use a cascade that will help us detect the frontal eyes in an image. You will need to download the Haar cascades first. You can do that from here.
Loading the Cascades
eye_cascade = cv2.CascadeClassifier("frontalEyes35x16.xml")
Now let us read our image. We shall read a picture of Hermione Granger and give her a cool pair of goggles!
When working with OpenCV python, we store the images in the form of numpy ndarray.
img=plt.imread("Hermione1.jpg")
plt.imshow(img)
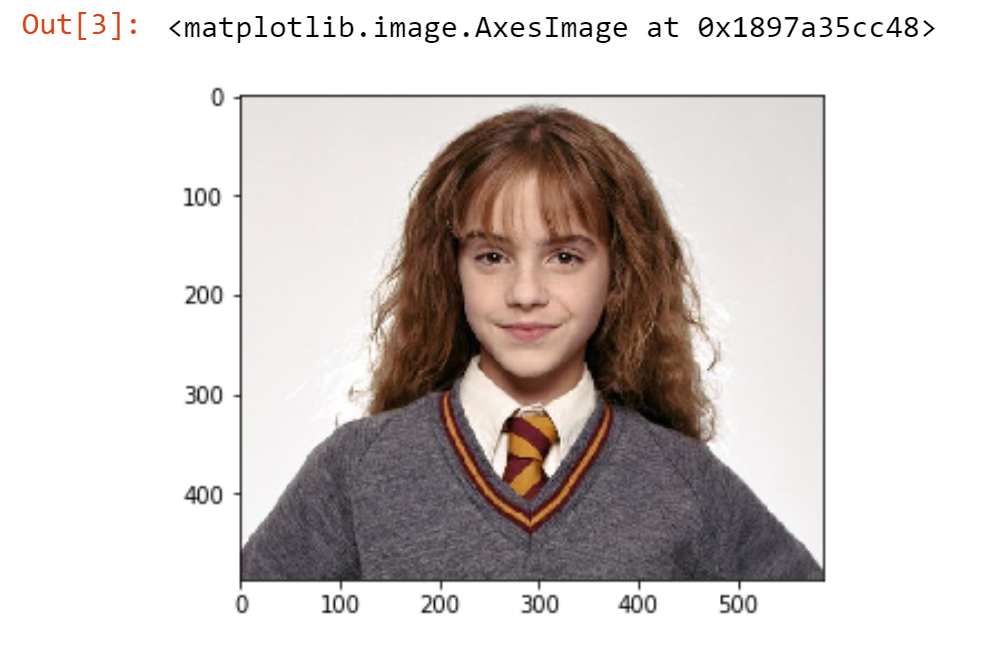
( Image Source : link )
We get the above output.
Now let us display the image shape of our original image. Since the image has been stored in a numpy ndarray, we can now use ndarray.shape to get the dimensions of the image. This can be done by the following code
img.shape
Output : (487, 586, 3)
The output (487, 586, 3) represents the height, width, and the number of channels in the image respectively.
We must also create a copy of the original image and store it as img1 for displaying the final result.
img1=img.copy()
Now, we shall identify the eyes in the image with the help of detectMultiScale() method using the eye_cascade object defined earlier. We will pass our input image as a parameter. This shall help us locate the pair of eyes in our image.
eye=eye_cascade.detectMultiScale(img)[0]
print (eye)
Output : [221, 130, 134, 61]
This returns the location of the eyes in the format (x,y,w,h). Here
- x stands for the X coordinate of the bottom left corner
- y stands for the Y coordinate of the bottom left corner
- w stands for the width of the eye region
- h stands for the height of the eye region
We then store the data obtained in
four different variables as shown. Once the location of the eye is detected we
shall draw a rectangle on the initial image to visualize our result. This can
be done by passing the calling the cv2.rectangle method and passing the coordinates of the eye, the color of the rectangle, and the width of the rectangle as parameters.
Here, we have passed (225, 225, 255) for the color and 5 for the width so we shall obtain a white rectangle of width 5.
eye_x,eye_y,eye_w, eye_h= eye
img = cv2.rectangle(img, (eye_x, eye_y), (eye_x + eye_w, eye_y + eye_h), (255,255,255), 5 )
plt.imshow(img)

Now we shall read the image of the glasses and store it in a variable. We then check the size of our input image as shown.
glasses=plt.imread("sample1.png")
glasses.shape
Output : (200, 200, 4)
We observe that the size of the glasses and the image of Hermione are proportional, thus we must resize the glasses so that they fit Hermione perfectly! So let’s do that and resize the image based on the coordinates of the eyes we had obtained earlier.
It might take you some trial and error to adjust the values to suit your image. These are the values that give the best results for our image.
glasses=cv2.resize(glasses,(eye_w+50,eye_h+55))
glasses.shape
Output: (116, 184, 4)
Now for the final step! Since we do not want the rectangle detecting the eyes on our final image we shall deal with the copy image ‘img1’ we had created earlier. Now that we have the coordinates of our glasses we simply have to replace the pixels of the image of Hermione with the pixels of the glasses. To do that we use 2 for loops. If the pixel on the glasses image is 0 that means, we want that portion to be transparent, so we do not replace that pixel. In all other cases, we simply replace the pixel of the image with the pixel of the glasses at the desired location.
Let’s see how it is done!
for i in range(glasses.shape[0]):
  for j in range(glasses.shape[1]):
    if (glasses[i,j,3]>0):
      img1[eye_y+i-20,eye_x+j-23, :]=glasses[i,j,:-1]
plt.imshow(img1)
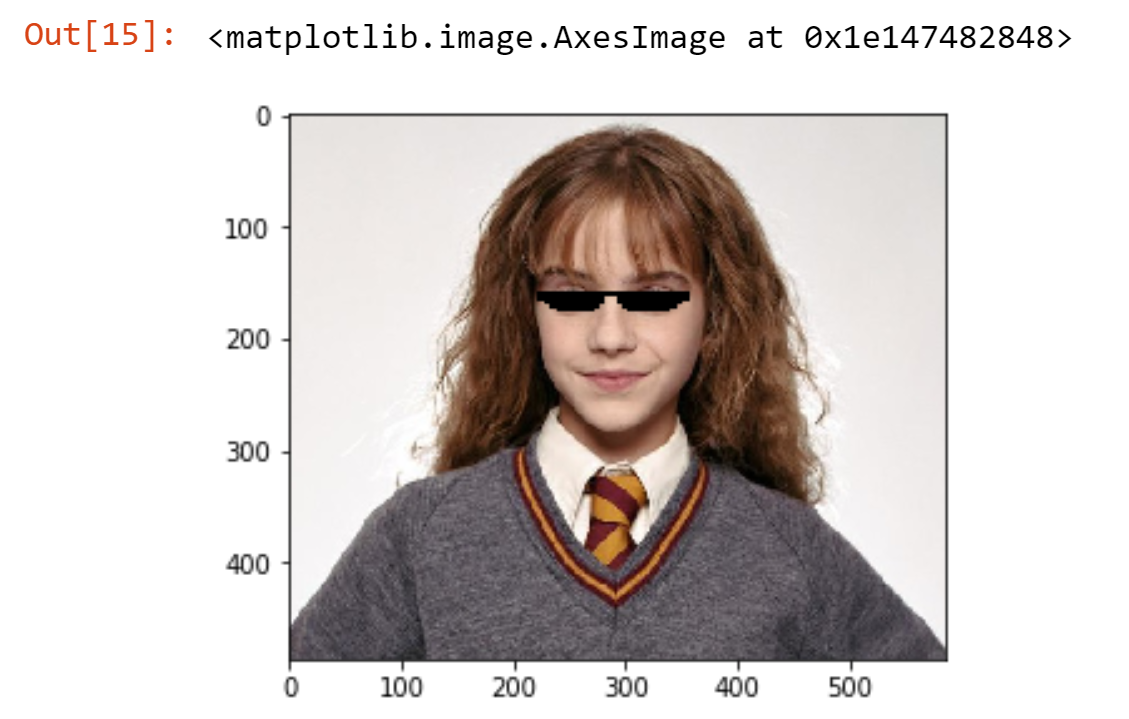
Voila! There you have it! We have successfully given Miss Granger a cool pair of glasses!
Resources
Find the link to the code and the Haar Cascade used here.
Conclusion
This particular application of Computer Vision is widely used in applications such as Instagram, Snapchat, PicsArt and various other photo editing apps.
Now that we have implemented this filter on a picture of Hermione and you know how it is done, it’s time to have fun using OpenCV. Feel free to try it out with your own pictures and accessories and create some amazing, fun filters of your own!
After all, you don’t need magic, just the basics of OpenCV!
About Me:
Hey there, I’m Tithi Sreemany. Hope you liked reading this article and found it useful.
You can reach out to me on LinkedIn.
Thanks for reading!


