 Illustration by Author
Disclaimer: The goal of this post is only educational. Web Scraping is not encouraged, especially when there are terms and conditions against such actions.
The post is the fourth in a series of tutorials to build scrapers. Below, there is the full series:
- HTML basics for web scraping
- Web Scraping with Octoparse
- Web Scraping with Selenium
- Web Scraping with Beautiful Soup (this post)
The purpose of this series is to learn to extract data from websites. Most of the data in websites are in HTML format, then the first tutorial explains the basics of this markup language. The second guide shows a way to scrape data easily using an intuitive web scraping tool, which doesn’t need any knowledge of HTML. Instead, the last tutorials are focused on gathering data with Python from the web. In this case, you need to grasp to interact directly with HTML pages and you need some previous knowledge of it.
Web scraping is the process of collecting data from the web page and store it in a structured format, such as a CSV file. For example, if you want to predict the Amazon product review’s ratings, you could be interested in gathering information about that product on the official website.
You surely aren’t allowed to scrape data from all the websites. I recommend you first look at the robots.txt file to avoid legal implications. You only have to add ‘/robots.txt’ at the end of the URL to check the sections of the website allowed/not allowed.
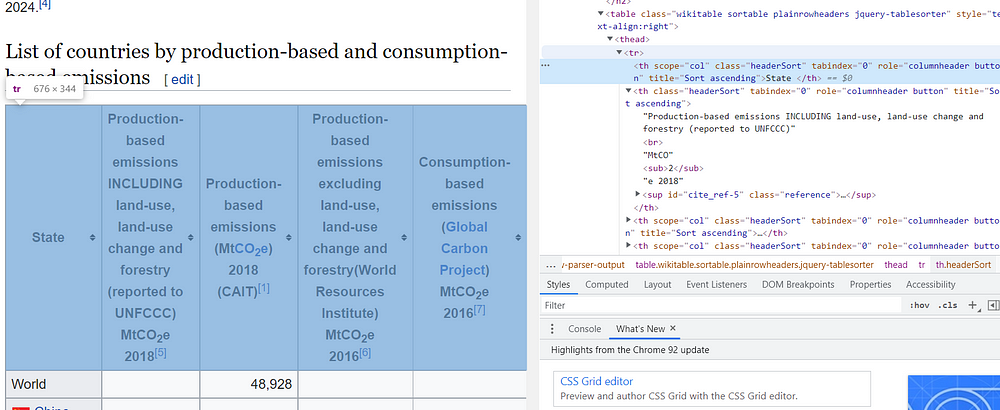
As an example, I am going to parse a web page using two Python libraries, Requests and Beautiful Soup. The list of countries by greenhouse gas emissions will be extracted from Wikipedia as in the previous tutorials of the series.
Table of Content:
- Import libraries
- Create response object
- Create a Beautiful Soup object
- Explore HTML tree
- Extract elements of the table
1. Import libraries
The first step of the tutorial is to check if all the required libraries are installed:
!pip install beautifulsoup4
!pip install requests
Once we terminated to look, we need to import the libraries:
Let’s import:
from bs4 import BeautifulSoup
import requests
import pandas as pd
Beautiful Soup is a library useful to extract data from HTML and XML files. A sort of parse tree is built for the parsed page. Indeed, an HTML document is composed of a tree of tags. I will show an example of HTML code to make you grasp this concept.
<!DOCTYPE html>
<html>
<head>
<title>Tutorial of Web scraping</title>
</head>
<body>
<h1>1. Import libraries</h1>
<p>Let's import: </p>
</body>
</html>

Since the HTML has a tree structure, there are also ancestors, descendants, parents, children and siblings.
2. Create Response Object
To get the web page, the first step is to create a response object, passing the URL to the get method.
url = 'https://en.wikipedia.org/wiki/List_of_countries_by_greenhouse_gas_emissions'
req = requests.get(url)
print(req)
# <Response[200]>
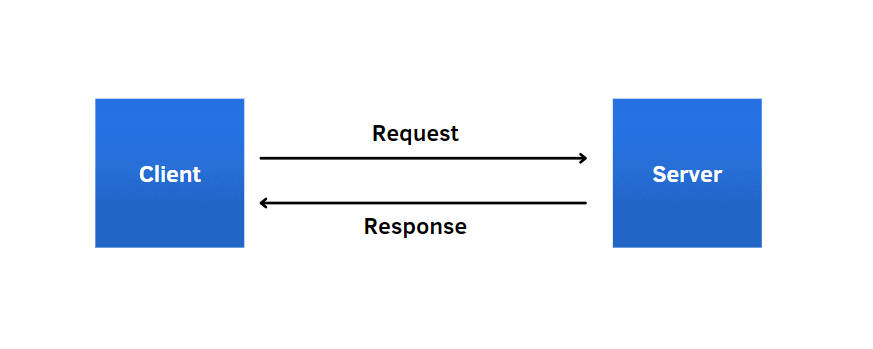
This operation can seem mysterious, but with a simple image, I show how it works. The client communicates with the server using a HyperText Transfer Protocol(HTTP). In this line of code, it’s like when we type the link on the address bar, the browser transmits the request to the server and then the server performs the requested action after it looked at the request.
3. Create a Beautiful Soup object
Let’s create the Beautiful Soup object, which parses the document using the HTML parser. In this way, we transform the HTML code into a tree of Python objects, as I showed before in the illustration.
soup = BeautifulSoup(req.text,"html.parser")
print(soup)
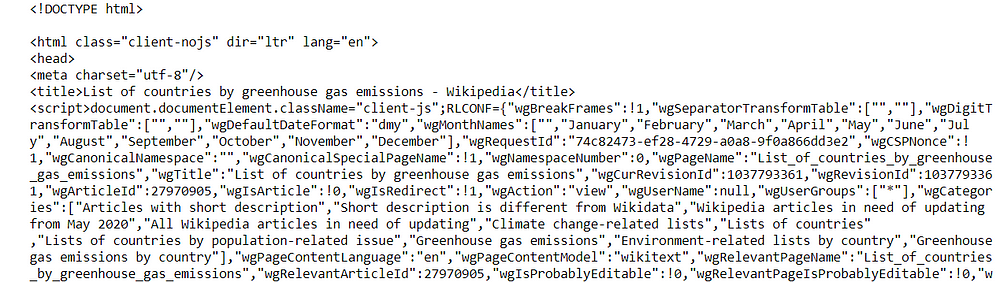
If you print the object, you’ll see all the HTML code of the web page.
4. Explore HTML tree
As you can observe, this tree contains many tags, which contain different types of information. We can get access directly to the tags, just writing:
soup.head
soup.body
soup.body.h1
#<h1 class="firstHeading" id="firstHeading">List of countries by #greenhouse gas emissions</h1>
A more efficient way is to use the find and find_all methods, which filter the element(s in case of find_all method).
row1 = tab.find('tr')
print(row1)
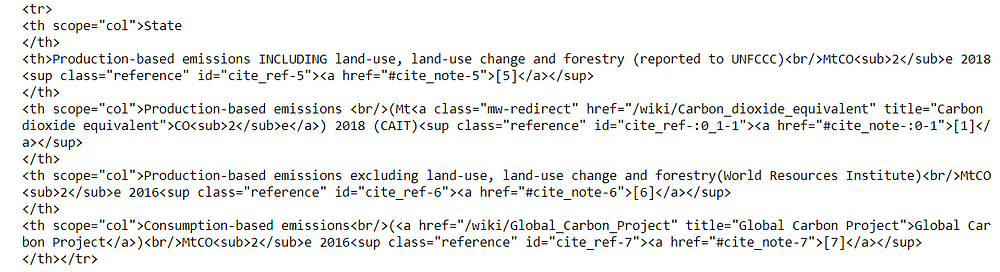
Using the find method, we zoom a part of the document within the
tags, which are used to build each row of the table. In this case, we got only the first row because the function extracts only one element. Instead, if we want to gather all the rows of the table, we use the other method:
rows = tab.find_all('tr')
print(len(rows))
print(rows[0])
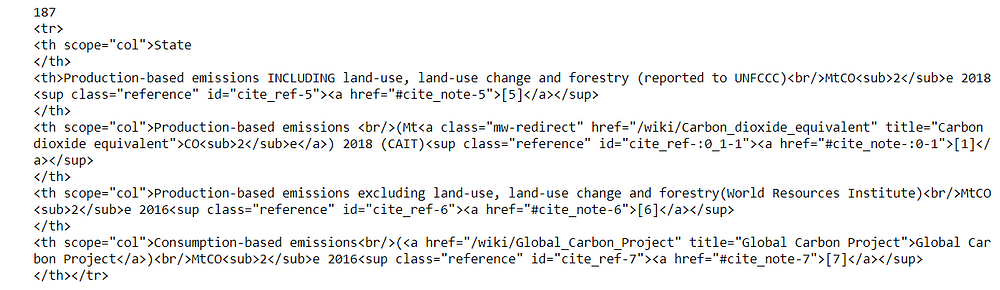
We obtained a list with 187 elements. If we show the first item, we’ll see the same output as before. find_all method is useful when we need to zoom in on more parts with the same tag within the document.
5. Extract elements of the table
To store all the elements, we create a dictionary, which will contain only the names of the columns as keys and empty lists as values.
rows = tab.find_all('tr')
cols = [t.text.rstrip() for t in rows[0].find_all('th')]
diz = {c:[] for c in cols}
print(diz)

The first row of the table contains only the headlines, while the rest of the rows constitute the body. To see the HTML code of specific elements, you need to put the mouse pointer in that point and select with a right-click “Inspect”.
So, we iterate over the rows of the table, excluding the first:
for r in rows[1:]:
    diz[cols[0]].append(r.find('th').text.
                 replace('xa0', '').rstrip())
    row_other = r.find_all('td')
    for idx,c in enumerate(row_other):
        cell_text = c.text.replace('xa0', '').rstrip()
        diz[cols[idx+1]].append(cell_text)
The first column is always contained within the
tags, while the other columns are within the
tags. To avoid having “n” and “xa0”, we use respectively the rstrip and replace functions.
In this way, we extract all the data contained in the table and save it into a dictionary. Now, we can transform the dictionary into a pandas DataFrame and export it into a CSV file:
df = pd.DataFrame(diz)
df.head()
df.to_csv('tableghg.csv')
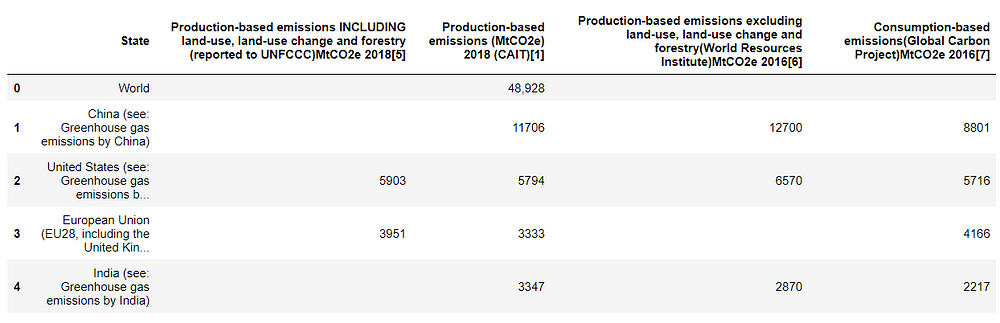
Finally, we can have an overview of the table obtained. Isn’t it amazing? And I didn’t write many lines of code.
Final thoughts
I hope you found useful this tutorial. Beautiful Soup can be the right tool for you when the project is small. On the other hand, if you have to deal with more complex items in a web page, such as Javascript elements, you should opt for another scraper, Selenium. In the last case, it’s better to check the third tutorial of the series. Thanks for reading. Have a nice day!


You can stop writing articles about Screen Scraping. Those days are over. Yahoo has found a way to block screen scrapers. For example, url = 'https://finance.yahoo.com/quote/AA/profile?p=AA' returns a response of 404. Charles
Also, a great way of screen scraping is to delegate your scraping task to third-party supplier like e-scraper.com