This article was published as a part of the Data Science Blogathon.
Introduction
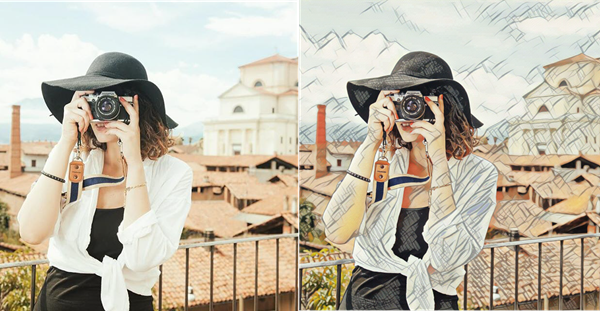
In this article, we will be working on the application which will be capable enough to change the image to its watercolor art form, that we will be using just computer vision operations i.e. none of the machine learning techniques will be involved just refined image processing techniques will be enough to perform this problem statement.
Real-world Application of Computer Vision
So before discussing the approach and jumping on the code part let’s first discuss how the techniques used in this project help in the real-world scenario.
- Cartooning the image: Though in this problem statement we will be working on watercolor art but the main thing is if we will fine-tune the parameters we can achieve this problem for that we just need to brush up on our concepts.
- Apply filters: We can go for a variety of filters using the same techniques which can be very helpful from an artificial intelligence market’s view most specifically for VR/AR companies.
- Modifying images: Nowadays many applications are developed in the market which give a pricky effect to the pictures and this filtering kind of image processing can surely contribute to those applications.
Approach Towards this Problem Statement
In this section of the article, we will list down all the valid steps/phases in developing the application that will convert our original image to watercolor effect art using computer vision operations.
- Phase 1: Input the image and resize it- We all know that we need an image to perform computer vision concepts on it but there is a strict logic behind resizing it. Let’s take an example to explain that reason so suppose you will be operating on the unique distribution of an image. And we are taking 3×3 kernel to operate on every size of the image than in that situation the 3×3 kernel will behave differently for unique distribution of images so to remove this complexity. To make sure that in each type of the image our results should be same for that, it is always a good practice to use resize function so our kernel operations are done effectively.
- Phase 2: Clearing the impurities- In this phase, we will clear all the impurities when I say impurities it’s not dust 🙂 but the impurities in the image will lag the operations due to the color variations it can be a spot or uneven pixels distributions. This can lead to a delay in applying the filters, for removing these impurities from the image we have ample functionalities that we will discuss them in detail during this phase.
- Phase 3: Apply Filtering- In this phase we will apply our desired filters to the image in this particular problem statement we will apply such filtering techniques that will be converting the real image into water colored painting effect. And for that we will be performing some filtering techniques like Gaussian or Bilateral filtering that we will be looking in this particular phase.
- Phase 4: Tuning the Art- In this phase, we will be tweaking to give our filtering more accurate results, suppose after applying the desired filters we get the blurred effect so to remove that we will be applying to sharpen the image. And what if the result we got is showing some loosen colors so that we will be applying the de-haze operation by managing the color-contrasts of the image to get the refined form of our result.
Importing Libraries
import cv2
import numpy as np
import matplotlib.pyplot as plt
Phase 1: Reading and Resizing the Image
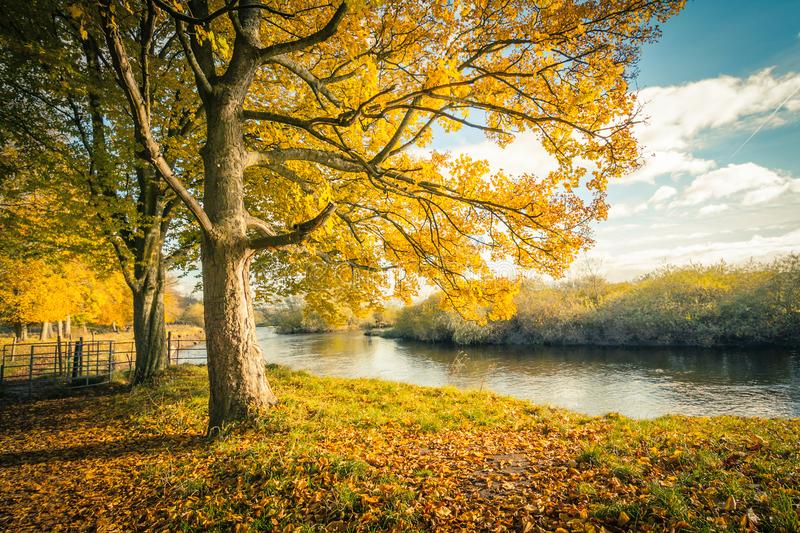
Here we will first read and resize our sample image and for a better experience, we will use two sample images just to double-check our results.
image = cv2.imread('sample.jpg')

plt.figure(figsize = [10, 10])

plt.title("Image");plt.axis('off');plt.imshow(image[:,:,::-1]);plt.show()
Output:
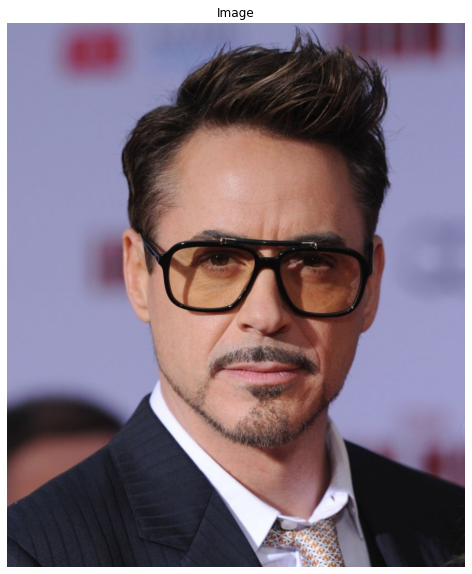
image = cv2.imread('sample2.jpg')
plt.figure(figsize = [10, 10])
plt.title("Image");plt.axis('off');plt.imshow(image[:,:,::-1]);plt.show()
Output
Code breakdown:
- Here firstly we have read the image using the read function and please note that the image type is .webp.
- Then we are using the figure function from Matplotlib’s library to set the figure size.
- At the last, we will simply show the image using the show method.
Resizing the Image
image_resized = cv2.resize(image, None, fx=0.5, fy=0.5)
About Resize function
Here we are resizing the image so that kernel of a specific size (say 3×3) will give the same results irrespective of the distribution of the image. Keep a close eye on the parameters that we have given in the resize function.
- image: Here we are simply passing the image that we want to resize.
- Fx: This will help to cut the x-axis by half (as the value is 0.5).
- Fy: This will help to cut the y axis by half (as the value is 0.5).
- Note: This option basically will set the height and width manipulation to None as we are just changing the axes of the image.
Phase 2: Removing / Clearing the Impurities
Now comes our clearing the impurities part where we will be using the median blur algorithm along with that we will go through the bilateral filtering but later.
image_cleared = cv2.medianBlur(image_resized, 3)
image_cleared = cv2.medianBlur(image_cleared, 3)
image_cleared = cv2.medianBlur(image_cleared, 3)

image_cleared = cv2.edgePreservingFilter(image_cleared, sigma_s=5)
Code breakdown
- While looking at the code one question is definite which is, Why I have filtered the image thrice?
- Answer: The reason is simple we want the most filtered image so for that, we need to filter the same image multiple times (here thrice) so now we could get the more filtered image comparatively.
- Along with median blur filtering, we will be looking at Edge preserving filtering which is responsible to maintain the constant color spread along with the whole image.
Phase 3: Bilateral Image Filtering
The main difference between Gaussian filtering and Bilateral image filtering is that In gaussian blur it will only work with the blurring of the image i.e. only spaces are considered (no corners are preserved) but here bilateral filtering, we will work with the Gaussian kernel of the image which will, in turn, focus on the more intense picture and will preserve the corners as well.
image_filtered = cv2.bilateralFilter(image_cleared, 3, 10, 5)

for i in range(2):
    image_filtered = cv2.bilateralFilter(image_filtered, 3, 20, 10)

for i in range(3):
    image_filtered = cv2.bilateralFilter(image_filtered, 5, 30, 10)
Code breakdown
Before breaking down the code we need to understand why we are using loops for bilateral filtering? Answer: Because if we will increase the parameter value all at once then instead of watercolor art we will get the cartoony image which is not our goal hence we are applying the filtering in loops and gradually increasing the value of the sigma space.
Parameters of Bilateral filtering:
- Source: Source image which needs to be filtered.
- D: D is the diameter value of every pixel (here 3/5).
- Sigma color: The more will be the value of the sigma color the farther color will mix.
- Sigma Space: The more will be the value of the sigma space the color on the wider space will start mixing.
Phase 4: Tuning the art – Sharpening the Image
So when we used to apply bilateral filtering it used to blur the image though it preserved the corner of the image and convert it into blur form so to remove that and get a clearer output we used to sharpen the image.
gaussian_mask= cv2.GaussianBlur(image_filtered, (7,7), 2)
image_sharp = cv2.addWeighted(image_filtered, 1.5, gaussian_mask, -0.5, 0)
image_sharp = cv2.addWeighted(image_sharp, 1.4, gaussian_mask, -0.2, 10)
Code breakdown:
- First with the help of Gaussian Blur only we will subtract the part of the image to get the gaussian mask.
- Then with the above Gaussian mask, we will be sharpening the image using and weighted() function and if you will notice the parameter we are trying different values for alpha and gamma to get the desired results.
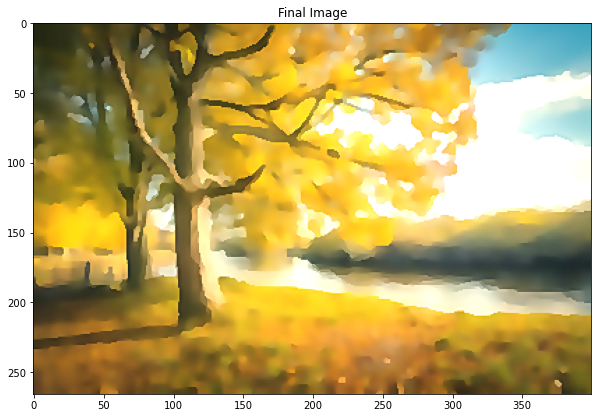
Displaying Images Using Computer Vision
plt.figure(figsize=[30,30])
plt.subplot(131);plt.imshow(image_sharp[:,:,::-1]);plt.title("Final Image");plt.axis('off');
plt.subplot(132);plt.imshow(image_cleared[:,:,::-1]);plt.title("Clear Impurities");plt.axis('off');
plt.subplot(133);plt.imshow(image[:,:,::-1]);plt.title("Original");plt.axis('off');
Output 1:
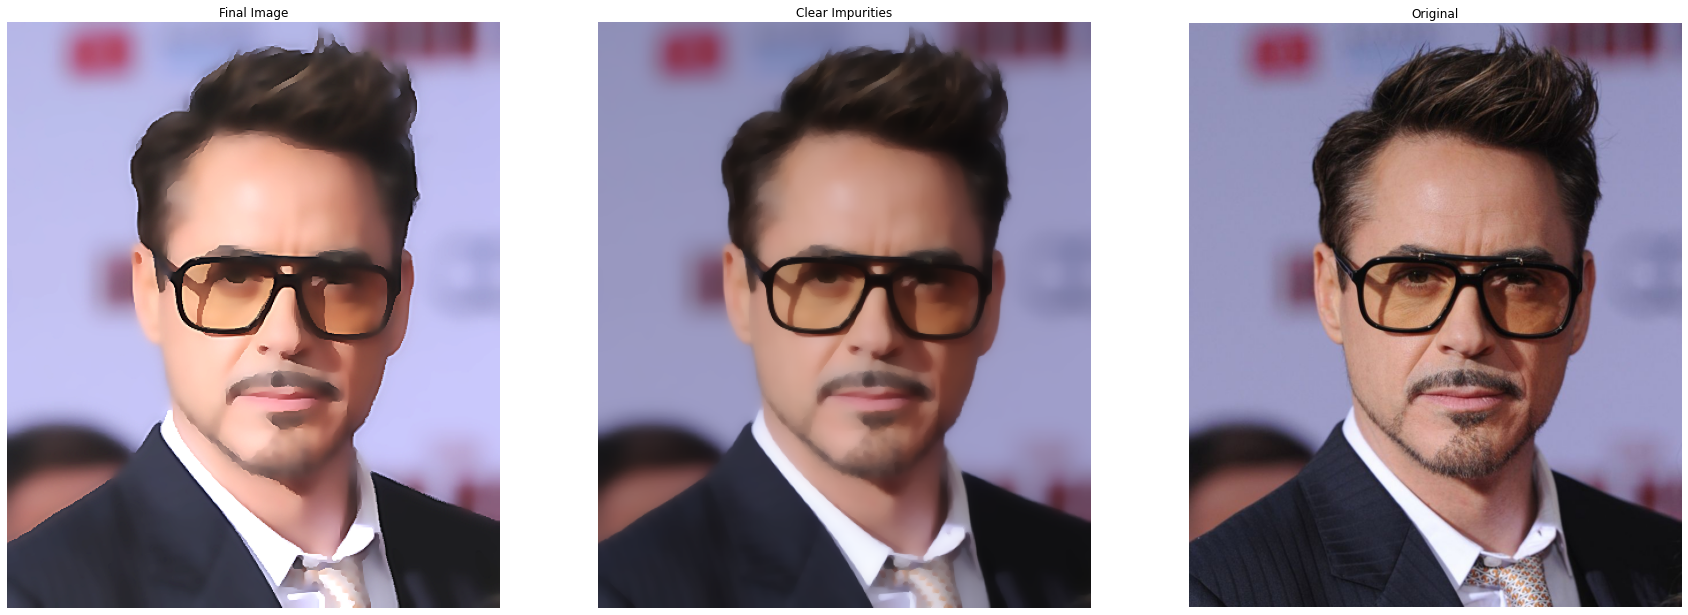

Output 2:
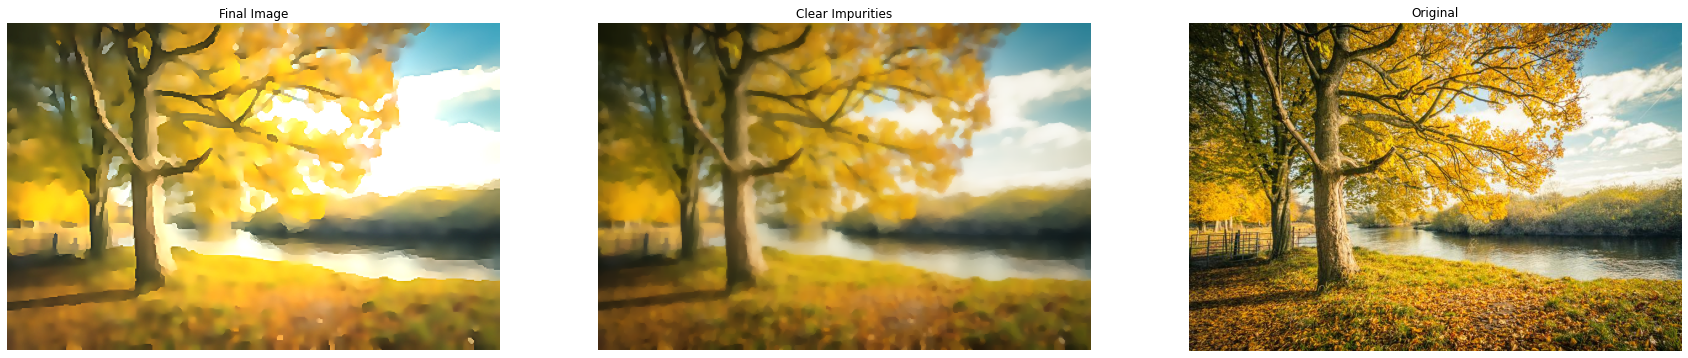
Original Image Source: Dreamstime
Code breakdown
As we have already discussed plotting the image previously in the article so can refer to that. There is only one point to be noted in this part which is a subplot that is dividing the section of the image into three parts:
- Final image
- Clear impurities
- Original image (simultaneously)
Conclusion on Computer Vision
So, from the above output, you can see that the image of Rober Downey Jr. has been converted to watercolor art you can convert any image you want by using the same process and image processing technique just to make sure the image quality is good enough to apply the filters. Do you think computer vision is an exciting concept to convert such images?
- Here the very first thing which we learned is about the resize function which is very much important.
- Then we came to know about different algorithms and concepts which helped to clear the impurities from the images.
- And at the last we learned about giving the final touch to the processing i.e. tuning the image, to improve the quality of the result.
Here’s the repo link to this article. Hope you liked my article on the Convert your image to watercolor art using computer vision. If you have any opinions or questions, then comment below.
Connect with me on LinkedIn for further discussion. Read more articles on computer vision here.
The media shown in this article is not owned by Analytics Vidhya and is used at the Author’s discretion.


Thank you very much, great Article!