Object detection is one of the popular applications of deep learning. Let’s start by considering a real-life example. Most of you would have used Google Photos in your phone, which automatically categorizes your photos into groups based on the objects present in them under the “Things” option. I’m attaching a snippet below.
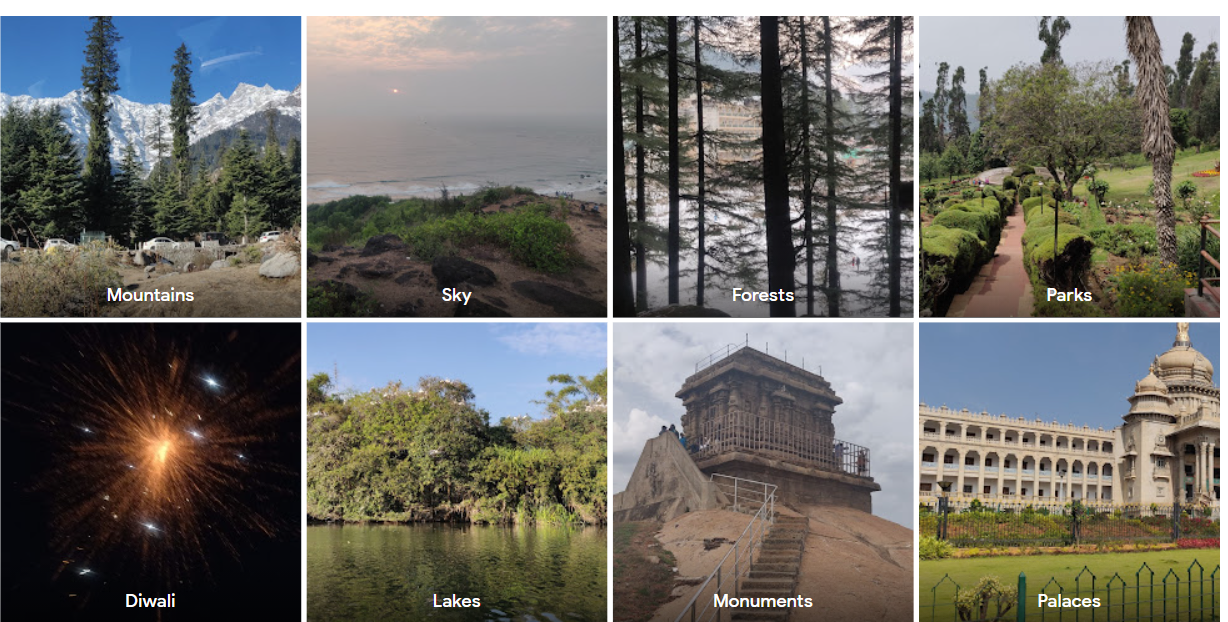
You can observe that the app is able to identify objects from pictures and use them to classify them into broader categories. This is one example that involves object detection. In this article, I’ll perform object detection using a recent, robust model called Detectron 2. I’ll be using PyTorch for the code.So Basically in this article you will get understanding about the detectron2 and how to import detectron into Python, With this you will also know that about object detection with detectron2.
This article was published as a part of the Data Science Blogathon
Table of contents
Introducing Detectron2
Facebook AI Research (FAIR) came up with this advanced library, which gave amazing results on object detection and segmentation problems. Detectron2 is based upon the maskrcnn benchmark. Its implementation is in PyTorch. It requires CUDA due to the heavy computations involved.
It supports multiple tasks such as bounding box detection, instance segmentation, keypoint detection, densepose detection, and so on. It provides pre-trained models which you can easily load and use it on new images. I’ll cover an example in the next section.
What is Detectron2 used for?
Detectron2, created by Facebook AI Research (FAIR), is a specialized tool for computer vision tasks. Constructed using PyTorch technology obtained from pytorch.org, it showcases expertise across various aspects of image analysis.
Identifying items in a picture includes spotting and labeling them by highlighting their edges, usually done by creating bounding boxes. Visit the website https://github.com/facebookresearch/detectron2 to learn more.
Image segmentation involves categorizing individual pixels within an image to enhance comprehension of the overall scene. Various forms of segmentation exist.
Semantic segmentation involves assigning a distinct category label to every pixel in an image to distinguish between various objects or elements.
Instance segmentation involves more than just identifying objects in images; it also involves delineating each object and giving a distinct label to each instance.
Panoptic segmentation integrates semantic and instance segmentation to comprehensively examine objects and background regions utilizing annotated data.
Detectron2 is famous for its:
There are many pre-trained models available for you to customize to meet the specific requirements of your project, instead of starting from the beginning.
Creating with modular parts allows easy adaptation for various requirements.
Support is available for customizing: Detectron2 offers the necessary tools for creating new models or tasks if needed.
Here in the Next Step you will get how to Detectron 2 in Python.
Installation
The first step is to install the detectron2 library and the required dependencies
import torch
torch.__version__
import torchvision
#torchvision.__version__
!pip install detectron2 -f https://dl.fbaipublicfiles.com/detectron2/wheels/cu102/torch1.7/index.html
Now, you have to import detectron2 and its modules.
import detectron2
from detectron2.utils.logger import setup_logger
setup_logger()
%matplotlib inline
from detectron2 import model_zoo
from detectron2.engine import DefaultPredictor
from detectron2.config import get_cfg
from detectron2.utils.visualizer import Visualizer
from detectron2.data import MetadataCatalog, DatasetCatalog
from detectron2.structures import BoxMode
Let’s also import the common libraries we shall need.
import numpy as np
import os, json, cv2, random
import matplotlib.pyplot as plt
Using Pretrained model for Inference: Code
Many pre-trained models of Detectron2 can be accessed at model zoo. These models have been trained on different datasets, and are ready to be used.
Even when people are training their custom dataset, they use these pre-trained weights to initialize their model. It has proven to reduce the training time and improve the performance. The model we’ll be using is pretrained on the COCO dataset.
First, we have to define the complete configuration of the object detection model. We imported the ‘get_cfg’ function from the detectron2.config module, we will be using it now. I have chosen the Coco Instance segmentation configuration (YAML file). There are other options available too. You also have to set the model’s threshold score (usually set between 0.4 to 0.6). You can load the pretrained weights for the configuration from the checkpoint
cfg = get_cfg()
cfg.merge_from_file(model_zoo.get_config_file("COCOInstanceSegmentation/mask_rcnn_R_50_FPN_3x.yaml"))
cfg.MODEL.ROI_HEADS.SCORE_THRESH_TEST = 0.5
cfg.MODEL.WEIGHTS = model_zoo.get_checkpoint_url("COCOInstanceSegmentation/mask_rcnn_R_50_FPN_3x.yaml")
Once we have finished the configuration part, we initialize the DefaultPredictor with the configuration.
predictor = DefaultPredictor(cfg)It’s ready to start predicting on images now.
Let’s use it on sample example images. Below code loads and reads images using OpenCV library.
!wget http://images.cocodataset.org/val2017/000000439715.jpg -O input.jpg
im = cv2.imread("./input.jpg")
print(im.shape)
plt.figure(figsize=(15,7.5))
plt.imshow(im[..., ::-1])
How to do detection?
Pass the input image to the predictor we initialized
outputs = predictor(im[..., ::-1])
This output is a dictionary. The dictionary has the instances (prediction boxes), scores, prediction labels I’m attaching the output of the code snippet
Next, use the Visualizer class to see how detection has been performed. The visualize class has a function to draw instance predictions.
v = Visualizer(im[:, :, ::-1], MetadataCatalog.get(cfg.DATASETS.TRAIN[0]), scale=1.2)
out = v.draw_instance_predictions(outputs["instances"].to("cpu"))
plt.figure(figsize=(20,10))
plt.imshow(out.get_image()[..., ::-1][..., ::-1])
You can observe that the model detected all the persons and horses.
I’m attaching another example output on a photo.
The car in the background has also been detected with 97% accuracy.
Detectron2 on Custom Dataset
Till now, we were just getting inference using the pre-trained models. But in some cases, you might have to detect particular objects like cars, persons alone. And you might want to train a model on your dataset from scratch.
Detectron2 provides a simple way for that also. Let’s see how.
Preparing the Dataset
I’ll be using the balloon dataset, the aim will be to detect the balloons in images. This is a relatively simple example.
Note that Detectron2 requires the data in a specific format. To convert our balloon dataset into such a format, let us define some helper functions. Our function will input the image directory/folder path as input. The JSON files are is then opened and loaded. We enumerate through records of JSON files, get the image path. Each image is read from the path, and its height, weight, file name, and image ID are stored in a dictionary ‘record’ Next, we read through the annotations, and store bounding box details in another dictionary ‘obj’. At the end of each loop, the record is appended to a list called “dataset_dicts”. Similarly, the bounding box dictionaries are also appended to a list “objs”. This list will in turn be assigned as the value against the “annotations” key in the record dictionary. Each of these record dictionaries is then appended to a final list which will be returned.
from detectron2.structures import BoxMode
def get_balloon_images(img_folder):
    json_file = os.path.join(img_folder, "via_region_data.json")
    with open(json_file) as f:
        imgs_anns = json.load(f)
    dataset_dicts = []
    for idx, v in enumerate(imgs_anns.values()):
        record = {}
        filename = os.path.join(img_dir, v["filename"])
        height, width = cv2.imread(filename).shape[:2]
        record["file_name"] = filename
        record["image_id"] = idx
        record["height"] = height
        record["width"] = width
        annos = v["regions"]
        objs = []
        for _, anno in annos.items():
            assert not anno["region_attributes"]
            anno = anno["shape_attributes"]
            px = anno["all_points_x"]
            py = anno["all_points_y"]
            poly = [(x + 0.5, y + 0.5) for x, y in zip(px, py)]
            poly = [p for x in poly for p in x]
            obj = {
                "bbox": [np.min(px), np.min(py), np.max(px), np.max(py)],
                "bbox_mode": BoxMode.XYXY_ABS,
                "segmentation": [poly],
                "category_id": 0,
            }
            objs.append(obj)
        record["annotations"] = objs
        dataset_dicts.append(record)
    return dataset_dicts
Finally, this helper function returns a list of dictionaries that have annotations. The next step is to register these training and validation datasets. For registering a dataset, you have to use the DatasetCatalog.register and the MetadataCatalog method.
for d in ["train", "val"]:
    DatasetCatalog.register("balloon_" + d, lambda d=d: get_balloon_images("balloon/" + d))
    MetadataCatalog.get("balloon_" + d).set(thing_classes=["balloon"])
balloon_metadata = MetadataCatalog.get("balloon_train")
Train data visualization
we have registered the datasets. Let us take a look at the training data now. The below code takes a random sample from the balloon train dataset. To draw the instance detection, we again use the visualizer class
dataset_dicts = get_balloon_images("balloon/train")
for d in random.sample(dataset_dicts, 3):
    img = cv2.imread(d["file_name"])
    visualizer = Visualizer(img[:, :, ::-1], metadata=balloon_metadata, scale=0.5)
    out = visualizer.draw_dataset_dict(d)
    plt.figure(figsize=(15,7))
    plt.imshow(out.get_image()[:, :, ::-1][..., ::-1])
Training on Custom data
Let’s get to the training part. For this, start by importing DefaultTrainer from the engine module of Detectron. Define the dataset and other parameters like no of workers, batch size, no of classes ( 1 in this case). We initialize the model with pre-trained weights and train further. The max iterations parameter will vary depending upon the size of the dataset and the complexity of the task.
from detectron2.engine import DefaultTrainer
cfg = get_cfg()
cfg.merge_from_file(model_zoo.get_config_file("COCO-InstanceSegmentation/mask_rcnn_R_50_FPN_3x.yaml"))
cfg.DATASETS.TRAIN = ("balloon_train",)
cfg.DATASETS.TEST = ()
cfg.DATALOADER.NUM_WORKERS = 6
# Let training initialize from model zoo
cfg.MODEL.WEIGHTS = model_zoo.get_checkpoint_url("COCO-InstanceSegmentation/mask_rcnn_R_50_FPN_3x.yaml")
cfg.SOLVER.IMS_PER_BATCH = 8
cfg.SOLVER.BASE_LR = 0.001
cfg.SOLVER.MAX_ITER = 500
cfg.MODEL.ROI_HEADS.BATCH_SIZE_PER_IMAGE = 128   # faster, enough for this dataset (default: 512)
cfg.MODEL.ROI_HEADS.NUM_CLASSES = 1  #only one class (balloon)
os.makedirs(cfg.OUTPUT_DIR, exist_ok=True)
trainer = DefaultTrainer(cfg)
trainer.resume_or_load(resume=False)
trainer.train()
This might take a while to train!
Conclusion
Detectron2 is a robust tool for identifying objects and segmenting them, providing top-notch models and versatility for researchers and developers. It is commonly employed for activities like image categorization, recognizing objects, and segmenting instances. Setting up is simple, and minimal preparation is needed when using pretrained models for inference. Detectron 2 also has the capability to train on custom datasets, requiring appropriate dataset preparation and visualization. By adhering to the specified steps, you can efficiently teach models using personalized data, utilizing the capabilities of Detectron2 to attain superior outcomes in different computer vision tasks.
Hope you like the article and get to know about the detectron 2 and about the object detection with detectron2. How to import detectron2 in Python.
Note that whenever you train a deep learning model, save its final checkpoint. You can load it easily to perform predictions and get inferences.
The below code snippet loads the model and initializes the predictor. We take some random samples from the validation dataset and pass them to the predictor.
cfg.MODEL.WEIGHTS = os.path.join(cfg.OUTPUT_DIR, "model_final.pth")  # path to the model we trained
cfg.MODEL.ROI_HEADS.SCORE_THRESH_TEST = 0.5   # set a testing threshold
predictor = DefaultPredictor(cfg)
from detectron2.utils.visualizer import ColorMode
dataset_dicts = get_balloon_images("balloon/val")
for d in random.sample(dataset_dicts, 2):
    im = cv2.imread(d["file_name"])
    outputs = predictor(im)
    v = Visualizer(im[:, :, ::-1],
                   metadata=balloon_metadata,
                   scale=0.5,
                   instance_mode=ColorMode.IMAGE_BW
    )
    out = v.draw_instance_predictions(outputs["instances"].to("cpu"))
    plt.figure(figsize=(15,7))
    plt.imshow(out.get_image()[:, :, ::-1][..., ::-1])
Q1.What is RPN in Detectron2?
In Detectron2, RPN (Region Proposal Network) finds potential objects in an image by predicting bounding boxes and their likelihood of containing an object. It helps the model focus on these regions for faster and more accurate detection.
Q2.How to check if Detectron2 is installed?
Try importing detectron2 in Python or use pip show detectron2 to see if there’s installation info. No errors or output means no Detectron2.


One of the best Detectron2 articles I've come across on the internet. Thank you!
This is a great post! I'm a recent graduate of the University of Washington with a degree in computer science and I'm interested in learning more about object detection. I found this post very helpful.
Can i have the trained modeled file ??? im struggling to predict my input