It was just past the midway mark of 2019 and the Internet casually decided to trick us as it normally does. An optical illusion went viral on Twitter which depicted a gray image that looked colored! Confused? Well, let’s dive deep in then!. We’ll first go through the different types of optical illusions and then learn how to code them in Python.
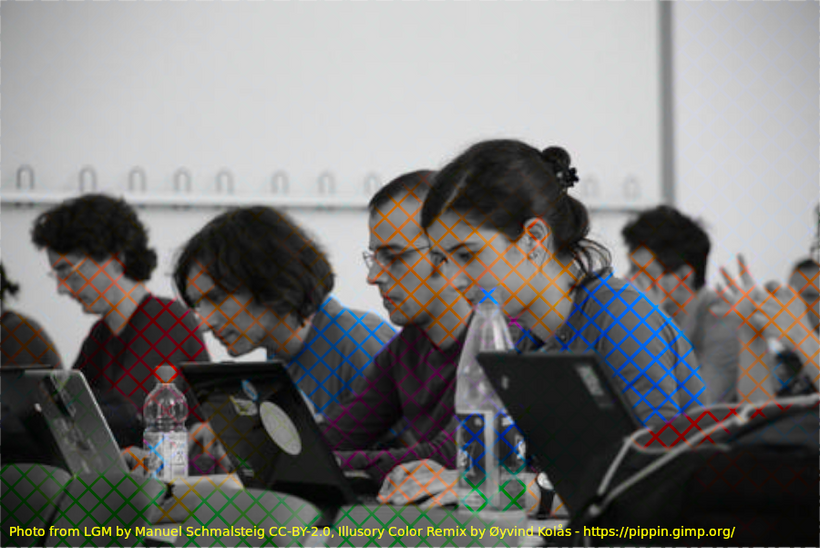
At a first glance, the image looks quite colored, though a bit dim. But after troubling their mind just enough, one can deduce that the image is a grey one with some colored lines that are forming a kind of a grid. This shows how amazing our mind is: how it just fills in the colored blanks with minimal context. This illusion was created by artist Øyvind Kolås from GIMP. According to him:
“An over-saturated colored grid overlayed on a grayscale image causes the grayscale cells to be perceived as having color”
In this article, I will be focusing on how to program this particular illusion and not try to explain the illusion itself.
But before that, let’s look at some similar illusions[2]:
White’s illusion
In this illusion, there are stripes of black and white alternating each other. Of course not just that! Parts of the black and white stripe are replaced by gray like this:
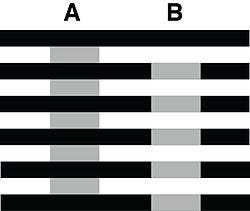
What do you think about the grays? Do you see 2 different shades? Or a single one?
Most of us would see 2 different shades of gray. But in reality, there is only a single shade of gray(You can try it out here: https://michaelbach.de/ot/lum-white/)
Munker Illusion
Munker illusion is basically a colored version of the previous illusion.
“When an area is enclosed by a colored surround and both are partly occluded by a colored grating, the area appears to be tinted in the same direction as the color of the grating(assimilation) as well as in the direction opposite to the color of the surround(contrast).”
— A brief classification of color illusions by A Kitaoka [11]
This would be clearer in the following illustrations.
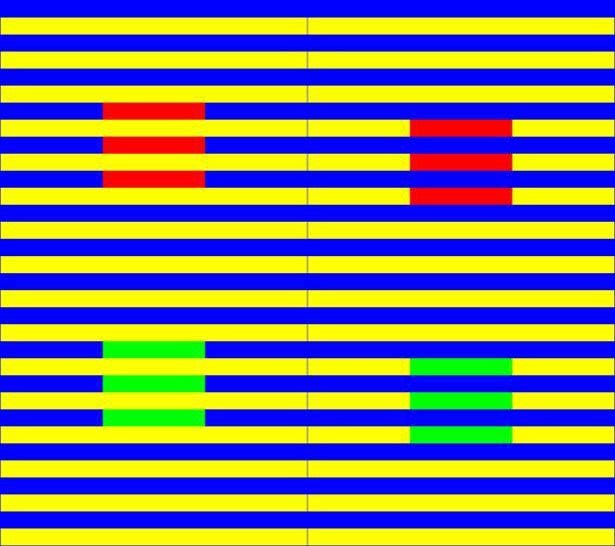
Source: The Munker Illusion destroys your faith in color [6]
Here, the colored patches: the top two and the bottom two are of the same in color although we seem to see two different shades of red and green.
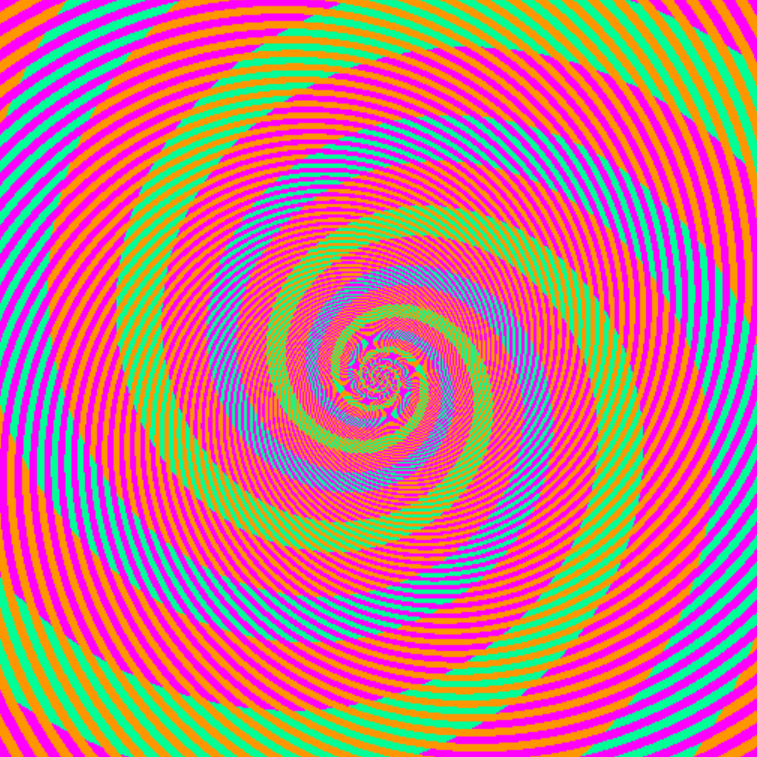
A spiral version of the same illusion:
Munker Illusion with tennis balls:
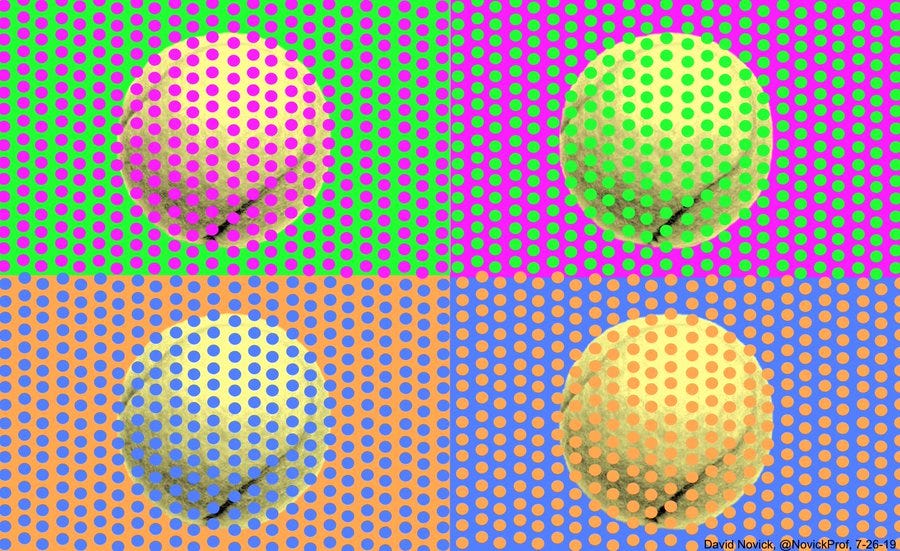
Here, all the balls are of the same color represented by RGB values: [251,255,140] but you probably see these colors on the balls:
- pink,
- green,
- (almost) white, and
- yellow
The same illusion can also be visualized with horizontal and vertical stripes as illustrated below:
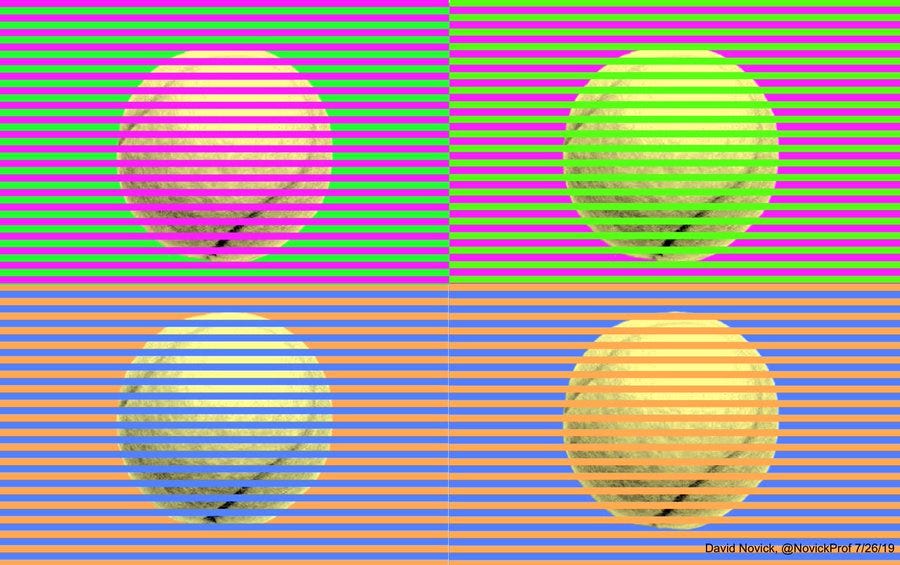
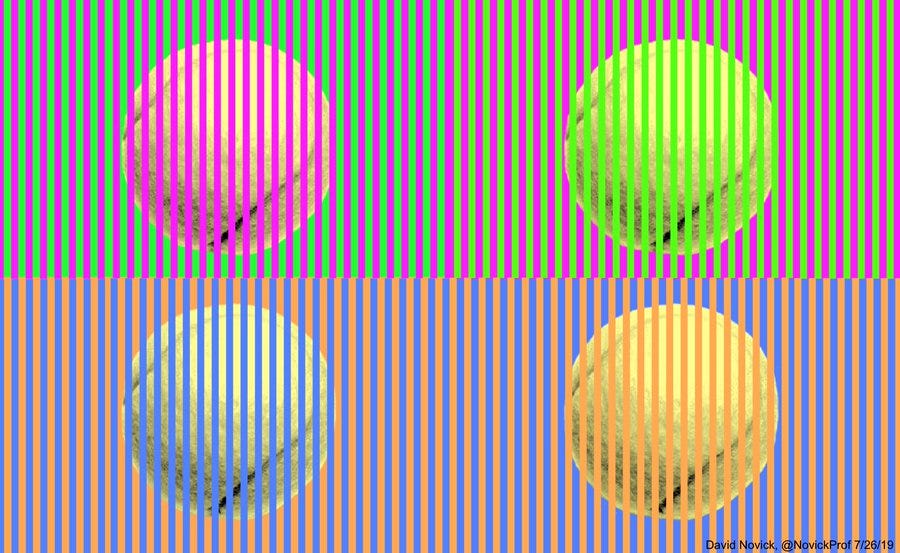
The original tennis ball png files can be found here.
At this point, you might be pretty amazed at all these wonderful illusions and hopefully not seeing crazy colors around! We will now begin the python programming journey at the end of which we can create similar illusions and also do some analysis.
Creating the Illusion in Python
We can break down the illusion into 2 parts:
- the grayscale image
- the colored grid: the colors on the grid lines are the ones that cause illusions and determine which color our brain fills the picture with
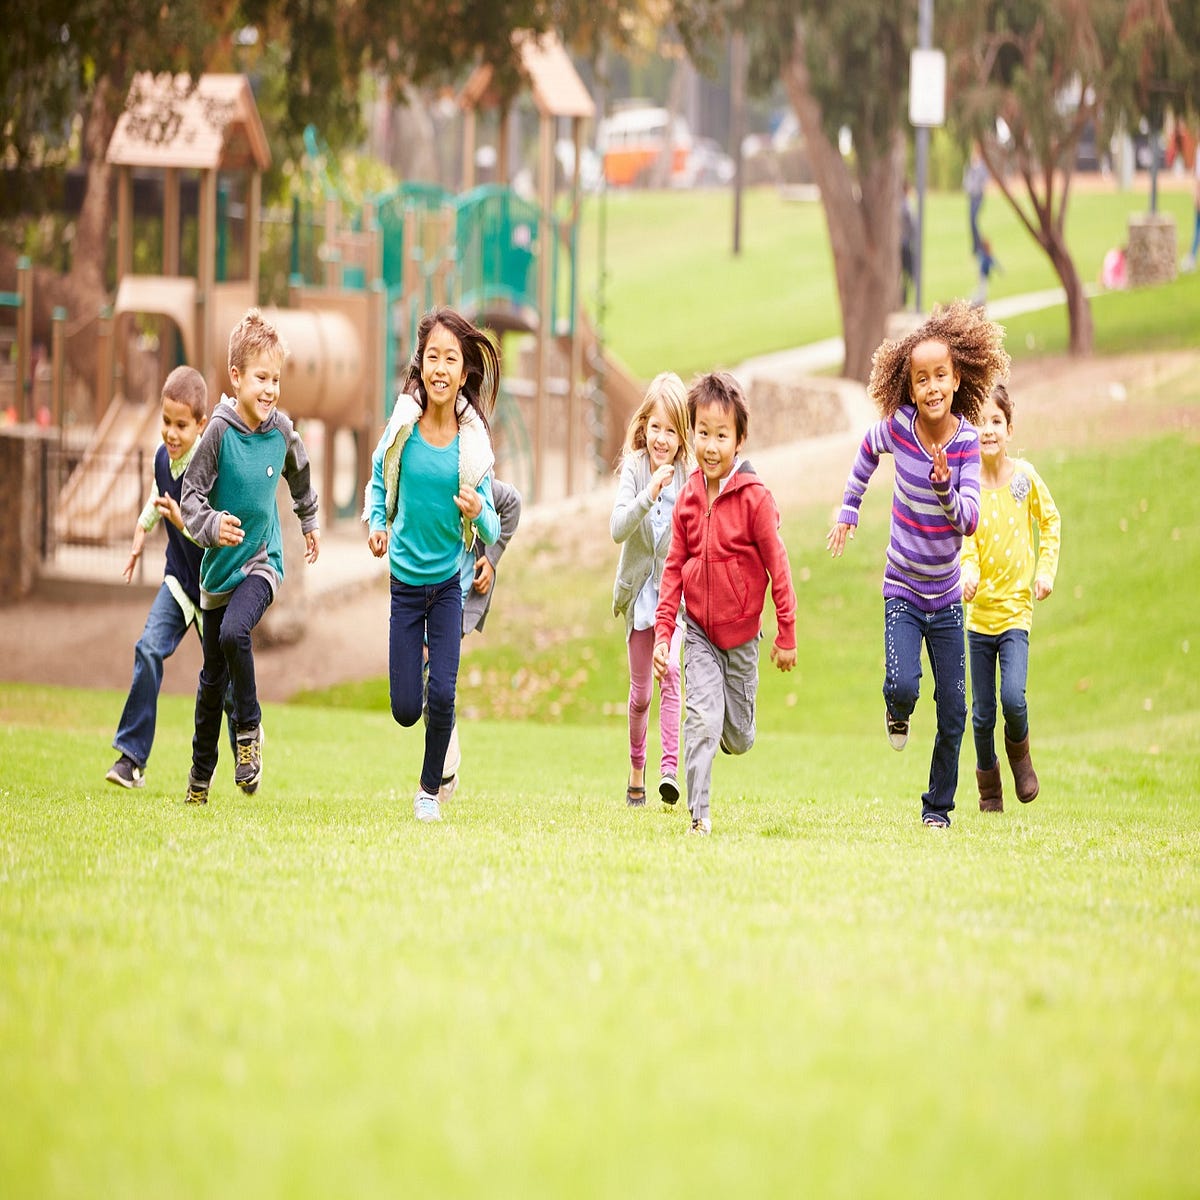
We would be using this image to create our illusion.
Let’s load the image first:
import matplotlib.pyplot as plt
import cv2 as cv
import numpy as np
img = cv.imread(r'C:UsersJojoDownloadstest.jpg')
mask = cv.imread(r'C:UsersJojoDownloadsmask5.jpg')
#Show the image with matplotlib
plt.imshow(img[:,:,[2,1,0]])
plt.show()
Converting an image into grayscale is very easy using OpenCV:
img_gray = cv.cvtColor(img, cv.COLOR_BGR2GRAY)
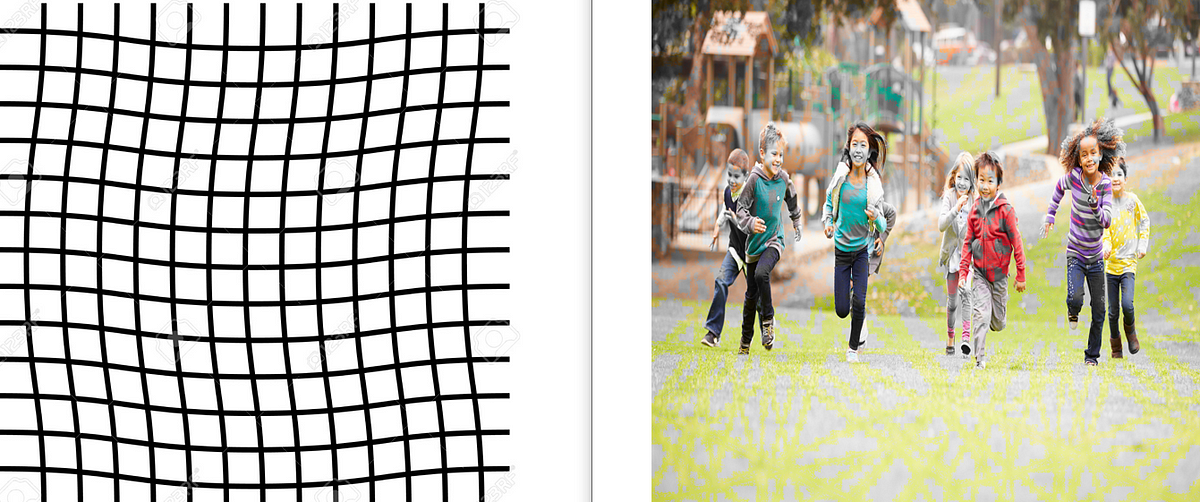
To create the illusion, we need to draw colored gridlines on the grayscale image. I tried different types of grids for this illusion to see if grid types have any effect. (The original illusion, if you notice, has only a grid with sets of parallel lines cutting each other)
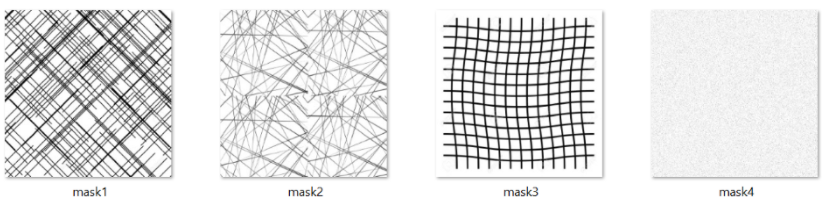
*mask4 here is just a plain white image with salt and pepper noise
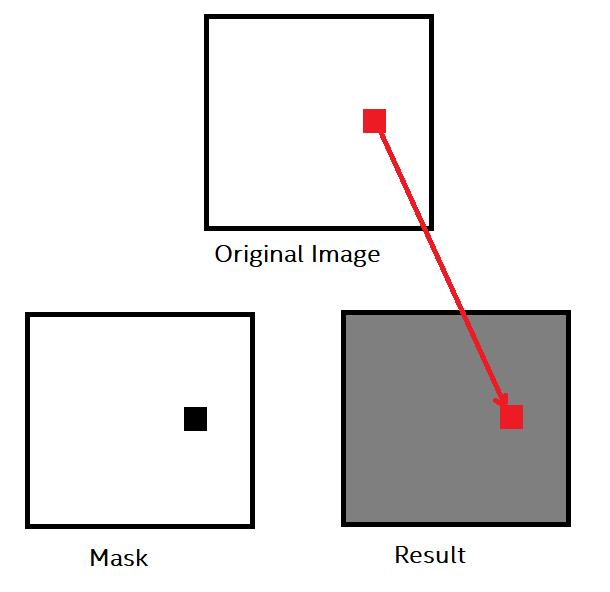
Now the interesting part.
We iterate through the mask, check every pixel. Also, a copy of the original image is made. If a mask pixel is black, we keep the original pixel color, else we change the pixel color to gray.
test = img.copy()//creating a copy of the original image
img_gray = cv.cvtColor(img, cv.COLOR_BGR2GRAY)
mm = ~mask[:,:,0]
count = 0
for i in range(mask.shape[0]):
    for j in range(mask.shape[1]):
        if mm[i,j] == 0: //mask pixel is black
            test[i,j,0] = img_gray[i,j]
            test[i,j,1] = img_gray[i,j]
            test[i,j,2] = img_gray[i,j]
            count+=1
Results
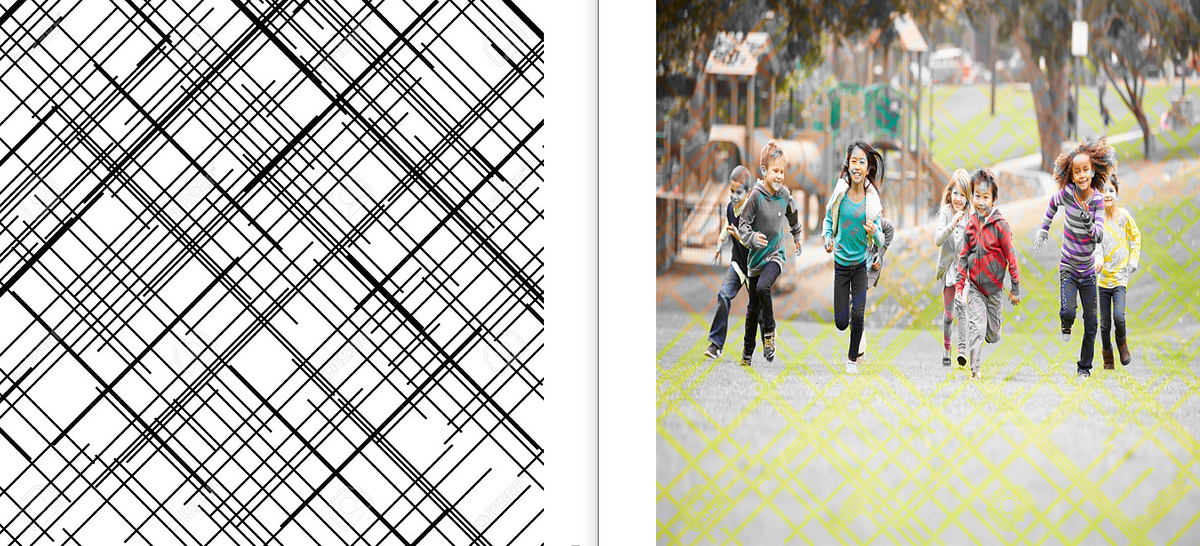
#Mask1
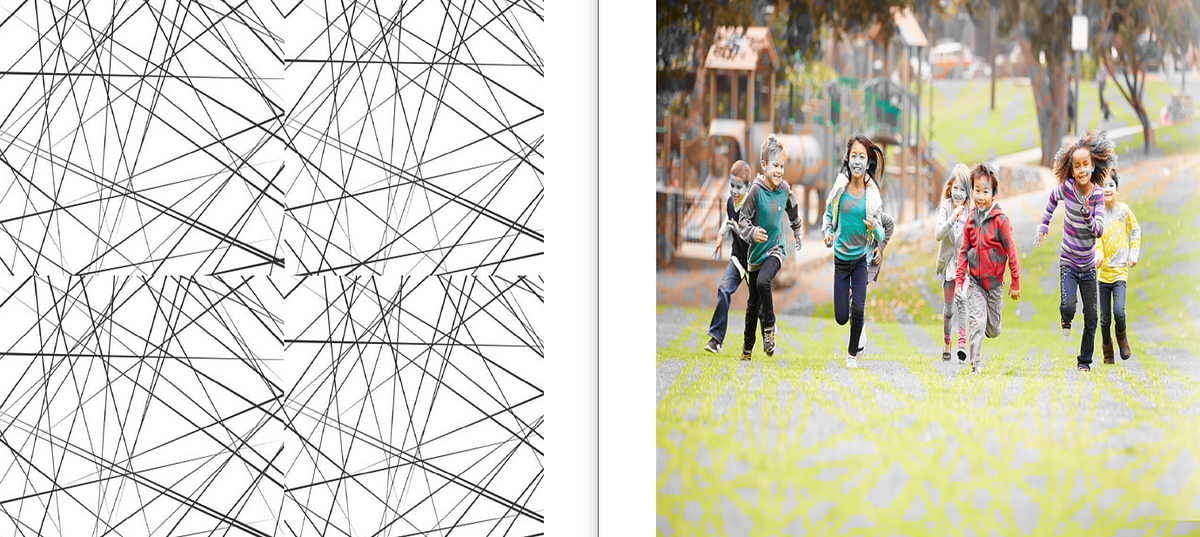
#Mask2
#Mask3
#Mask4
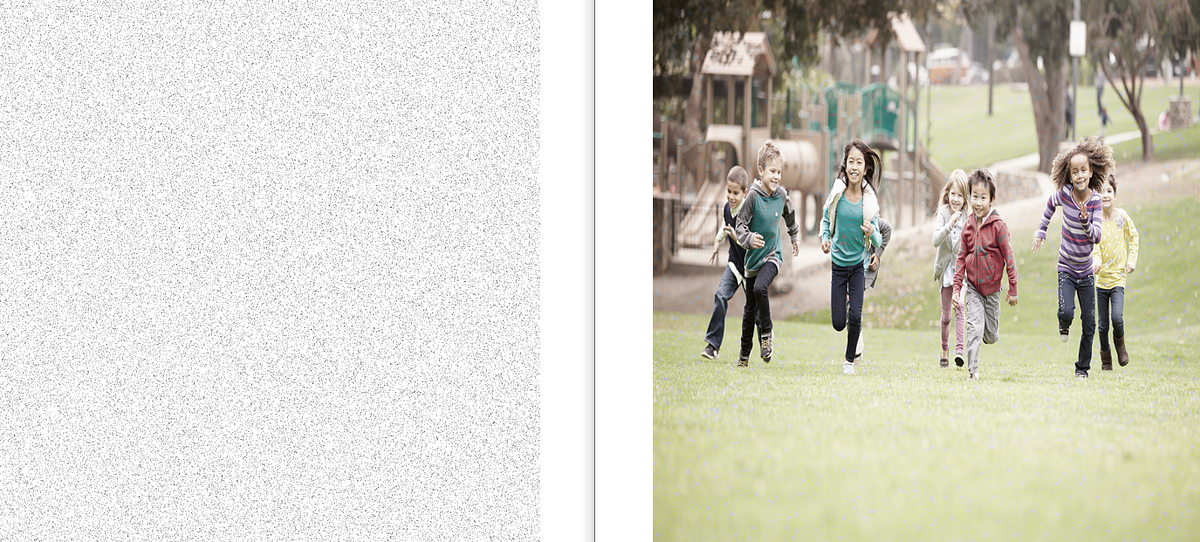
One interesting thing I found: the fourth mask with the salt and pepper noise works the best for me. The ordered grids do give a colored impression but the effect with the salt and pepper noise is the strongest. Mask4 has black pixels that are randomly spaced and that’s why maybe the image appears better colored as compared to others where it is easier to pick up gray spaces. In the case of other masks, the gray spaces are regular and so the effect is not that strong (author’s opinion).
Whole Code Snippet for building illusion in Python
import matplotlib.pyplot as plt
import cv2 as cv
import numpy as np
img = cv.imread(r'C:UsersJojoDownloadstest.jpg')
mask = cv.imread(r'C:UsersJojoDownloadsmask5.jpg')
#Show the image with matplotlib
plt.imshow(img[:,:,[2,1,0]])
plt.show()
img_gray = cv.cvtColor(img, cv.COLOR_BGR2GRAY)
test = img.copy()//creating a copy of the original image
img_gray = cv.cvtColor(img, cv.COLOR_BGR2GRAY)
mm = ~mask[:,:,0]
count = 0
for i in range(mask.shape[0]):
    for j in range(mask.shape[1]):
        if mm[i,j] == 0: //mask pixel is black
            test[i,j,0] = img_gray[i,j]
            test[i,j,1] = img_gray[i,j]
            test[i,j,2] = img_gray[i,j]
            count+=1
Code for producing a salt and pepper noise mask:
import random
mm = img.copy()
mm[:,:,0]=255
mm[:,:,1]=255
mm[:,:,2]=255//just creating a white image
def sp_noise(image,prob):
    '''
    Add salt and pepper noise to image
    prob: Probability of the noise
    '''
    output = np.zeros(image.shape,np.uint8)
    thres = 1 - prob
    for i in range(1300):
        for j in range(1300):
            rdn = random.random()
            if rdn < prob:
                output[i][j] = 0
            elif rdn > thres:
                output[i][j] = 255
            else:
                output[i][j] = image[i][j]
    return output
noise_img = sp_noise(mm,0.007)
plt.imshow(noise_img)
# Filename
filename = r'C:UsersJojoDownloads\mask4.jpg'

# Using cv2.imwrite() method
# Saving the image
cv.imwrite(filename, noise_img)
#Source: https://stackoverflow.com/questions/22937589/how-to-add-noise-gaussian-salt-and-pepper-etc-to-image-in-python-with-opencv
Explanation of the salt and pepper noise: Here the sp_noise function takes 2 attributes: image (for accepting input image which would be blessed with the noise), prob (higher the probability higher the noise). The function creates a temporary image that has the same shape and size as the input image. The threshold is defined as 1 minus the probability defined by the parameter prob. Now,
- there is a nested for loop which runs for every pixel in the temporary image
- every time a random number is generated and if that number is less the threshold, the corresponding pixel is set to zero, else white.
References:
[1] https://twitter.com/page_eco/status/1155077311399489536 [2] Is this popular optical illusion made of a grey-scale image with coloured lines? https://skeptics.stackexchange.com/questions/44609/is-this-popular-optical-illusion-made-of-a-grey-scale-image-with-coloured-lines [3] Color Assimilation Grid Illusion https://www.patreon.com/posts/color-grid-28734535 [4] A Life in Bloom https://www.communitycentershanghai.com/wp-content/uploads/2021/04/CCS_Spring_2021Digital.pdf [5] White’s Illusion https://en.wikipedia.org/wiki/White%27s_illusion [6] The Munker Illusion destroys your faith in color https://gizmodo.com/the-munker-illusion-destroys-your-faith-in-color-5907175 [7] Munker Illusion from Michael’s Visual Phenomena & Optical Illusions. https://michaelbach.de/ot/col-Munker/ [8] Color illusion http://www.psy.ritsumei.ac.jp/~akitaoka/color-e.html [9] Color Assimilation Grid Illusion. https://www.patreon.com/posts/color-grid-28734535 [10] https://twitter.com/NovickProf/status/1154741008552226819 [11] A brief classification of colour illusions by A Kitaoka https://aic-color.org/resources/Documents/jaic_v5_review.pdf*note: There is a method to prepare this illusion in GIMP which comes from the original author(Color Assimilation Grid Illusion)[9]. The original post that went viral was a compressed version and with further sharing acquired even more degradation. The given link in reference 9 contains the versions of the post that display the illusion properly. The illusion can be built in Gitlab: try this link from the author. The title image has been adopted from [4]
You can reach me on LinkedIn or Twitter.
PhD Researcher, Virtual Reality | Light & Lighting Laboratory, KU Leuven | Msc Computer Graphics, Vision and Imaging UCL | Interested in Python, Virtual Reality, Augmented Reality, Cryptography | Currently working on the perception of light in real and virtual environments


