This article was published as a part of the Data Science Blogathon.
Introduction
In our day-to-day life, we are dealing with many web and mobile applications. To access that application many times we may have seen “Please log in” 0r “Please Sign in” pop-ups. Do we ever think about what the application is doing once we press that in the background process? The background process is to authorize the user whether he/she has the authority to access the request. To achieve that, developers are using many techniques with the latest technology. There are many concepts to authorize the user via the application, but one of the most popular concepts is OAuth2.
In this article, we are going to learn what is OAuth2 concepts, and how to implement OAuth2 features inside our Spring Boot Applications using spring security. We will also have to look at how to implement OAuth2 patterns for different kinds of applications like server-side rendered applications which are developed using Spring MVC (Model View Controller) single page applications which are developed using frameworks like angular and also going to see how to implement machine to machine authorization like in the case of micro-services, we will use keycloak as our identity server or authorization server to help us implement these OAuth2 patterns.
What is OAuth2?
OAuth stands for open authorization and industry-standard protocol that was developed for authorization between services or applications. And the protocol is right now in version 2.0. That’s why it is usually known as OAuth2.
Where do we Implement OAuth 2?
1. At Spring MVC (Model View Controller) application.
2. At Single page applications like Angular, react with spring-boot backend.
3. At M2M (Machine to Machine) Authorization between micro-services as identity server or authorization server.
Note: Guys if you know spring-boot and spring security that is much better to understand well.
Practical Example
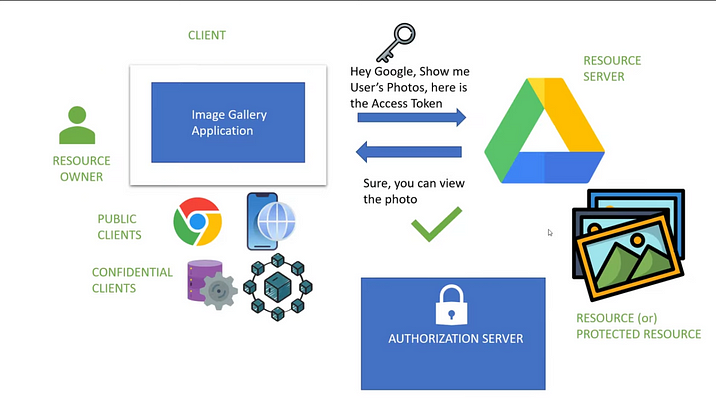
This is an image gallery application, simply it can upload, create, edit, and print photos from cloud services. So if we want to access the photos via a Google account or Facebook account from our image gallery application, we need to provide permission. We can’t just hand over the username & password of our Google or Facebook account to this application; it’s risky and hackers can get access to our account and database.
.png)
So we need a safe way to authorize the image gallery application to access the google or Facebook account. The OAuth framework was developed for this reason.
.png)
Note: Auth in OAuth stands for AUTHORIZATION but NOT AUTHENTICATION.
.png)
Here, instead of giving Google credentials, the app redirects to Google login.
.png)
Once we log in, we can grant the permissions for the image gallery application to access the Google account. (We can also restrict the permission).
.png)
Once we grant the permission, the Google server returns the unique access token to the application. Our application can use the access token to access the photos from our google account.
.png)
Once the google server receives the access token, it verifies whether it is a valid token or not. If it confirms the valid token (that means the token is generated by the Google server itself), it grants access to the photos.
As for now, we looked at the high-level overview and got to know how the OAuth2 protocols work. Now move a bit deeper, starting with OAuth2 Terminology.
OAuth2 Terminology
To understand the OAuth 2protocol we need to familiarize the OAuth 2 terminology.
1. Resource — Anything which needs to be accessed by an external service, which needs authorization. Eg: In our image gallery application Images are the Resource.
2. Resource Owner — Owner of the protected Resource. Eg: In our image gallery application Resource Owner is you or me.
3. Resource Server — A server that serves or hosts or stores the protected resource. Eg: In our image gallery application Google Drive is the Resource Server.
4. Client — A service or application which accesses the Resource through Resource Owner. Eg: Image gallery application. (web, mobile, desktop application, micro-service, smart service)
Note: The client has two types
1. Public Client — Web, Mobile, Desktop, and Smart TV apps which can access by the public.
2. Confidential Client — Remote shell scripts, CRON jobs, Microservices.
5. Authorization Server — Server that generates and validates Access Tokens for Clients.
Options in Market
1. AWS Cognito
2. Microsoft Azure AD
3. Google Identity Platform
4. OKTA
5. Key Cloak
6. Spring Authorization Server
If you want to manage the authorization on your keycloak is a very good option.
So As we understand the OAuth2 we also need to understand OIDC.
What is OIDC?
OIDC is also known as OpenID Connect. This is a protocol that is built on top of OAuth2, it acts as an identity Layer. So what is an Identity layer, previously we show in our image gallery application that when the client wants to access a resource like the photos on the google drive, it needs an access token from the authorization server? An access token is a random alphanumerical set of characters, which does not provide any context or information about the user, so which makes it hard for the client to understand and get the user information. For this reason, the identity layer will send an additional token called an ID token which contains the basic information about the user like email, first name & last name.
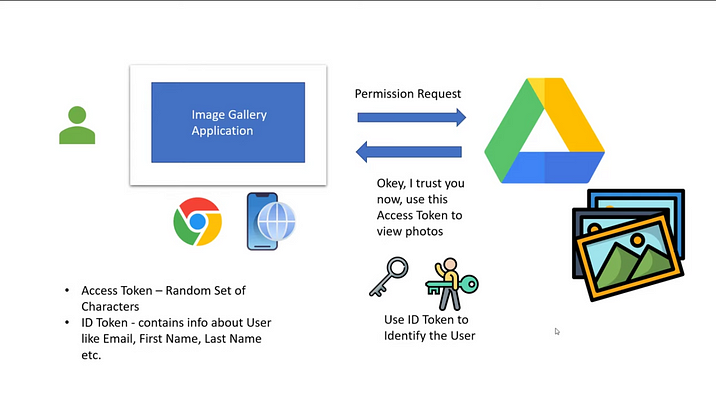
Access Token: Used to verify a user is authorized to access the resource.
ID Token: Used to verify the user information and identity of the user.
Practical
After a clear explanation of the basic structure of the OAuth2 protocol, Let’s start our practical session with keycloak and spring-boot configurations.
OAuth 2 with Keycloak Configuration
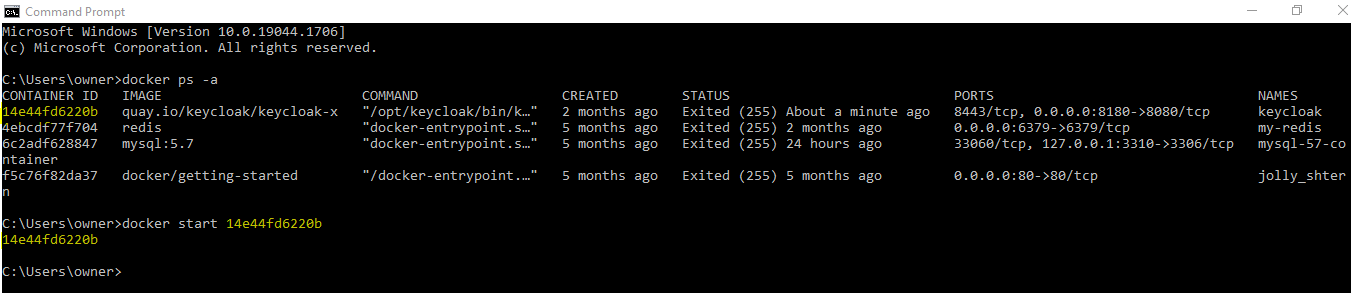
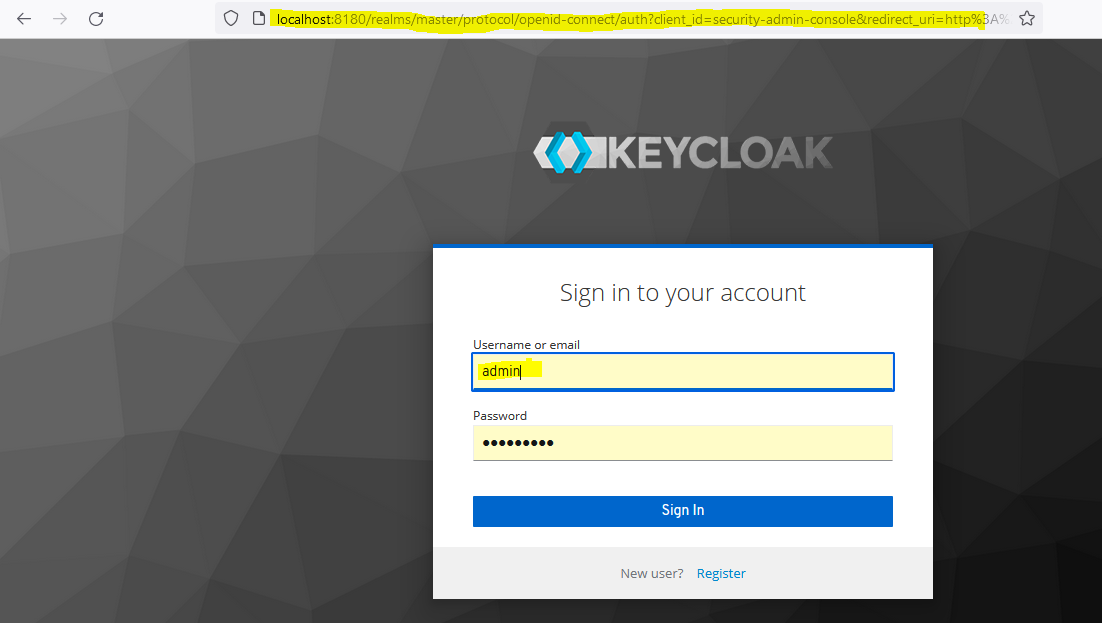
As we already discussed we need to configure our keycloak. To get some basic ideas you can read my Introduction to Keycloak article. Here I am using keycloak by using the docker image.
Run Docker Image
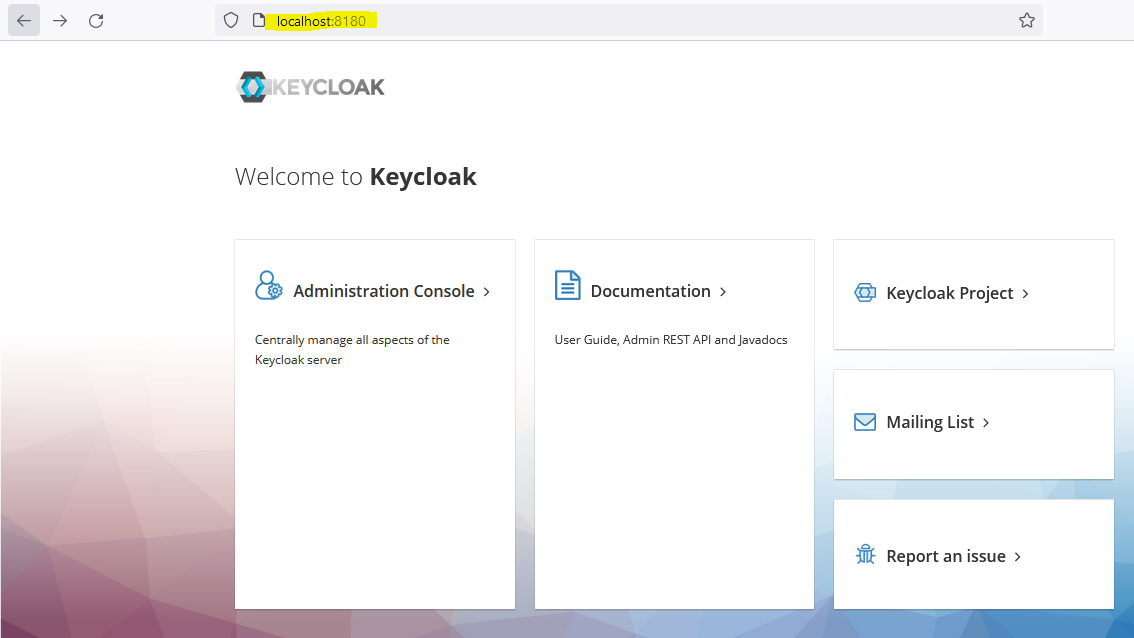
Keycloak Dashboard
.png)
Once we run our keycloak server we can see the dashboard, so we need to create the account. Once the user is created we can log in to the authorization server.
Once you logged in, At first you can see the Master, Master is the default Realm in a key cloak.
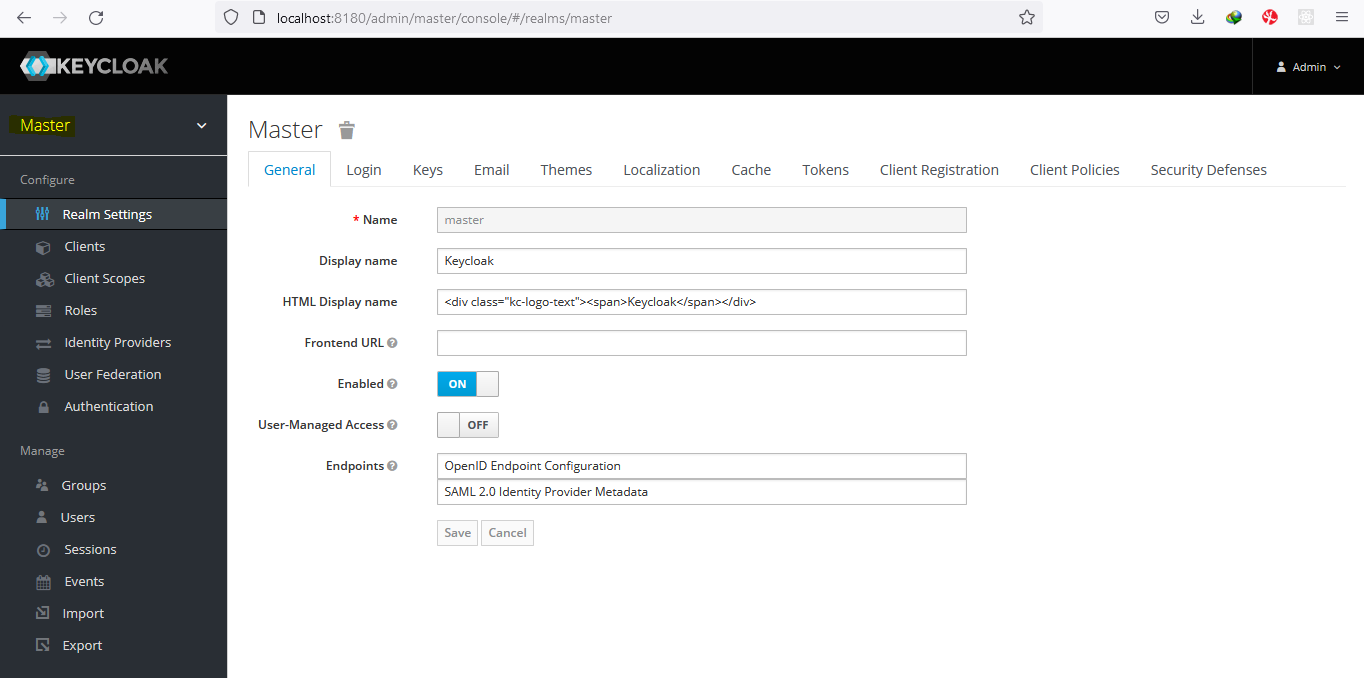
Realm is like a placeholder where you can manage the set of clients’ users and their roles. Each realm is not connected with each other so I create a user in one realm they are not available or accessible in another realm.
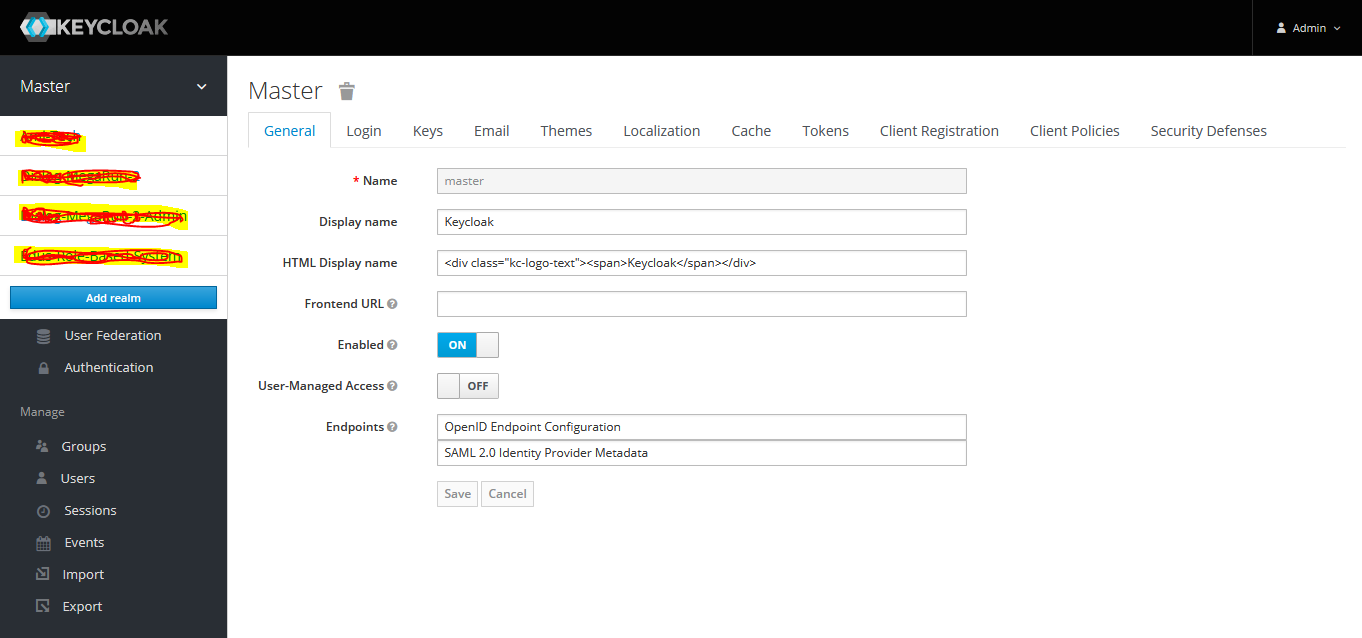
Create Realm
So the first thing we are going to do now is to create our own realm, by clicking add realm button.
Here I am creating a realm called “oauth2-demon-realm”.
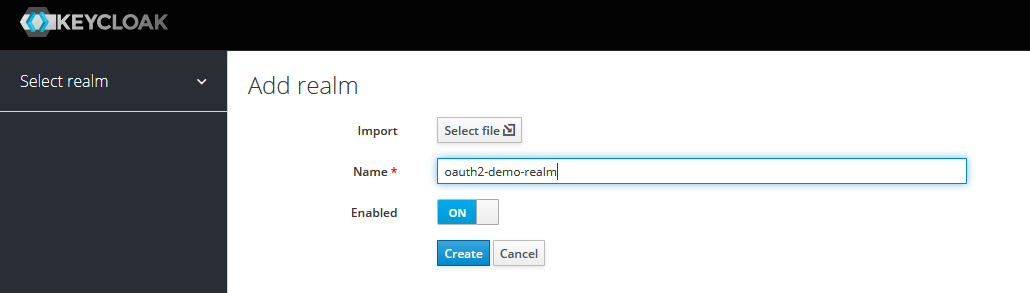
Now we can create many clients under this realm, also we can have many users and roles.
Create Client
Let’s go ahead and create a client. For us, the client is going to be a Spring MVC application that is developed using thyme-leaf. So this is going to be a server-side spring MVC application.
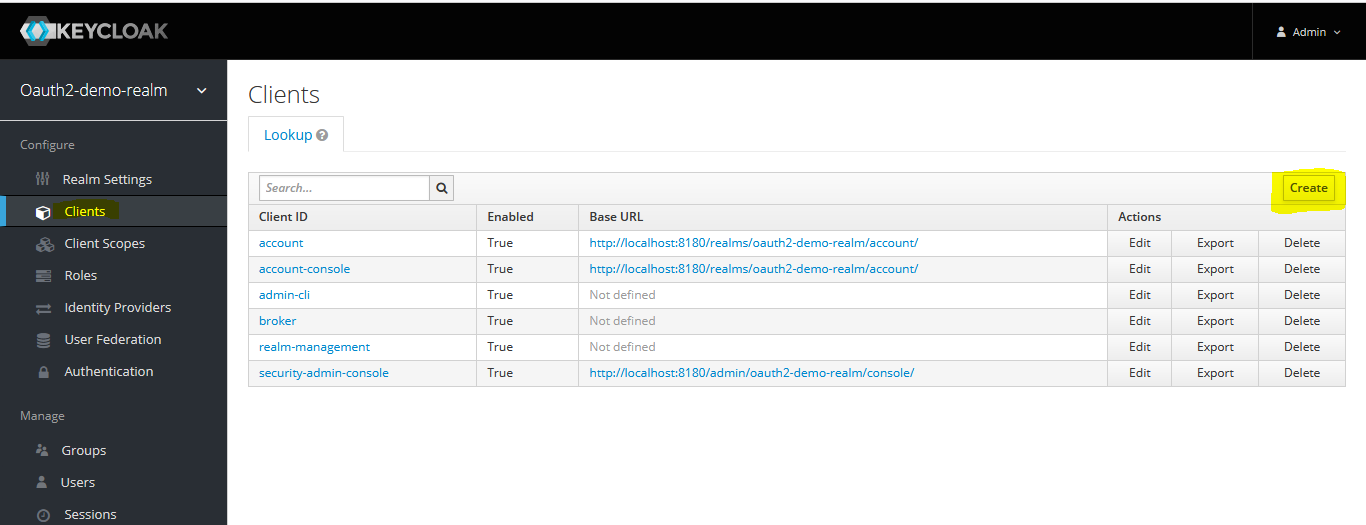
Here I am creating a client called “oauth2 demo client”.

After we created we can see much more details on the client page.
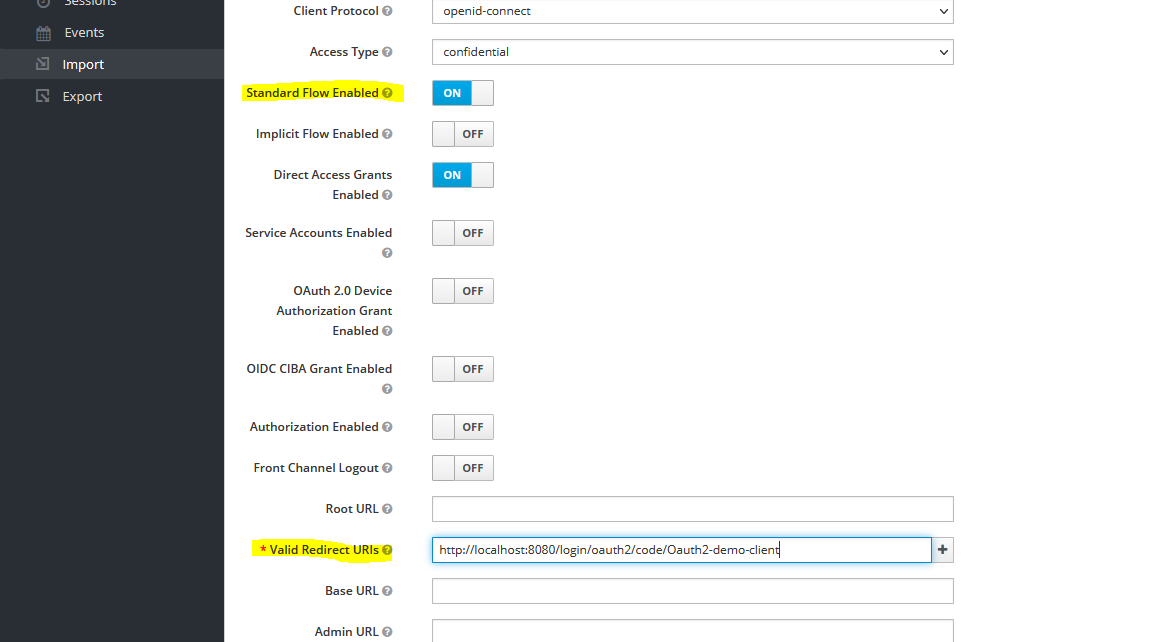
In the Client protocol, we are leaving it as OpenID-connect.
.png)
Next is access type, As we now dealing with the server-side rendered spring MVC application, so I am choosing as confidential.
.png)
Here I am leaving Standard Flow Enabled as default, also providing valid Redirect URIs, this will be the redirect URI that the authorization server will use to send us the authorization code as we saw earlier. So for this field, I am going to provide the value “http://localhost:8080/login/oauth2/code/oauth2-demo-client”. Note here I am using my client id: “oauth2-demo-client”. This is the default redirect URI that spring-boot supports. This URI will be recognized by the spring-boot application by itself, we don’t need to implement this endpoint. Spring will automatically handle the request when keycloak is redirected to this particular URI.
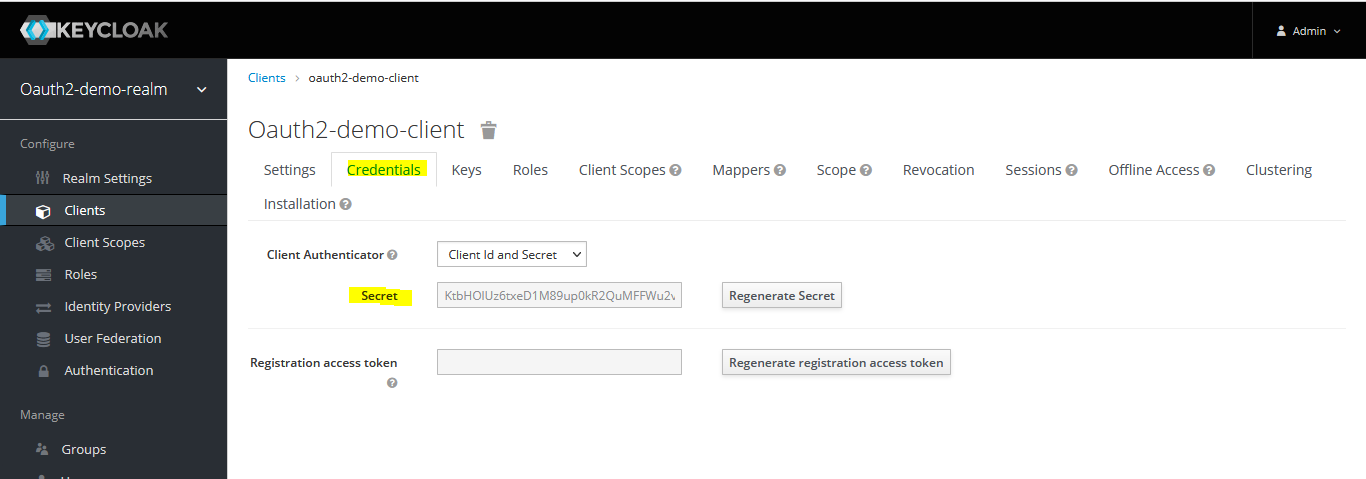
Now the last thing we have to do is generate a client secret. We can do that by clicking the credentials tab on the client page of a particular client. It will already be generated as default.
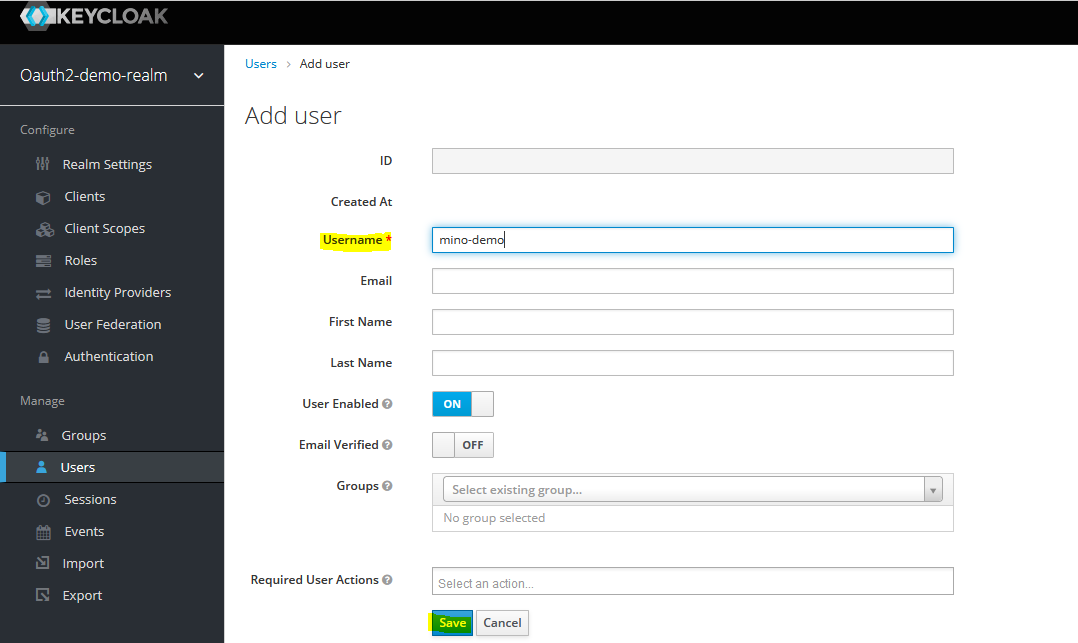
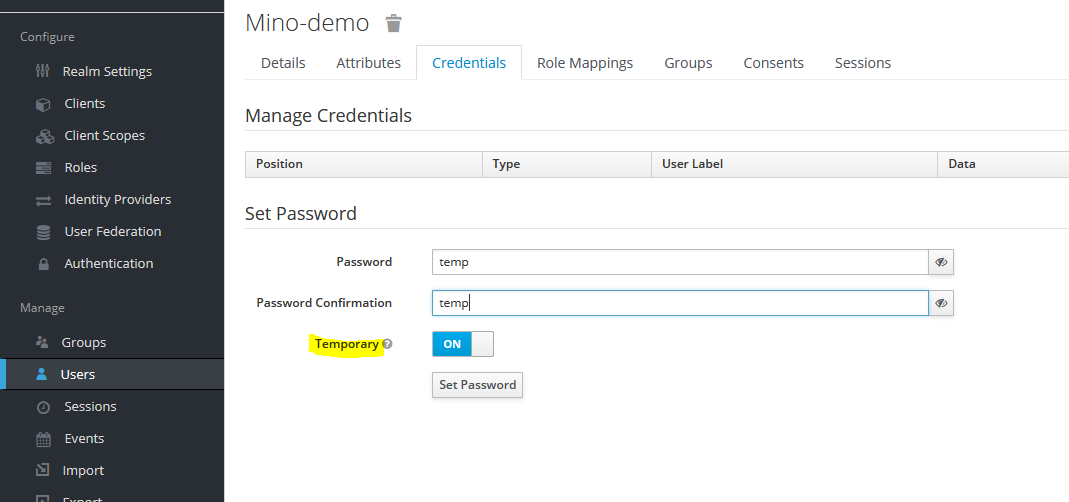
Create User
Now we need to create the user to login into our application. To achieve that click on the user’s section. We need to click add a user. In my case, I am creating the user called “mino-demo”.
After the user is created we need to set a password, for that click on the credentials tab, here I am going to provide the random password. If you choose this, while login it will ask you to create a password.
So for now we created Realm, client, and user. That’s all for now in keycloak. Now let’s jump into our spring-boot demo application.
Develop Spring MVC Application
Let’s create the spring-boot application. I am using https://start.spring.io/ to create an application.
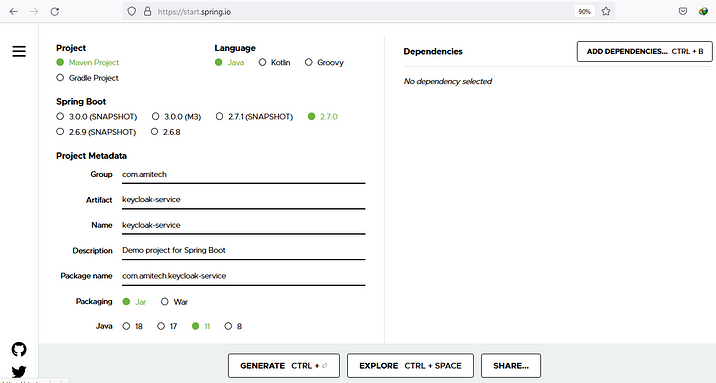
After I created the application, I downloaded the zip file, and extract and opened it in the IntelliJ. Then in pom.xml, I added 3 dependencies. 1. spring-boot-starter-web for activating the spring activating MVC module, 2. spring-boot-starter-oauth2-client for initializing activating the client authorization server, 3. spring-boot-starter-thyme leaf enable the thyme leaf features. I am not going dependencies deeper.
   org.springframework.boot
   spring-boot-starter-web

   org.springframework.boot
   spring-boot-starter-oauth2-client

   org.springframework.boot
   spring-boot-starter-thymeleaf

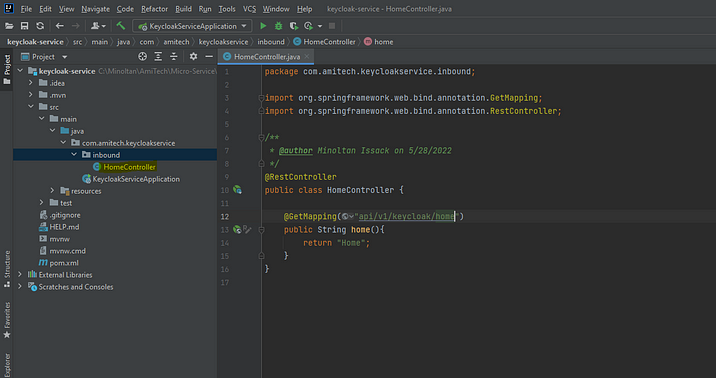
After I am creating API request in the Home Controller to serve our initial request to our application.
package com.amitech.keycloakservice.inbound;
import org.springframework.web.bind.annotation.GetMapping;
import org.springframework.web.bind.annotation.RestController;
/**
 * @author Minoltan Issack on 5/28/2022
 */
@RestController
public class HomeController {
  @GetMapping("api/v1/keycloak/home")
    public String home(){
        return "Home";
    }
}
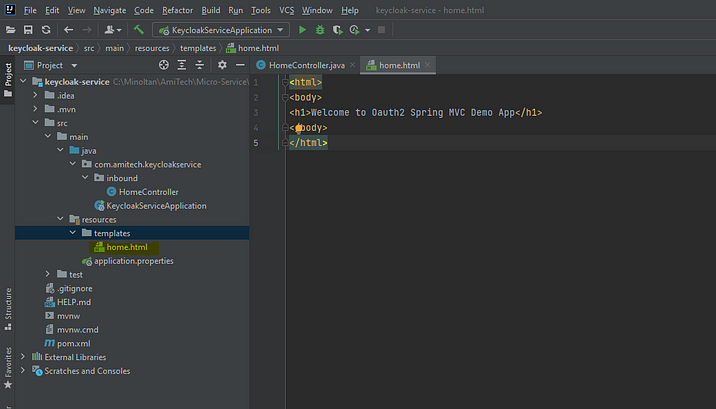
Then create the home.html file under the templates folder
Welcome to Oauth2 Spring MVC Demo App
Let’s configure the OAuth2 client properties at application.properties.
spring.security.oauth2.client.registration.oauth2-demo-thymeleaf-client.client-id=oauth2-demo-client
spring.security.oauth2.client.registration.oauth2-demo-thymeleaf-client.client-secret=KtbHDummyValueuMFFWu2v
spring.security.oauth2.client.registration.oauth2-demo-thymeleaf-client.scope=openid, profile, roles
spring.security.oauth2.client.registration.oauth2-demo-thymeleaf-client.authorization-grant-type=authorization_code
spring.security.oauth2.client.registration.oauth2-demo-thymeleaf-client.redirect-uri=http://localhost:8080/login/oauth2/code/oauth2-demo-client
spring.security.oauth2.client.provider.oauth2-demo-client.issuer-uri=http://localhost:8180/realms/oauth2-demo-realm
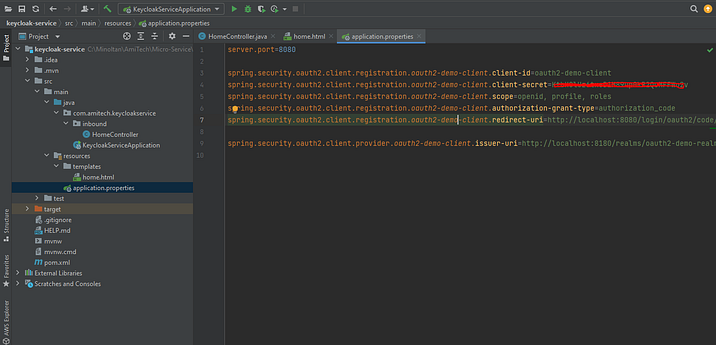
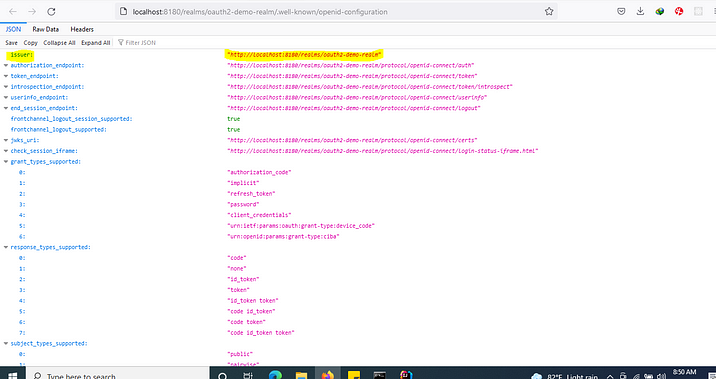
To get the issuer URI

All Done..! Now Run the spring-boot application.
Demo
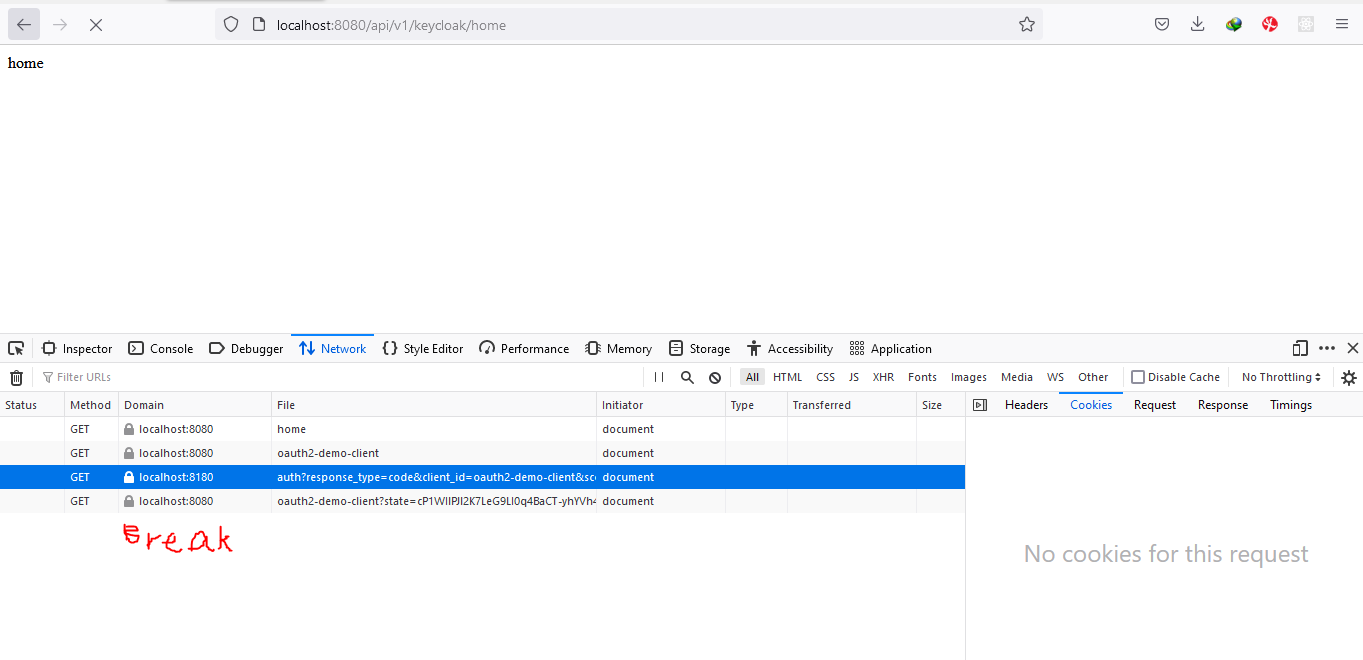
Open your browser with the network tab, once you enter localhost:8080/api/v1/keycloak/home, it will redirect to the login page
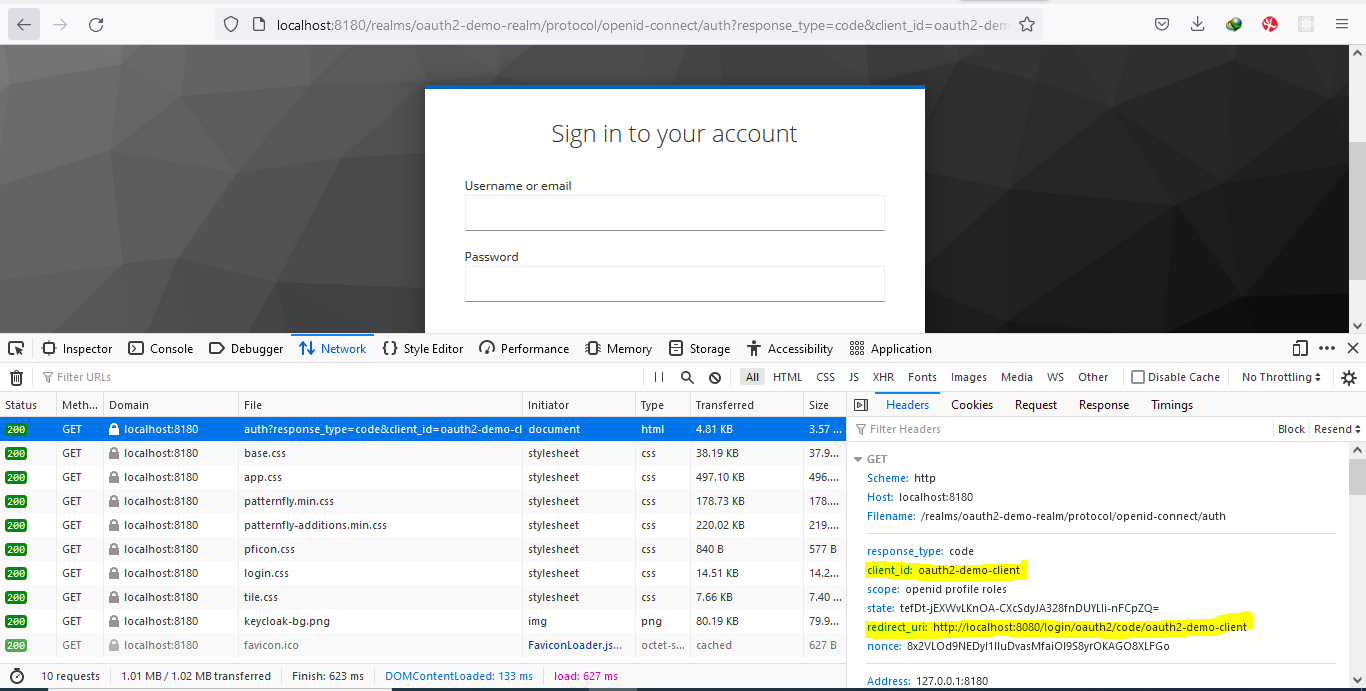
The keycloak server requests this redirect_uri after the successful authentication along with the authorization code.
After providing the username, and password and clicking on login, call the redirect URI, and our application uses the authorization code to request
the token (code highlighted in the yellow color). The access token and the ID token are received by the spring-boot application in the background process, which we cannot see in the browser network tab.
After providing the username, and password and clicking on login, call the redirect URI, and our application uses the authorization code to request the token (code highlighted in the yellow color). The access token and the ID token are received by the spring-boot application in the background process, which we cannot see in the browser network tab.
To see the token that is placed in the background process. I need to enable spring security dependency at pom.xml in the spring-boot application.
   org.springframework.boot
   spring-boot-starter-security
Search the external library and find the OidcAuthorizationCodeAuthenticationProvider.class
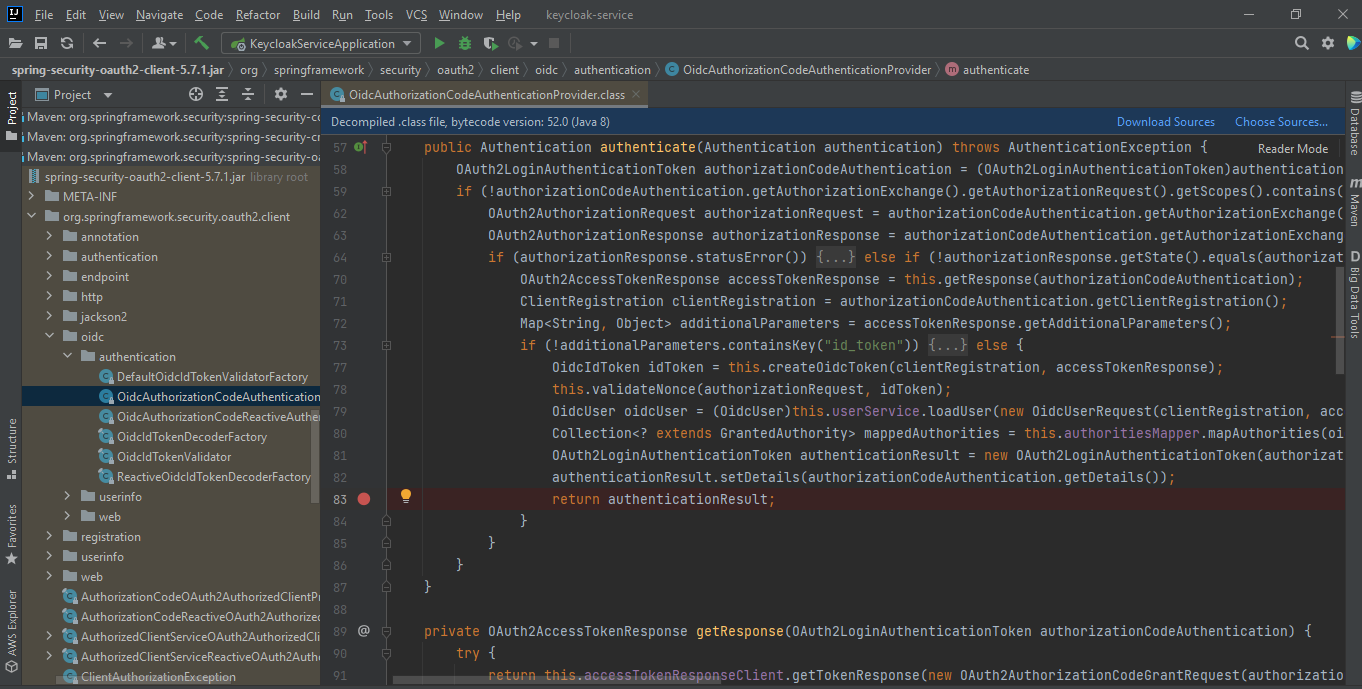
Then put the breakpoint in the authenticationResult in the authenticate method, then refresh the browser.
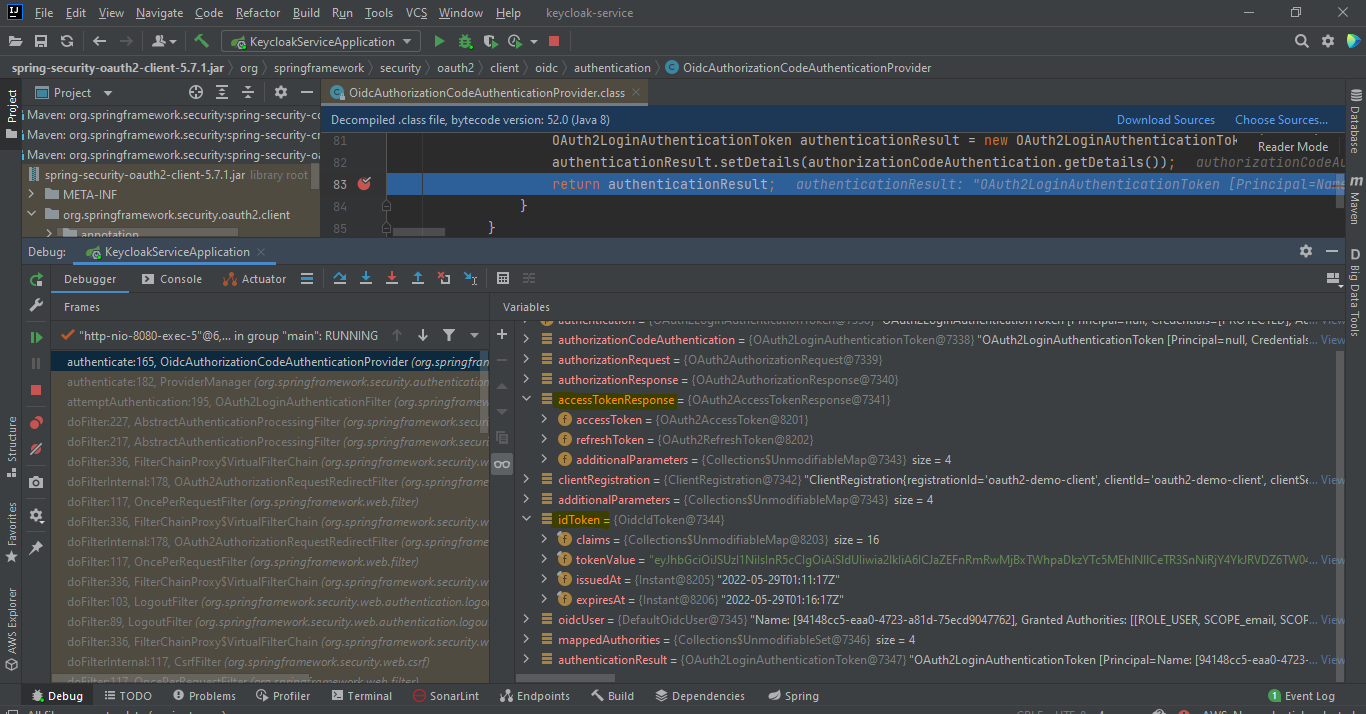
Here you can observe that the result contains accessTokenResponse & idTokenResponse.
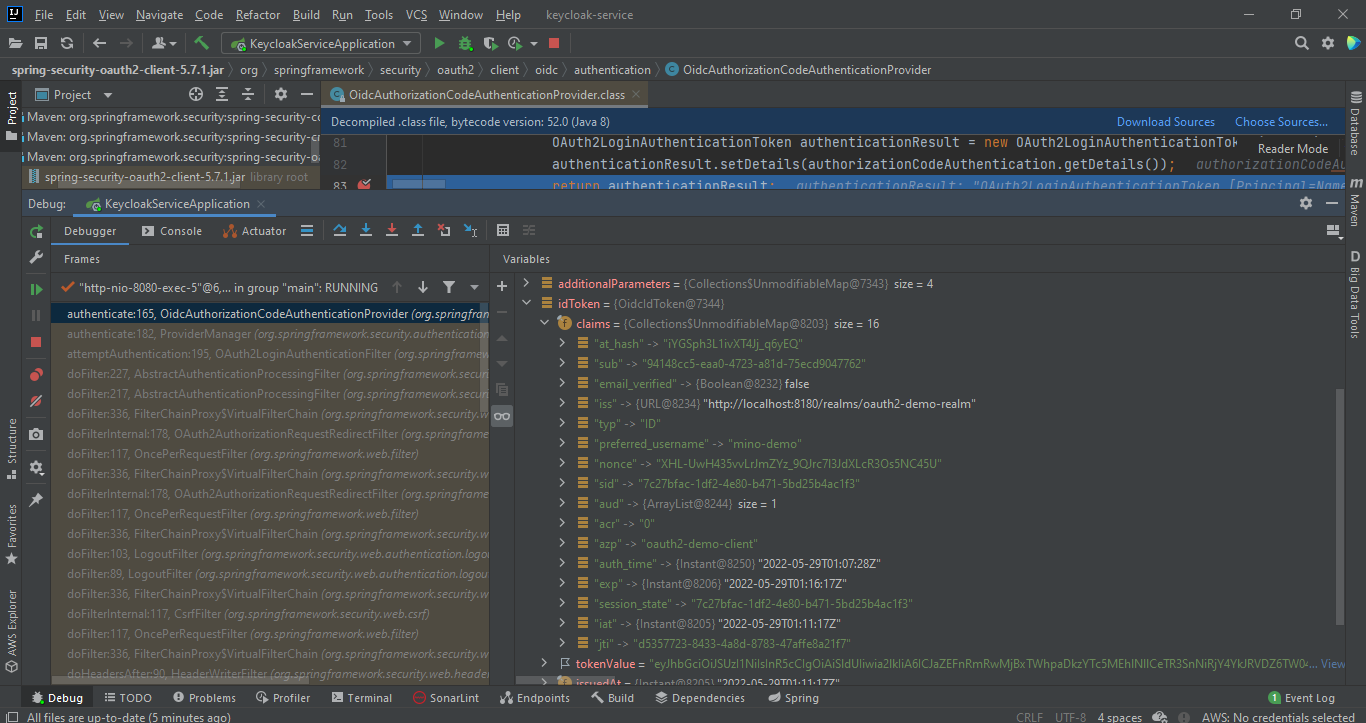
Inside of idTokenResponse -> claims you can see the user information.
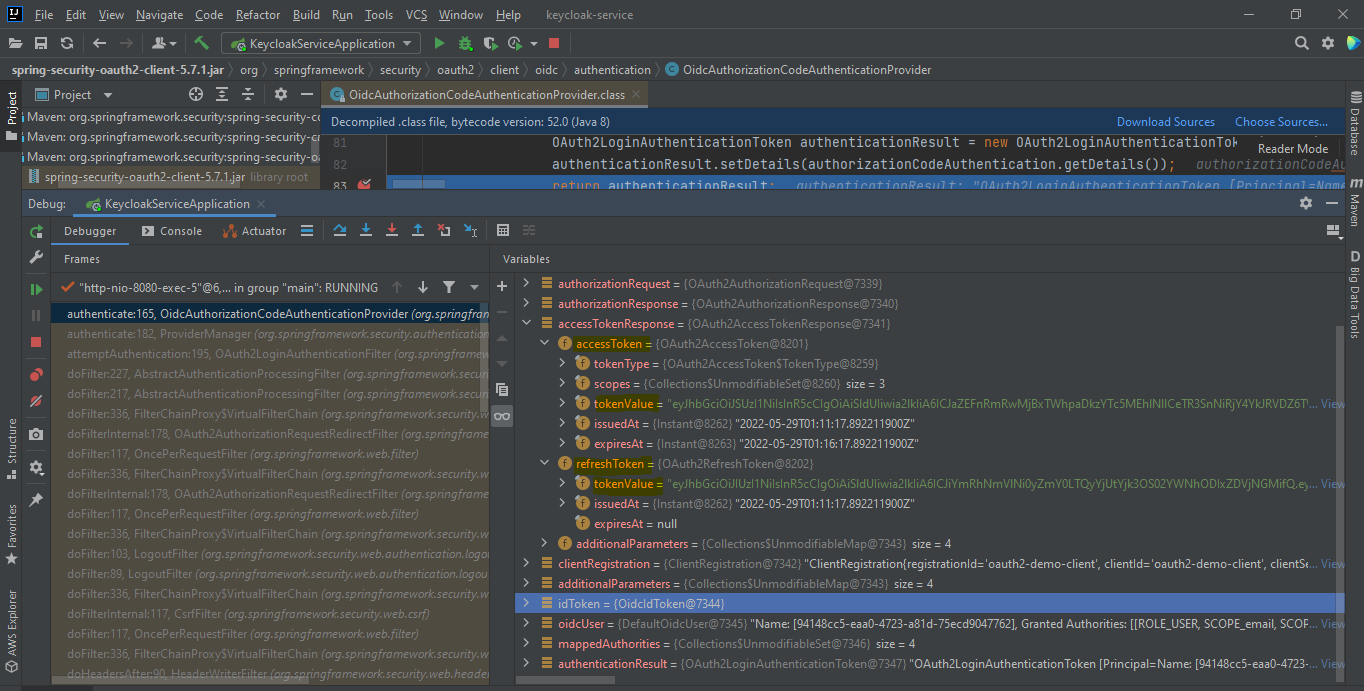
Inside of accessTokenResponse you can see the access token & refresh token.
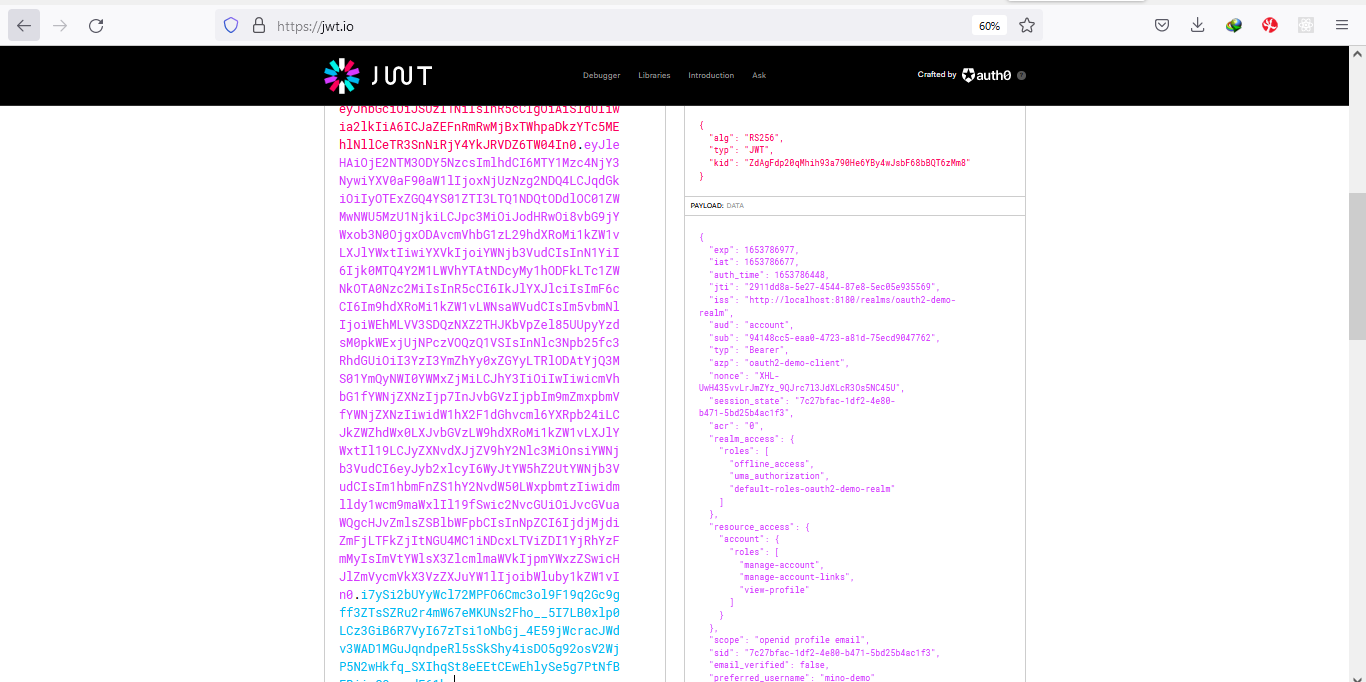
I copied the token and decode it from https://jwt.io/, the response is as follows.
Conclusion
Finally, we end up with the expected result. Hopefully, we learned from Spring Security OAuth2 with Keycloak, how we are handling the token from the request. Also, you learned about OAuth2 terminologies like resource server, client, authorization server, etc. In addition, you got to know what OIDC is, Not only that, you also got to know the response after authorizing we have an access token, refresh token, and, ID token. Please go through the article and do the practical, and get ready for my next article to learn more about keycloak.
The key takeaways from what we learned:
- OAuth2 protocol is developed for authorization between services or applications.
- Understood client, resource, resource server, and resource owner.
- OpenID Connect (OIDC) is a protocol that is built on top of OAuth2, it acts as an identity Layer.
- Keycloak administration console configurations.
- Spring MVC configuration with keycloak.
The media shown in this article is not owned by Analytics Vidhya and is used at the Author’s discretion.


@RestController need to be changed to @Controller in HomeController.java so that home.html is returned when hitting localhost:8080/api/v1/keycloak/home