This article was published as a part of the Data Science Blogathon.
Introduction
Most of the time we may have seen that in the browser when we enter any pages, google asks us the “I am not a robot” checkbox. Did you ever think what is that, why ask like that? The answer is quite simple. If I run the web application, I need to protect my users from bots. Bots are trying leaked passwords posting spam and scraping the web contents.
The reCAPTCHA “I am not robot checkbox” changed the way to protect my web application. But it is a one-time verification method that does not fit every use case. reCAPTCHA v3 does away with the need for interactive tests and give us a score to let us know when we have risky traffic. It never interrupts the user, so we are in control of when to run risk analysis and what to do with the results. In this article, we are going to learn how it works.
Scenario
Let’s imagine, I am running an online store. I have recently noticed that there is a lot more traffic in my web application. I could realize that they might not be real customers or users. But I didn’t know where they were on my site and what they were trying to do. To overcome this issue I used reCAPTCHA v3 for each main section of my application. Like Home, Login, Reviews, Search, and, Checkout pages. For each page, I have added the reCAPTCHA v3 script and some codes for validating.
By doing this I can see what the bots were doing on my site. For this, I went to the Google reCAPTCHA admin console to look at the score. In that, I can see that the bots were posting lots of reviews. To stop the bots I need to verify reCAPTCHA on my server (In our case spring boot application). After verification was added, when the bots come and posted a review, so this review received a lot of reCAPTCHA scores, I marked it as risky and added it to a verification queue. Now the bots have been turned away, so now the customers can trust the review page.
What is reCAPTCHA?
It is a free service risk analysis engine that takes in various signals about the interactions and predicts the likelihood that the request was generated by the bots. It works best with context about how humans and bots interact with web applications. It protects web applications against passing by generating and grading tests that human or computer program. Google reCAPTCHA recognizes by using machine learning and advanced risk analysis.
reCAPTCHA v1 (Version 1)
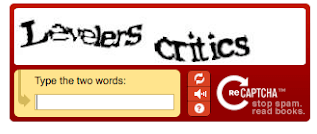
It looks like a form that contains text and numbers to enter. But it is no longer available now.
Source: v1
reCAPTCHA v2 (Version 2)
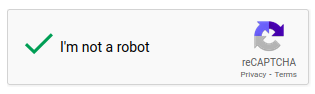
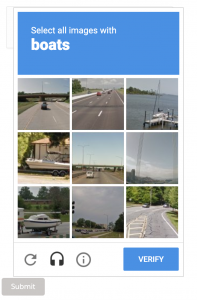
It is I am not a robot check box. While clicking on these it will ask to select some objects from the image box.
Source: https://datadome.co/bot-management-protection/recaptchav2-recaptchav3-efficient-bot-protection/
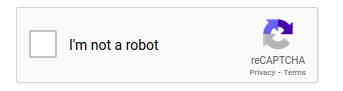
reCAPTCHA v2 – Invisible reCAPTCHA
Here it does not ask the user to select the check box, it automatically generates the image box to select the objects.
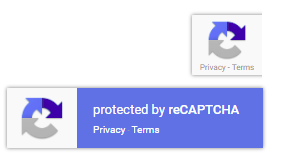
reCAPTCHA v3 (Version 3)
reCAPTCHA v3 is truly invisible. This does not show anything to the users. There is no challenge to select the objects from the image. Instead returns a probability score between zero to one (0-1). If the score is less than a particular value we can differentiate bots and humans. It depends on our application and business case.
Practical Demo


In this demo, we are going to do reCAPTCHA v3 by using the spring boot application. For that, we are using a simple Button. This button is protected with reCAPTCHA v3, while clicking on the button, it will call google reCAPTCHA.
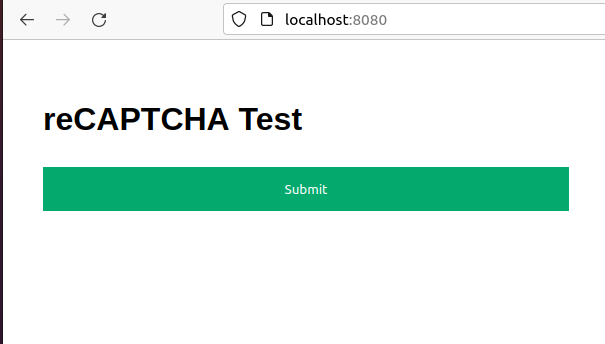
Here I created the simple button by using thymeleaf. If you need you can use a different HTML body for the different views. The view design can be anything you follow.
reCAPTCHA v3 returns a score for each request without user friction. The
score depends on the interactions with our application and we can take appropriate action according to our business case. We can execute reCAPTCHA on as many actions on the same page.
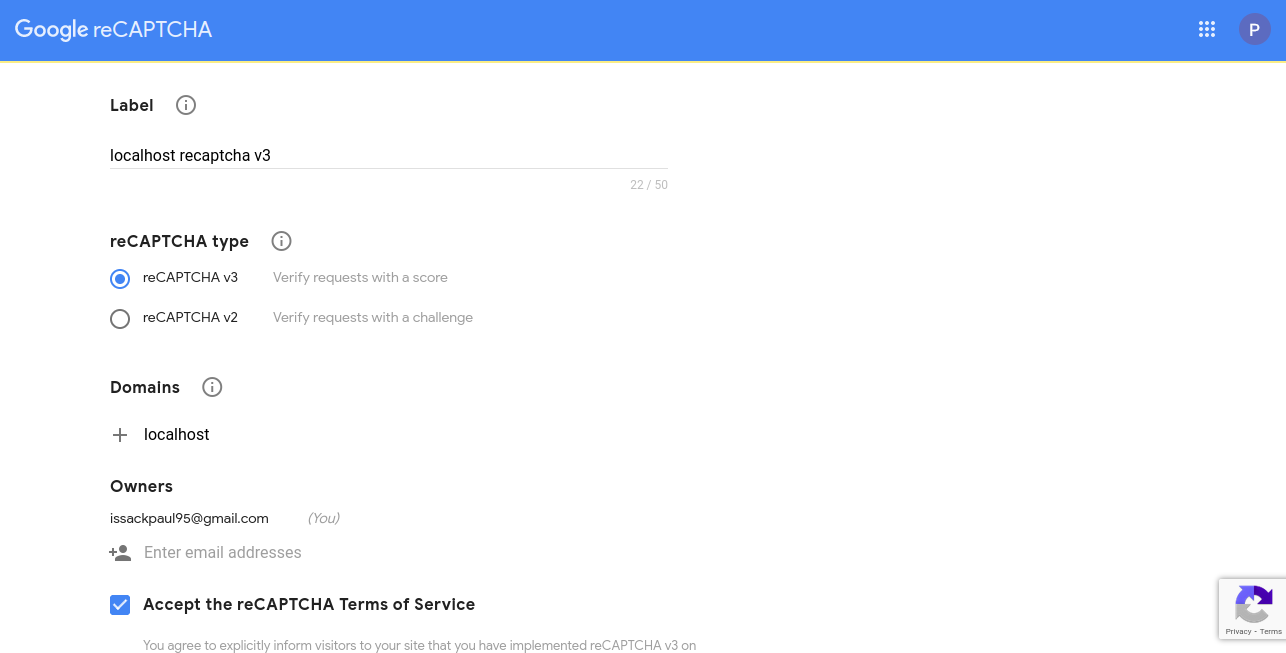
Register a New Site for Google reCAPTCHA v3
Visit Google reCAPTCHA admin by using this link – https://www.google.com/recaptcha/admin/create
Then simply register. While registering you can give any label, choose reCAPTCHA v3, if you are using localhost you can give localhost as the domain and check the terms and conditions. Finally submit the form.
After clicking on submit you will have the site key and secret key.
Handle the Token from the Spring Boot Application
To engage with the demo, First I am doing the token handling part, Token is given by the Google reCAPTCHA site while clicking the button in the front-end, that part we will be look later. So here we are using the token for validating the score by getting from the google client by giving google token and secret to the following URL.
URL: https://www.google.com/recaptcha/api/siteverify
1. Create API for getting token
WebController
package com.amitech.recaptchaservice.controller;
import com.amitech.recaptchaservice.resource.TokenResource;
import com.amitech.recaptchaservice.service.RecaptchaService;
import org.springframework.beans.factory.annotation.Autowired;
import org.springframework.web.bind.annotation.*;
@RestController
@RequestMapping
public class WebController {
    @Autowired
    RecaptchaService recaptchaService;

    @GetMapping("/index")
    public String index() {
        return "index";
    }

    @PostMapping("/api/v1/saveScore")
    public String saveScore(@RequestBody TokenResource tokenResource) throws Exception {
        return recaptchaService.checkValidity(tokenResource.getToken());
    }
}
2. Validate the token by calling the google client
TokenResource
package com.amitech.recaptchaservice.resource;
public class TokenResource {
    private String token;
    public TokenResource() {}
    public TokenResource(String token) {
         this.token = token;
    }

    public String getToken() {
      return token;
    }
    public void setToken(String token) {
        this.token = token;
   }

   @Override
    public String toString() {
       return "tokenResource{" +
            "token='" + token + ''' +
                '}';
    }
}
RecaptchaService
package com.amitech.recaptchaservice.service;
import com.amitech.recaptchaservice.client.GoogleRecaptchaClient;
import com.amitech.recaptchaservice.response.RecaptchaResponse;
import org.springframework.beans.factory.annotation.Autowired;
import org.springframework.stereotype.Service;
@Service
public class RecaptchaService {
 @Autowired
private GoogleRecaptchaClient googleRecaptchaClient;

 public String checkValidity(String token) throws Exception {
if ("FIRST_TIME".equals(token)) {
return "FIRST_TIME";
}
else {
RecaptchaResponse recaptchaResponse = googleRecaptchaClient.checkScore(token);
if (!recaptchaResponse.getSuccess()) {
if("timeout-or-duplicate".equals(recaptchaResponse.getErrorCodes().get(0))){
return "timeout-or-duplicate";
}else{
return "Error: " + recaptchaResponse.getErrorCodes().get(0);
}
}
else if (recaptchaResponse.getSuccess() && recaptchaResponse.getScore() <= 0.5) {
return "Score: " + recaptchaResponse.getScore();
}
else if (recaptchaResponse.getSuccess() && recaptchaResponse.getScore() > 0.5) {
return "Score: " + recaptchaResponse.getScore();
}
}
return token;
}

}
GoogleRecaptchClient
package com.amitech.recaptchaservice.client;
import com.amitech.recaptchaservice.response.RecaptchaResponse;
import com.fasterxml.jackson.databind.ObjectMapper;
import org.slf4j.Logger;
import org.slf4j.LoggerFactory;
import org.springframework.beans.factory.annotation.Autowired;
import org.springframework.http.HttpMethod;
import org.springframework.http.ResponseEntity;
import org.springframework.stereotype.Service;
import org.springframework.web.client.HttpClientErrorException;
import org.springframework.web.client.HttpServerErrorException;
import org.springframework.web.client.RestTemplate;
import org.springframework.web.util.UriComponentsBuilder;
@Service
public class GoogleRecaptchaClient {
    private String mSpaceHost = "https://www.google.com/recaptcha/api/siteverify";
    private final RestTemplate restTemplate;
    private static final Logger logger = LoggerFactory.getLogger(GoogleRecaptchaClient.class);
    @Autowired
    public GoogleRecaptchaClient(RestTemplate restTemplate) {
        this.restTemplate  = restTemplate;
    }
public RecaptchaResponse checkScore(String token) throws Exception {
try {
RestTemplate restTemplate = new RestTemplate();
UriComponentsBuilder builder = UriComponentsBuilder.fromHttpUrl(mSpaceHost)
.queryParam("secret", "6LfqNpQgAAAAACXR6d-2DaOPADtr2y0UKvBDYlwX")
.queryParam("response", token);
ResponseEntity exchange = restTemplate.exchange(builder.toUriString(), HttpMethod.POST, null, String.class);
return new ObjectMapper().readValue(exchange.getBody(), RecaptchaResponse.class);
} catch (HttpClientErrorException | HttpServerErrorException e) {
logger.error("Error response : State code: {}, response: {} ", e.getStatusCode(), e.getResponseBodyAsString());
throw e;
} catch (Exception err) {
logger.error("Error: {} ", err.getMessage());
throw new Exception("This service is not available at the moment!");
}

 }

}
Thymeleaf App Configuration
Protect button with reCAPTCHA v3
Inside our HTML document,
1. Load the JavaScript API with our sitekey.
2. Add the following tag in the button
<button class="g-recaptcha"
        data-sitekey="6LfqNpQgAAAAABgZ4O_tTN185xDW8gC6nu9bBQ5f"
        data-callback='onSubmit'
        data-action='submit'>Submit

3. Add Submit Script
Call grecaptcha.execute on each action you wish to protect.
function onSubmit() {
        grecaptcha.execute('6LfqNpQgAAAAABgZ4O_tTN185xDW8gC6nu9bBQ5f', {action:'validate_captcha'})
            .then(function(token) {
                document.getElementById('g-recaptcha-response').value = token;
                console.log(token);
            });
}
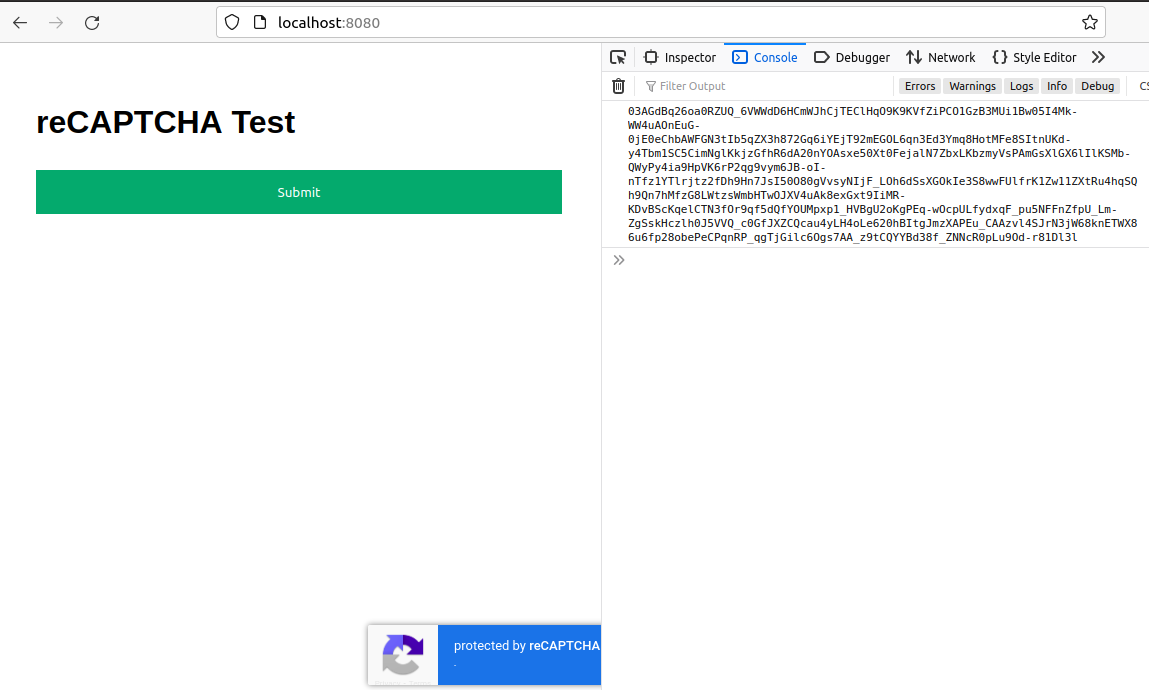
From this image, you can see the protected application, and while clicking the protected button it returns the token from the google site.
Then post the token to the relevant API (The API should be already created by the spring-boot application), and get the response and display.
index.html
        body {font-family: Arial, Helvetica, sans-serif;}
        button {
            background-color: #04AA6D;
            color: white;
            padding: 14px 20px;
            margin: 8px 0;
            border: none;
            cursor: pointer;
            width: 100%;
        }
        button:hover {
            opacity: 0.8;
        }
        .container {
            padding: 16px;
        }
        span{
            float: right;
            padding-top: 16px;
        }
reCAPTCHA Test
<button class="g-recaptcha"
data-sitekey="6LfqNpQgAAAAABgZ4O_tTN185xDW8gC6nu9bBQ5f"
data-callback='onSubmit'
data-action='submit'>Submit
function onSubmit() {
grecaptcha.execute('6LfqNpQgAAAAABgZ4O_tTN185xDW8gC6nu9bBQ5f', {action:'validate_captcha'})
.then(function(token) {
document.getElementById('g-recaptcha-response').value = token;
console.log(token);
saveScore(token)
});
}

function saveScore(session_token) {
url = "/api/v1/saveScore";
var request = new XMLHttpRequest();
request.open('POST', url, true);
request.setRequestHeader('Content-Type', 'application/json');
let token_resource = {
"token": session_token
}
request.send(JSON.stringify(token_resource));
request.onreadystatechange = processRequest;
function processRequest(e) {
if (request.readyState == 4) {
if (request.status == 200) {
var response = request.responseText;
let response2 = `

${response}

`
document.getElementById("response").innerHTML = response2;
}
else {
var response = request.responseText;
let response2 = `

${response}

`
document.getElementById("response").innerHTML = response2;
}
}
}
}
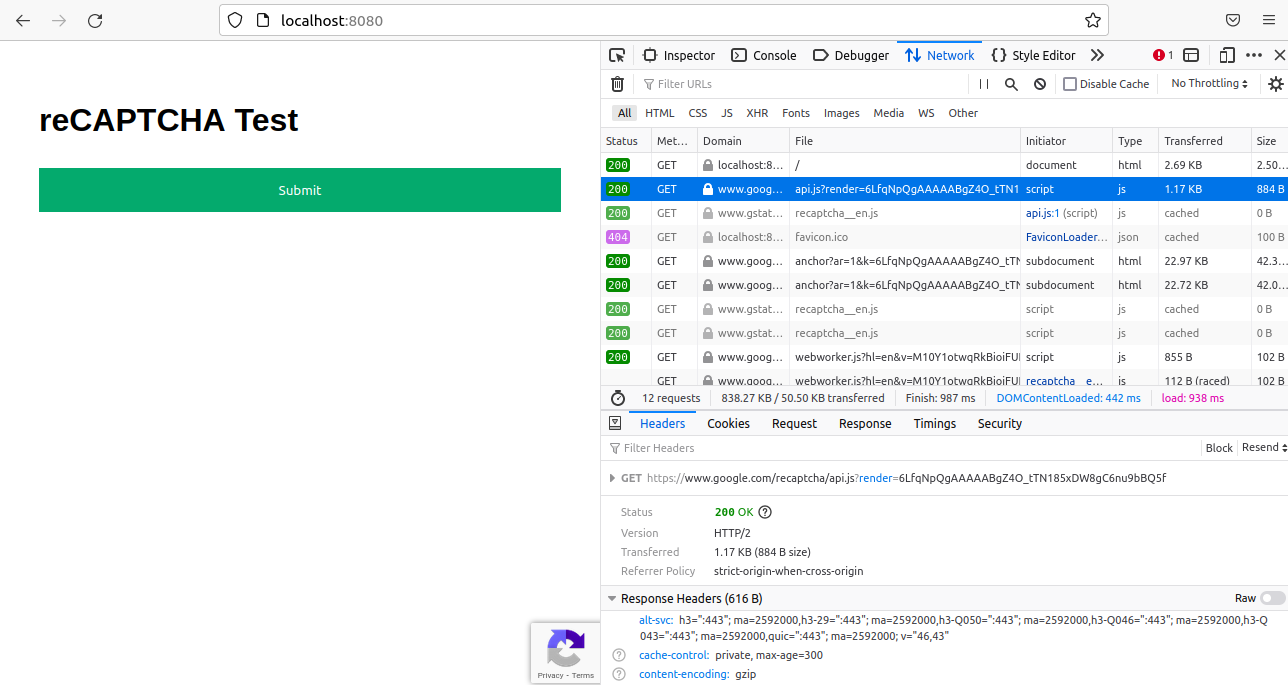
While Rendering the Application
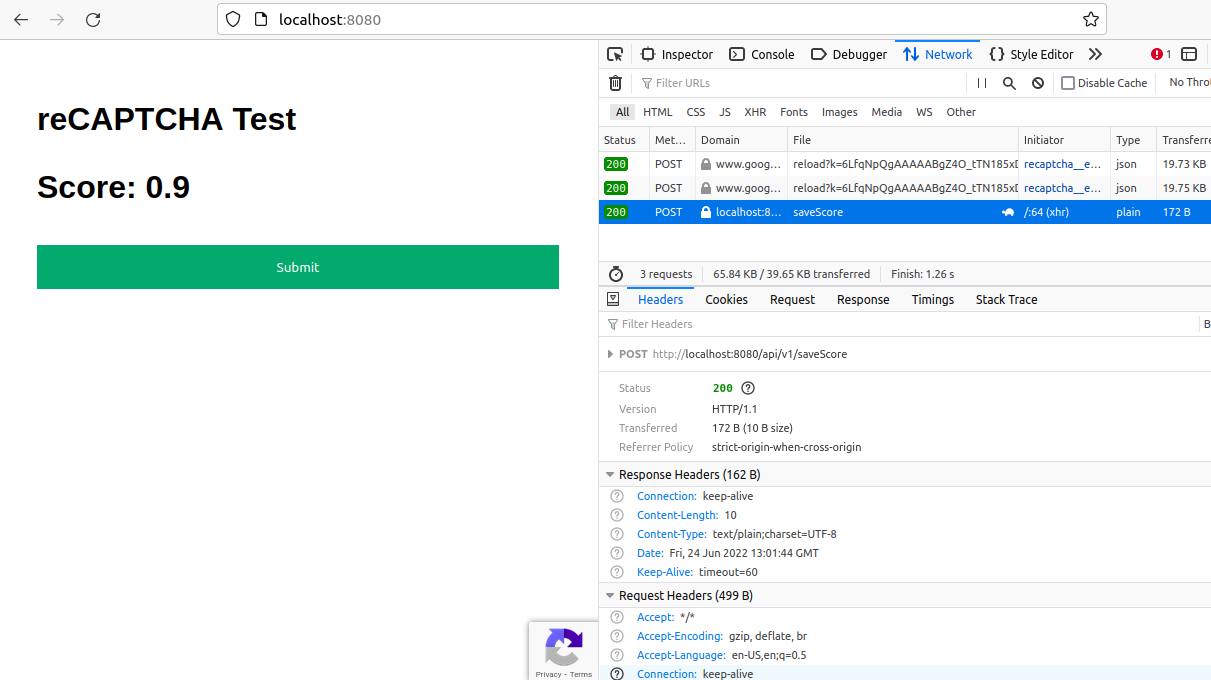
While Click on Submit Button
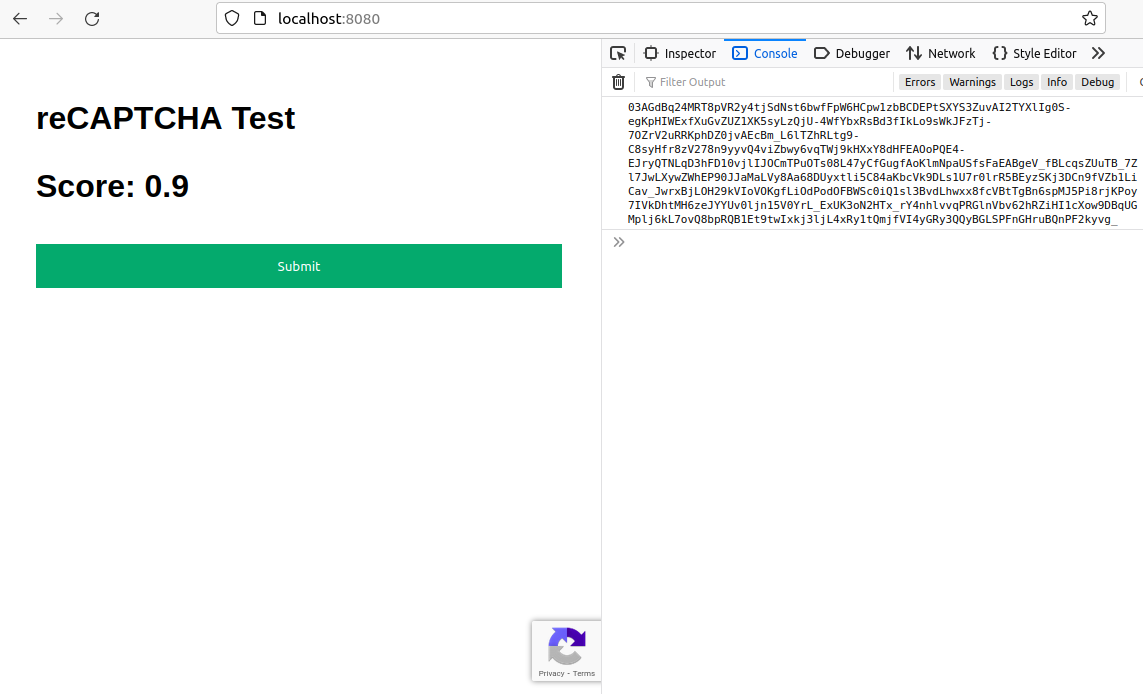
Final Output
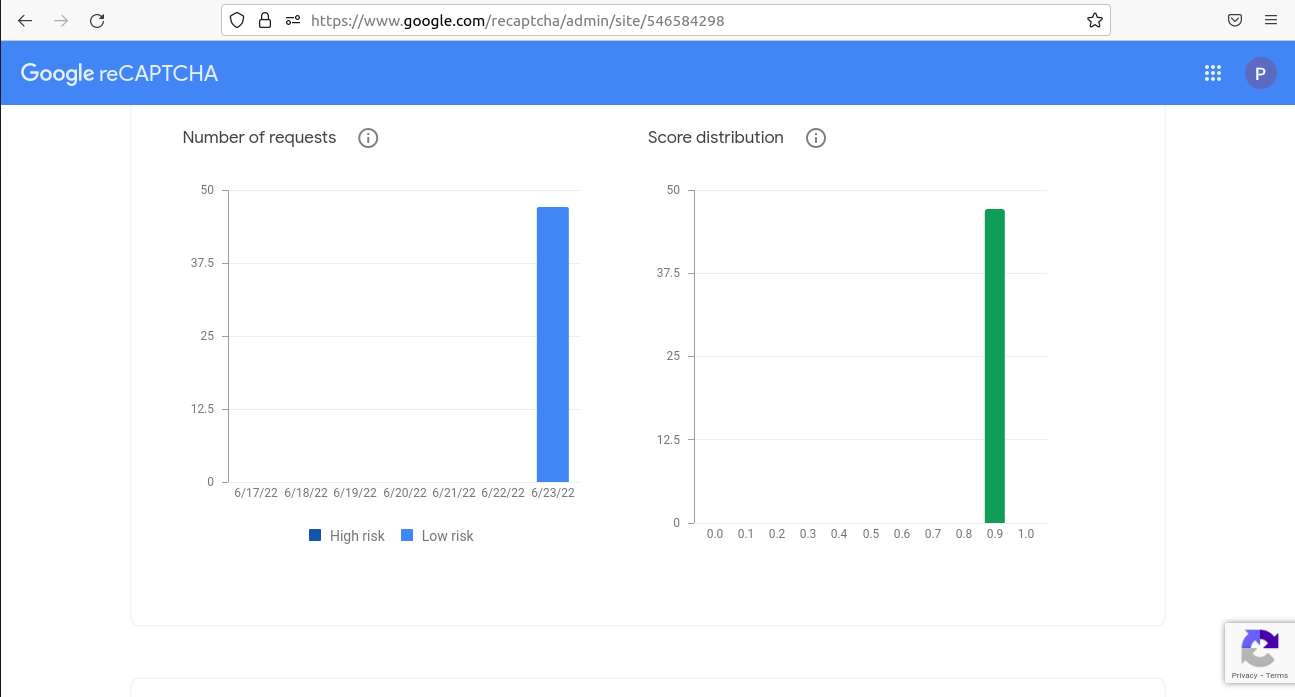
Google Admin Management Console
Frequently Asked Questions
Q1. What is reCAPTCHA and how it works?
A. reCAPTCHA is like a puzzle that websites use to check if you’re a real person or a computer program. Instead of just asking for a password, it might show you some pictures and ask you to click on specific objects, like cars or street signs. This helps the website make sure that you’re a human and not a sneaky bot trying to cause trouble. By solving the puzzle correctly, you prove that you’re a real person and can access the website.
Q2. How do I enable reCAPTCHA in Chrome?
A. To enable reCAPTCHA in Chrome, you don’t need to make any specific settings within the browser itself. However, websites that use reCAPTCHA may display the reCAPTCHA challenge automatically when you visit them. You’ll typically encounter reCAPTCHA when filling out forms, logging in, or performing actions that require verification.
When you come across a reCAPTCHA challenge, you’ll see instructions on the webpage, such as selecting specific images or solving puzzles. Follow the prompts and complete the challenge as requested. Once you successfully complete the reCAPTCHA, you’ll be able to proceed with the intended action on the website. Chrome will handle the necessary interactions with the reCAPTCHA service seamlessly within the browser.
Conclusion
So by following the full flow now you have got a better understanding of google reCAPTCHA. In the Google Admin Management console, you can see there is no suspicious behavior in the application. We simply protect by using some basic codes. You can modify or extend the codes according to your requirements like updating Databases, calling some other functions, etc. Please keep reading my technical articles to refine your technical knowledge.
What we have learned so far
- Understood the multiple versions.
- Register a new site for Google reCAPTCHA v3
- Integrating it with Spring boot application with thymeleaf.
- Protect login form & code a custom Login filter before spring security filter.
- Verify the response.
- Make a decision based on reCAPTCHA v3’s score.
The media shown in this article is not owned by Analytics Vidhya and is used at the Author’s discretion.


Good article. I think it would be better if you can put the code on github. So that we can follow the code. Thanks