Introduction
This article shows how you can create and manage a Cloud SQL Database on the Google Cloud Platform and further connect that database to any web application. This tutorial shows how you can join that database with a Django Application. By the end of this article, you will have a sufficient understanding of SQL databases, their features, properties, and practical use.
This article was published as a part of the Data Science Blogathon.
Table of contents
What is SQL Database?
SQL stands for Structured Query Language, a programming language used to create and manage Relational Databases. A Relational Database consists of tables containing data in rows and columns in a pre-defined model/schema. Also, all the data in those tables have a relation between them. They are also called RDBMS (Relational Database Management System). The Relational Databases store the data in a spreadsheet or an Excel sheet format. SQL Databases are an example of Relational Databases. Some examples are:
1. SQLite
2. MySQL
3. PostgreSQL
4. Cassandra
and many more.
Benefits of Cloud SQL?
Cloud SQL is an example of PaaS(Platform as a service). It is one of the best databases, providing high availability throughout all regions and automatically managing your latency, updates, backups, etc.
You can use services of various Cloud SQL service providers like Google Cloud Platform (GCP), Microsoft Azure, AWS, etc. This tutorial uses GCP to create a Cloud SQL Database.
Setting Up a SQL Database- Process
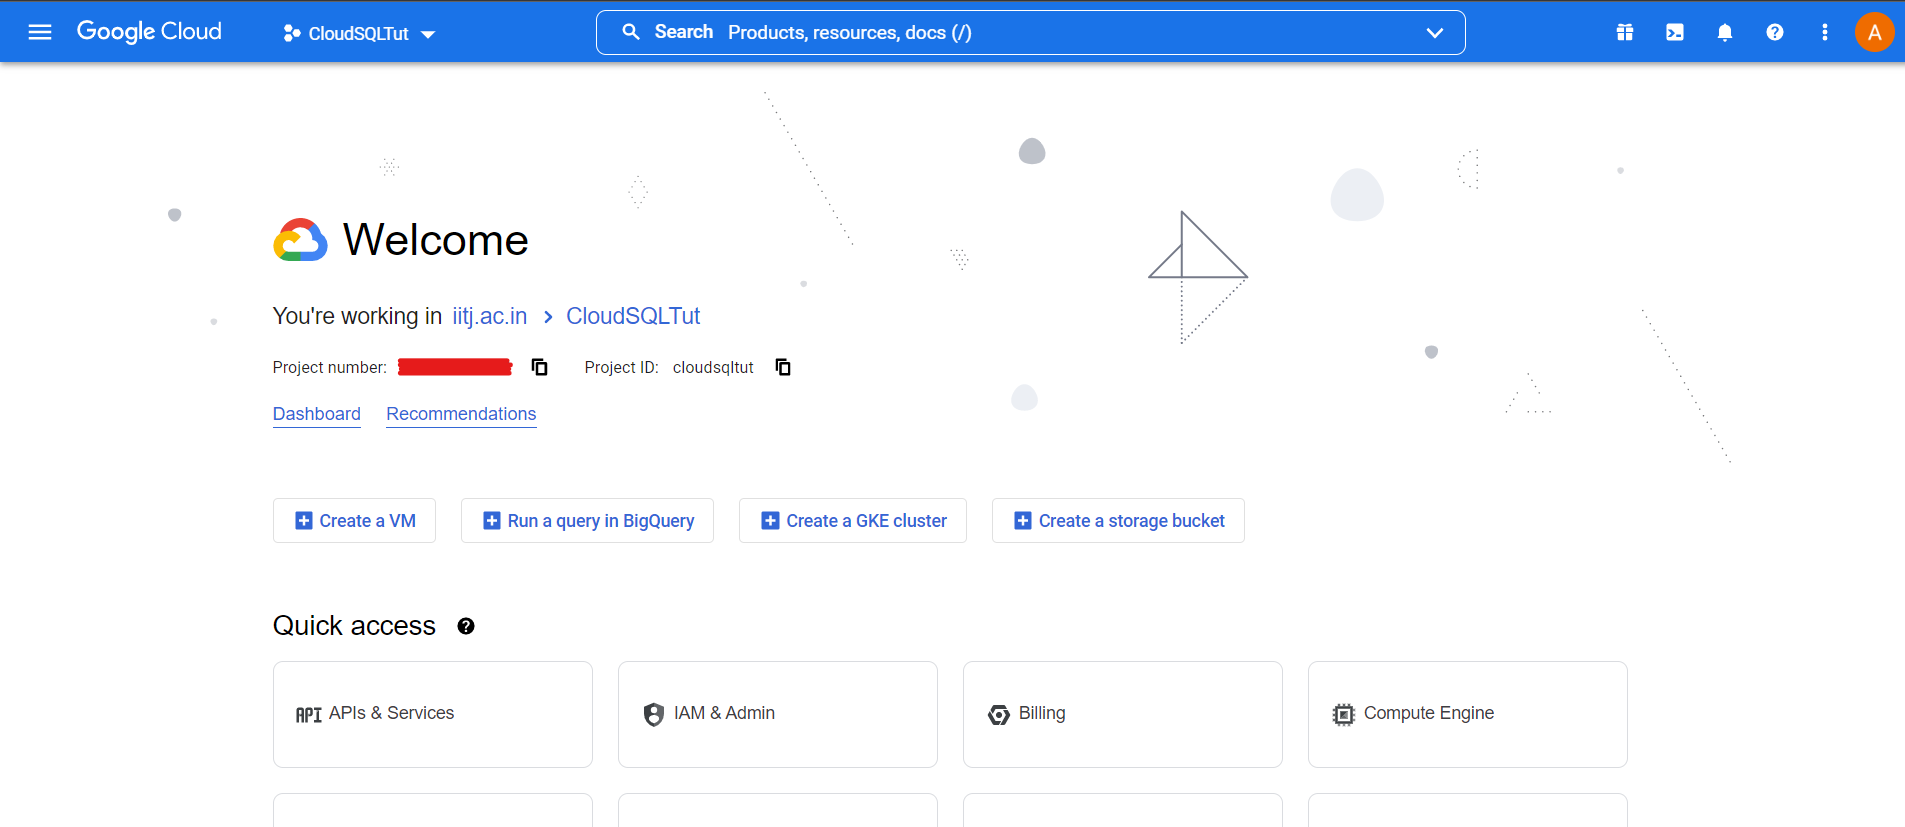
1. Log into your GCP Console.
Prerequisites: You must have a billing account on Google Cloud, a paid service.
2. Create a New Project or use an Existing Project.
3. Select your newly created project.
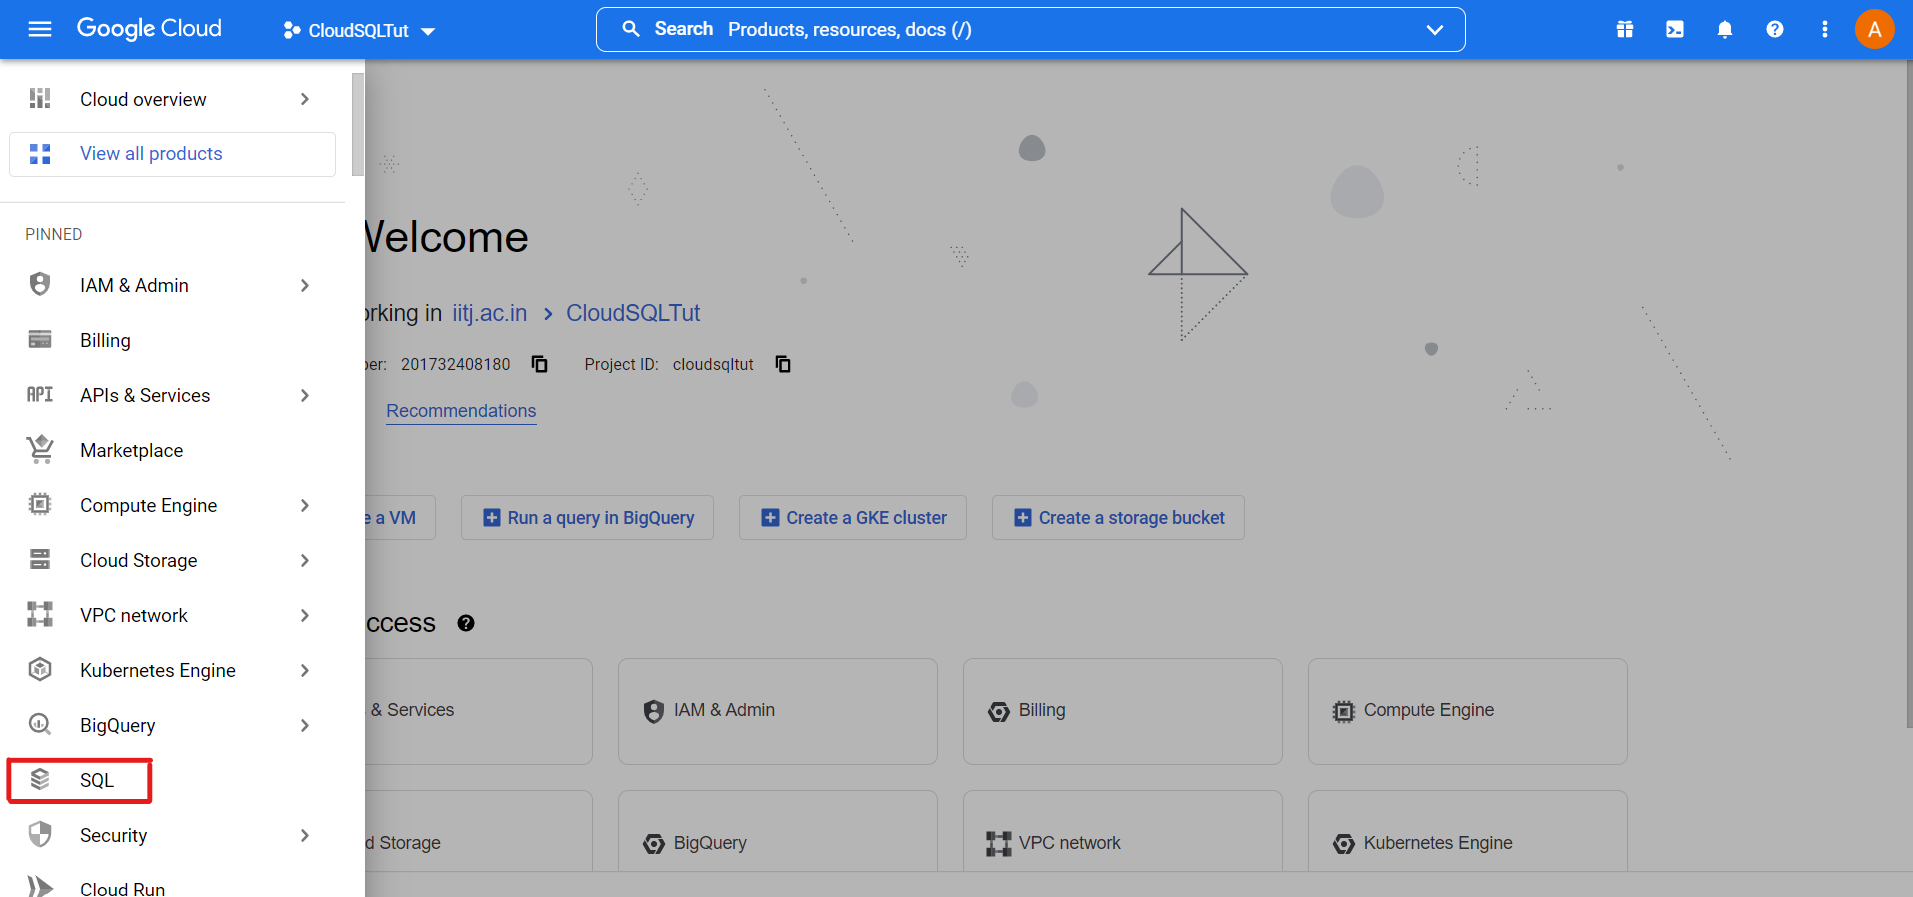
4. Navigate to SQL
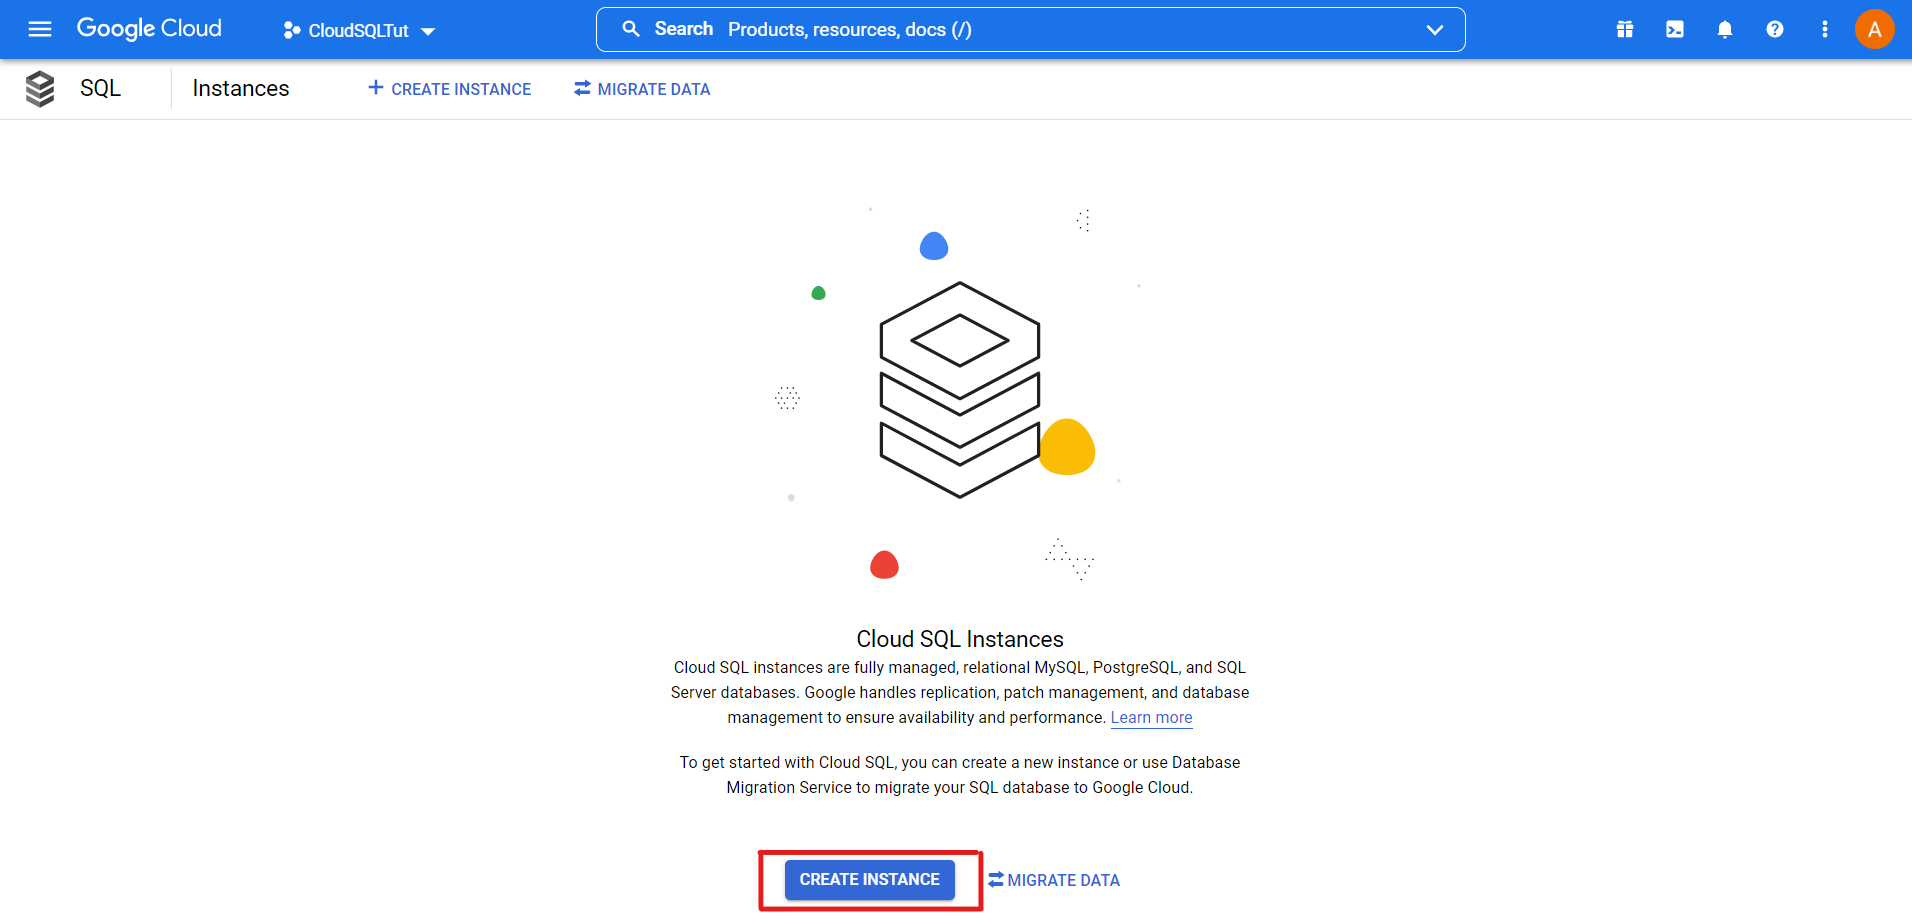
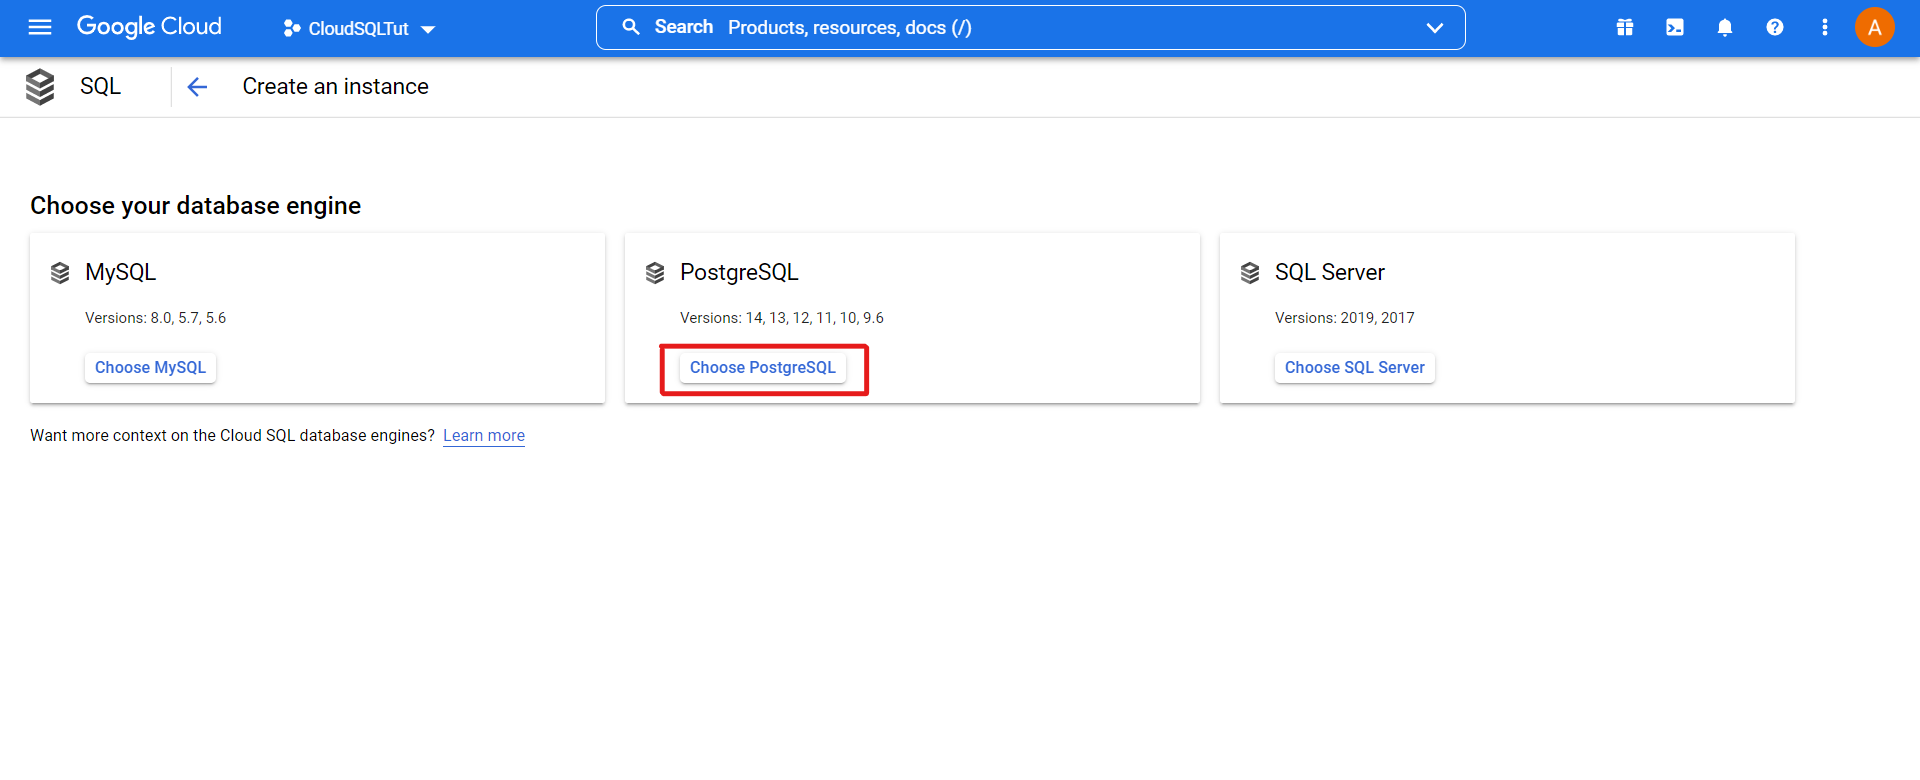
5. Click on the Create Instance button
6. Choose the type of SQL Database. In this tutorial, we have chosen PostgreSQL
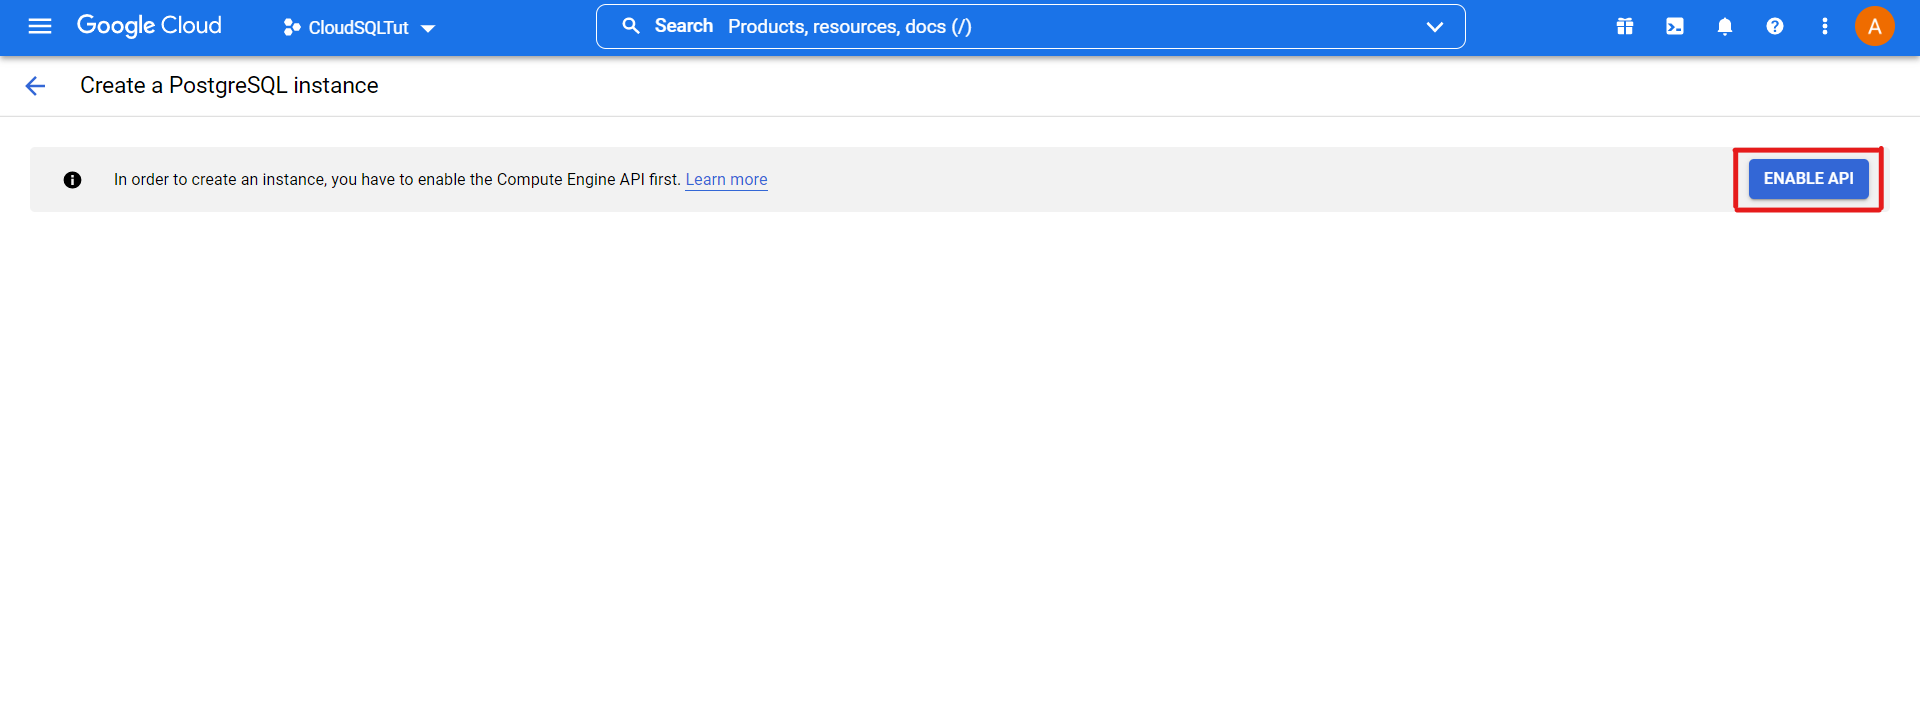
7. Enable the PostgreSQL Instance API
8. Fill out the database configurations, like ID, Password, etc.
You can also monitor the monthly cost of the Instance according to your configurations.
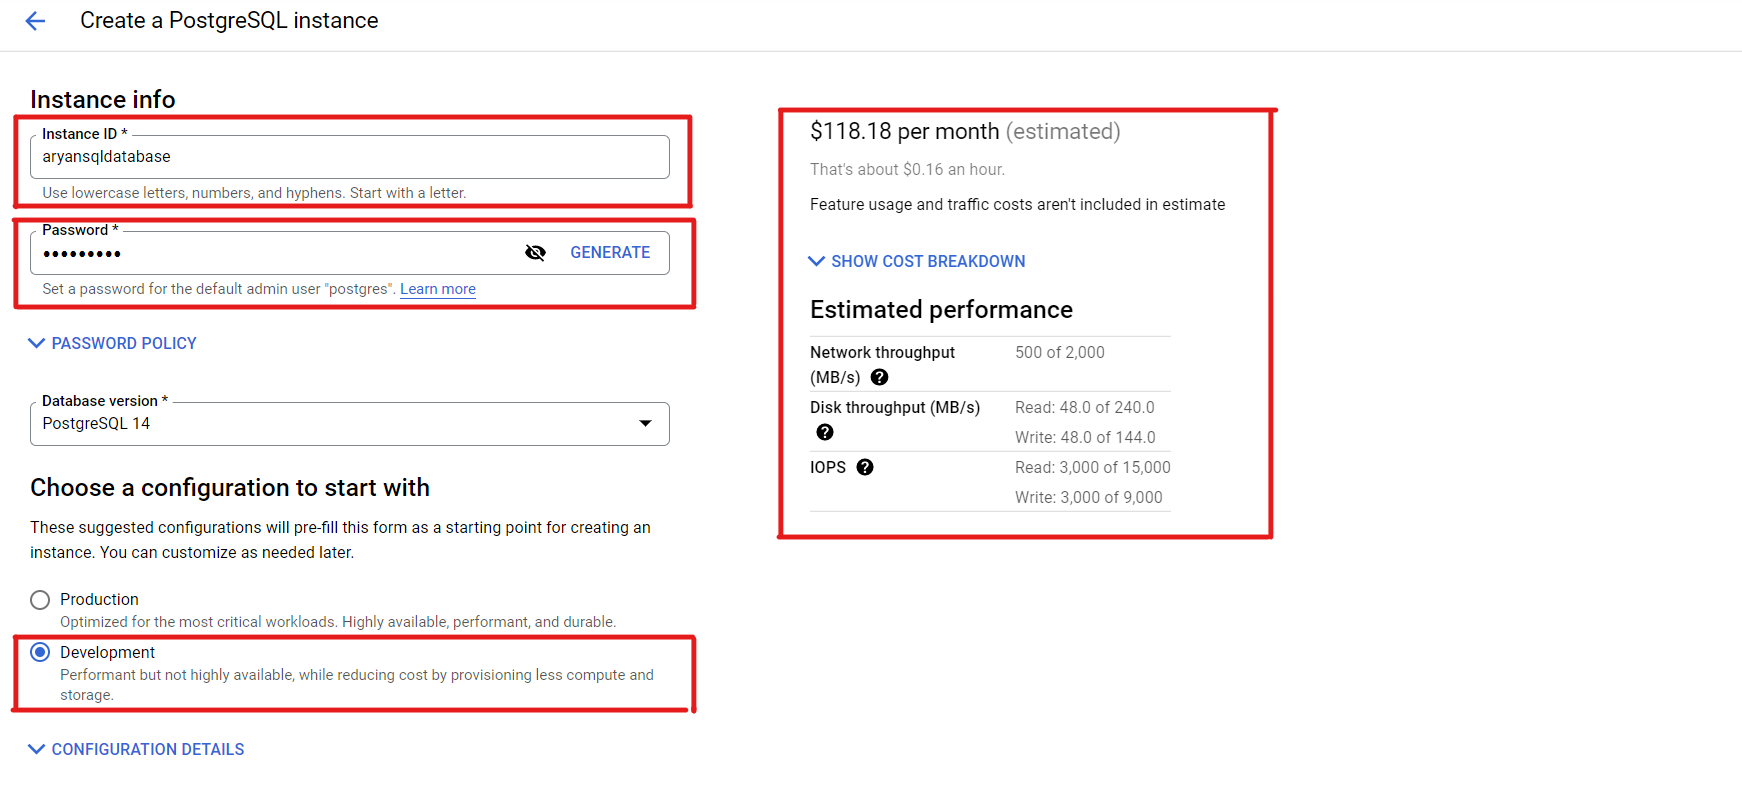

Finally, create the Instance after choosing all the configurations.
9. Your newly created database looks like this:
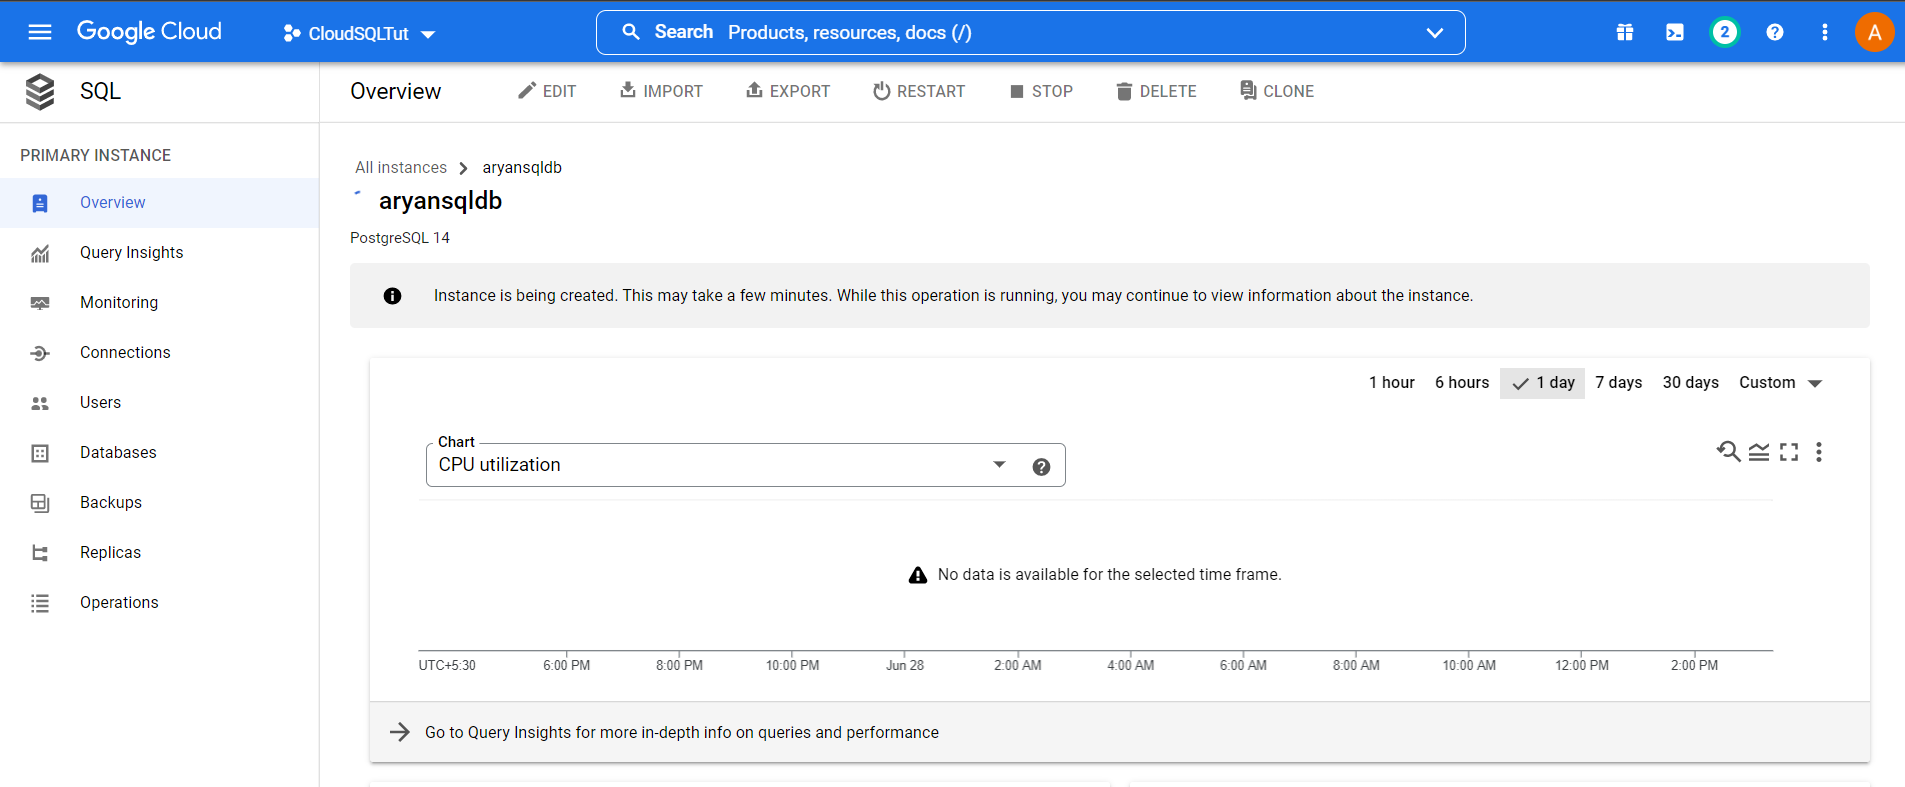
10. You can see your Instance’s Public and Internal IP addresses.
You can also open Cloud Shell to access its terminal.

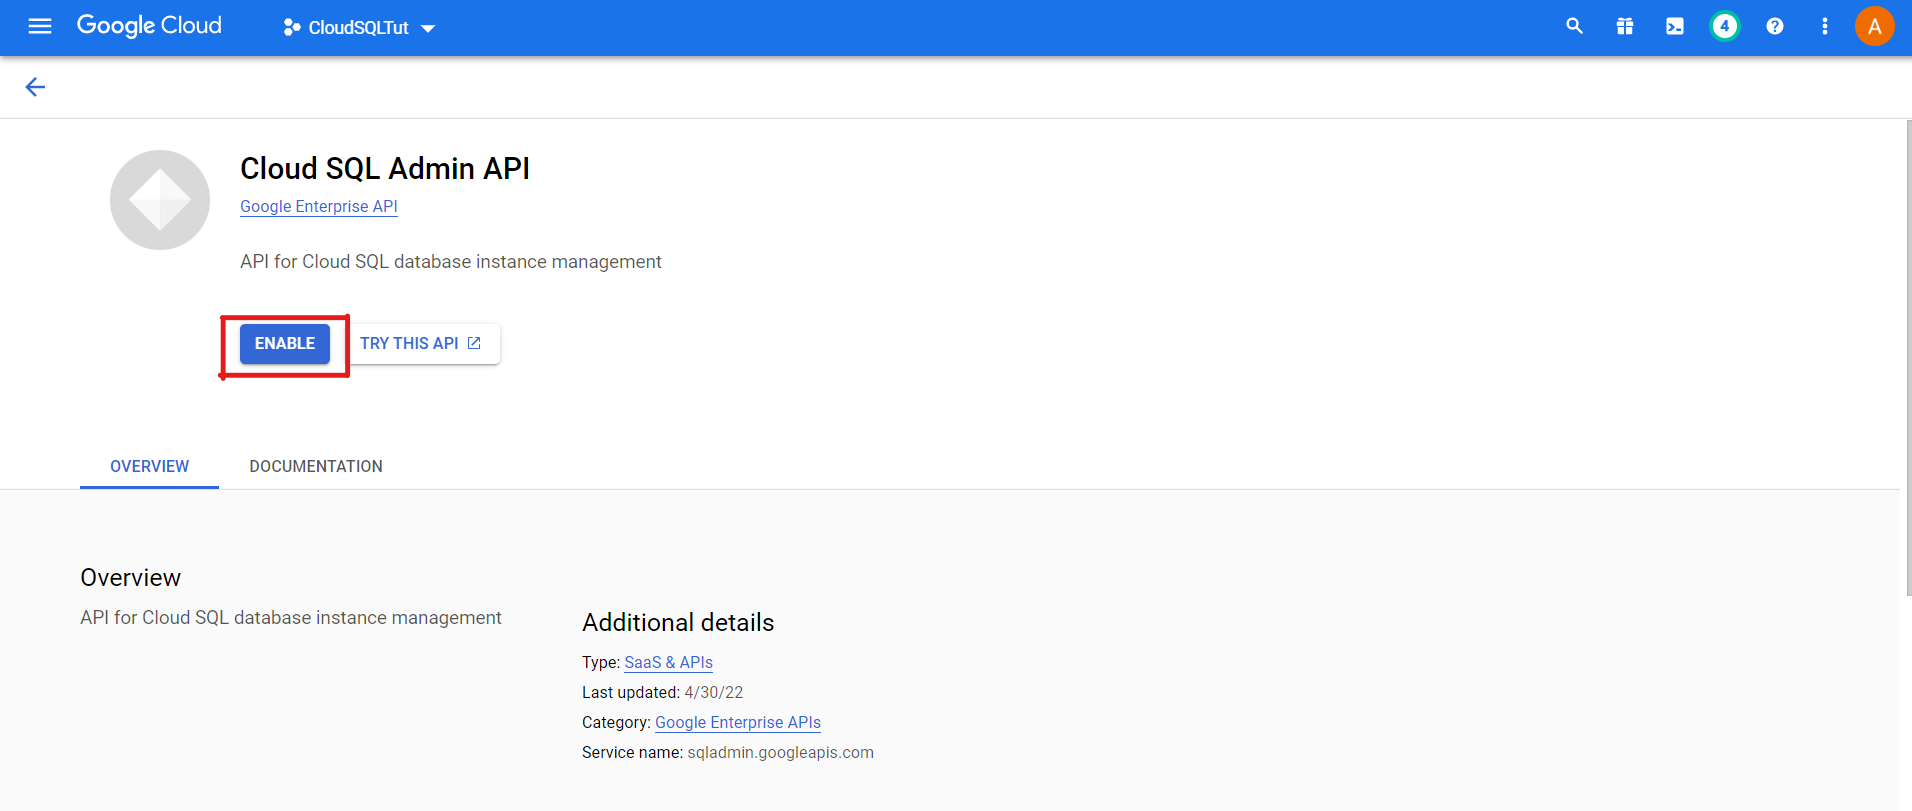
Enabling SQL Admin API
By enabling this API, you can get access to control the Database through Cloud Shell.
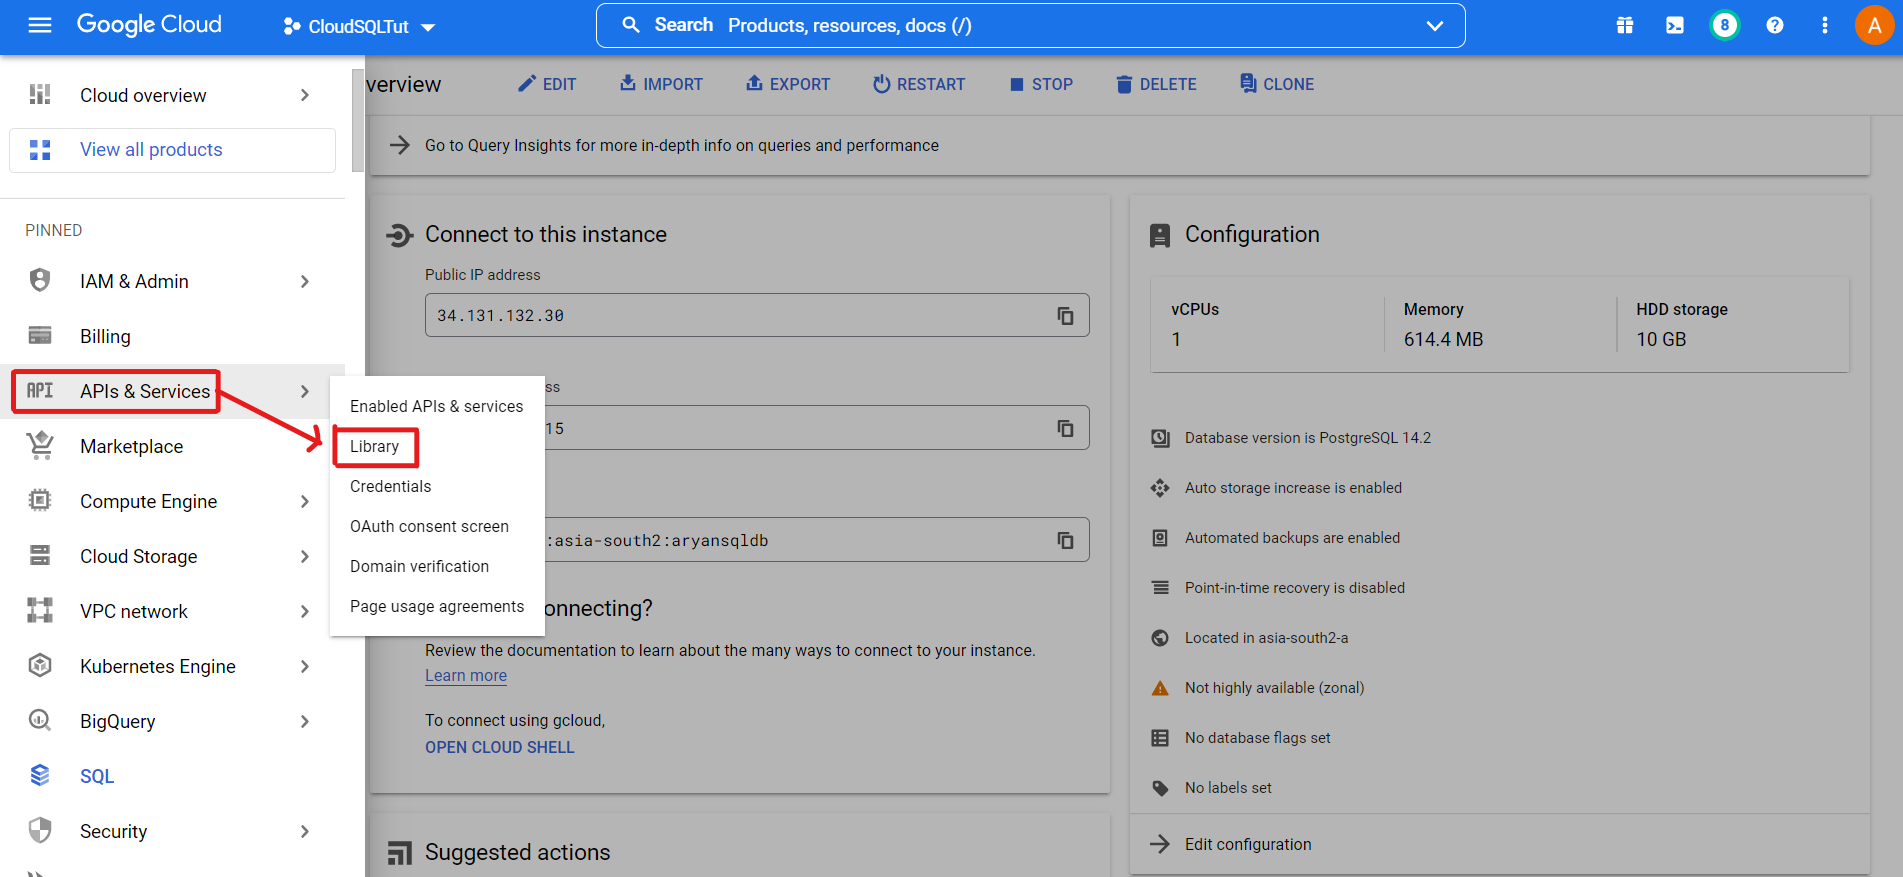
1. Navigate to APIs & Services >> Library
2. Search for “Cloud SQL Admin API” and Enable it.
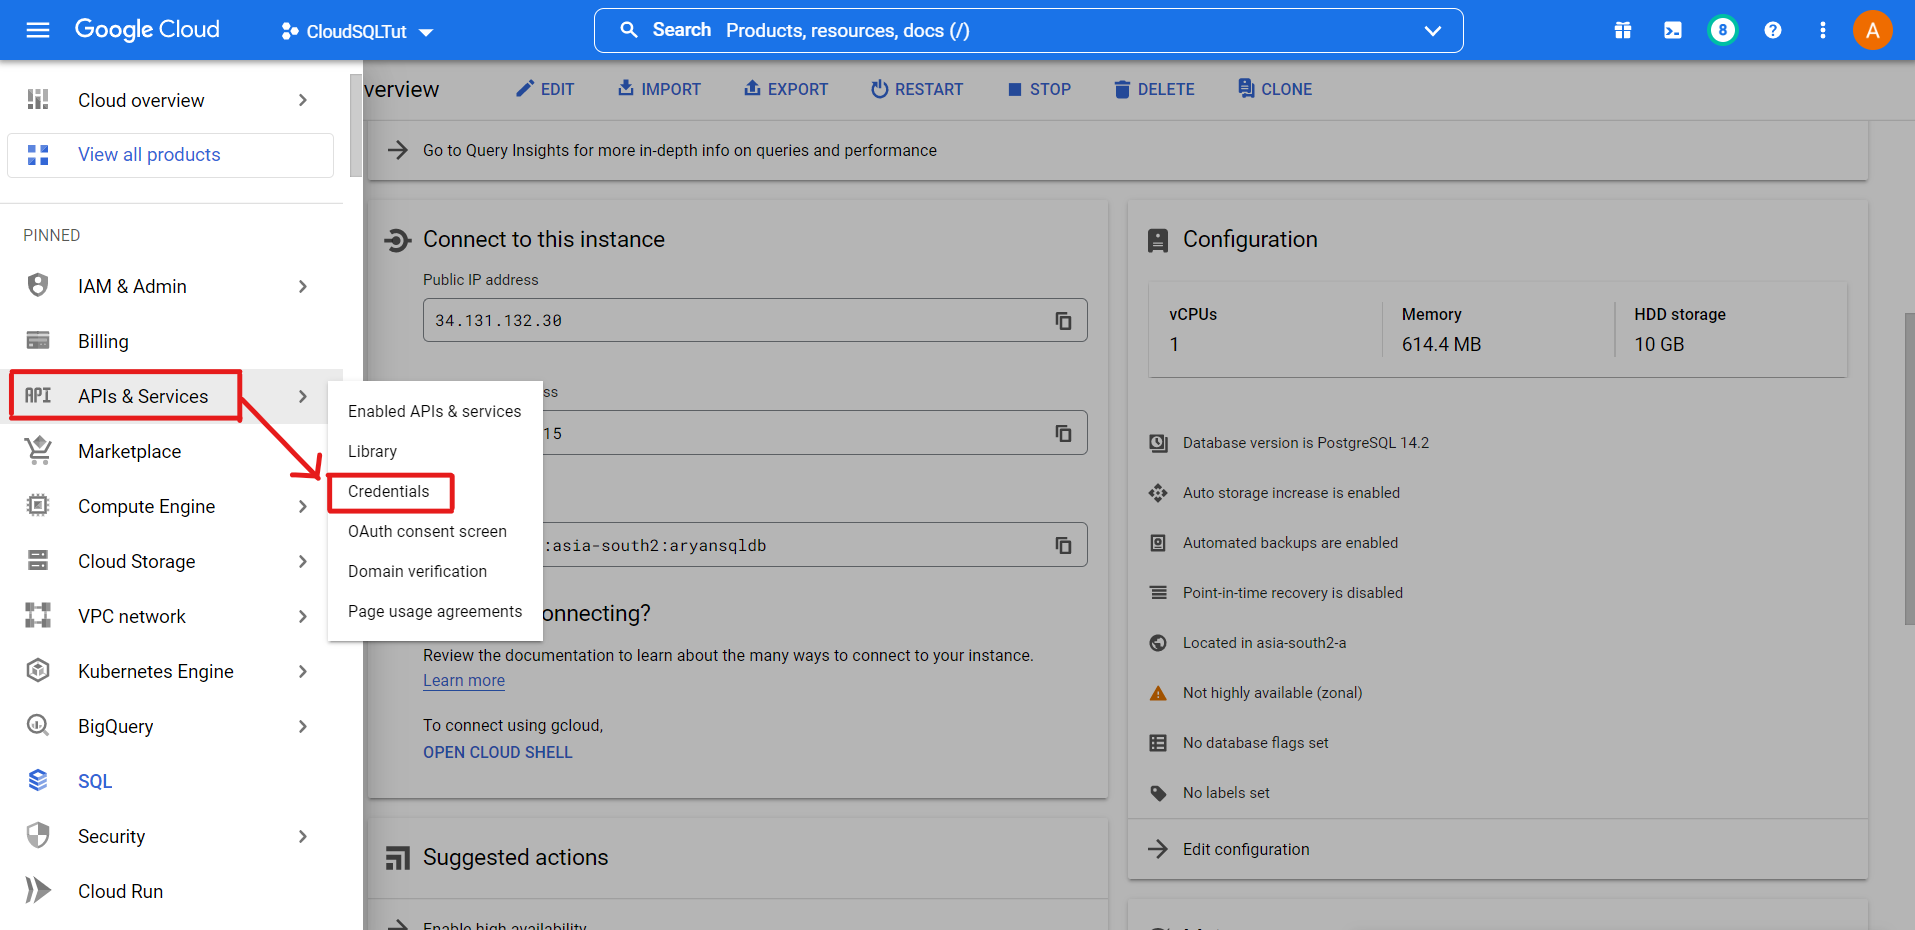
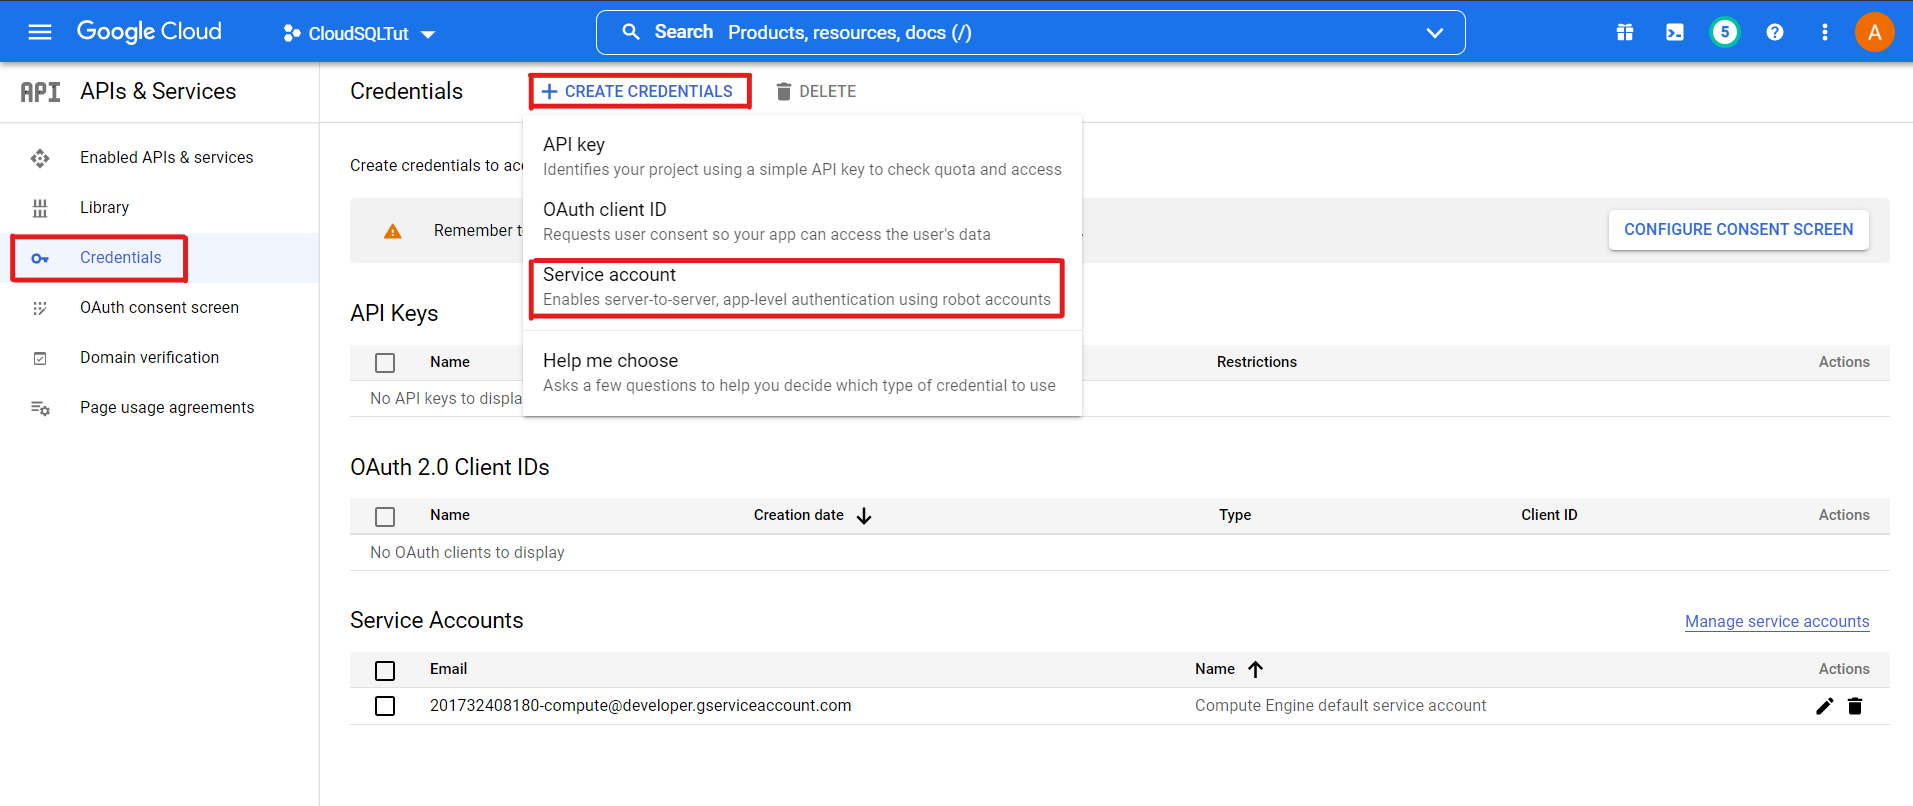
3. Navigate to APIs & Services >> Credentials to create a new Service Account
Creating Database
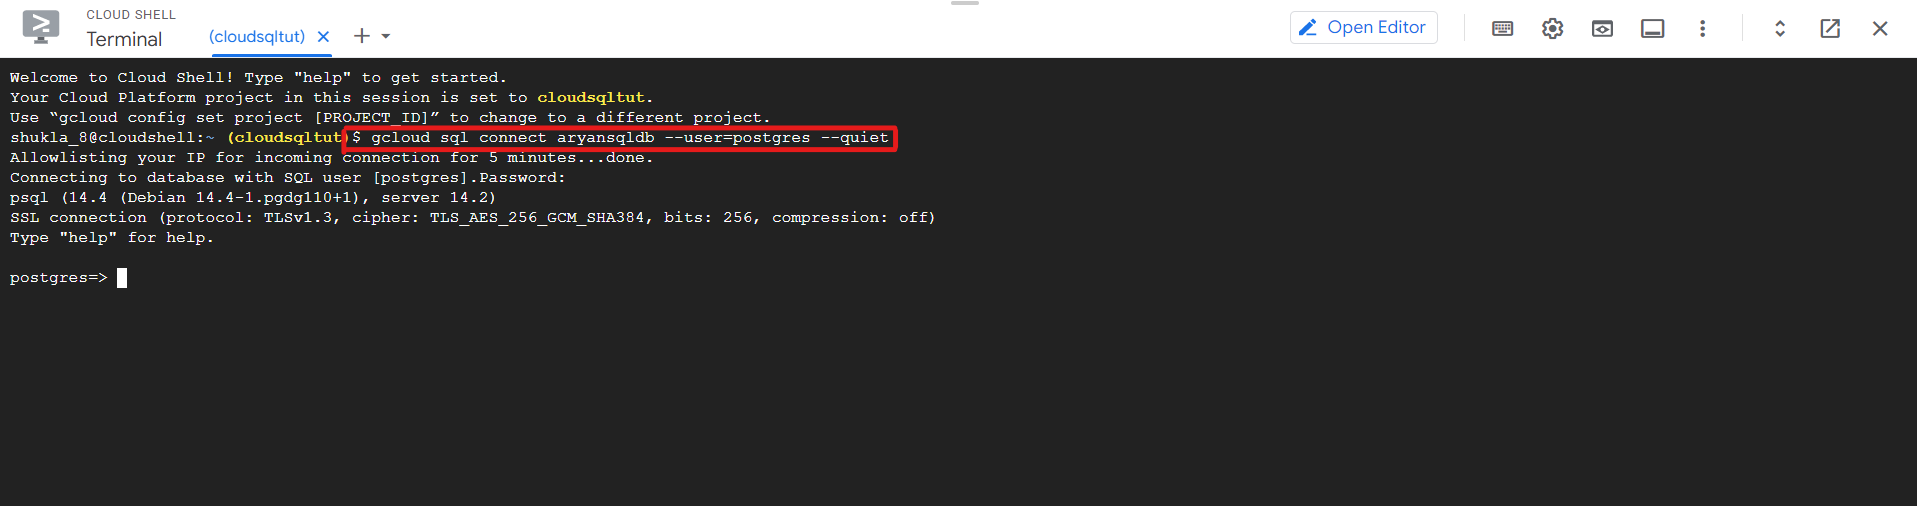
1. Now, navigate to your SQL Database and open Cloud SQL Shell.
2. In your Cloud SQL shell, type the below command and then your password, which you set earlier while creating the Instance.
Note: The below command would be different from yours.
$gcloud SQL connect aryansqldb –user=postgres –quiet
You can create a new database using the Shell or the GCP Console. I will show you both ways.
a) Creating DB using Shell:
$ CREATE DATABASE #sqltutdb;
Use the below command to get the list of all your databases:
$ l
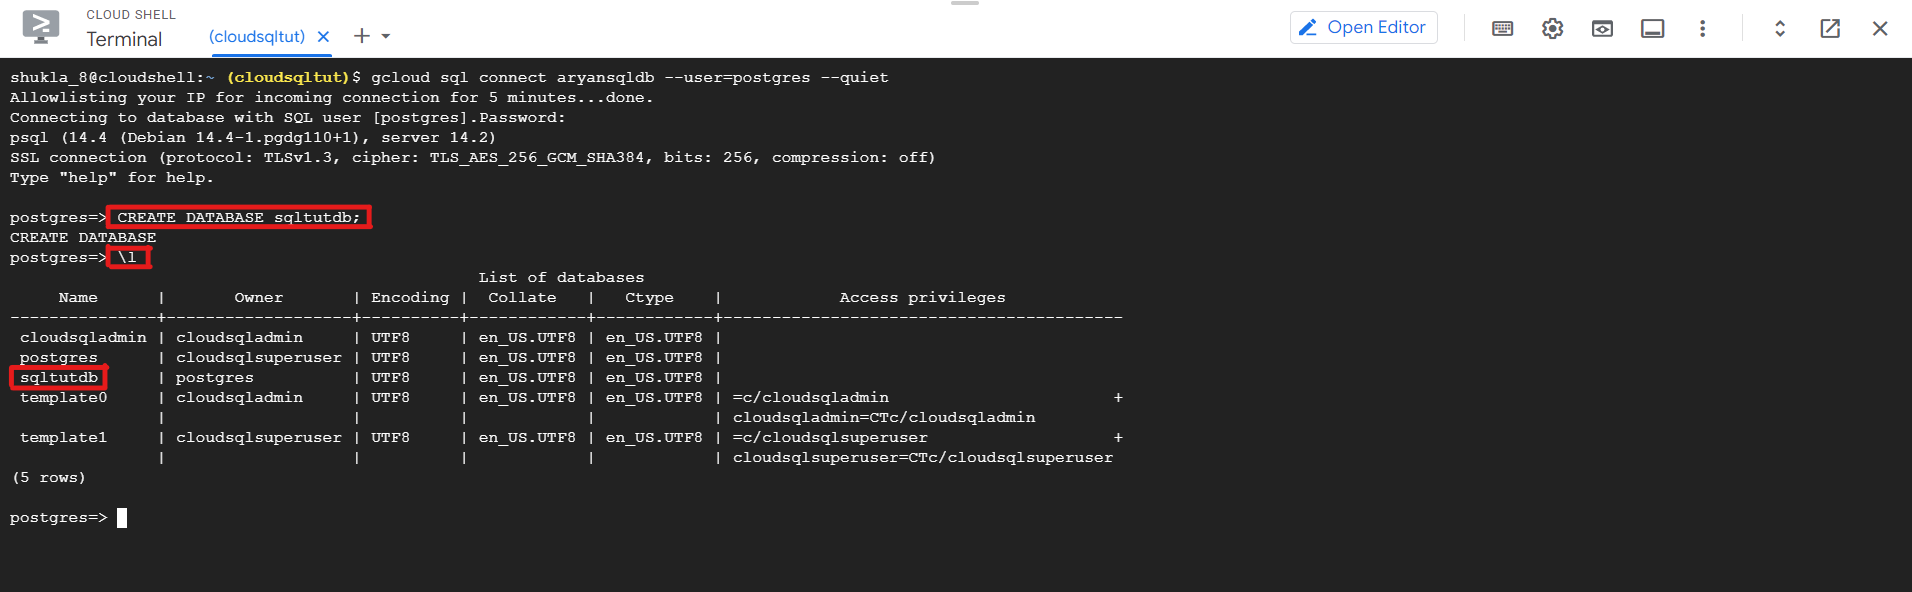
You can observe above that your database has been successfully created.
b) Creating DB using GCP Console:
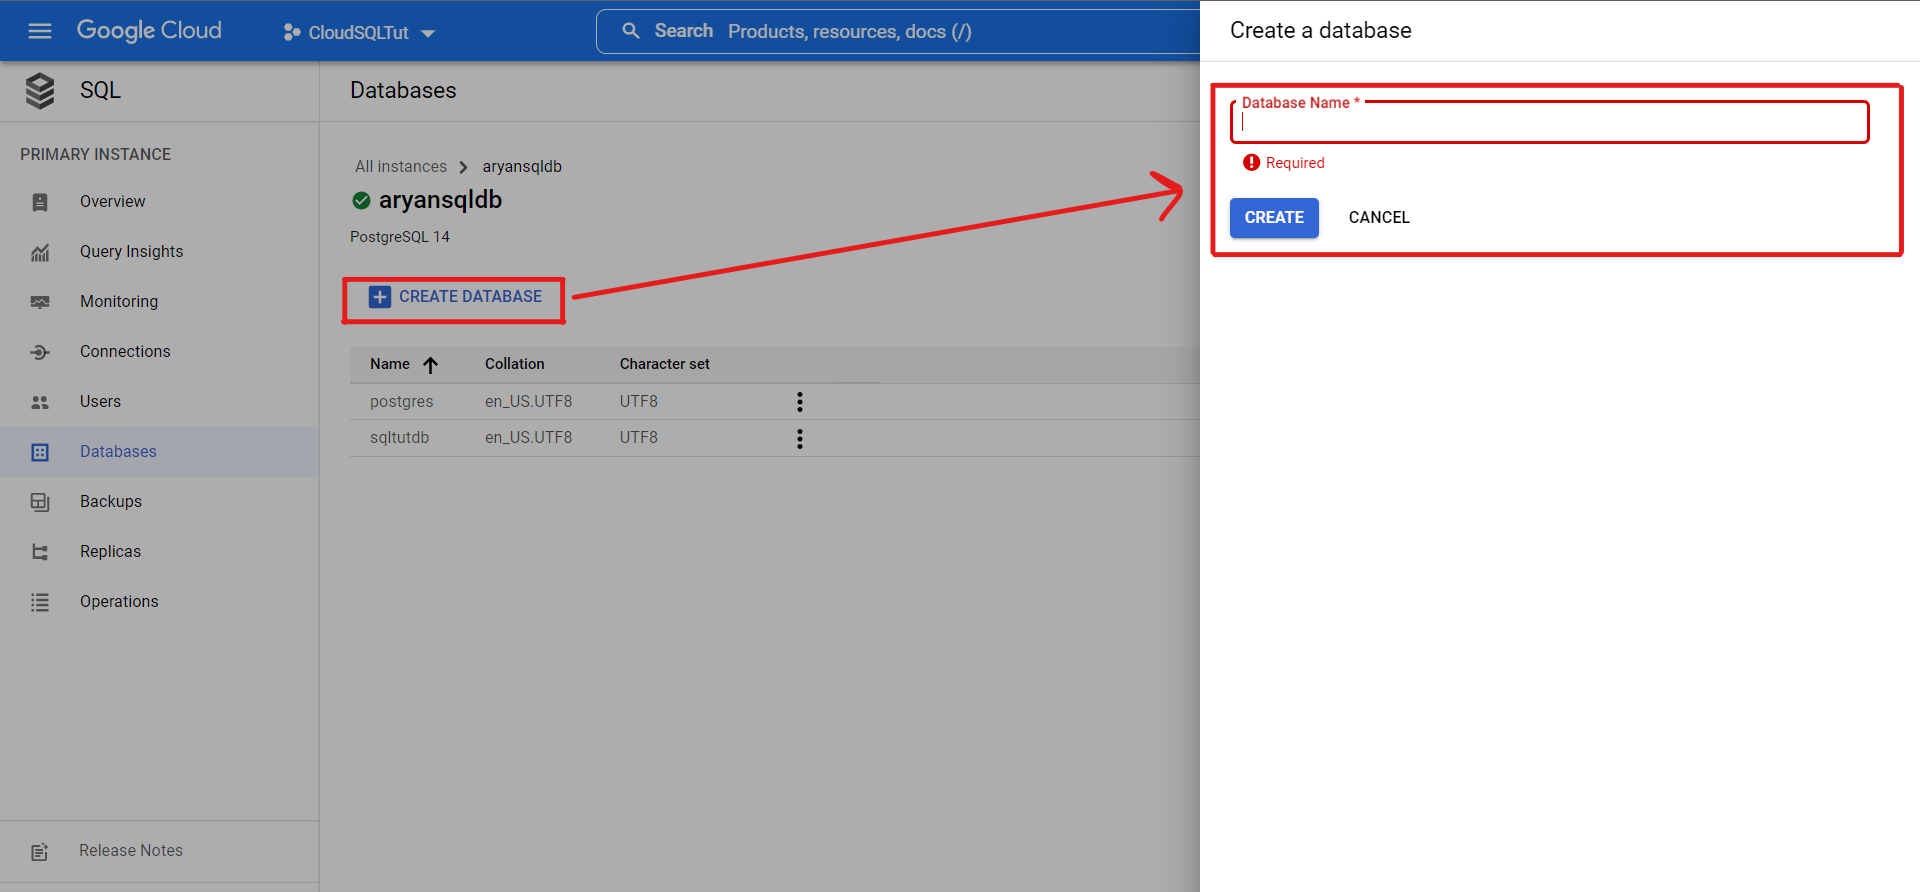
Navigate to Databases
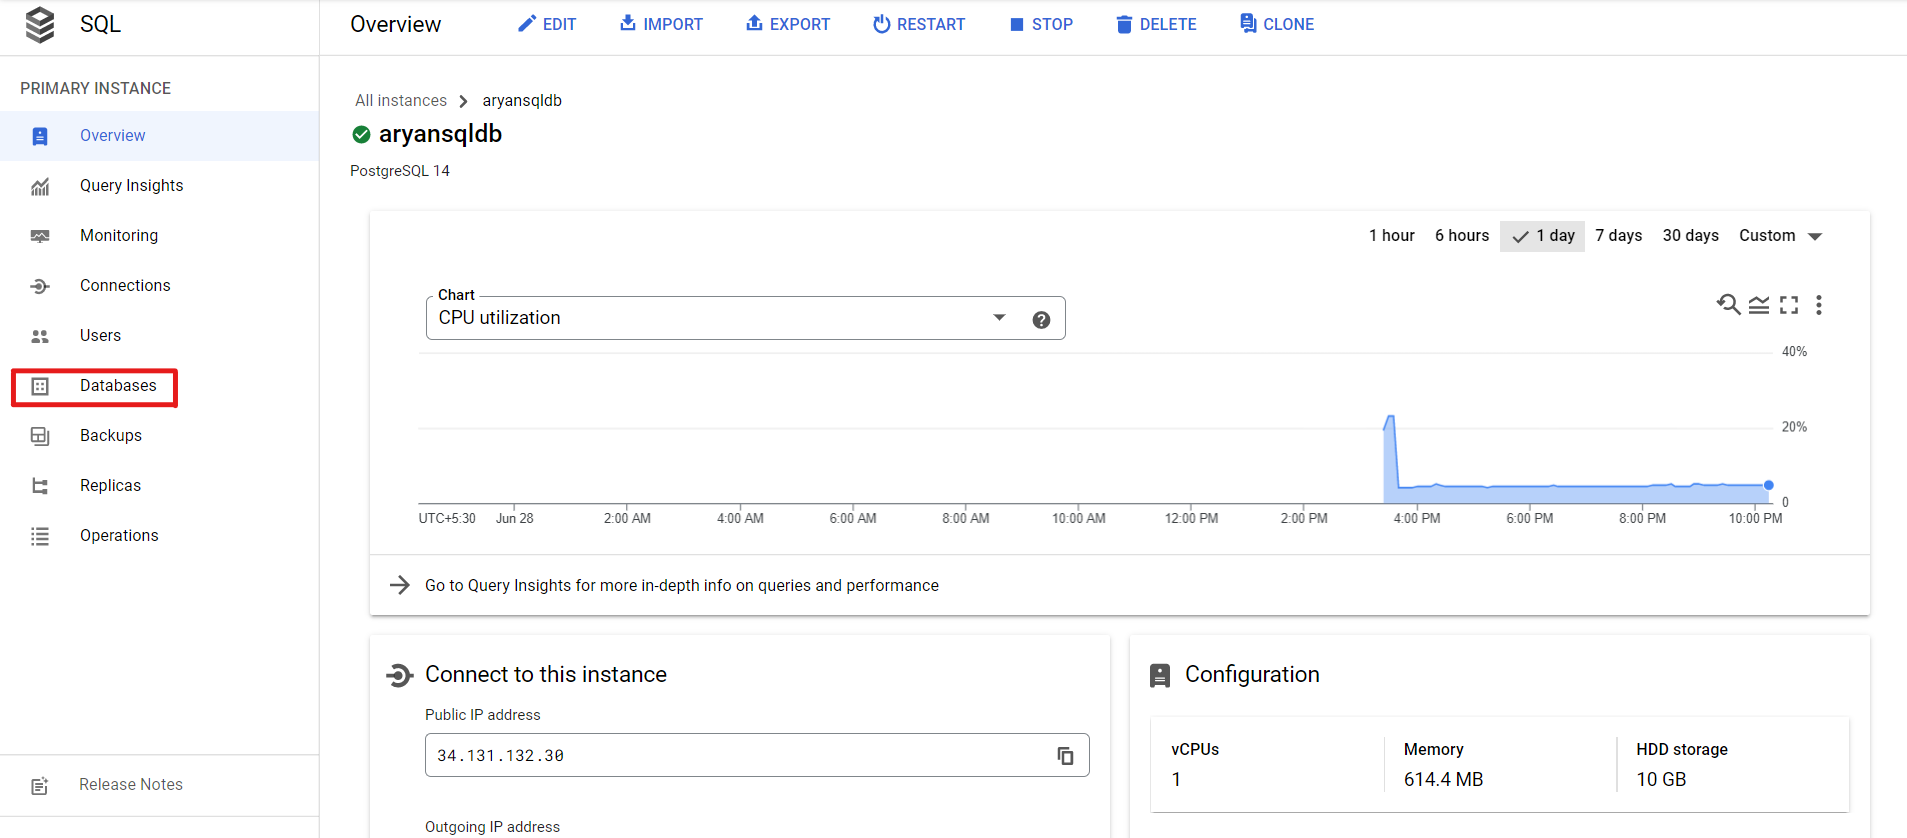
Create a new database of the name of your choice.
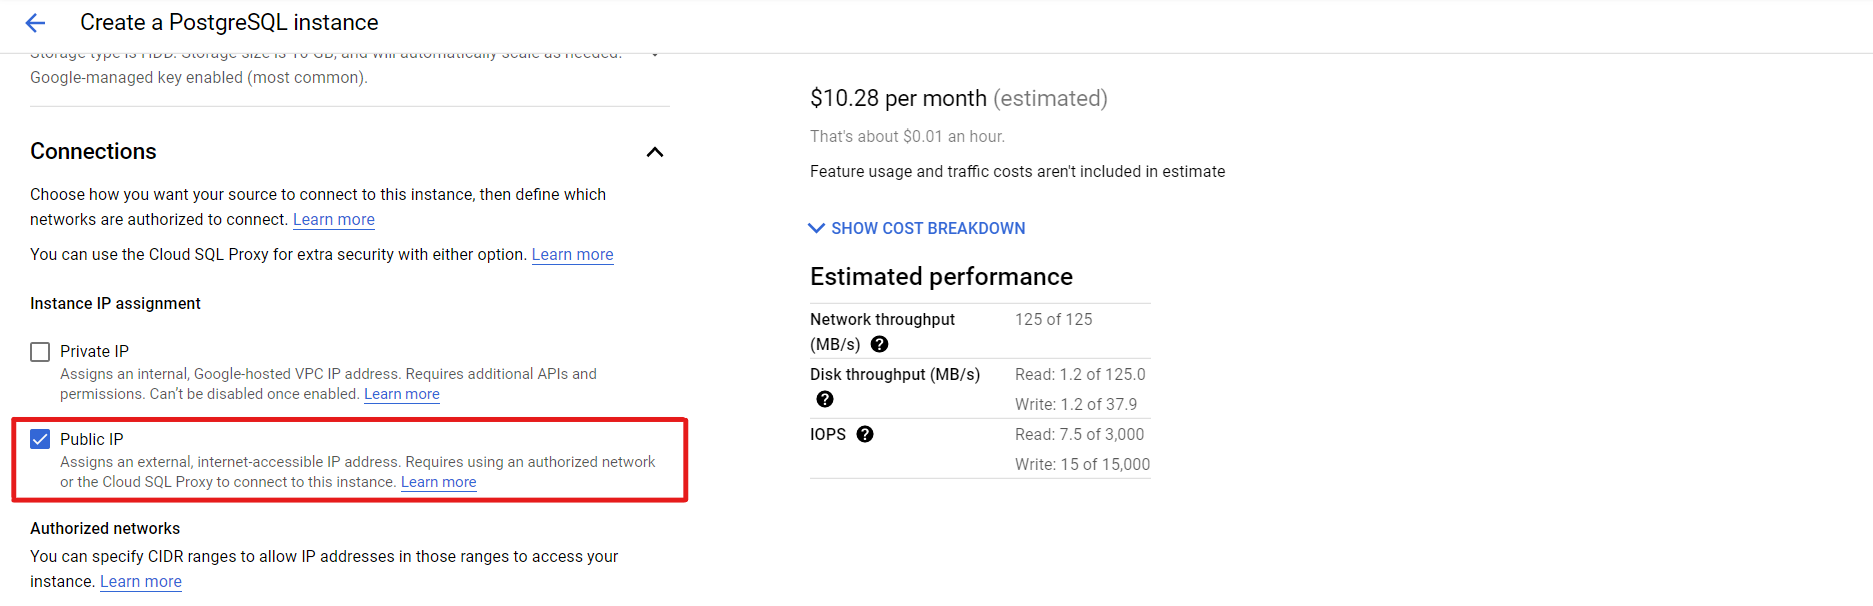
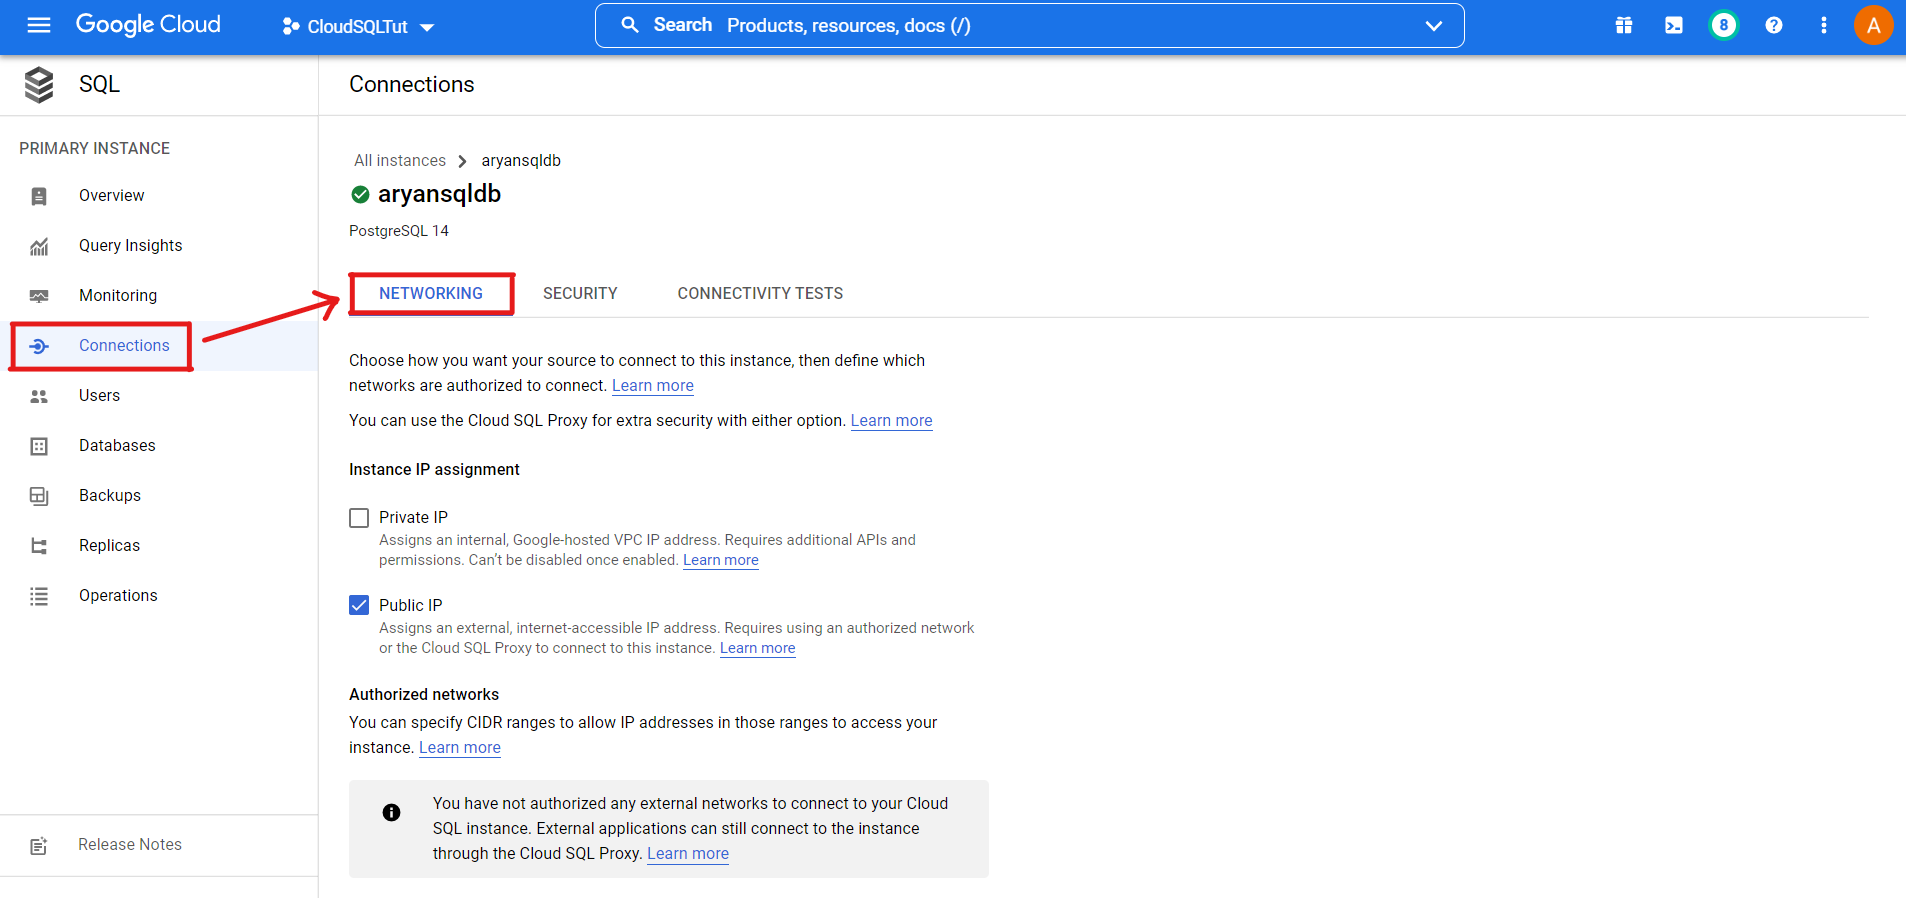
Configuring Networking Settings
This section will configure the firewall rules to allow all incoming requests or traffic to your Instance.
1. Navigate to Connections >> Networking
2. Click on Add a Network to add the range of IP Addresses we want to allow.
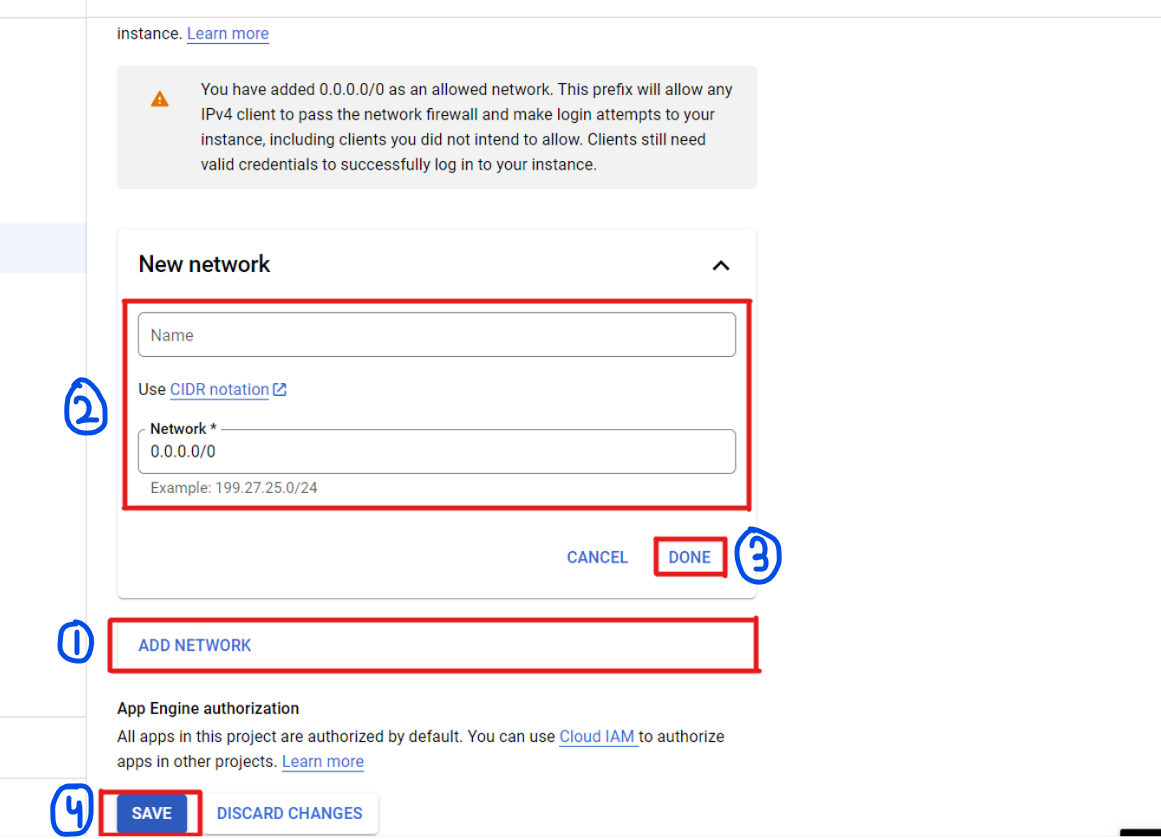
We have chosen the IP Address as 0.0.0.0/0. After providing the login credentials, it will allow all the IPV4 clients to connect to the Instance. But in the production build, you must add only a specific IPV4 address on which your application will be hosted.
Creating Django Application
This section will create a sample Django application and connect that application remotely with our Cloud SQL Database.
1. Installing Django
$ pip install django
$ pip install psycopg2
2. Creating a New project
$ django-admin startproject #sqldbtut
3. Configuring the Settings.py file
We have to change the default database from SQLite to PostgreSQL.
DATABASES = {
    'default': {
        'ENGINE': 'django.db.backends.postgresql',
        'NAME': "",        #sqltutdb
        'USER': "",        #postgres
        'PASSWORD': "",
        'HOST': "",
        'PORT': 5432,
    }
}
4. Create migrations in the database
To check if our DB is connected successfully, we will create the migrations in the database.
$ python manage.py makemigrations
$ python manage.py migrate
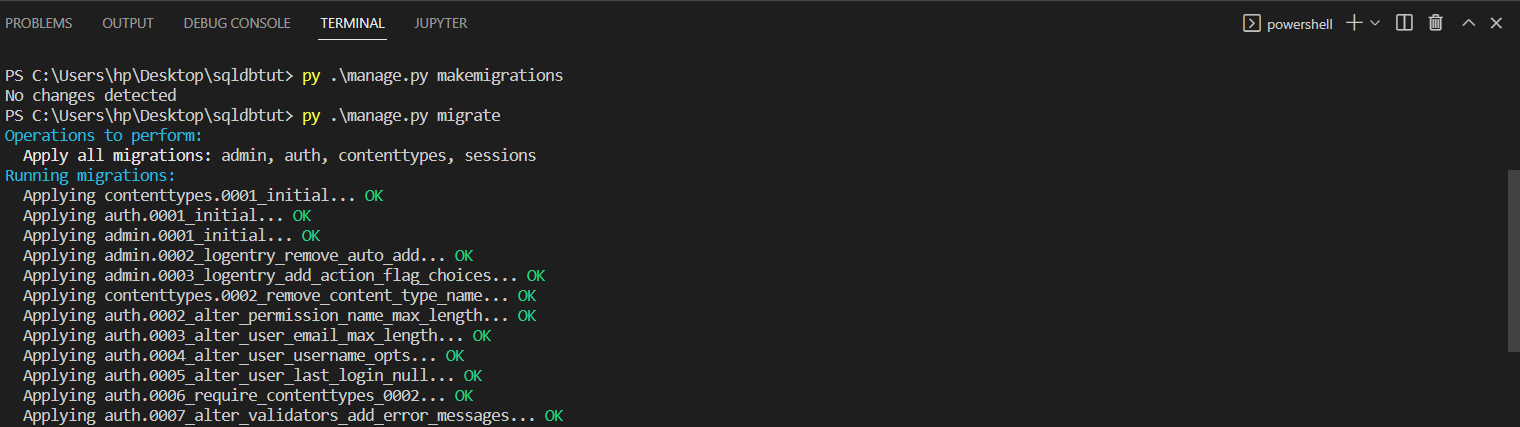
Hurray 🎉! You created a Cloud SQL Database and successfully tested it.
Conclusion
In this article, we have created an SQL Database Server on Google Cloud and used that database in a Django Web Application. As discussed above, SQL Databases have a pre-defined and structured format. On the other hand, we also have NoSQL databases, which don’t have a pre-defined structure and store the raw data in JSON format. NoSQL Databases are of four major types: Key-Value (VK) Stores, Document Stores, Column Family Data stores, and Graph Databases. SQL databases are vertically scalable, while NoSQL databases are horizontally scalable.
Suppose your requirements are precise, the r dataset is structured, and you want your database to follow ACID Properties (Atomicity, Consistency, Isolation, and Durability). In that case, you must go towards SQL Databases. On the other hand, if your data requirements are not precise and your dataset is unstructured, then NoSQL databases are the best choice for you.
Some key takeaways from this article are:
1. Firstly, we briefly talked about SQL databases.
2. Then, we created a SQL Database on Google Cloud.
3. We have enabled the Cloud SQL Admin API to access the Cloud SQL Shell.
4. After that, we created a Service account and configured firewall settings.
5. Finally, we created a sample Django Web Application and connected it to our database.
Frequently Asked Questions
Q1. How do I manage Google Cloud SQL?
A. Google Cloud SQL is managed via the Google Cloud Console, enabling easy control of databases, including MySQL, PostgreSQL, and SQL Server. Tasks like scaling, backups, and security are managed effortlessly.
Q2. Does Google Cloud have an SQL database?
A. Yes, Google Cloud offers various SQL database options, including Cloud SQL for MySQL, PostgreSQL, and SQL Server, ensuring flexibility to suit different project needs.
Q3. Can you run SQL Server on Google Cloud?
A. Absolutely! Google Cloud supports running SQL Server through Google Compute Engine or as a managed service via Cloud SQL for SQL Server.
Q4. How do I connect to the SQL database in Google Cloud?
A. Connecting to a SQL database in Google Cloud involves using Cloud SQL Proxy, Cloud SQL Auth Proxy, or direct connection methods, ensuring secure access from various environments, including local machines and other cloud services.
The media shown in this article is not owned by Analytics Vidhya and is used at the Author’s discretion.
I am currently pursuing my Bachelor of Technology (B.Tech.) in Electrical Engineering and Engineering from the Indian Institute of Technology Jodhpur(IITJ). I am very enthusiastic about Machine learning, and Software Development. Feel free to connect with me on Linkedin.


