Data Science without data is similar to fishing without fish.
When we talk about structured data, Database is the word that comes first to mind. There are various types of databases, here we will be looking at the NoSQL database.
For the past few years, one of the most common ways to store data is by using NoSQL Databases. NoSQL databases AKA “non SQL” OR “not only SQL” are those databases that store data in a non-tabular format different from a relational database.
Today, we will be working with MongoDB, a widely used product for NoSQL databases, and learning how to use data inside MongoDB databases, for data science. You can learn more about the NoSQL database on the official site of MongoDB: NoSQL Explained.
pymongo module in Python
pymongo module for working with MongoDB client in Python. Install using pip install pymongo
After the successful installation of MongoDB Compass (refer to the link given in the above step), we will briefly explore its interface.
.png)
NOTE: If you are using it for the first time, you might not see any recent entries.
1.png)
.png)
NOTE: Admin, local, and config are the 3 databases that will be present in your MongoDB client by Default. We will be working with the admin database for demonstration purposes.
Still if you have any doubts, you can quickly glance over the Glossary for MongoDB
.png)
.png)
.png)
.csv file from the provided link. Here are the steps to import the dataset into our MongoDB admin database (as Tutorial Collection).png)
.png)
Select the iris.csv file that you downloaded from the dataset above.
.png)
Note: Remember to check and change the data type of columns; if necessary before importing.
.png)
Here is how your ‘Tutorial’ collection would look like after the successful import of Iris data from the .csv file.
.png)
Great!! you have successfully got your hand dirty with MongoDB while creating a new collection in the MongoDB database. Now, let’s explore how to bridge the MongoDB data and Python using pymongo.
To install the module, you need to simply write pip install pymongo in your terminal.
import pymongo
# Getting the access to local MongoDB databases
databases = pymongo.MongoClient()
# Getting the access to `admin` database from the group of other databases present
admin_db = databases.admin
# Getting the access to 'Tutorial' collection that we just created inside `admin` database
tutorial_collection = admin_db.Tutorial
# Now this is where our imported `iris` data is stored.
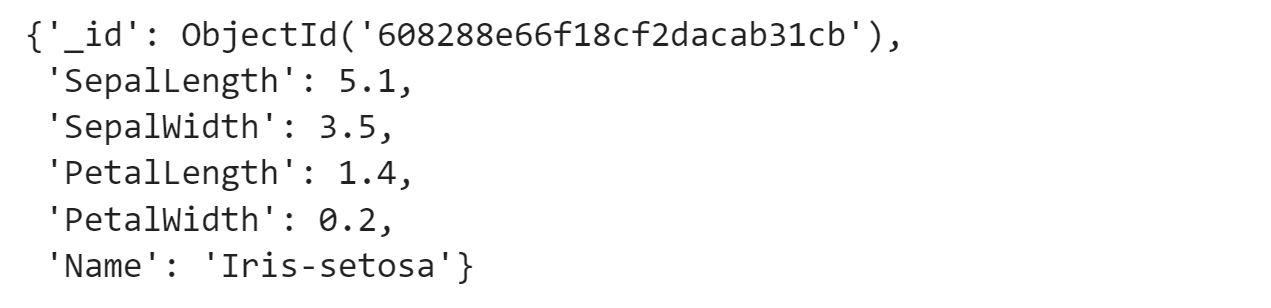
#To fetch one entry/record/document from the collection we can write:
tutorial_collection.find_one({})
tutorial_collection.find({})

Note: pymongo cursor object is iterable, so here we converted it into a list to glance at all the values.
list(tutorial_collection.find({}))
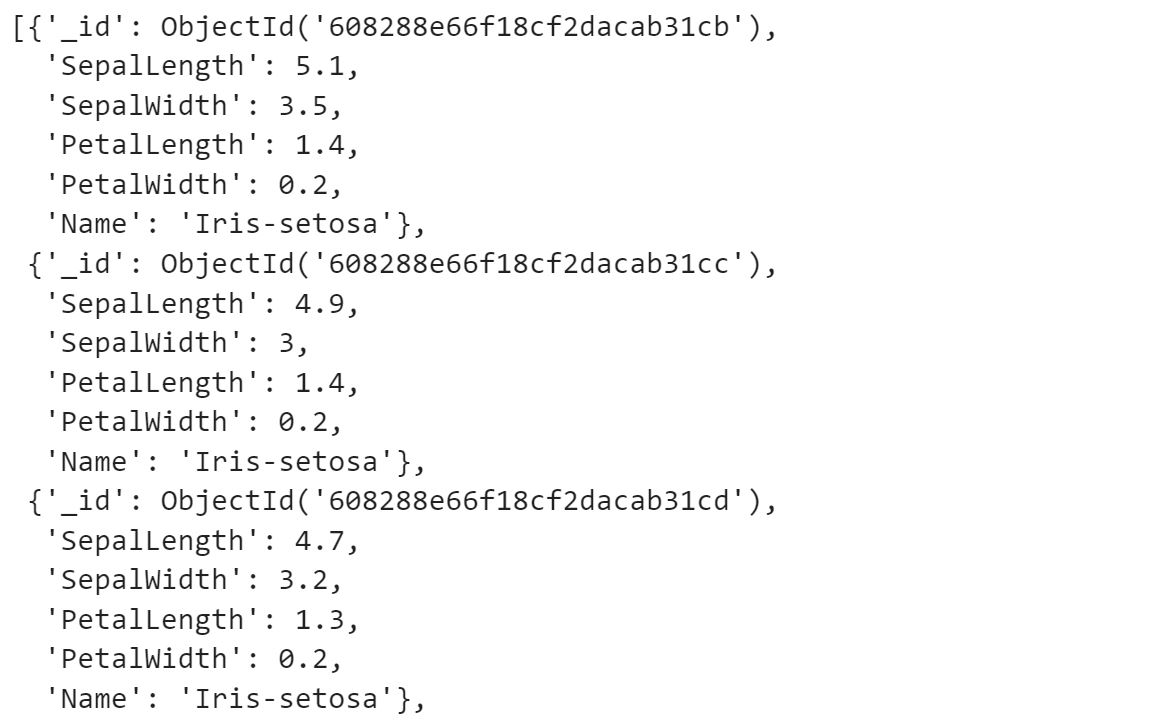
the list goes on till all the 150 values of the iris dataset.
We are onto the final stage that would join this tutorial to further down the line data science/ Analytics tasks.
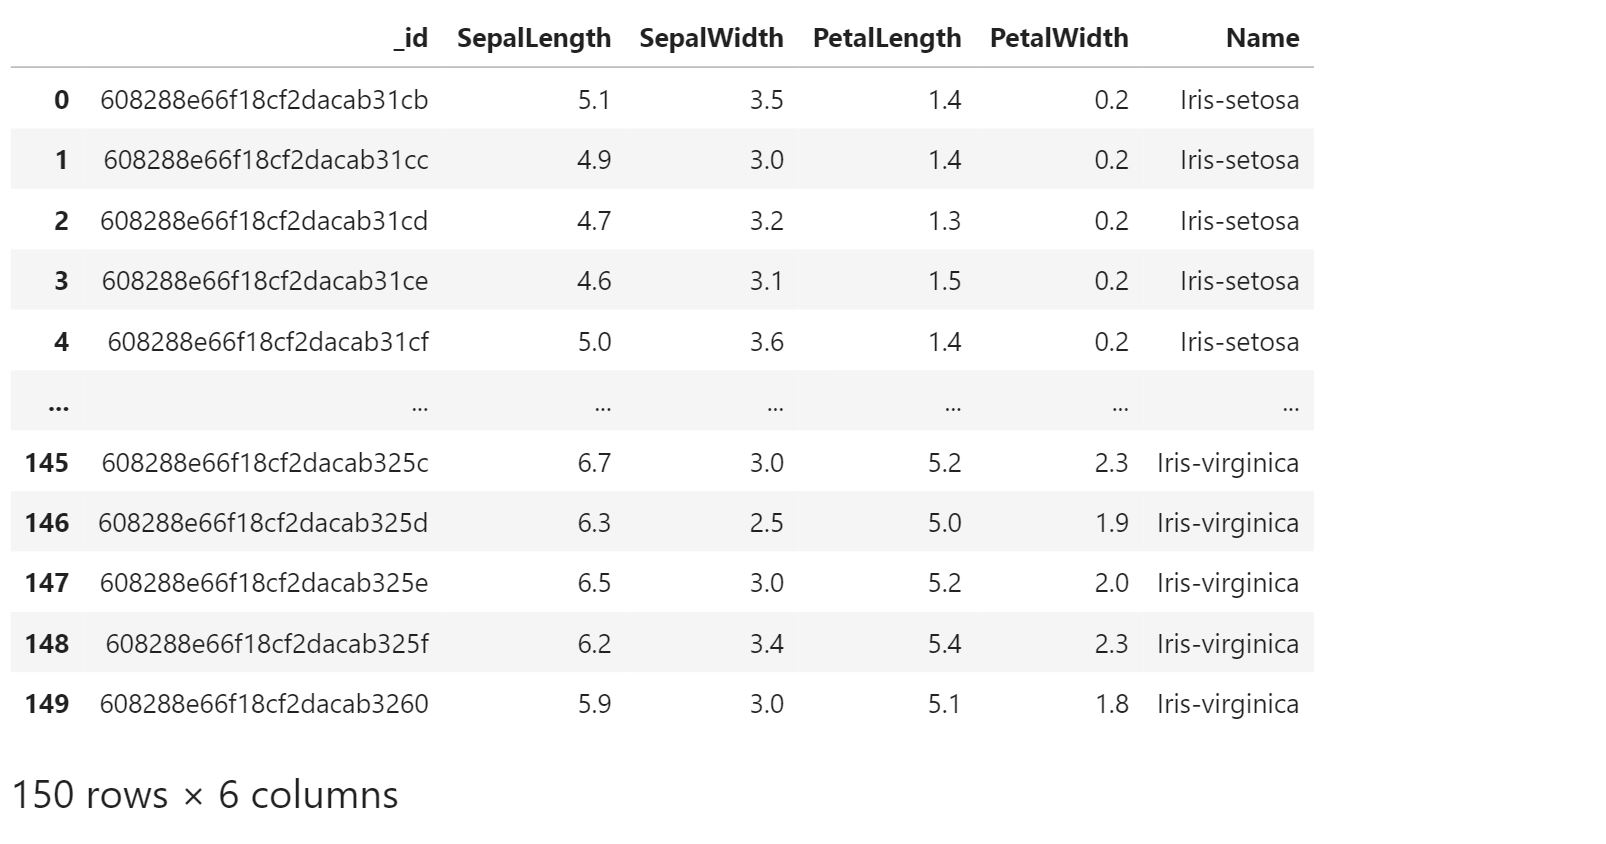
We need to create a DataFrame using pandas for our MongoDB Tutorial Collection. Let’s see how we can do that in Jupyter notebooks for better interactivity.
import pandas as pd
iris_df = pd.DataFrame(list(tutorial_collection.find({})))
iris_df
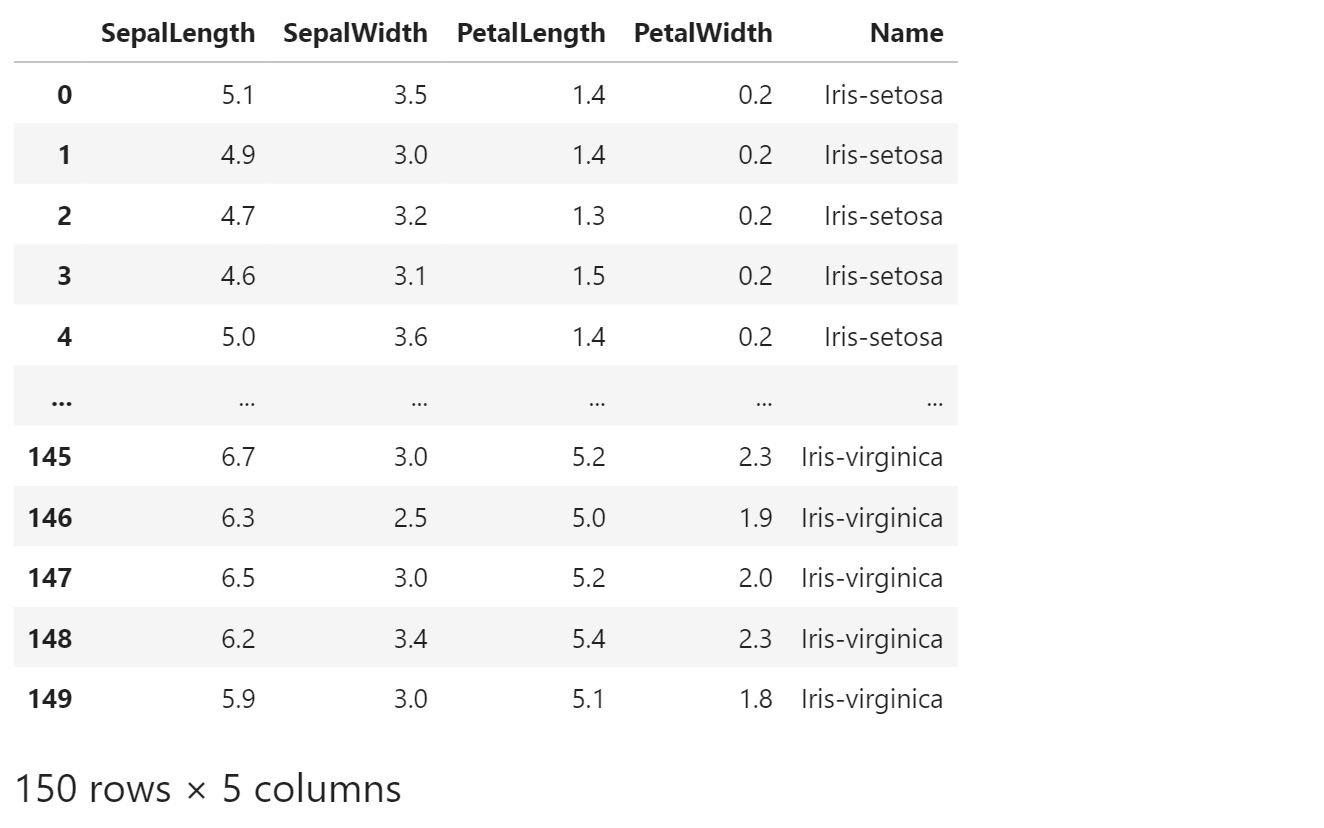
If you don’t want some of the columns you can clean them in 2 ways:
# we will clearn the `id` columns by second approach,
iris_df = iris_df.drop("_id", axis=1)
iris_df.head()
You have reached the end of this tutorial. Now further down the line, you can write the same code as any other data science/analytics task. From this point onwards, you can be as flexible as would want with your data science skills.
MongoDB offers the functionality of aggregate pipelines (mentioned once above) to filter, pre-process, and in general create use-case-specific data pipelines. With proper logic and built, they can be really powerful to retrieve refined and enriched data from the output of that pipeline. It is several times computationally faster than achieving the same result in python or any interpretable language after creating a DataFrame.
Gargeya Sharma
B.Tech in Computer science (3rd year)
Specialized in Data Science and Deep learning
Data Scientist Intern at Upswing Cognitive Hospitality Solutions
For more information, check out my GitHub Home Page.
The media shown in this article are not owned by Analytics Vidhya and is used at the Author’s discretion.
Lorem ipsum dolor sit amet, consectetur adipiscing elit,


You did a great work gargeya