This article was published as a part of the Data Science Blogathon.
Introduction
If you are a data scientist or a Python developer who sometimes wears the data scientist hat, you were likely required to work with some of these tools & technologies: Pandas, NumPy, PyArrow, and MongoDB.
If you are new to these terms, here is a quick one-line description of these tools & technologies:
- Pandas: Pandas is a fast, powerful, and easy-to-use open-source data analysis and manipulation tool built on Python.
- NumPy: NumPy is a library for the Python programming language, adding support for large, multi-dimensional arrays and matrices, along with a large collection of high-level mathematical functions to operate on these arrays
- PyArrow: Python library for Apache Arrow
- MongoDB: MongoDB is an open-source document database and leading NoSQL database.
In this tutorial, we will see how to import and export data from MongoDB database into Pandas DataFrame, NumPy array, and Arrow Table using PyMongoArrow. It is a tool built by MongoDB that allows you to transfer data in and out of MongoDB into various other data formats such as Pandas DataFrame, NumPy array, and Arrow Table in a very easy and efficient manner.
Installation & Setup
For this article, we assume you have the recent version of Python installed on your system. Install PyMongoArrow by running the following commands in your terminal/powershell. If you already have PyMongoArrow installed, please make sure that it is >=0.5.0 version so that you can use all the functionalities shown in this tutorial.
python -m pip install pymongoarrow
To use PyMongoArrow with MongoDB Atlas (a fully-managed MongoDB database in the cloud), we also need to install MongoDB’s pymongo driver with the SRV extra.
python -m pip install 'pymongo[srv]'
If you don’t have Pandas, Numpy, and PyArrow installed in your system, please run the following commands to do it:
python -m pip install pandas numpy pyarrow
Connecting to your MongoDB Database
In this tutorial, we assume you are familiar with the basics of PyMongo and MongoDB concepts. If not, head to the official documentation of PyMongo for a quick tutorial.
For this tutorial, we are going to use MongoDB’s Free atlas cluster as our data source for the sake of simplicity. If you already have an Atlas account and created your first cluster, go to your Atlas dashboard to get the connection string. If you haven’t created your first Atlas cluster yet, no need to worry – you can follow some really easy steps to create your first Atlas cluster (your database in the cloud), retrieve the connection string for connecting to it, and follow along.
Now, let’s import all the necessary packages:
import pymongo
import pymongoarrow
from pymongo import MongoClient
Now, let’s create a MongoClient instance to establish a connection with our MongoDB database in Atlas. Now, input your cluster connection string as an argument to the ‘MongoClient function.
client = MongoClient('Enter your Atlas cluster connection string here')
Note: If you are connecting to a locally running MongoDB instance that is running on the default host and port, then this is how you can connect to it and follow along. “client = MongoClient(‘localhost,’ 27017)”
Let’s connect to a test database named ‘test_database’ and a test collection named ‘test_collection.’
db = client.test_database
col = db.test_collection
An important note about collections (and databases) in MongoDB is that they are created lazily – none of the above commands have performed any operations on the MongoDB server. Collections and databases are created when the first document is inserted into them.
Now, let’s insert a few documents into the test_database.test_collection collection. But before we do that, let’s quickly import the datetime library as one of the fields in our document will be a date.
from datetime import datetime
col.insert_many([
{'_id': 1, 'measure': 43, 'status':'active', 'installed_on': datetime(2022, 1, 8, 3, 43, 12)},
{'_id': 2, 'measure': 32, 'status':'active', 'installed_on': datetime(2022, 2, 2, 11, 43, 27)},
{'_id': 3, 'measure': 62, 'status':'inactive', 'installed_on': datetime(2022, 3, 12, 3, 53, 12)},
{'_id': 4, 'measure': 59, 'status':'active', 'installed_on': datetime(2022, 4, 8, 3, 22, 45)}
])
Now, let’s verify that the data has been successfully written to your database by running the following commands:
import pprint
for doc in col.find({}):
   pprint.pprint(doc)
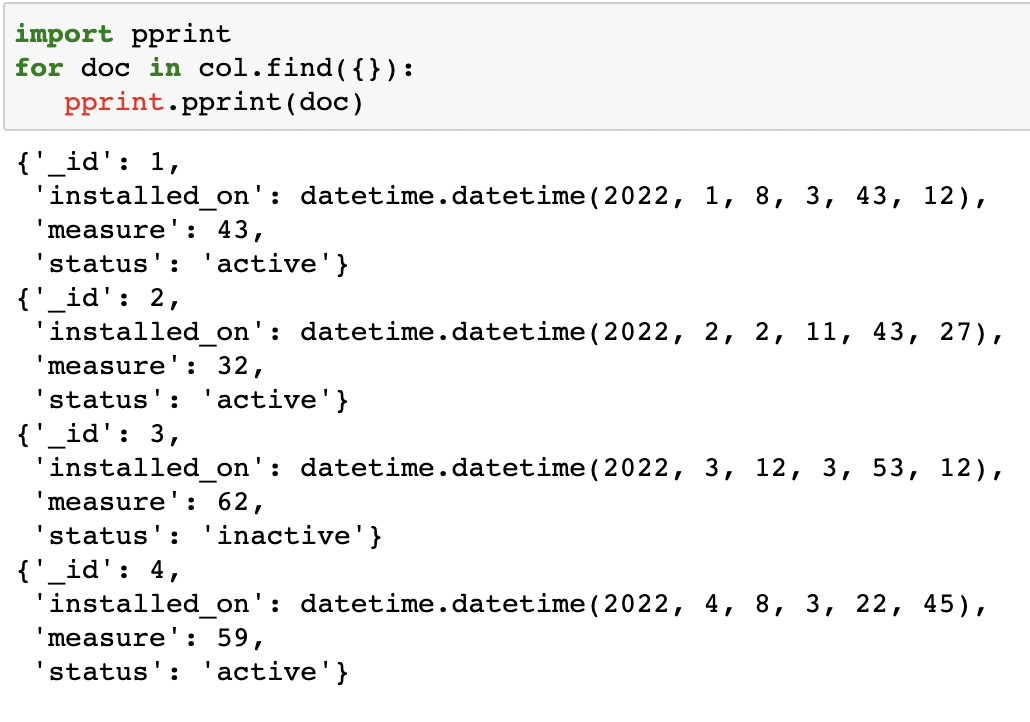
As you can see, we have successfully inserted 4 documents into our collection.
Now, let’s quickly run these two lines of code to patch PyMongo. Which will allow us to use PyMongoArrow’s functionality directly to Collection instances of PyMongo.
from pymongoarrow.monkey import patch_all
patch_all()
Exporting MongoDB Data Into Other Formats
Exporting Data out of MongoDB into Pandas DataFrame
Now that we have inserted data into our MongoDB database let’s quickly see how we can export data to other data formats. We are going to use PyMongoArrow’s find_pandas_all() function to export MongoDB results set into Pandas DataFrame. We will pass this function a query predicate to filter the desired documents. For example, we want MongoDB to return all the documents which have a ‘measure’ field value greater than 40.
import pandas as pd
df = col.find_pandas_all({'measure': {'$gt': 40}})
Let’s quickly print the content of the ‘df’ dataframe to verify that data has been successfully written to it.
print(df)
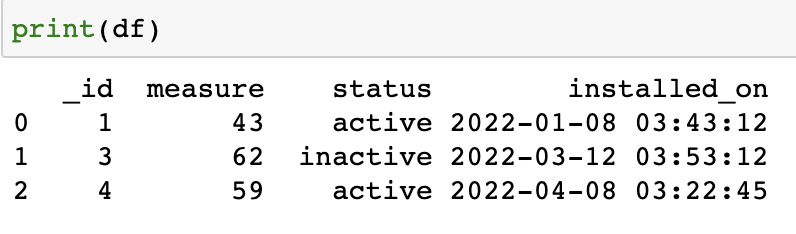
As you can see, we have successfully exported MongoDB data into a Pandas DataFrame.
Exporting Data out of MongoDB into NumPy Array
Here, we are going to use PyMongoArrow’s find_numpy_all() function to export MongoDB results set into NumPy Array. In this case, we are going to leave the query predicate field empty to return us all the documents in the collection.
Did you know that PyMongoArrow also lets you define the data schema manually so that the exported data field values are in the desired format? You can define the schema by instantiating pymongoarrow.api.Schema using a mapping of field names to type-specifiers. For example:
from pymongoarrow.api import Schema
# let's define the schema
schema = Schema({'_id': int, 'measure': float, 'status': str, 'installed_on': datetime})
import numpy as np
npa = col.find_numpy_all({},schema=schema)
Let’s quickly print the content of the ‘NPA’ array to verify that data has been successfully written to it.
npa

Exporting Data out of MongoDB into Arrow Table
Here, we will use PyMongoArrow’s find_arrow_all() function to export MongoDB results set into Arrow Table. In this case, we will leave the query predicate field empty to return us all the documents in the collection.
import pyarrow
arrow_table = col.find_arrow_all({})
Let’s quickly print the content of the ‘arrow_table’ table to verify that data has been successfully written to it.
print(arrow_table)

Importing Data From Other Data Formats
Importing Data from Pandas DataFrame into MongoDB
Importing data from Pandas DataFrame is clear using PyMongoArrow’s write() function. Write (collection, tabular) function takes two arguments:
collection – Name of the collection in which you want to write the data.
tabular – which is an instance of result.ArrowWriteResult. It could be your pandas dataframe, NumPy ndarray, or Arrow Table
Let’s import the ‘write’ function and invoke it. We will pass it two arguments i.e. ‘the name of the collection where we want to write the data and the “dataframe which we want to write to MongoDB.” We will reuse the ‘df’ DataFrame we created in the previous example.
from pymongoarrow.api import write
write(db.pandas_data, df)
Let’s quickly verify that the content of ‘df’ DataFrame has been written successfully by running the following commands:
for doc in db.pandas_data.find({}):
pprint.pprint(doc)
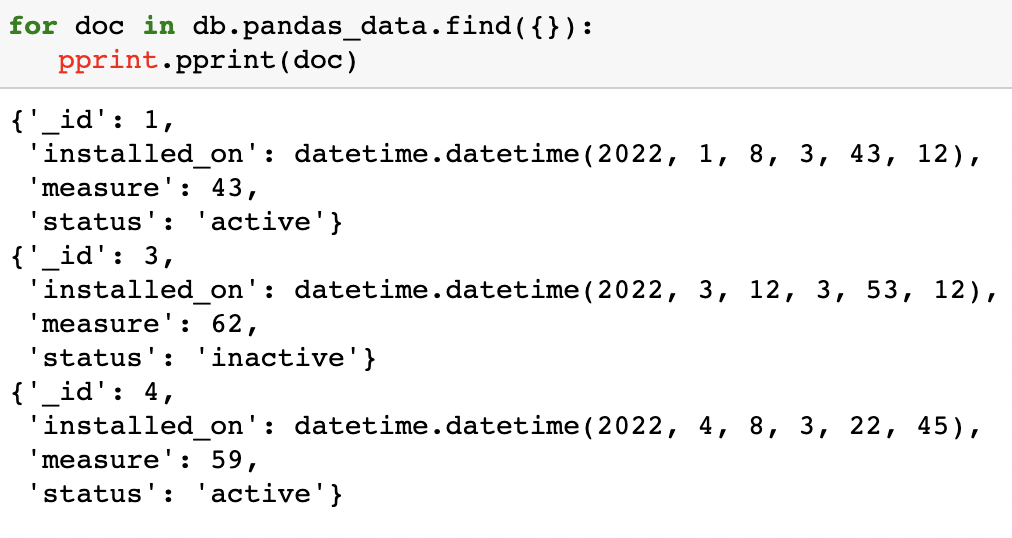
As you can see, we have successfully written Pandas DataFrame data into MongoDB.
Importing Data from NumPy Array into MongoDB
We will use the write() function and pass it to two arguments, i.e., “name of the collection where we want to write the data and “numpy array which we want to write to MongoDB.” We will reuse the ‘NPA’ array we created in the previous example.
write(db.numpy_data, npa)
Let’s quickly verify that the content of the ‘NPA’ array has been written to MongoDB successfully by running the following commands:
for doc in db.numpy_data.find({}):
   pprint.pprint(doc)
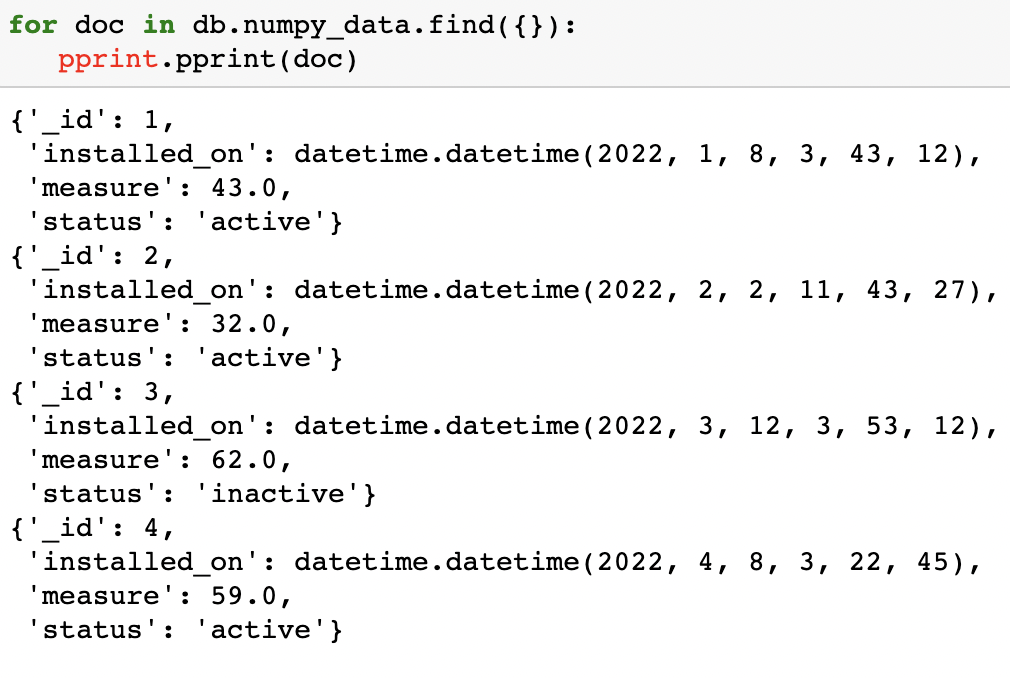
As you can see, we have successfully written numpy array data.
Importing Data from Arrow Table into MongoDB
We will use the write() function and pass it to two arguments, i.e., “name of the collection where we want to write the data and “Arrow table which we want to write to MongoDB.” We will reuse the ‘arrow_table’ table we created in the previous example.
write(db.arrow_data, arrow_table)
Let’s quickly verify that the content of the ‘arrow_table’ table has been written to MongoDB successfully by running the following commands:
for doc in db.arrow_data.find({}):
   pprint.pprint(doc)
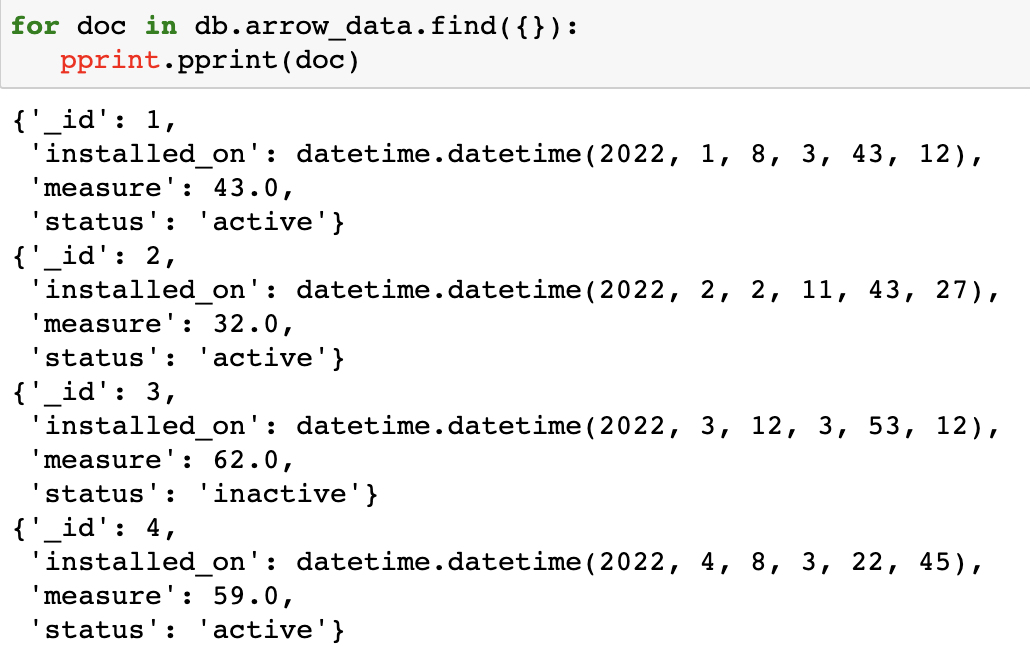
As you can see, we have successfully written Arrow Table into our MongoDB database.
Conclusion
Throughout this article, we discussed an easy, efficient, and fast way to export data out of MongoDB into your favorite data analysis tools such as Pandas, NumPy, and PyArrow using PyMongoArrow. We also saw how we could use the same tool to write those data back to the MongoDB database effortlessly. Some of the key takeaways are:
- We utilised find_pandas_all() function to load MongoDB query result sets into Pandas DataFrame.
- We utilised find_numpy_all() function to load MongoDB query result sets into NumPy array.
- We utilised find_arrow_all() function to load MongoDB query result sets into Arrow Table
- We utilized PyMongoArrow’s write() function to write Pandas’ DataFrame type, NumPy’s array type, and Arrow’s Table type data back to the database.
I highly recommend you to try out this tool, and if you have any feedback/questions related to PyMongoArrow, please feel free to ask them in the MongoDB Community Forum. If you want to learn more about PyMongoArrow, check out our documentation.
The media shown in this article is not owned by Analytics Vidhya and is used at the Author’s discretion.


