This article was published as a part of the Data Science Blogathon.
Overview
In this article, we are going to discuss automated multi-class classification on the mixed data type. Think about text classification. When we have a bunch of text and a target label. Based on the incoming text we create a model to learn on the target label and finally predict on the target label. We typically perform all our NLP steps like tokenization, etc to classify our target values. But if you take real-world data sometimes along with the text data you will also have some continuous variables or categorical variables. For example, consider a call center and you have a customer voice to text conversion model and you are trying to classify whether the sentence is positive or negative. Here, along with the text data, you might also have information on how much time the customer was on the line with the call center agent, how many times the customer transferred from one agent to another. These things will also have an impact on identifying whether the customer had positive interaction or negative interaction with the agent. Here, we are going to work and classify such a kind of data.
Getting Started with Automated Text Classification
Here, I am using AutoViML. It is a package for automated machine learning.
It can be installed
by using
pip install autoviml
I am also using TensorFlow datasets where I am using the amazon personal care appliances dataset. I am also using other python libraries like NumPy and Pandas.
Importing libraries and Pre-processing for Text Classification
Let’s import these
libraries.
import tensorflow_datasets as tfds
import numpy as np
import pandas as pd
Next, I am loading our dataset from TensorFlow datasets and assigning it
to the variable dataset. The info variable is metadata about the dataset. Next,
I am loading the training dataset into train_dataset.
dataset, info = tfds.load('amazon_us_reviews/Personal_Care_Appliances_v1_00', with_info = True, batch_size = -1)
train_dataset = dataset['train']

Now, let’s print the info.
info
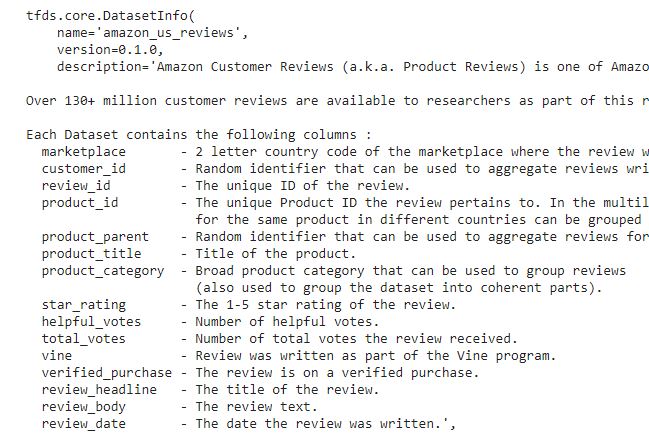
It is listing all the columns in the dataset along with their data types.
Next, I am converting
the dataset into a NumPy array.
dataset = tfds.as_numpy(train_dataset)
If you print the dataset output, you can see some initial set of rows
because it is a NumPy array.
dataset
Now, I am taking a few selected columns, a combination of continuous
value and a combination of categorical value and a text column.
verified_purchase = dataset['data']['verified_purchase']
helpful_votes = dataset['data']['helpful_votes']
review_headline = dataset['data']['review_headline']
review_body = dataset['data']['review_body']
rating = dataset['data']['star_rating']
Next, I am converting these entire variables into a Pandas data frame.
reviews_df = pd.DataFrame(np.hstack((verified_purchase[:, None], helpful_votes[:,None], review_headline[:,None], review_body[:,None],rating[:,None])), columns = ['verified', 'votes', 'headline', 'reviews', 'rating'])
Now, I am declaring data types to the column.
convert_dict = {'verified': int,
                'votes': int,
                'headline': str,
                'reviews': str,
                'rating': int
                }
Then I am passing it to review the data frame.
reviews_df = reviews_df.astype(convert_dict)
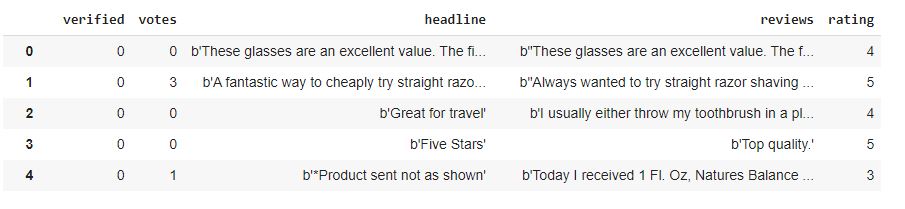
Let me print it.
reviews_df

You can see the output.
I have the verified column showing whether it is a verified purchase. The votes were given to the review, the headline of the review, the body of the review, and then the rating between 1 to 5.
Automated Multi-Class Text classification
Now, I am going to create a multi-class classification.
Rather than converting the reviews to positive or negative, I am converting them into positive, negative, and neutral. For that, I am creating a function. In that function, if the rating is less than or equal to 2, I am considering it as a negative review. If the rating is equal to 3 then I am considering it as a neutral review. The rating above 3 is a positive review.
def convert_rating(rating):
  if rating <= 2:
    out = 0
  elif rating == 3:
    out = 1
  else:
    out = 2
  return out
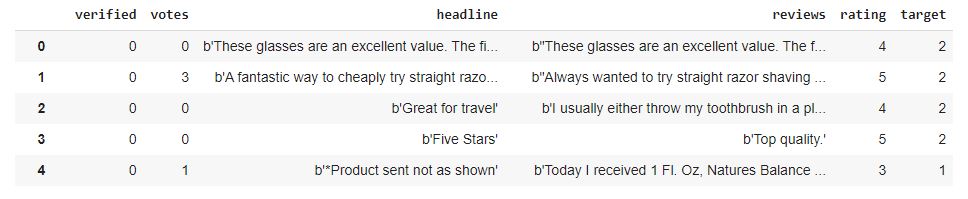
Now, I am creating a target variable. I am taking reviews_df of the target and then I am using the rating column by applying a lambda function to it and calling this function.
reviews_df["target"] = reviews_df["rating"].apply(lambda x: convert_rating(x))
reviews_df
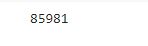
The shape of the data frame is
reviews_df.shape[0]
The target value count is
reviews_df["target"].value_counts()
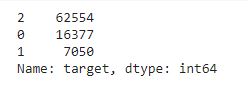
In this imbalanced data set, most of the reviews are positive. Some of the reviews are negative and a few of them are neutral.
Here, the neutral values are not predicted properly. The reason is when people write 3 for rating, they are okay with review and the words will overlap.
Train-Test Split
Let’s see how the model performs.
Auto ML is just to get an intuition of how the modeling technique is performing. It is not going to give the perfect model that you tune and deploy. It is used to take an initial understanding of the output of the model and then you can further fine-tune it and apply.
Now, I am going to
drop the rating column because I don’t require the rating column into the already created target. If I keep the rating column and pass it to the model, it may be just a learning and mapping function for the target variable.
reviews_df = reviews_df.drop('rating', axis = 1)
Now, I am splitting the dataset into 75-25. That is 75% into the train
set and 25% into the test set.
from sklearn.model_selection import train_test_split
train, test = train_test_split(reviews_df, test_size = 0.25)
Training Automated Text Classification Model using AutoViML
After that, I am importing the AutoViML package.
from autoviml.Auto_ViML import Auto_ViML
I am defining the target variable as a target.
target = 'target'
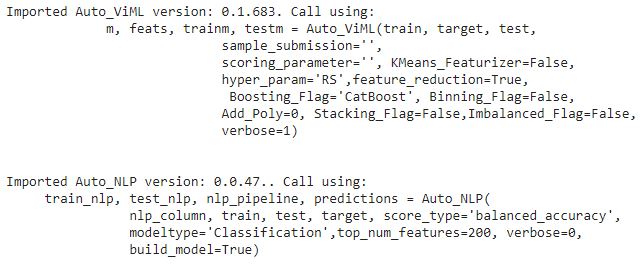
I am calling the AutoViML function. here, I am passing the training data frame and the test data frame along with the target variable.
m, feats, trainm, testm = Auto_ViML(train, target, test,
                                    sample_submission = '',
                                    scoring_parameter = '', KMeans_Featurizer = False,
                                    hyper_param = 'RS', feature_reduction = True,
                                    Boosting_Flag = 'CatBoost', Binning_Flag = False,
                                    Add_Poly = 0, Stacking_Flag = False, Imbalanced_Flag = False,
                                    verbose = 2)
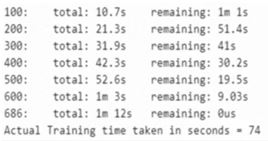
Now the training is completed.
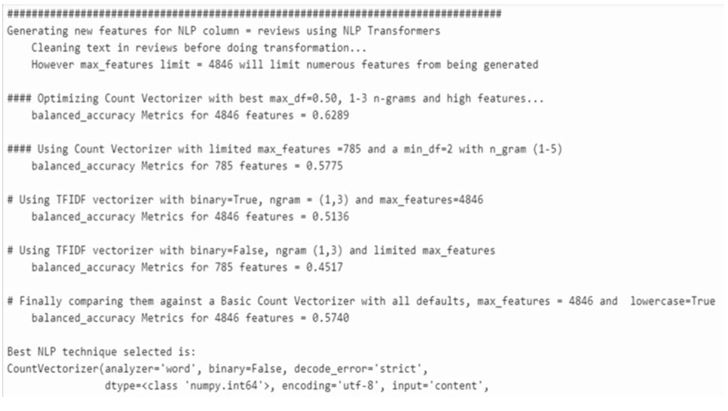
It gives you the distribution of words within the review column.
It tries out a different combination. First, it tries out count vectorizer and then TFIDF vectorizer with and without binary. Then it picks the
best one (Count vectorizer) which is working for the particular model.
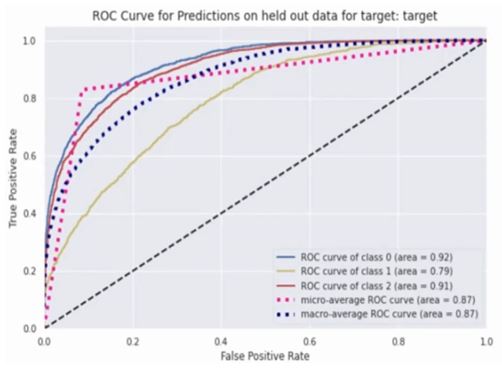
It also gives you the ROC curve for each variable.
It is also giving the feature importance.
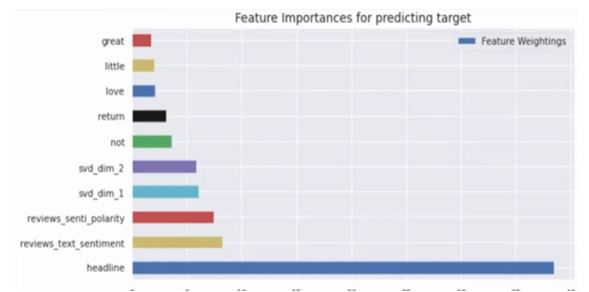
As I said earlier, this is not the finalized model. It is just giving an idea of how it performs. You can use the features that are created and techniques that are created and then you can do your feature engineering further.
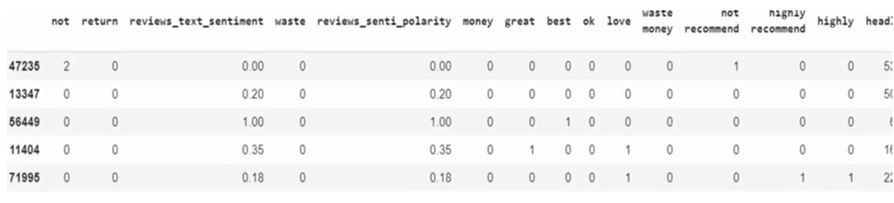
Next, let me print the feats. It will give all the features that are used.
feats
You can see the various texts that are considered as features.
Next, let see the
test frame.
testm
It is printing all the features and finally the different models that are used and what are the target column, prediction based on the test data.
Now, we can save the
model.
m.save_model('model', format = 'cbm')
Testing the Automated Text Classification model
Let’s get into the prediction part of text classification.
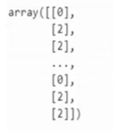
m.predict(testm[feats])
Finally, I am plotting the confusion matrix.
from autoviml.Auto_NLP import plot_coonfusion_matrix,plot_classification_matrix
plot_confusion_matrix(test[target].values,m.predict(testm[feats]))
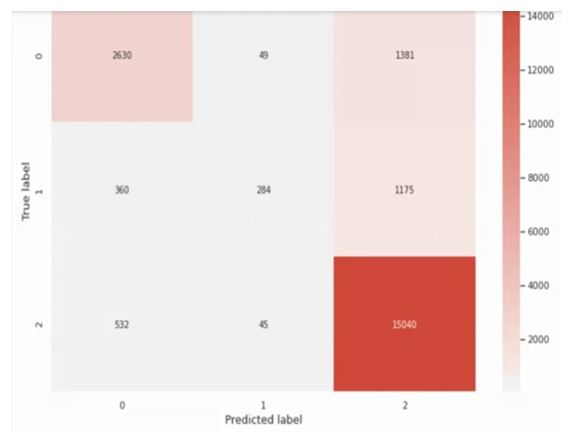
From the confusion matrix, it can be seen that the model has done very well in class 2. It has done decent prediction in class 0 also. But class 1 is not done correctly. The reason is maybe this is not data for really splitting into the neutral review. Another reason may be that neutral people may like it but they don’t want to express themselves a lot.
End Notes
In this article, we understood how to use AutoViML. I hope you find this useful in your NLP journey. As always, I wish you the best in your learning endeavors!


