If you have ever looked at a professional spreadsheet, you must have noticed titles spanning across multiple columns. That is the most essential and widely used example of a popular Excel function called Merge. Continuing our Excel 101 series, we shall explore the Cell Merge function today. We shall understand what it allows us to do, how to use it, and what the absolute essentials are that we should keep in mind while using it.
Because anyone who has used cell merge will tell you that more often than not, its use gives you a solid pushback from Excel. Starting out, you may see errors left, right, and centre. This guide is meant to make you understand the cell merge function and bypass all such errors.
So, without any delay, let’s begin with the basics.
Table of contents
- What is Cell Merging in Excel?
- Why Do We Merge Cells in Excel?
- Merge Options in Excel
- How to Merge Cells in Excel
- What Happens to Data When You Merge Cells?
- Merging vs Combining in Excel
- How to Combine Values in Excel
- Problems with Merged Cells in Excel
- Better Alternative to Merging: Centre Across Selection
- Conclusion
What is Cell Merging in Excel?
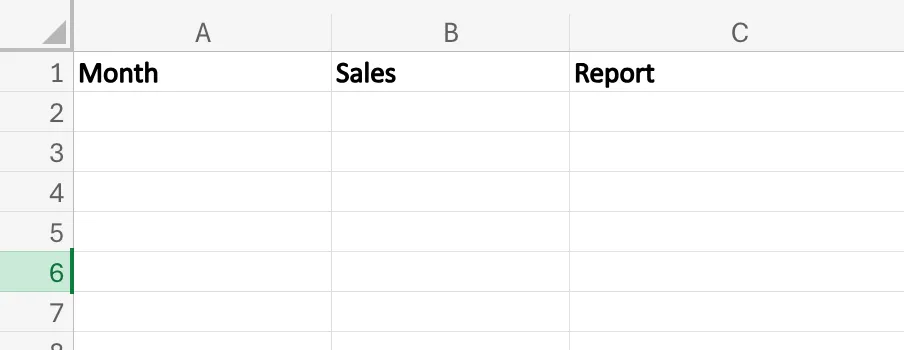
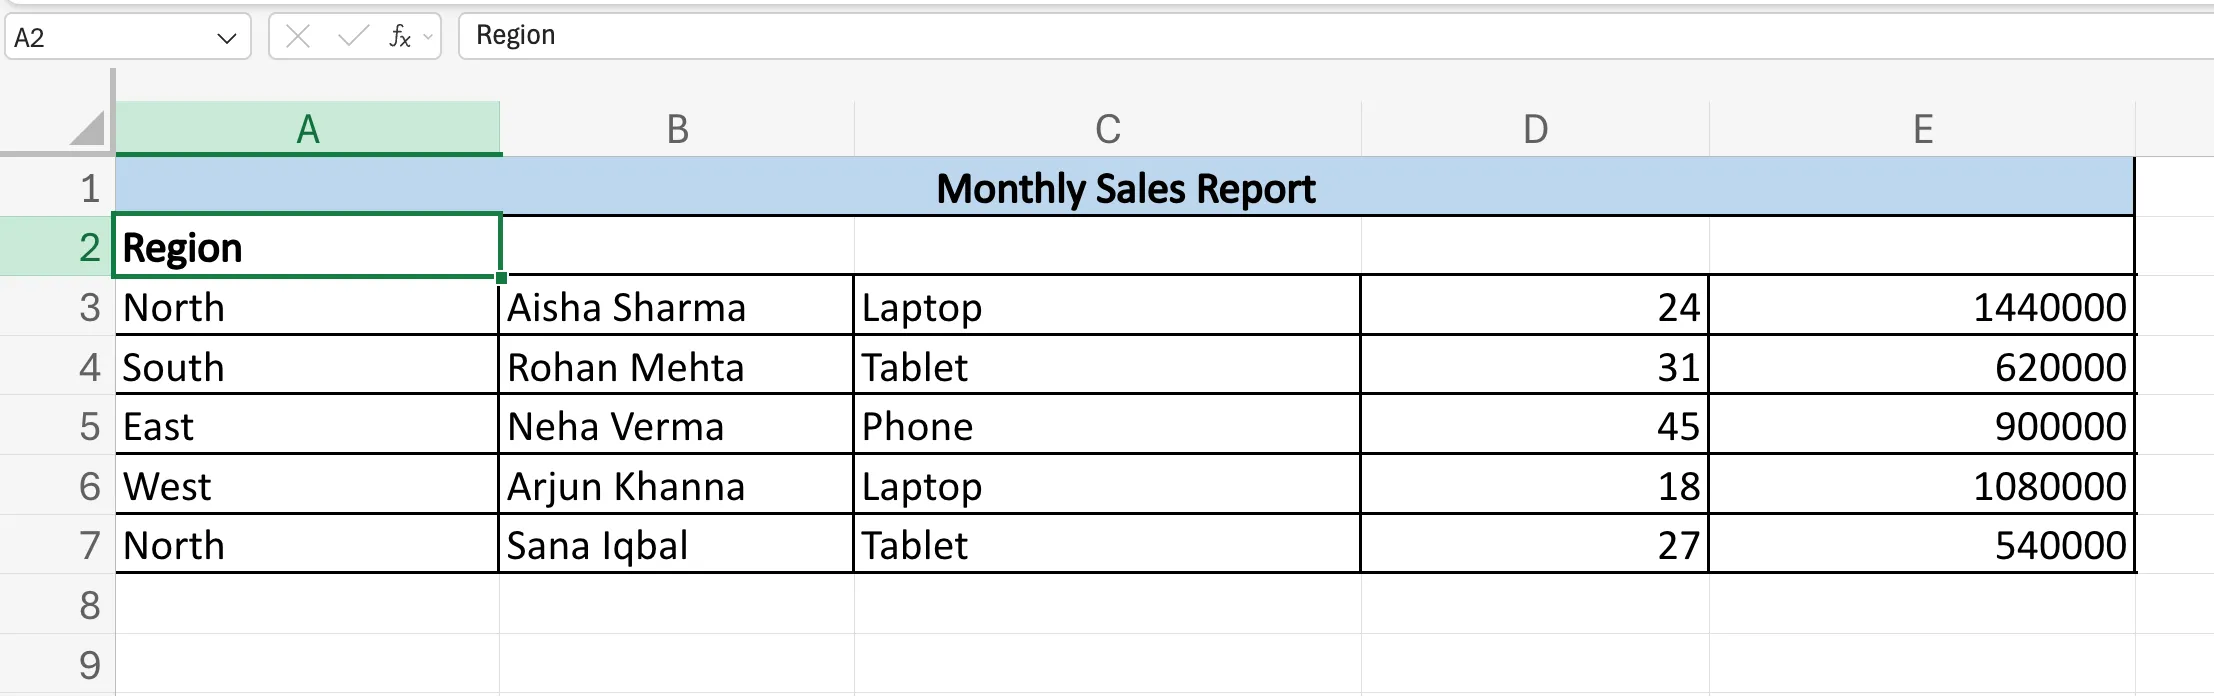
Cell merging in Excel simply means combining two or more adjacent cells into one larger cell. So, if you select cells A1, B1, and C1 and merge them, Excel will turn them into a single big cell. This is why the feature is mostly used for titles, section headers, labels, and other formatting-heavy parts of a worksheet.
Now here comes the small detail that causes the big drama.
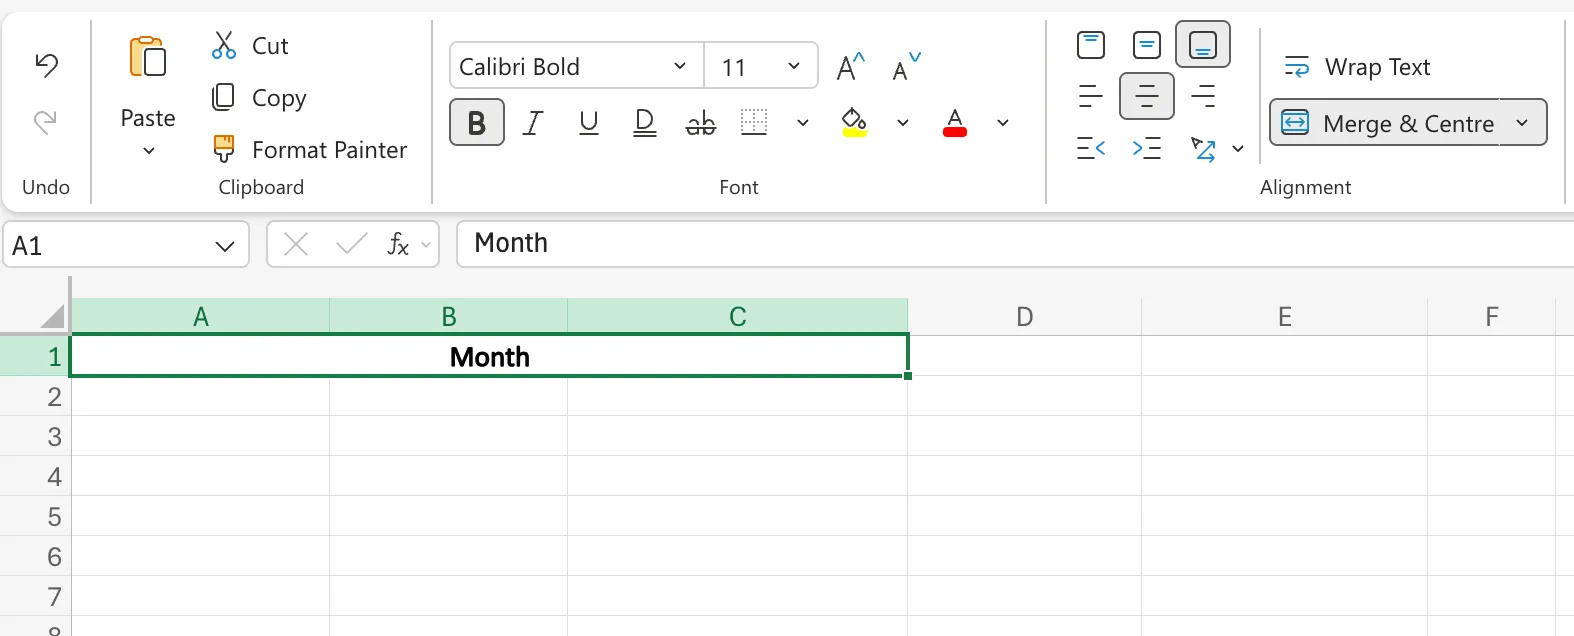
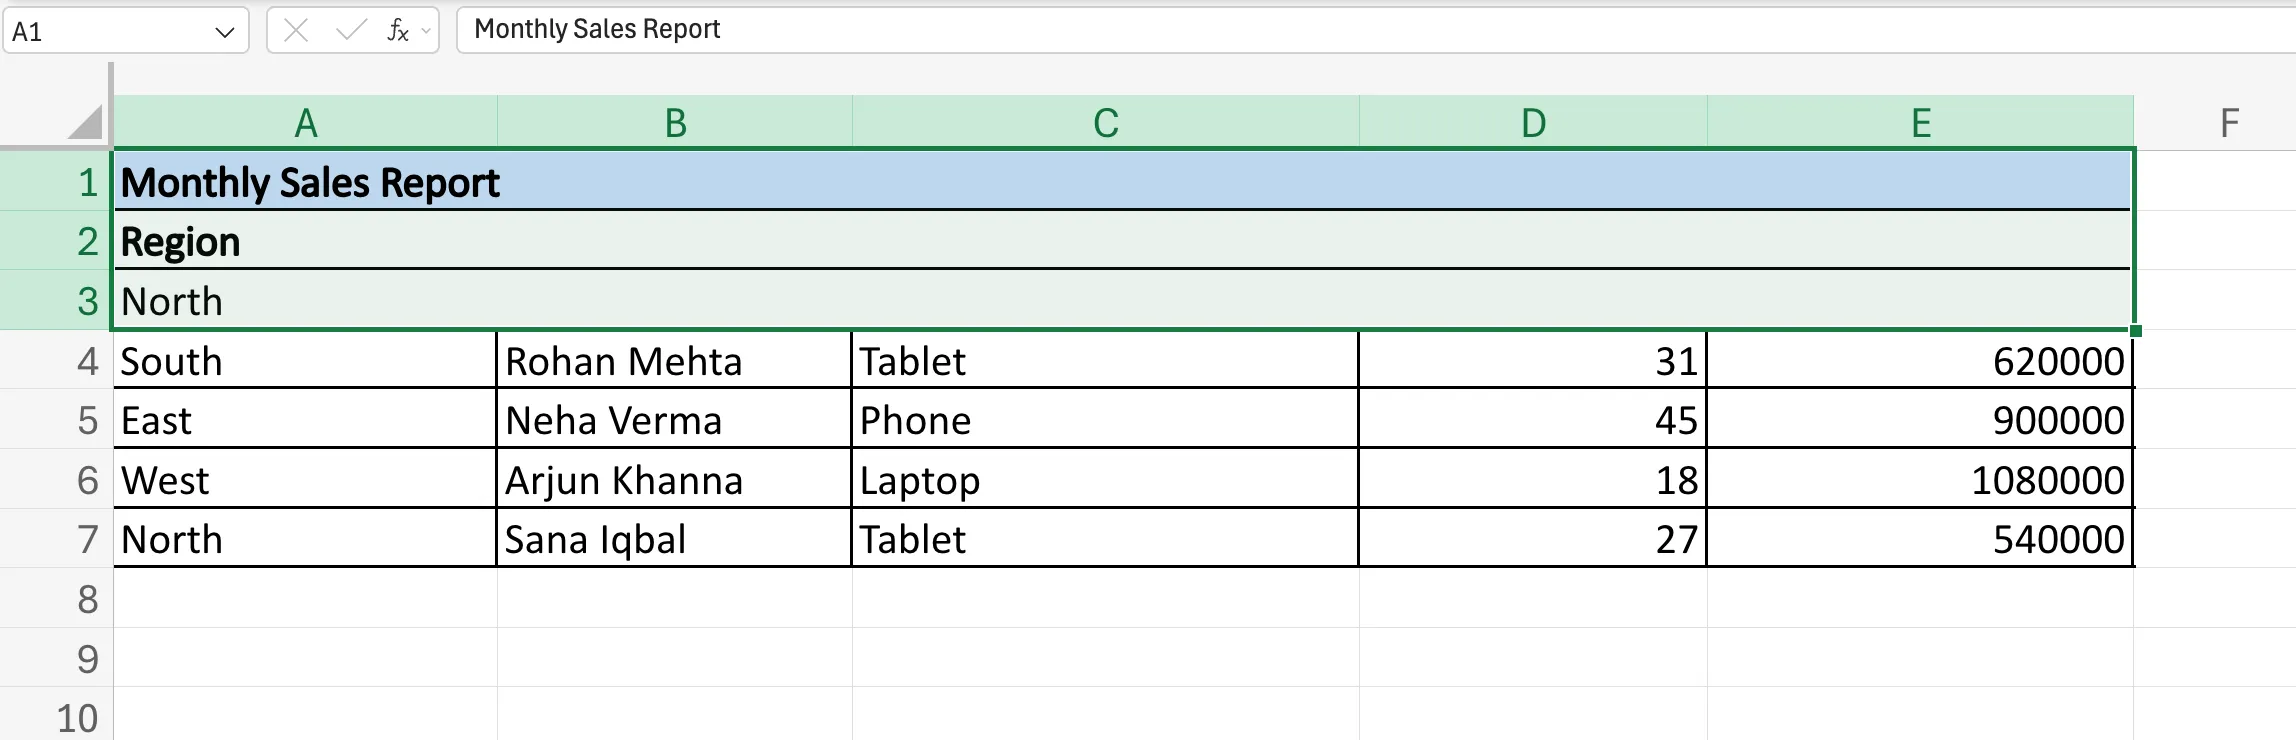
When Excel merges cells, it does not preserve the contents of every selected cell. It only keeps the value from the top-left cell and removes everything else. So if A1 has “Monthly”, B1 has “Sales”, and C1 has “Report”, merging them will not magically create “Monthly Sales Report”. Excel will only keep “Monthly” and quietly sacrifice the rest. Check out the function and its result in the carousel below.
That is why it is important to understand that cell merging is a formatting feature, not a data-combining feature. Its purpose is to improve the visual layout of a sheet. It is not, I repeat, it is NOT to bring together values from multiple cells.
This is exactly why many people, instead of finding it helpful, find it a complete nuisance. That is because they do not understand this difference and the associated practices with it.
Before we get into the actual merge options in Excel, let us first see where and why people use this feature in the first place.
Why Do We Merge Cells in Excel?
The main reason people merge cells in Excel is simple: presentation. Sometimes, a worksheet is not just meant to store data. It is also meant to look organised, readable, and somewhat less terrifying to the human eye. That is where merging helps.
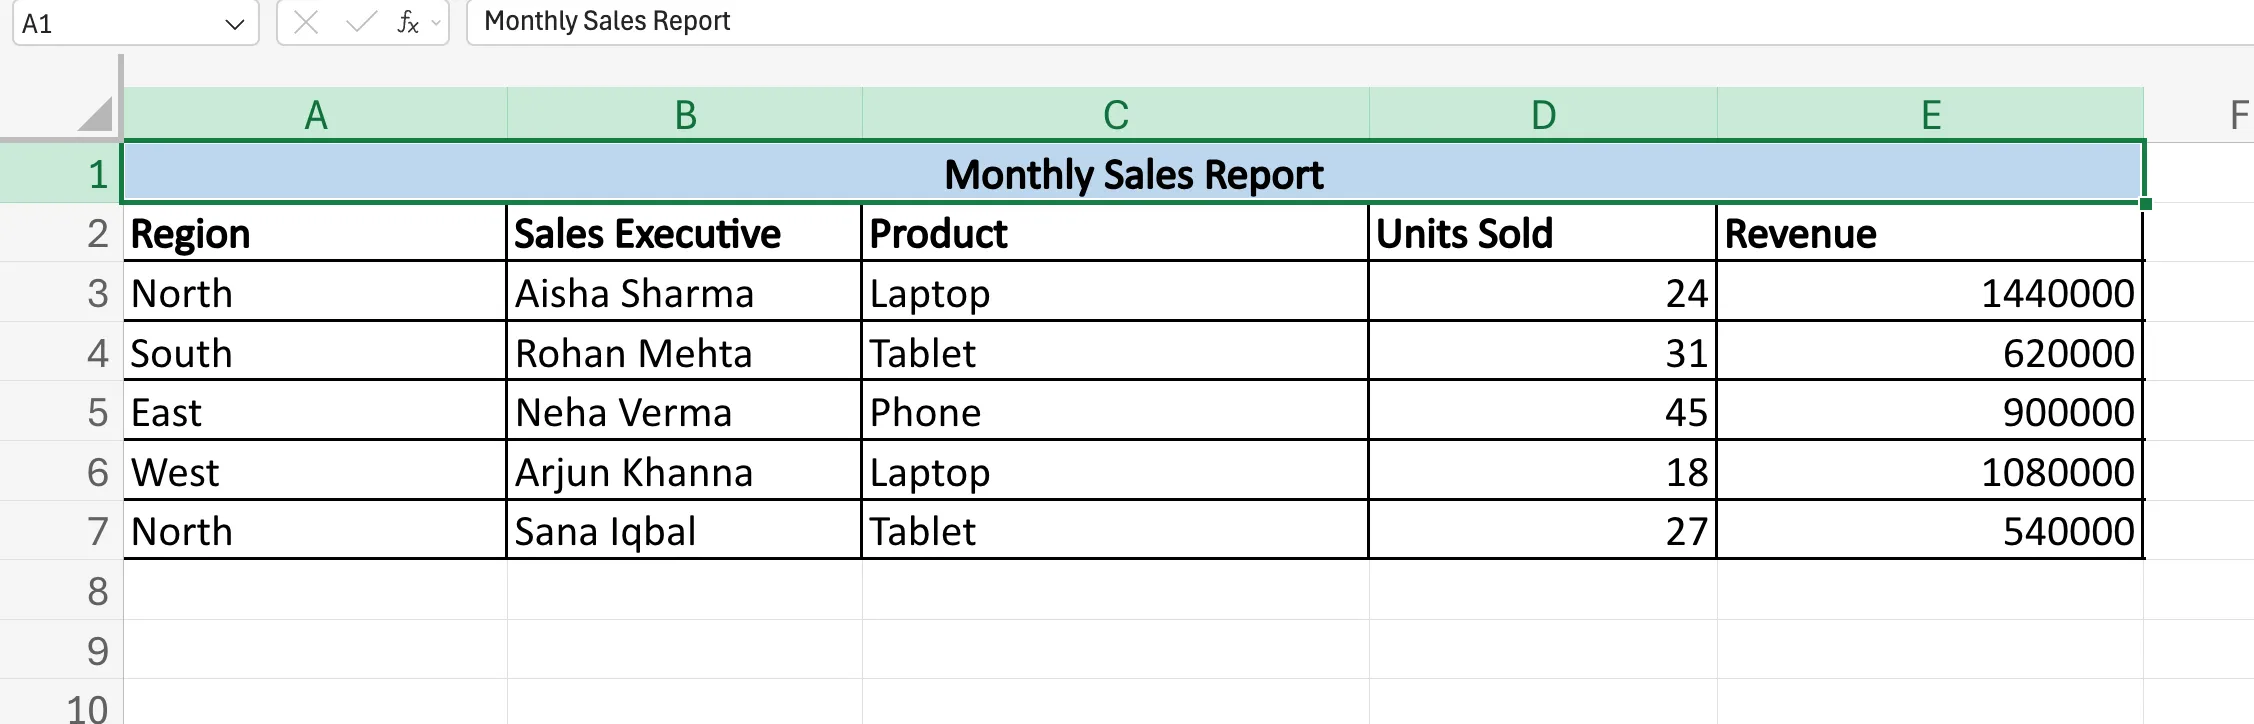
The most common use case is, of course, a title. If your report stretches from columns A to F, putting the heading in just A1 looks oddly lonely. Merging those cells lets the title sit across the full width of the table, which instantly makes the sheet look cleaner and more intentional. Check out the neat way in which the title is presented in the sheet below.
The same logic applies to section headers, dashboard labels, forms, invoice templates, and other layouts where visual grouping matters. In short, whenever you want one label to represent multiple adjacent columns, merging starts looking very tempting.
And to be fair, Excel does offer multiple ways to do this. The trouble only begins when people assume all merge options behave the same way, or worse, when they start merging cells inside actual datasets like they are decorating a wedding card. So before Excel gets a chance to object, let us understand the different merge options it gives you.
Merge Options in Excel
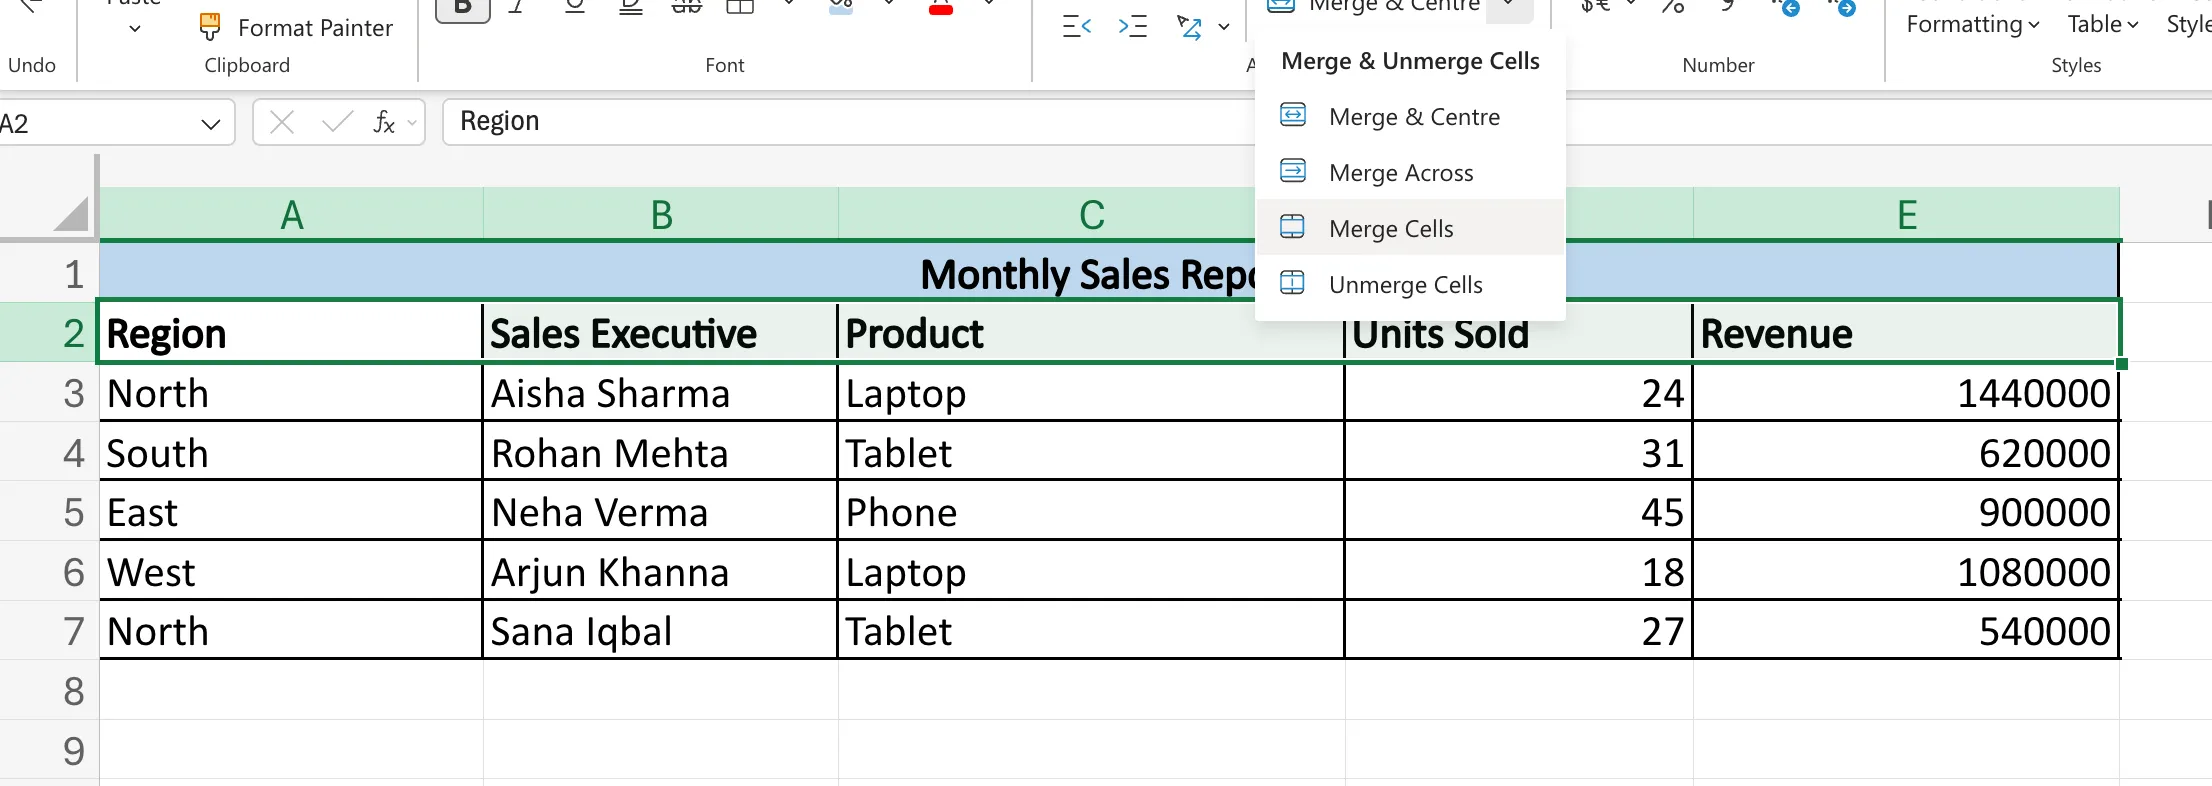
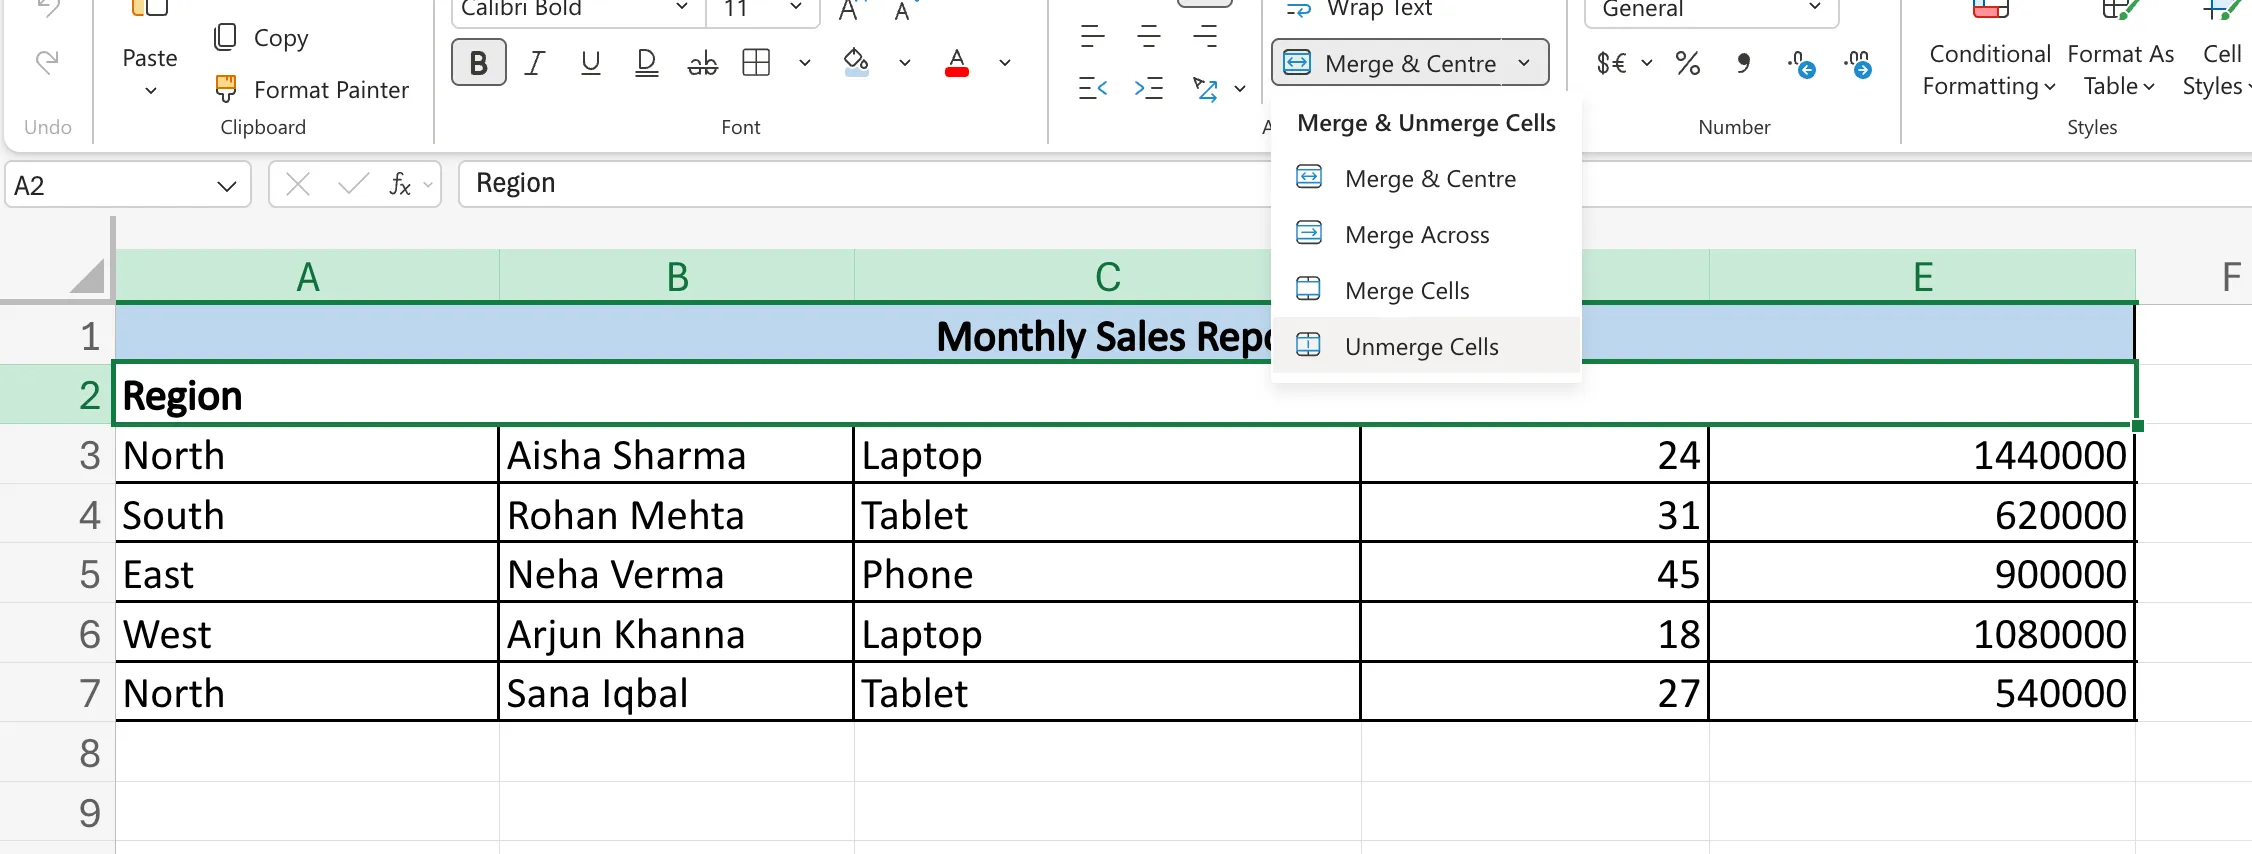
Excel gives you more than one way to merge cells, which is helpful because not every layout problem needs the same treatment. All these options sit under the Merge & Center dropdown in the Home tab, and this is usually where most people begin their grand and occasionally reckless merging journey.
Merge & Center
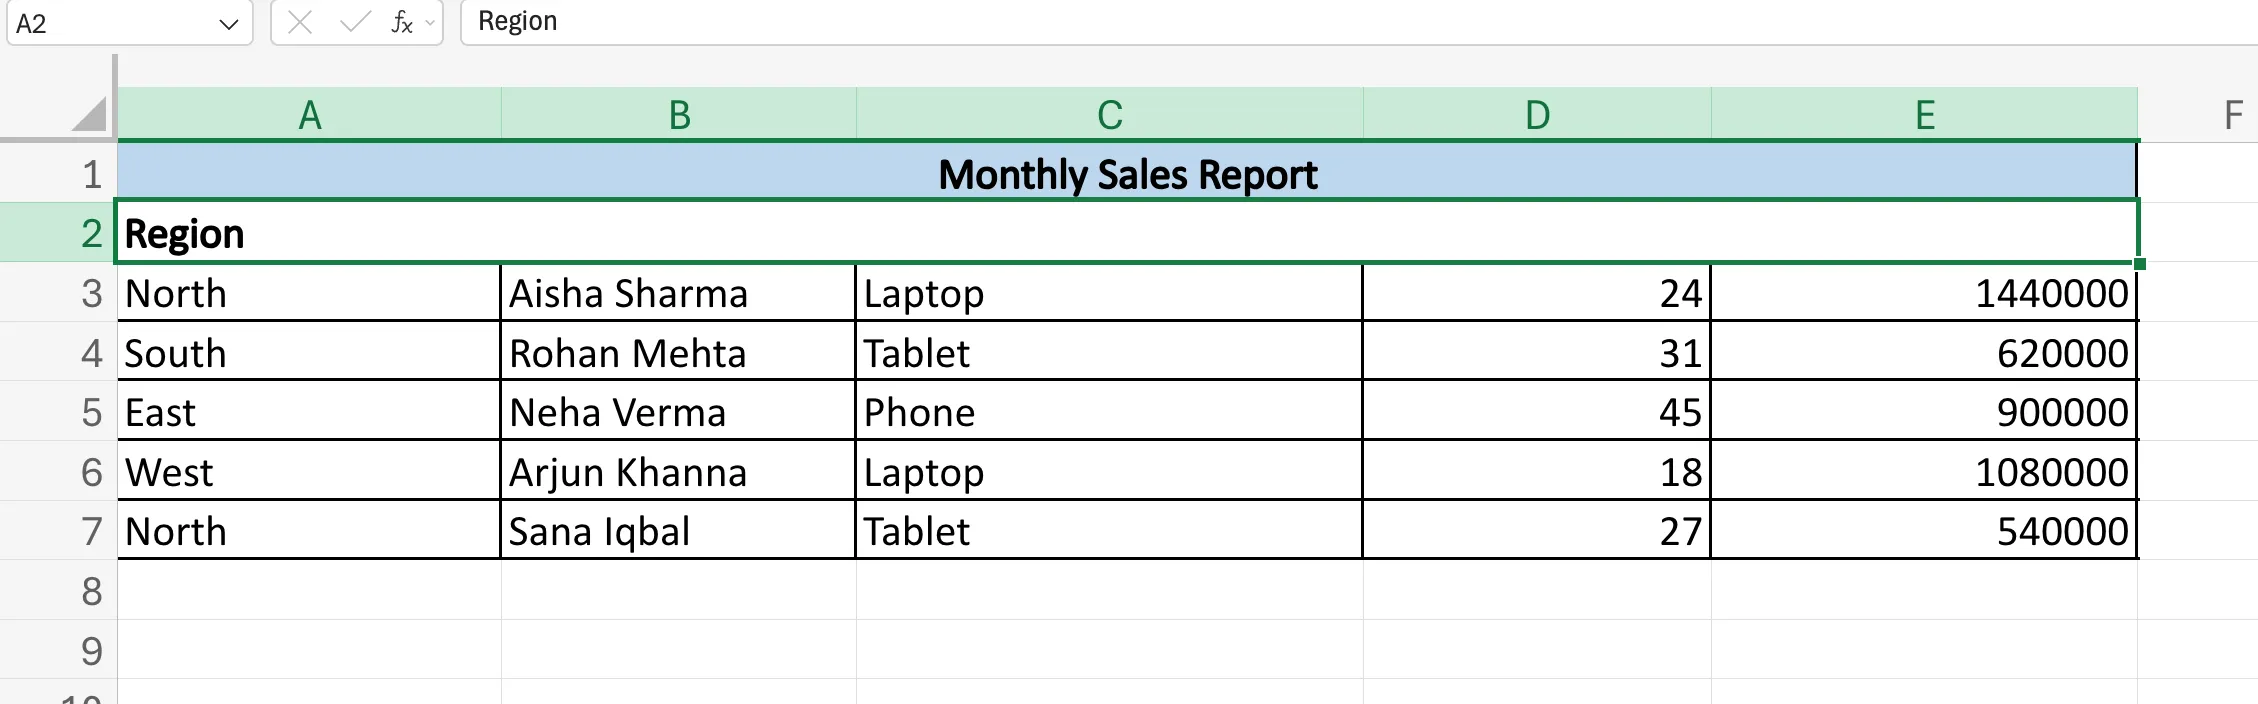
This is the one most people know. It combines the selected cells into one larger cell and then centres the content within it. So if you want a title to stretch neatly across a table and sit right in the middle like it owns the place, this is the option you use.
This is the function that we have seen in the examples above. It is the most visually polished merge option, which is why it tends to get overused.
Merge Across
This one is a little different. Instead of merging one large rectangular selection into a single giant cell, Excel merges the cells row by row across the selected range.
For example, if you select A1:C3 and choose Merge Across, Excel will create:
- one merged cell from A1:C1
- one merged cell from A2:C2
- one merged cell from A3:C3
So it merges horizontally across each row, not the whole block together. Check it out in the example below:
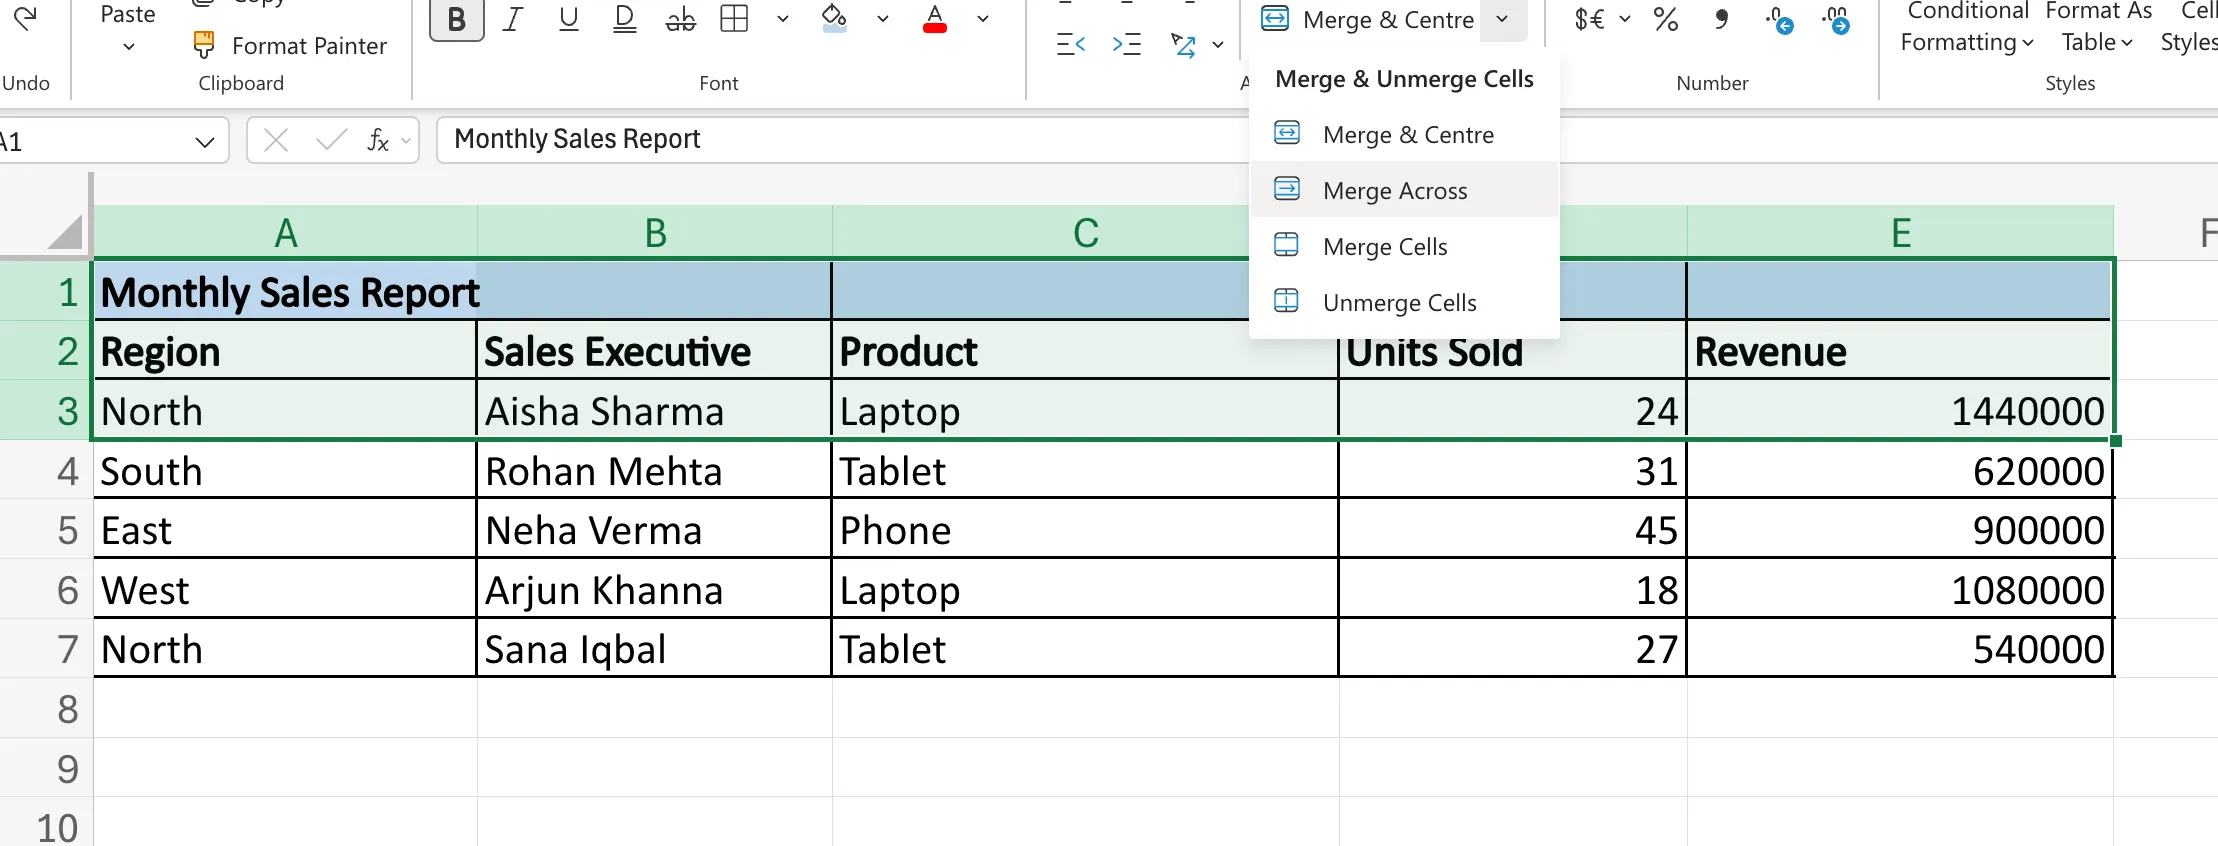
Merge Cells
This option simply merges the selected cells into one larger cell, but does not centre the content automatically. The text stays aligned according to its original formatting. This is useful if you want the merge effect without forcing everything into the centre.
Notice the difference in the merging of cells in Row 2, as compared to Row 1, in the images below.
Unmerge Cells
As the name suggests, this breaks a merged cell back into individual cells. But do not expect Excel to suddenly restore all the old values like a guilty conscience kicking in. Once cells are merged, only the content from the top-left cell survives. When you unmerge, that content remains in the top-left cell, while the rest comes back empty.
Note how Excel unmerges the cells in Row 2 but does not bring back the values of the other cells back in the images below.
Now that the different merge options are clear, let us see how to actually use them inside Excel without clicking random buttons and hoping for the best.
How to Merge Cells in Excel
Now that the options are clear, let us get to the actual process. Thankfully, Excel does not make merging difficult. The feature is easy to use. The only dangerous part is what people do after using it.
Using the Ribbon
This is the most common method.
Start by selecting the adjacent cells you want to merge. Then go to the Home tab. In the Alignment group, you will see the Merge & Centre button. Click the dropdown next to it, and Excel will show you all the merge options we just discussed:
- Merge & Center
- Merge Across
- Merge Cells
- Unmerge Cells
Pick the one you need, and Excel will apply it instantly.
So if you want to create a report title across A1:D1, simply select those cells and click Merge & Centre. Excel will combine them into one larger cell and place the text in the middle.
Using Format Cells
There is another route as well, for those who enjoy taking the slightly longer but still perfectly valid road.
Select the cells you want to merge and press Ctrl + 1 to open the Format Cells box. Go to the Alignment tab, and under the text control options, tick Merge cells. Then click OK.
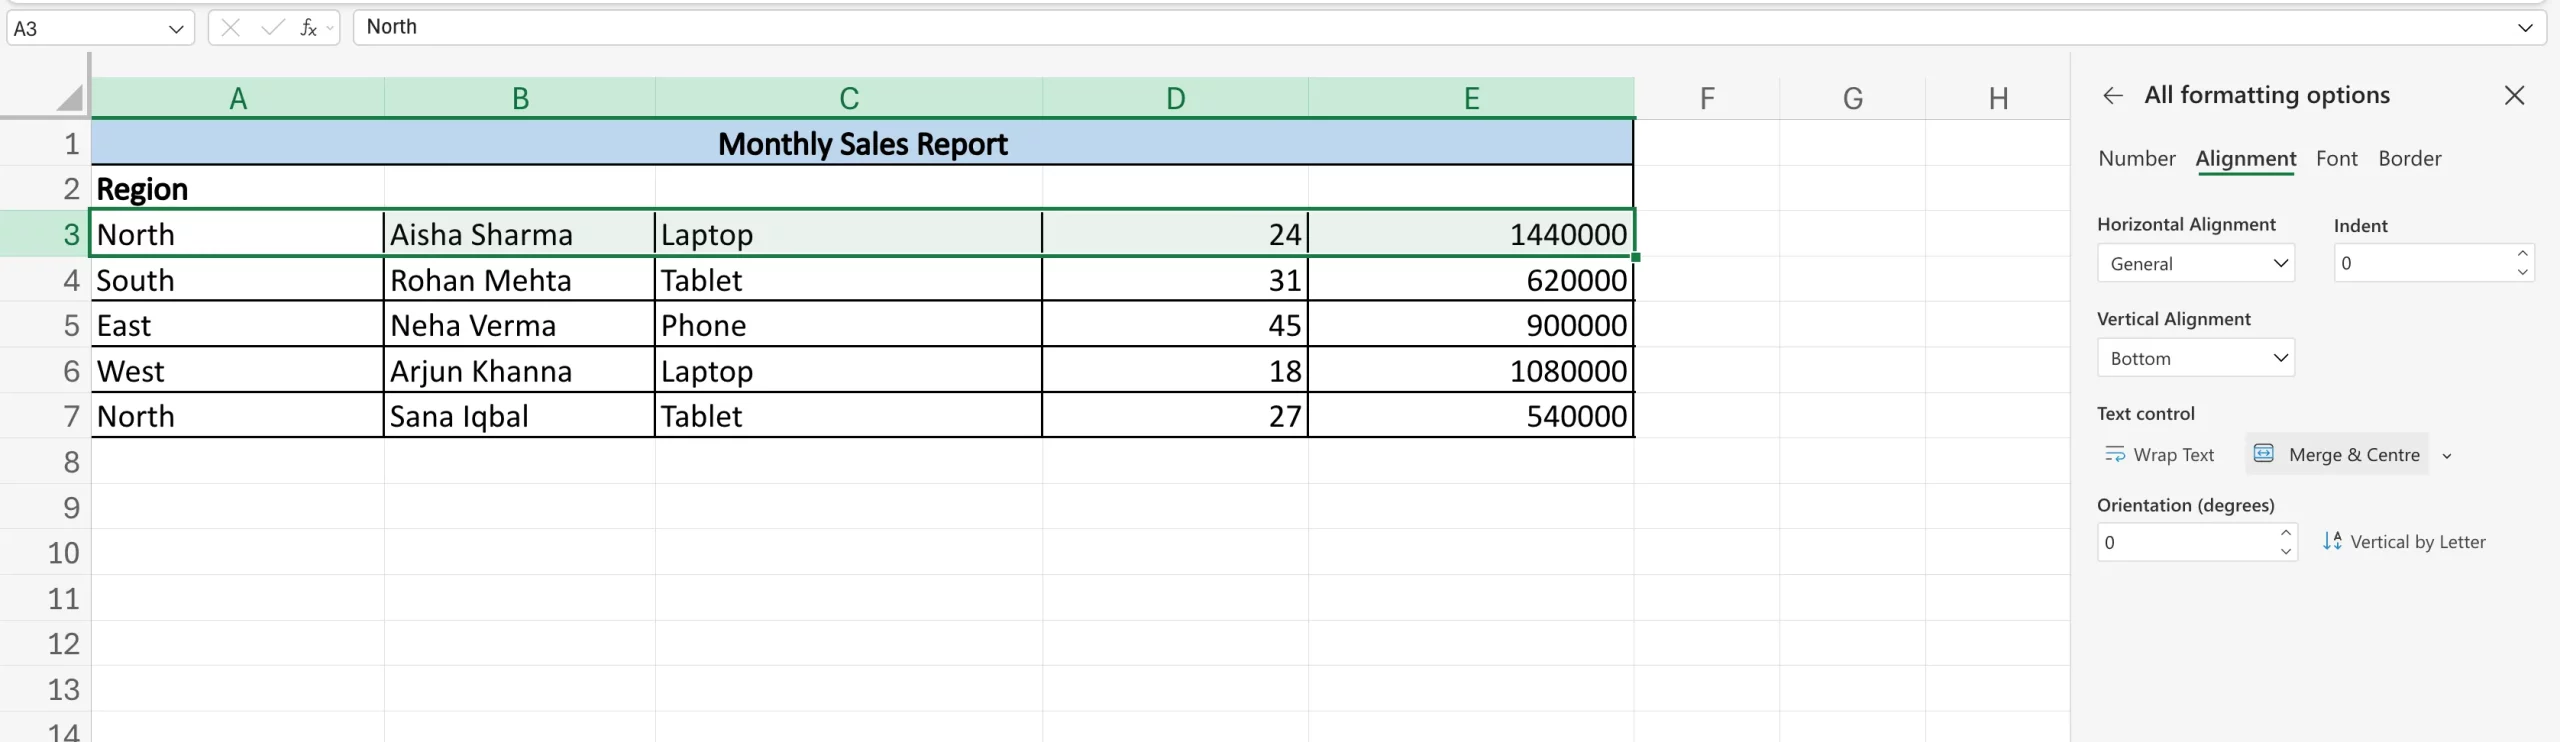
This method merges the selected cells, but it does not automatically centre the text like Merge & Center does. So if you want both merging and centring, you may still need to adjust the alignment separately.
That covers the “how”. Now comes the part that trips people up most often: what exactly happens to the data inside those cells once you merge them.
What Happens to Data When You Merge Cells?
This is the part you absolutely need to know before using merge too casually.
When Excel merges multiple cells, it keeps only the content of the top-left cell and removes everything else. Yes, removes! Not stores somewhere secretly. Not keeps in reserve in case you regret your decision five minutes later. Just removes it.
So suppose:
A1 contains Monthly
B1 contains Sales
C1 contains Report
If you merge A1:C1, Excel will keep only Monthly. The contents of B1 and C1 will be lost.
That is exactly why merging should never be confused with combining text or values. If your goal is to visually create one larger heading area, Merge works fine. But if your goal is to bring together the contents of multiple cells, merge is the wrong tool entirely.
This also explains why Excel gives users so much pushback around merged cells. The feature is designed for layout, not for preserving or transforming data. And once you understand that, the next obvious question becomes: what do people even mean when they say column merging in Excel?
Merging vs Combining in Excel
This is where a lot of Excel confusion begins. People often say they want to “merge columns,” but what they actually want may be one of two very different things. One is a formatting action, and the other is a data action. Excel treats them very differently, and so should you.
Merging Cells Across Columns
This is the version we have been discussing so far.
Here, you select adjacent cells across columns and turn them into one larger cell. So if you merge A1:D1, Excel creates a single merged cell that can be used for a title, label, or section heading. This is purely about layout and presentation.
You are not combining the values from four columns into one meaningful output. You are simply creating one larger visual cell that stretches across those columns.
That is why this type of merging is useful for:
- report titles
- dashboard headings
- section labels
- forms and printable layouts
My suggestion – use Merge before you enter any data into the cells.
But again, if you don’t, the important caveat remains the same: Excel only keeps the content from the top-left cell.
Combining Values from Multiple Columns
This is the second meaning people often intend when they say “column merging,” even though Excel does not treat it as merging at all.
Suppose:
column A contains the first name
column B contains the last name
Now if you want a full name in column C, you are not trying to create one larger visual cell. You are trying to bring together the contents of two different cells into one usable result. That is a completely different task.
In this case, the goal is not formatting, but data preparation. You want Excel to preserve the values from both columns and create a combined output from them. This is commonly done when working with names, addresses, labels, IDs, or any dataset where information from multiple columns needs to be brought together.
So while people casually call this “merging columns,” what they really mean is combining values. And unlike cell merging, this process does not discard data. It creates a new result using the contents of multiple cells.
The distinction is simple:
- Merging changes how cells look
- Combining changes how cell values are brought together
And since the second task is a very common one in Excel, the next thing we should understand is how to actually combine values properly.
How to Combine Values in Excel
Now that the difference is clear, let us look at how combining actually works.
Unlike merging, combining values in Excel does not change the cell layout. Instead, it takes the contents of two or more cells and brings them together into one output cell. This is the method you use when you want to create full names, full addresses, custom labels, joined IDs, or any other combined result from separate columns.
Using the Ampersand (&) Operator
This is the simplest and most commonly used method.
Suppose:
A2 contains John
B2 contains Smith
If you want the full name in C2, you can use:
=A2&” “&B2
Here, the & operator joins the values from both cells, while ” ” adds a space between them. Without that space, Excel would simply return JohnSmith, which may be technically correct but socially unacceptable.
This method is quick, readable, and perfectly fine for most basic combining tasks.
Using CONCAT
Excel also gives you a dedicated function for joining values.
Using the same example, you can write:
=CONCAT(A2,” “,B2)
This does the same job as the & operator, but in function form. Some users prefer it because it looks cleaner when combining multiple elements together.
Using TEXTJOIN
This is the more flexible option, especially when you are combining a larger range of cells.
For example:
=TEXTJOIN(” “,TRUE,A2:B2)
Here:
- ” ” tells Excel to use a space as the separator
- TRUE tells it to ignore empty cells
- A2:B2 is the range being combined
This becomes especially useful when some cells may be blank, and you do not want awkward extra spaces or separators showing up in the result.
So, if merging is the formatting route, combining is the data route. One changes how a sheet looks, while the other changes how information is brought together. And now that we have both sides of the confusion sorted, let us move to the part that really makes Excel users sigh: the problems caused by merged cells.
Problems with Merged Cells in Excel
This is the part where Excel stops being polite and starts reminding you that formatting choices have consequences.
Merged cells may look neat on the surface, but the moment they enter an actual working dataset, they begin to create friction. And the annoying part is that the friction usually shows up only when you are already in the middle of something important, like sorting a table, applying a filter, or copying a formula down a large range.
Sorting Problems
Merged cells and sorting are not exactly best friends.
If your data range contains merged cells, Excel may refuse to sort it properly and throw an error saying the merged cells need to be the same size. This usually happens because Excel expects a clean rectangular structure when sorting data, and merged cells disrupt that structure.
So if you are working with anything that needs regular sorting, merged cells are best kept far away from it.
Filtering Problems
Filtering runs into similar issues.
A filter works best when each column has a clear header and each row follows a consistent structure. Merged cells interrupt that pattern, which can make filtering awkward or unreliable. Even if Excel allows the filter to run, the sheet often becomes harder to read and manage afterward.
Formula and Reference Issues
Merged cells also make formulas more awkward than they need to be.
Once cells are merged, Excel treats the merged area as the top-left cell. That means if A1:C1 is merged, Excel will treat the whole area as A1. This can make formulas less intuitive, especially for users who expect B1 or C1 to still behave like separate cells.
So while merged cells look like one large block visually, formula logic still clings to that top-left reference behind the scenes.
Problems in Excel Tables
If you are working with structured data, tables, or anything meant for analysis, merged cells are usually a terrible idea.
Excel tables are designed to be clean, uniform, and sortable. Merged cells do not fit well into that system. They interfere with the structure that tables rely on, which is why most people avoid merging entirely inside raw data tables.
Copy-Paste Issues
Copying and pasting around merged cells can also become unnecessarily dramatic.
If the destination range does not match the merged structure of the source, Excel may refuse the paste, misalign the content, or simply make the whole thing more confusing than it needed to be. This is one of those problems that feels minor until you are doing repetitive sheet work and suddenly every paste starts misbehaving.
Resizing and Navigation Issues
Even simple tasks like resizing rows, adjusting columns, or moving through cells with the arrow keys can feel clumsier with merged cells around.
Because the sheet no longer follows a perfectly regular grid, small layout tasks start becoming oddly irritating. And that is usually the point where many users realise that merged cells looked far more harmless than they actually were.
So yes, merging has its place, but mostly in titles, labels, and presentation-heavy sheets. The moment you start using it in active datasets, Excel begins pushing back. Which is why, in many situations, a better option is to get the same visual effect without actually merging anything at all.
Better Alternative to Merging: Centre Across Selection
If your main goal is simply to make a title sit nicely across multiple columns, there is a much better option than merging: Centre Across Selection.
This is one of those quietly brilliant Excel features that does the visual job of merging without creating the structural mess that merged cells often bring along. Your text appears centred across the selected range, but the cells themselves remain separate. So the sheet keeps its proper grid structure, and Excel has far less to complain about later.
In other words, it gives you the clean look people usually want from merging, without the side effects that make sorting, filtering, and formulas awkward.
How to Use Centre Across Selection
Start by selecting the cells across which you want the text to appear centred.
Then:
- press Ctrl + 1 to open the Format Cells box
- go to the Alignment tab
- under Horizontal, choose Center Across Selection
- click OK
That is it.
The text will now appear centred across the selected cells, but unlike a merged range, each cell will still exist independently in the background. This makes it a much safer choice for headings in sheets where structure still matters.
So if merging is the flashy solution, Centre Across Selection is the mature, dependable one that quietly saves you trouble later.
Conclusion
Cell merging in Excel is one of those features that looks simple, feels useful, and then casually creates chaos if used in the wrong place.
At its best, it is a formatting tool that helps create cleaner titles, section headers, and presentation-friendly layouts. At its worst, it interferes with sorting, filtering, formulas, tables, and basic sheet navigation. That is why the real trick is not just knowing how to merge cells, but knowing when not to.
And perhaps the biggest takeaway from this guide is that merging and combining are not the same thing. If you want a better layout, merging can help. If you want to bring together actual values from multiple cells, combining is the route to take.
So use merging where presentation matters, avoid it where data structure matters, and whenever possible, let Excel keep its grid intact. It tends to behave better when it is not emotionally disturbed.