Everybody has witnessed chatbots in action; some are impressive, while others are annoying. However, what if you could create one that is genuinely intelligent, well-organized, and simple to integrate with your own application? We’ll use two potent tools in this article to build a chatbot from scratch:
- In addition to LLMs, LangGraph facilitates the management of organized, multi-step workflows.
- The chatbot can be exposed as an API using Django, a scalable and clean web platform.
We’ll begin with a brief setup, which involves using Pipenv to install dependencies and cloning the GitHub repository. The chatbot’s logic will then be defined using LangGraph, a Django-powered API will be built around it, and a basic frontend will be wired up to communicate with it.
You’re in the proper place whether you want to learn how LangGraph works with a real-world backend or if you wish to set up a simple chatbot.
Table of contents
Quickstart: Clone & Set Up the Project
Let’s start by cloning the project and setting up the environment. Make sure you have Python 3.12 and pipenv installed on your system. If not, you can install pipenv with:
pip install pipenvNow, clone the repository and move into the project folder:
git clone https://github.com/Badribn0612/chatbot_django_langgraph.git

cd chatbot_django_langgraph
Let’s now install all the requirements using pipenv.
pipenv installNote: If you get an error saying you do not have Python 3.12 in your system, use the following command:
pipenv --python path/to/python

pipenv install
To know the path of your Python, you can use the following command
which python (linux and windows)

which python3 (mac)
To activate this environment, use the following command:
pipenv shellNow that our requirements are set, let’s set up our environment variables. Use the following command to create a .env file.
touch .envAdd your API keys to the .env file
GEMINI API KEY: Access to sophisticated AI models for natural language processing, image creation, and other AI-driven functions is made possible by the Google Gemini AI API Key, which is used to authenticate and connect to Google Gemini AI services.
# Google Gemini AI

GOOGLE_API_KEY=your_google_api_key_here
GROQ API KEY: This key grants access to Groq’s high-performance AI hardware and software, facilitating the use of open-source LLMs like Llama.
# Groq

GROQ_API_KEY=your_groq_api_key_here
TAVILY API KEY: By connecting to Tavily’s search platform, this key makes it possible to integrate search features, retrieve search results, and access insights from multiple data sources via their API.
# Tavily Search
TAVILY_API_KEY=your_tavily_api_key_here
Generate a Google API Key from Google AI Studio, Generate a Groq API Key from Groq Console, and Get your Tavily key from Tavily Home.
Now that the setup is done, let’s run the following commands (make sure you activate your environment)
python manage.py migrate

python manage.py runserver
This should start the server
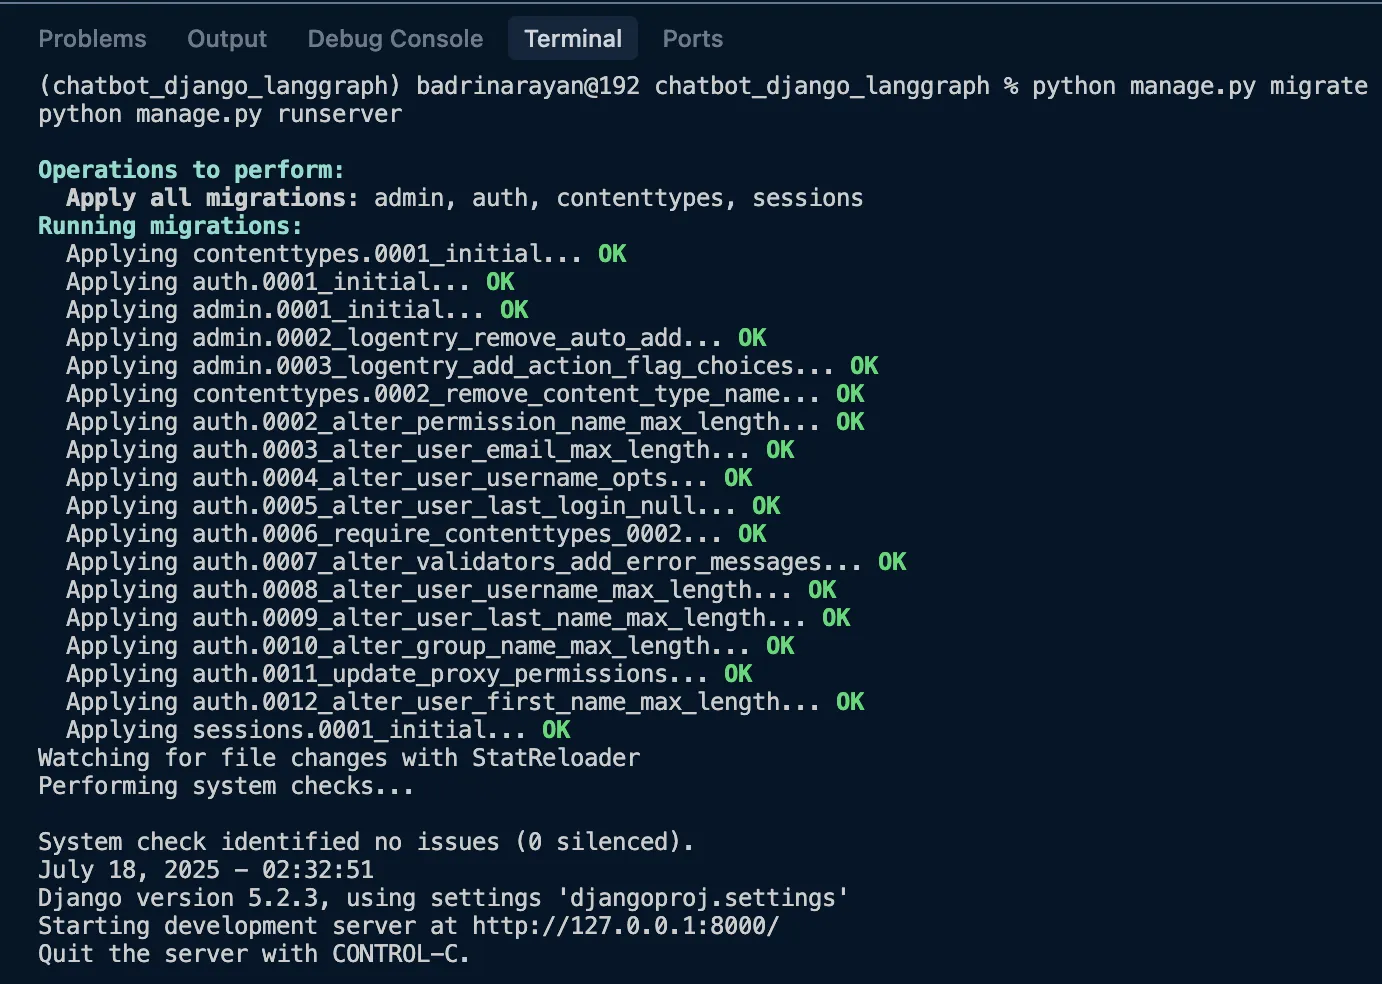
Click on the http://127.0.0.1:8000/ link where the application is running.
Designing the Chatbot Logic with LangGraph
Now, let’s dive into designing the chatbot logic. You might be wondering, why LangGraph? I picked LangGraph because it gives you the flexibility to build complex workflows tailored to your use case. Think of it like stitching together multiple functions into a flow that actually makes sense for your application. Below, let’s discuss the core logic. The entire code is available on Github.
1. State Definition
class State(TypedDict):

    messages: Annotated[list, add_messages]
So this state schema is responsible for the chatbot. It will primarily keep track of the message history if your Graph is in a loop; else, it will have input with history of messages and append the response from LLM to the previous history.
2. Initialize LangGraph
graph_builder = StateGraph(State)The above line of code will initialize the graph. This instance of stategraph is responsible for maintaining the flow of the chatbot (conversation flow).
3. Chat Model with Fallbacks
llm_with_fallbacks = init_chat_model("google_genai:gemini-2.0-flash").with_fallbacks(

    [init_chat_model("groq:llama-3.3-70b-versatile")]

)
This basically will make Gemini 2.0 Flash as the primary LLM and Llama 3.3 70B as the fallback. If Google’s servers are overloaded or when the API hits rate limits, it will start using Llama 3.3 70B.
4. Tool Integration
tool = TavilySearch(max_results=2)

llm_with_tools = llm_with_fallbacks.bind_tools([tool])
We are adding search tools to the LLM as well. This will be used when the LLM feels it lacks knowledge of the query. It will basically search for information using the tool, retrieve relevant information, and respond to the query based on the same.
5. Chatbot Node Logic
def chatbot(state: State):

    return {"messages": [llm_with_tools.invoke(state["messages"])]}
This is the function responsible for invoking the LLM and getting the response. This is exactly what I was talking about. With LangGraph, you can build a graph made up of multiple functions like this. You can branch, merge, and even run functions (called nodes in LangGraph) in parallel. And yes, I almost forgot, you can even create loops within the graph. That’s the kind of flexibility LangGraph brings to the table.
6. ToolNode and Conditional Flow
tool_node = ToolNode(tools=[tool])

graph_builder.add_conditional_edges("chatbot", tools_condition)

graph_builder.add_edge("tools", "chatbot")
We’ll create a node for the tool so that whenever the chatbot figures out it needs to use it, it can simply invoke the tool node and fetch the relevant information.
7. Graph Entry and Exit
graph_builder.add_edge(START, "chatbot")

graph = graph_builder.compile()
from IPython.display import Image, display
display(Image(graph.get_graph().draw_mermaid_png()))
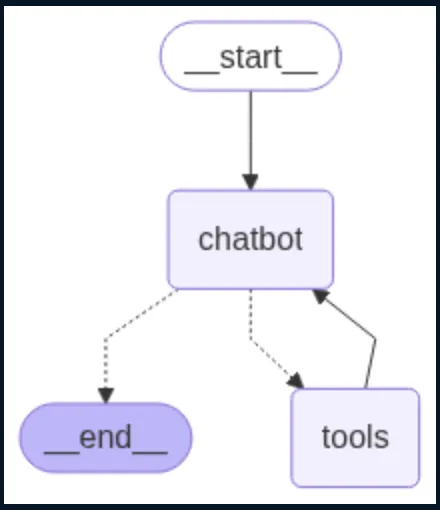
The preceding code gives the desired visual.
This LangGraph setup allows you to build a structured chatbot that can handle conversations, call tools like web search when needed, and fall back to alternative models if one fails. It’s modular, easy to extend. Now that the LangGraph part is done, let’s jump to how to create an API for our chatbot with Django.
Building the API with Django
You can use this guide to learn how to make an app if you’re new to Django. For this undertaking, we have established:
- Project: djangoproj
- App: djangoapp
Step 1: App Configuration
In djangoapp/apps.py, we define the app config so that Django can recognize it:
from django.apps import AppConfig

class DjangoappConfig(AppConfig):

    default_auto_field = "django.db.models.BigAutoField"

    name = "djangoapp"

Now register the app inside djangoproj/settings.py:

INSTALLED_APPS = [

    # default Django apps...

    "djangoapp",

]
Step 2: Creating the Chatbot API
In djangoapp/views.py, we define a simple API endpoint that handles POST requests:
from django.http import JsonResponse

from django.views.decorators.csrf import csrf_exempt

import json

from chatbot import get_chatbot_response

@csrf_exempt

def chatbot_api(request):

    if request.method == "POST":

        try:

            data = json.loads(request.body)

            messages = data.get("messages", [])

            user_query = data.get("query", "")

            messages.append({"role": "user", "content": user_query})

            response = get_chatbot_response(messages)

            serialized_messages = [serialize_message(msg) for msg in response["messages"]]

            return JsonResponse({"messages": serialized_messages})

        except Exception as e:

            return JsonResponse({"error": str(e)}, status=500)

return JsonResponse({"error": "POST request required"}, status=400)- This view accepts user input, passes it to the LangGraph-powered chatbot, and returns the response.
@csrf_exemptis used for testing/demo purposes to allow external POST requests.
Step 3: Hooking the API to URLs
In djangoproj/urls.py, wire up the view to an endpoint:
from django.urls import path

from djangoapp.views import chatbot_api, chat_interface

urlpatterns = [

    path('', chat_interface, name='chat_interface'),

    path('api/chatbot/', chatbot_api, name='chatbot_api'),

]
Now, sending a POST request to /api/chatbot/ will trigger the chatbot and return a JSON response.
Step 4: Serving a Basic Chat UI
To show a simple interface, add this to djangoapp/views.py:
from django.shortcuts import render

def chat_interface(request):

    return render(request, 'index.html')
This view renders index.html, a basic chat interface.
In djangoproj/settings.py, tell Django where to look for templates:
TEMPLATES = [

    {

        "BACKEND": "django.template.backends.django.DjangoTemplates",

        "DIRS": [BASE_DIR / "templates"],

        # ...

    },

]
We’ve used Django to transform our LangGraph chatbot into a functional API with just a few lines of code, and we’ve even included a basic user interface for interacting with it. Clean, modular, and simple to expand, this arrangement is ideal for both real-world projects and demos.
Following is the working demo of the chatbot:
Features You Can Build On Top
Here are some of the features that you can build on top of the application:
- Set up system prompts and agent personas to guide behavior and responses.
- Create multiple specialized agents and a routing agent to delegate tasks based on user input.
- Plug in RAG tools to bring in your own data and enrich the responses.
- Store conversation history in a database (like PostgreSQL), linked to user sessions for continuity and analytics.
- Implement smart message windowing or summarization to handle token limits gracefully.
- Use prompt templates or tools like Guardrails AI or NeMo for output validation and safety filtering.
- Add support for handling images or files, using capable models like Gemini 2.5 pro or GPT-4.1.
Conclusion
And that’s a wrap! We just built a fully functional chatbot from scratch using LangGraph and Django, complete with a clean API, tool integration, fallback LLMs, and more. The best part? It’s modular and super easy to extend. Whether you’re looking to build a smart assistant for your own product, experiment with multi-agent systems, or just get your hands dirty with LangGraph, this setup gives you a solid starting point. There’s a lot more you can explore, from adding image inputs to plugging in your own knowledge base. So go ahead, tweak it, break it, build on top of it. The possibilities are wide open. Let me know what you build.
Frequently Asked Questions
Q1. What tools are used to build the chatbot described in this article?
A. The chatbot uses LangGraph for logic orchestration, Django for the API, Pipenv for dependency management, and integrates LLMs like Gemini and Llama 3, plus the Tavily Search tool.
Q2. How does the chatbot handle failures from the primary LLM?
A. It uses Gemini 2.0 Flash as the primary model and automatically falls back to Llama 3.3 70B if Gemini fails or reaches rate limits.
Q3. What is the role of LangGraph in the chatbot’s logic?
A. LangGraph structures the chatbot’s conversation flow using nodes and edges, allowing for loops, conditions, tool use, and LLM fallbacks.
Q4. How do you run the chatbot locally after setup?
A. Set environment variables, run python manage.py migrate, then python manage.py runserver, and visit http://127.0.0.1:8000/.
Q5. What additional features can be built on top of this chatbot?
A. You can add agent personas, database-backed chat history, RAG, message summarization, output validation, and multimodal input support.
Data science Trainee at Analytics Vidhya, specializing in ML, DL and Gen AI. Dedicated to sharing insights through articles on these subjects. Eager to learn and contribute to the field's advancements. Passionate about leveraging data to solve complex problems and drive innovation.