Ever since the release of the original GPT-2 models, OpenAI has recently shared 2 open-source models with the open community. More recently, the release of gpt-oss-20B and gpt-oss-120B marked an exciting step forward, receiving strong feedback from the open-source ecosystem. These models introduced several architectural innovations that make them particularly efficient and capable.
At the same time, large reasoning models like OpenAI’s o3 have shown how generating structured chains of thought can improve response accuracy and quality. However, despite their strengths, current OSS models still face a notable drawback: they struggle with deep reasoning, multi-step logic, and advanced math.
Which is why fine-tuning and alignment are critical. By leveraging reinforcement learning and curated datasets, we can shape OSS models to reason more reliably and avoid biased or unsafe outputs. In this blog, we’ll explore how to fine-tune gpt-oss-20B using a multilingual thinking dataset from Hugging Face, enabling the model to deliver more accurate, logical, and trustworthy results across diverse contexts.
Table of contents
Finetuning LLMs
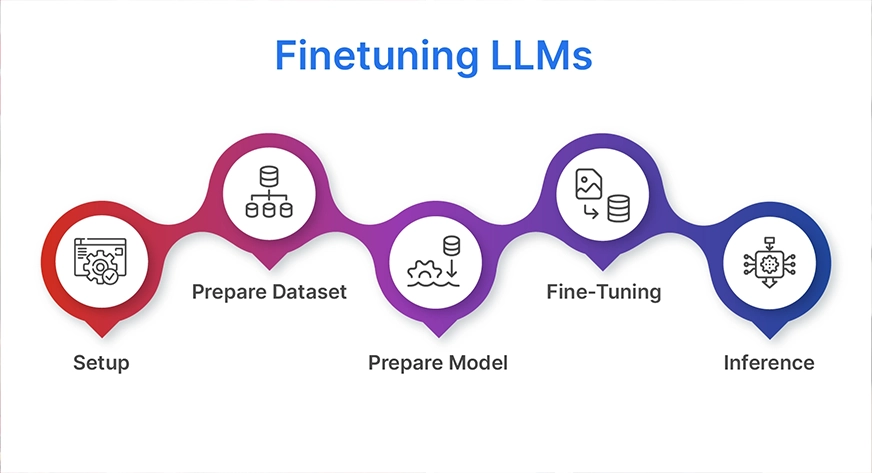
Fine-tuning a large language model (LLM) may sound complex, but the process can be broken down into five clear steps. In this blog, we’ll walk through these stages using gpt-oss-20B and a multilingual thinking dataset from Hugging Face to improve reasoning performance and alignment.
1. Setup
The first step is to install all the necessary libraries and dependencies. This includes frameworks like Hugging Face Transformers, Accelerate, PEFT (Parameter-Efficient Fine-Tuning), TRL, and other utilities that will help us run training efficiently on GPUs.
2. Prepare the Dataset
Next, we’ll download and preprocess the multilingual thinking dataset from Hugging Face. The data needs to be formatted into an instruction-response style, ensuring the model learns step-by-step reasoning across different languages.
3. Prepare the Model
We’ll then load the base gpt-oss-20B model and configure it for fine-tuning. Instead of updating all parameters (which would be extremely resource-intensive), we’ll use LoRA (Low-Rank Adaptation). This memory-efficient technique updates only small adapter weights while keeping the main model frozen.
4. Fine-Tuning
With everything in place, we train the model on our reasoning dataset. During this phase, reinforcement learning techniques can also be applied to align the model’s behavior, reduce biases, and encourage safe, logical outputs.
5. Inference
Finally, we test the fine-tuned model by generating reasoning responses in multiple languages. This allows us to evaluate how well the model handles complex, multi-step logic across diverse linguistic contexts.
The Hardware
The parameters (the weights the model has learnt) are the primary memory-consuming factor when fine-tuning a model. Since each parameter is four bytes, a 20-billion-parameter model already requires around 80 GB of memory just to store the weights in standard 32-bit precision. This amount decreases to about 40 GB or even 10 GB just for the weights if we use smaller formats, such as 16-bit or 4-bit. However, training also requires optimiser states, gradients, and temporary buffers, which add a lot more on top of weights alone.
Beginners find that LoRA or QLoRA fine-tuning is a useful solution. You train only small adapter layers and freeze the original weights rather than updating all 20B parameters. The adapters add very little, and the frozen base model may only require about 10 GB with quantisation (4-bit). Running on a single high-end GPU (such as 48GB or 80GB cards) is feasible because this method typically fits within 30 to 50 GB of GPU memory. LoRA/QLoRA is much more effective and realistic than full fine-tuning, which is why most people working with 20B+ models use it.
In order to understand the entire process of fine-tuning the GPT OSS 20 B model, we will carefully go over each of these steps.
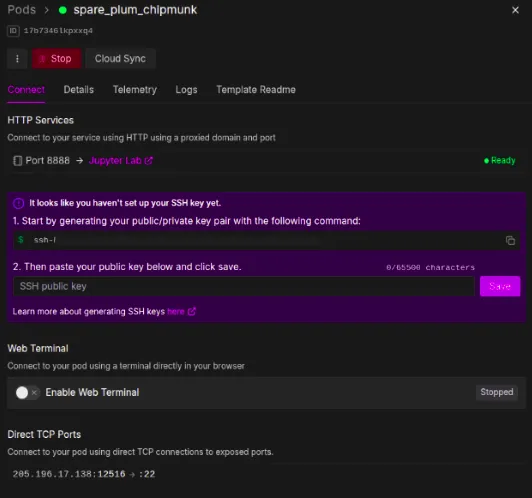
So, Runpod, a GPU supplier, will be used for the hardware configuration. You can access RunPod from the following link: https://console.runpod.io/
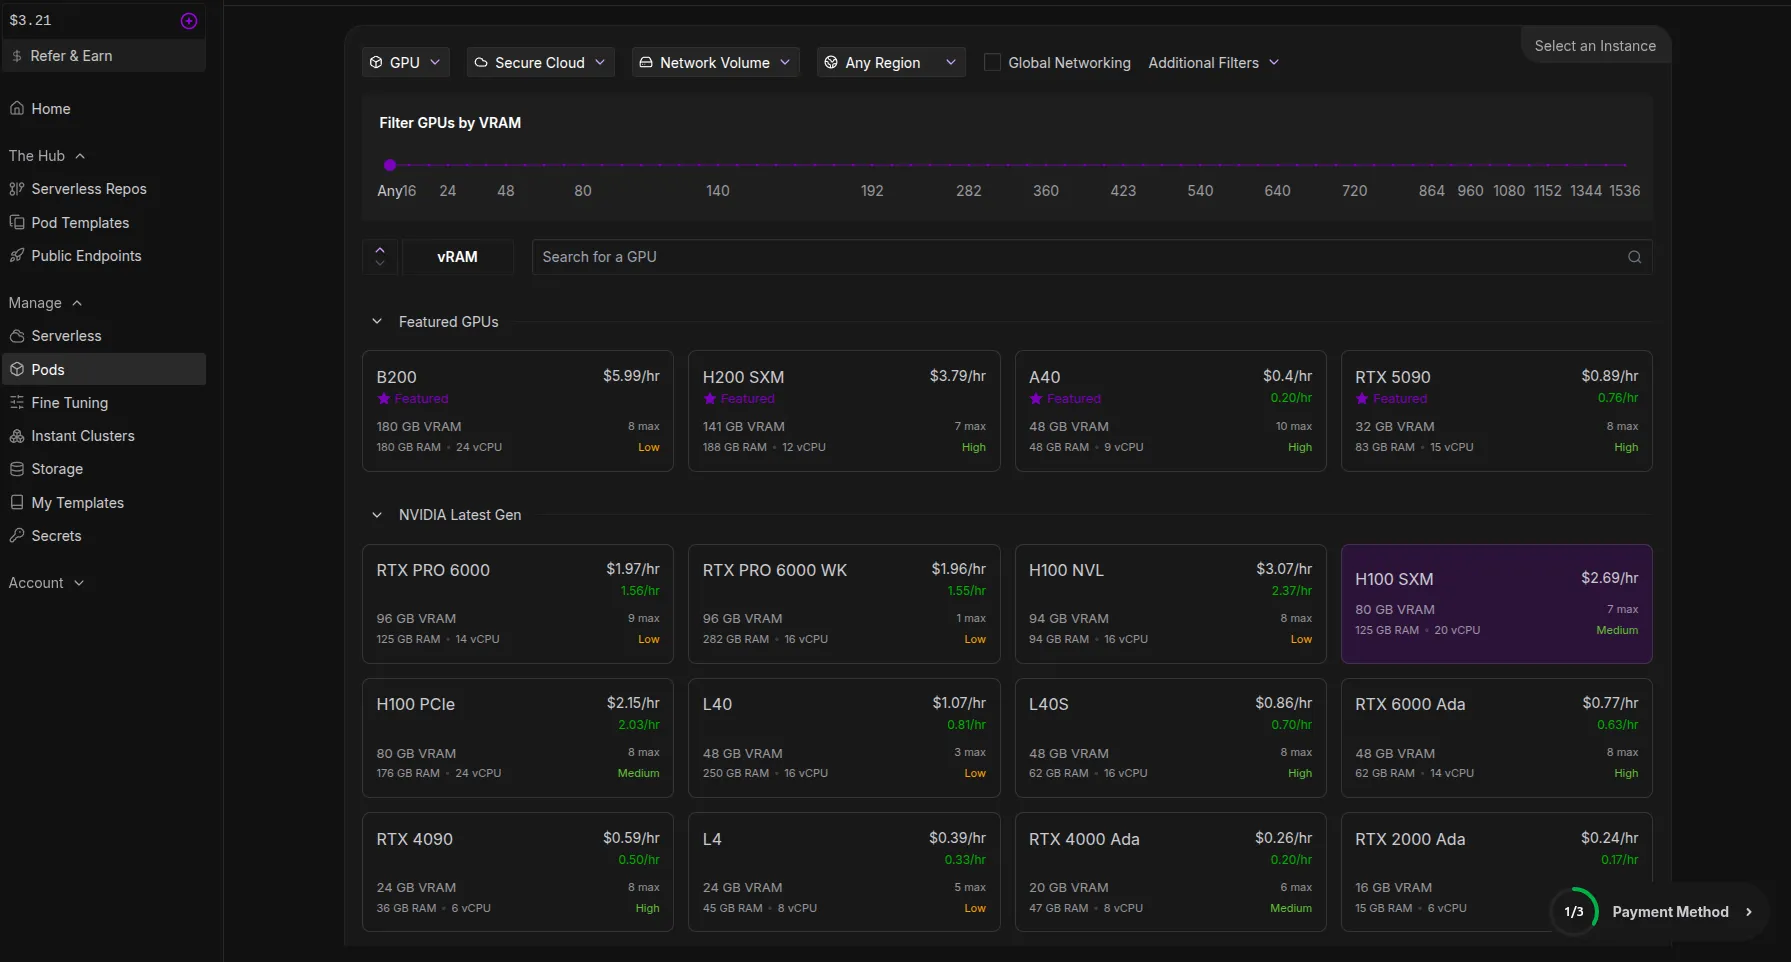
We’ll be using the H100 SXM GPU model, which has 80 GB of VRAM.
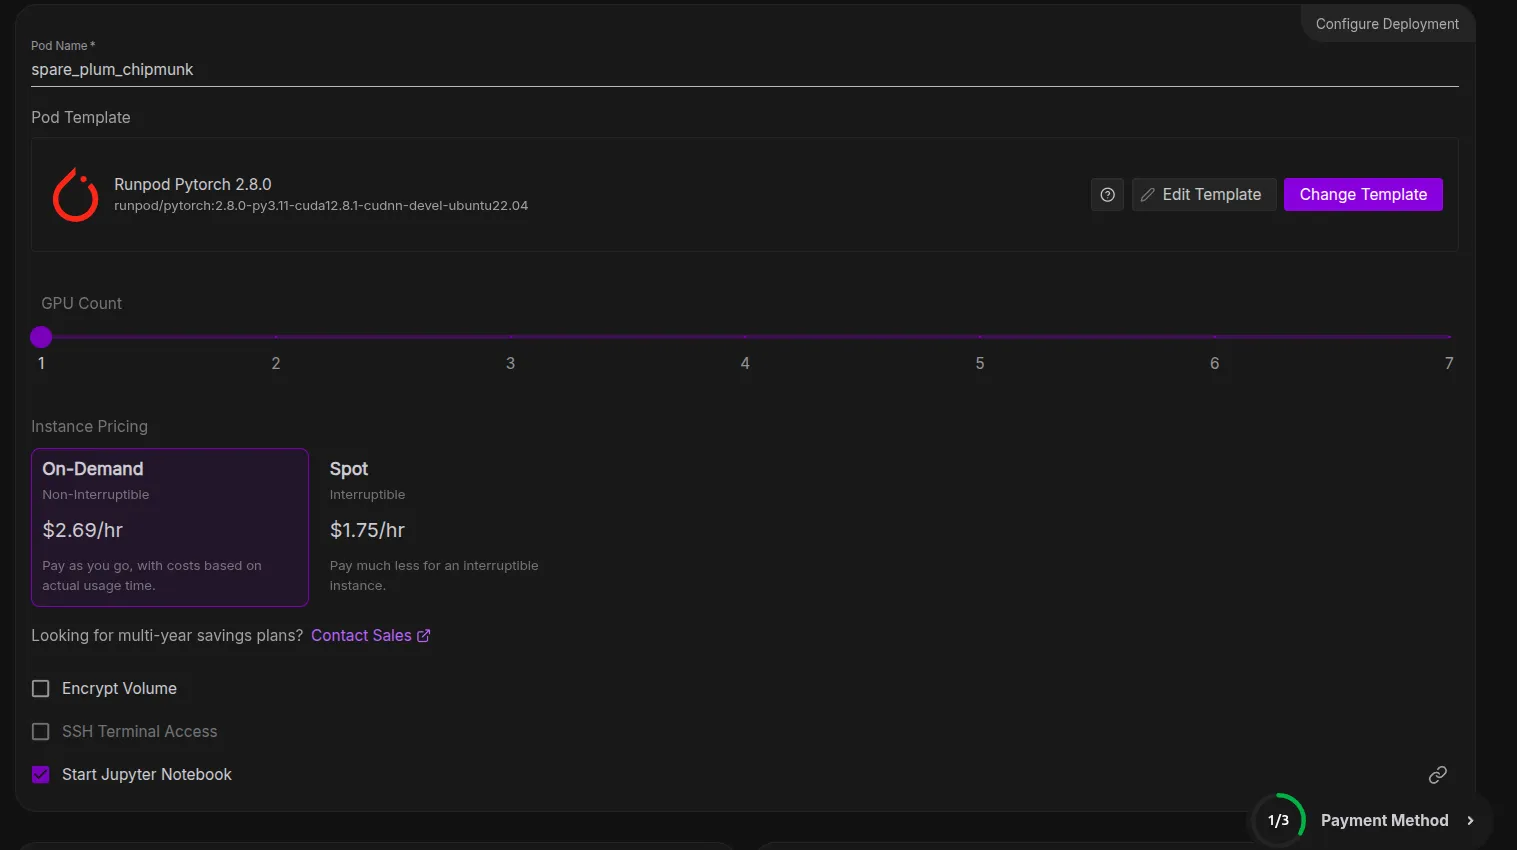
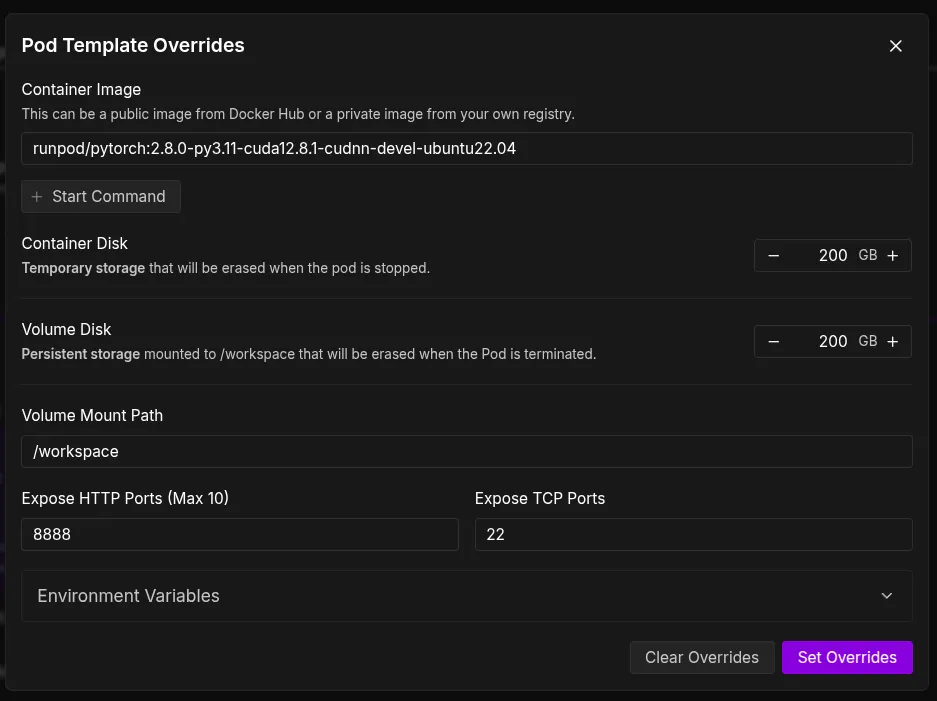
To be safe for our pod environment, we will also increase the size of the Container Disc and Volume Disc to 200 GB in the template.
We can now deploy our pod after overriding these settings, which could take up to two minutes to set up. Next, we can select the Jupyter Notebook option, which will take us to a new tab with a Jupyter notebook environment that is very similar to the ones we work on locally.
Set up for Fine-Tuning
The Jupyter Notebook environment is very easy to use, where we can open ipynb, py, and other types of files along with the terminal.
Step 1: Setup
Before diving into fine-tuning, let’s set up a clean environment to avoid dependency issues. We’ll use uv, a modern Python package manager that makes it easy to handle virtual environments and installations.
Create a Virtual Environment
Open your terminal and run the following commands:
# Install uv if not already installed

pip install uv

# Create a virtual environment

uv venv

# Activate the environment

source .venv/bin/activate
Additionally, if needed, you can run these commands too
apt-get update && apt-get upgrade -y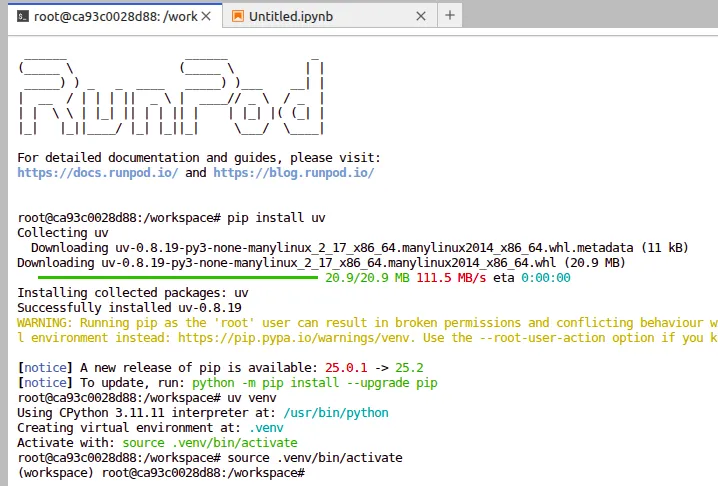
Install the Dependencies
With the virtual environment activated, the next step is to install all the required libraries. These will give us the tools to load the model, apply parameter-efficient fine-tuning, and train effectively on GPUs.
Run the following commands inside your terminal:
# Install PyTorch with CUDA 12.8 support

%pip install torch --index-url https://download.pytorch.org/whl/cu128

# Install Hugging Face libraries and other tools

%pip install "trl>=0.20.0" "peft>=0.17.0" "transformers>=4.55.0" trackio
Here’s what each of these does:
- torch -> The deep learning framework powering our training.
- trl -> Hugging Face’s library for training with reinforcement learning (great for alignment tasks).
- peft -> Parameter-Efficient Fine-Tuning, enabling techniques like LoRA.
- transformers -> Core library for working with LLMs.
- trackio -> Lightweight experiment tracking to monitor training progress.
Once these are installed, we’re ready to move on to dataset preparation.
We will also be logging into our Hugging Face using the access tokens, which we can get from our Profile Settings.
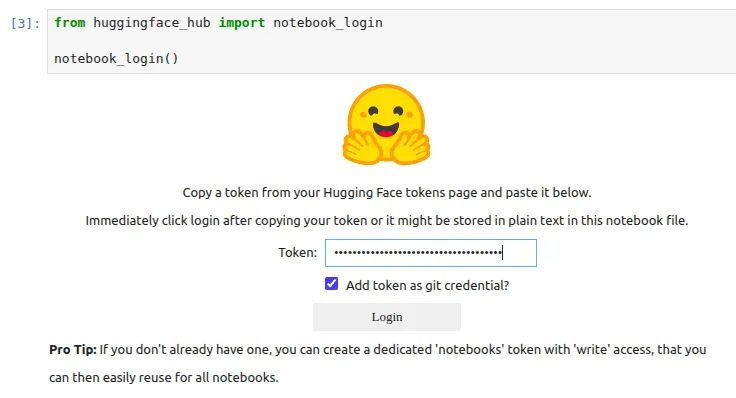
If you get any issues with respect to git, then you can run this command
!git config –global credential.helper storeStep 2: Prepare the Dataset
Earlier, we discussed how the gpt-oss models, despite their efficiency, are not particularly strong in deep reasoning and multi-step logic. To address this, we’ll fine-tune gpt-oss-20B on a specialized dataset that strengthens its reasoning ability.
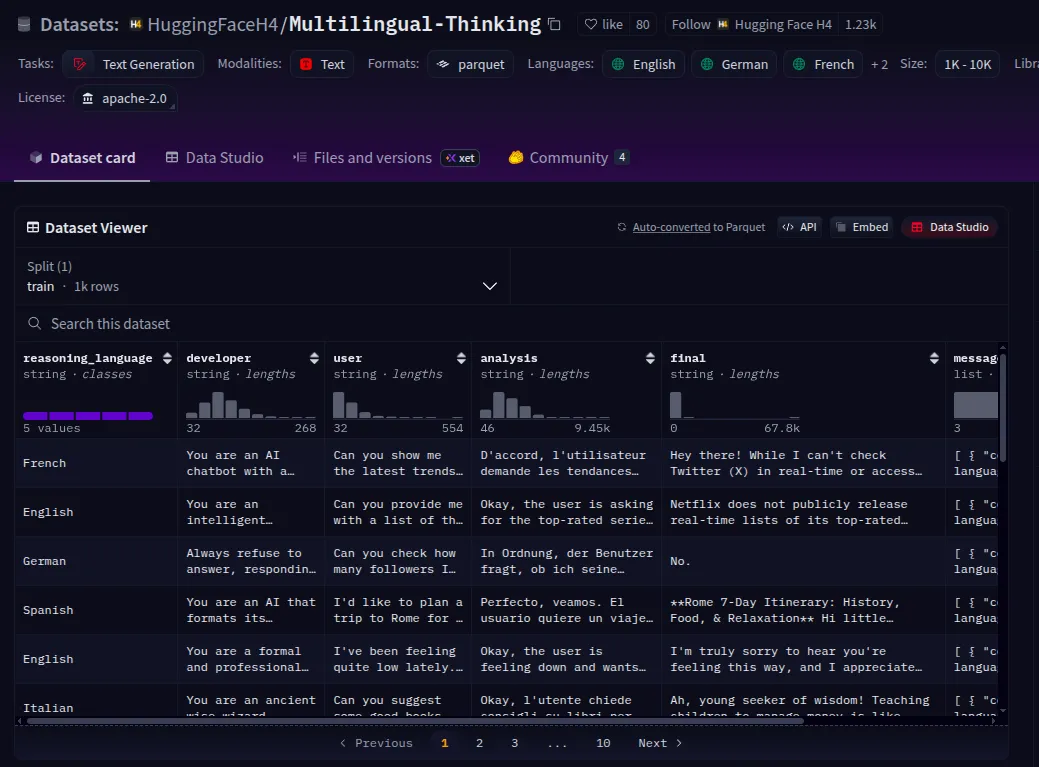
For this, we’ll use the Multilingual Thinking Dataset available on Hugging Face. This dataset is designed to test and train reasoning skills across multiple languages, making it an ideal choice for improving both logical accuracy and cross-lingual generalization.
Downloading the Dataset
We will be using Multilingual-Thinking, which is a reasoning dataset where the chain-of-thought has been translated into several languages, such as French, Spanish, and German. By fine-tuning openai/gpt-oss-20b on this dataset, it will learn to generate reasoning steps in these languages, and thus its reasoning process can be interpreted by users who speak those languages.
We will be using only the messages column of this dataset for our training.
Note:- You can make a dataset on your own, which should be similar to this format and enclosed within a dictionary that has key-value pairs, which can allow the model to understand what the question is and the appropriate answer to this question.
We can fetch the dataset directly using the Hugging Face datasets library:
https://huggingface.co/datasets/HuggingFaceH4/Multilingual-Thinking
from datasets import load_dataset

dataset = load_dataset("HuggingFaceH4/Multilingual-Thinking", split="train")

dataset
This is a small dataset of 1,000 examples, but this is usually more than sufficient for models like openai/gpt-oss-20b, which have undergone extensive post-training.
Step 3: Tokenize and Format the Dataset
Before training, we need to process the dataset into a format the model understands. Since gpt-oss-20B is a chat-style model, we’ll use its chat template to convert the dataset into conversational text that can be tokenized.
Load the Tokenizer
We start by loading the tokenizer of the gpt-oss-20B model:
from transformers import AutoTokenizer

# Load the tokenizer for GPT-OSS-20B

tokenizer = AutoTokenizer.from_pretrained("openai/gpt-oss-20b")
Apply Chat Template
Each example in the multilingual reasoning dataset contains structured messages. We can use the tokenizer’s chat template to convert these into a plain-text conversation that the model can train on:
# Take the first example from the dataset

messages = dataset[0]["messages"]

# Convert structured messages into plain-text conversation

conversation = tokenizer.apply_chat_template(messages, tokenize=False)

print(conversation)
The gpt-oss models were trained on the Harmony response format for defining conversation structures, generating reasoning output, and structuring function calls.
Step 4: Prepare the Model
Now that our dataset is ready, let’s prepare the gpt-oss-20B model for fine-tuning. Since training a 20B parameter model directly is very resource-intensive, we’ll make use of two key techniques:
- Quantization – reduces memory usage and speeds up inference by storing weights in lower precision (here we use MXFP4 quantization, which is utilized a lot for OpenAI models).
- LoRA (Low-Rank Adaptation) – enables parameter-efficient fine-tuning by training only small adapter layers while keeping most of the model frozen.
Read more: Finetuning LLMs with Llora
Load the Base Model with Quantization
What is MXFP4?
- MXFP4 (Mixed 4-bit Floating Point) is a quantization format developed to reduce memory usage and improve inference speed in large-scale autoregressive models like gpt-oss-20B.
- Unlike simple integer quantization (like INT8/INT4), MXFP4 uses a learned mixed floating-point representation, which preserves more of the original model’s numerical precision.
Why GPT models specifically?
- GPT-style models (decoder-only transformers) are extremely weight-heavy, especially in attention and feed-forward layers.
- MXFP4 is optimized for these architectures by focusing on linear layers + attention projections, which dominate the memory footprint.
Advantages
- Memory Efficient: Reduces VRAM requirements massively (20B parameter models fit on fewer GPUs).
- Speed: Enables faster inference by lowering precision without losing much quality.
- Accuracy Retention: Performs better than naïve INT4 quantization, especially on long-context reasoning tasks, where precision matters more.
import torch

from transformers import AutoModelForCausalLM, Mxfp4Config

# Configure MXFP4 quantization

quantization_config = Mxfp4Config(dequantize=True)

# Model kwargs for efficient training

model_kwargs = dict(

    attn_implementation="eager",

    torch_dtype=torch.bfloat16,

    quantization_config=quantization_config,

    use_cache=False,

    device_map="auto",

)

# Load GPT-OSS-20B with quantization

model = AutoModelForCausalLM.from_pretrained("openai/gpt-oss-20b", **model_kwargs)
Quick Test: Generating a Response
Before fine-tuning, let’s make sure the model is working:
messages = [

    {"role": "user", "content": "¿Cuál es la capital de Australia?"},

]

input_ids = tokenizer.apply_chat_template(

    messages,

    add_generation_prompt=True,

    return_tensors="pt",

).to(model.device)

output_ids = model.generate(input_ids, max_new_tokens=512)

response = tokenizer.batch_decode(output_ids)[0]

print(response)
At this stage, the model should return a response in Spanish (ans: Canberra).
Add LoRA Adapters
Now we integrate LoRA adapters to enable parameter-efficient fine-tuning.
from peft import LoraConfig, get_peft_model

# LoRA configuration

peft_config = LoraConfig(

    r=8,  # rank

    lora_alpha=16,

    target_modules="all-linear",

    target_parameters=[               # Specific layers we want to adapt - you can edit with any other layers too

        "7.mlp.experts.gate_up_proj",

        "7.mlp.experts.down_proj",

        "15.mlp.experts.gate_up_proj",

        "15.mlp.experts.down_proj",

        "23.mlp.experts.gate_up_proj",

        "23.mlp.experts.down_proj",

    ],

)

# Apply LoRA to the model

peft_model = get_peft_model(model, peft_config)

# Print trainable parameters

peft_model.print_trainable_parameters()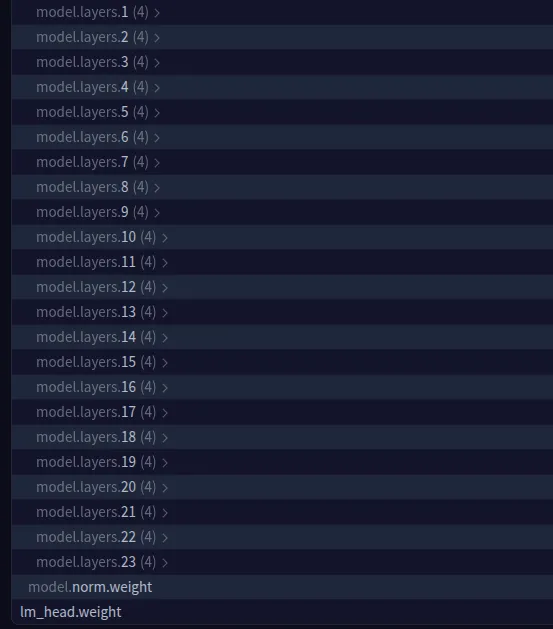
We can select other model layers also. You can check out the model parameters information via this link – https://huggingface.co/openai/gpt-oss-20b/blob/main/model.safetensors.index.json
This setup ensures that only a small fraction of the model’s parameters will be updated during training, keeping GPU memory requirements manageable while still allowing the model to learn reasoning skills.
Step 5: Fine-Tuning
With the model prepared and LoRA adapters applied, we’re ready to fine-tune gpt-oss-20B on the Multilingual Reasoning Dataset. For this, we’ll use Hugging Face’s TRL (Transformers Reinforcement Learning) library, which provides a simple SFTTrainer class for supervised fine-tuning.
Define Training Configuration
We’ll configure the training with a learning rate, batch size, logging frequency, and scheduler.
from trl import SFTConfig

# Training arguments

training_args = SFTConfig(

    learning_rate=2e-4,

    gradient_checkpointing=True,

    num_train_epochs=1,

    logging_steps=1,

    per_device_train_batch_size=4,

    gradient_accumulation_steps=4,

    max_length=2048,                          # if you want make it more light weight you can reduce this number

    warmup_ratio=0.03,

    lr_scheduler_type="cosine_with_min_lr",

    lr_scheduler_kwargs={"min_lr_rate": 0.1},

    output_dir="gpt-oss-20b-multilingual-reasoner",

    report_to="trackio",   # Logs training metrics

    push_to_hub=True,      # Push results to Hugging Face Hub

)
If you would like to track the logs of the model training, you can also go for WandB.
Initialize Trainer
from trl import SFTTrainer

# Create trainer

trainer = SFTTrainer(

    model=peft_model,

    args=training_args,

    train_dataset=dataset,

    processing_class=tokenizer,

)

# Start fine-tuning

trainer.train()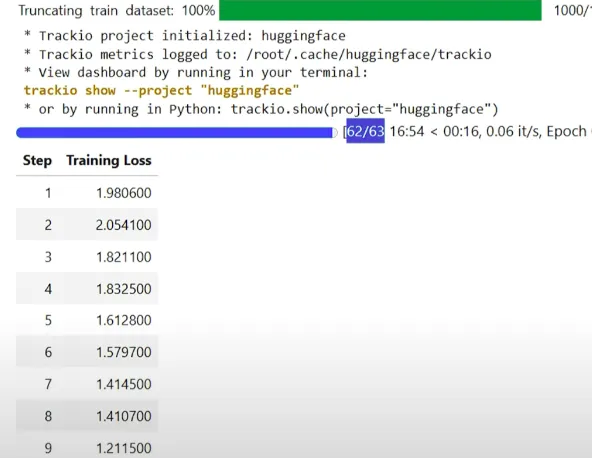
Monitor Logs
You can monitor your training progress with Trackio:
!trackio show --project "gpt-oss-20b-multilingual-reasoner"or in Python:
import trackio

trackio.show(project="gpt-oss-20b-multilingual-reasoner")
Training Time
On a single H100 GPU, training takes about 17 to 18 minutes. On less powerful hardware, the time may be longer depending on GPU memory and compute speed.
Save and Push Model
Once training completes, save the fine-tuned model locally and push it to the Hugging Face Hub:
# Save model locally

trainer.save_model(training_args.output_dir)

# Push to Hugging Face Hub

trainer.push_to_hub(dataset_name="skhamzah123/GPT-OSS-20B_FT")
Now your model is live and shareable, ready for reasoning tasks in multiple languages.
Step 6: Inference
After fine-tuning, we can now generate reasoning responses in multiple languages using our gpt-oss-20B multilingual model. We first load the base gpt-oss-20B model, merge it with our fine-tuned LoRA adapters, and then generate responses using a structured chat template.
I’d suggest you restart your kernel before running these cells, since too much memory is already stored in your RAM, and it might cause your kernel to crash.
from transformers import AutoModelForCausalLM, AutoTokenizer

from peft import PeftModel

# Load the tokenizer

tokenizer = AutoTokenizer.from_pretrained("openai/gpt-oss-20b")

# Load the base model

model_kwargs = dict(attn_implementation="eager", torch_dtype="auto", use_cache=True, device_map="auto")

base_model = AutoModelForCausalLM.from_pretrained("openai/gpt-oss-20b", **model_kwargs).cuda()

# Merge fine-tuned weights with base model

peft_model_id = "skhamzah123/gpt-oss-20b-multilingual-reasoner"

model = PeftModel.from_pretrained(base_model, peft_model_id)

model = model.merge_and_unload()

# Define language and prompt

REASONING_LANGUAGE = "Hindi" # edit this to any other language

SYSTEM_PROMPT = f"reasoning language: {REASONING_LANGUAGE}"

USER_PROMPT = "¿Cuál es el capital de Australia?"

messages = [

    {"role": "system", "content": SYSTEM_PROMPT},

    {"role": "user", "content": USER_PROMPT},

]

input_ids = tokenizer.apply_chat_template(

    messages,

    add_generation_prompt=True,

    return_tensors="pt",

).to(model.device)

gen_kwargs = {"max_new_tokens": 512, "do_sample": True, "temperature": 0.6}

output_ids = model.generate(input_ids, **gen_kwargs)

response = tokenizer.batch_decode(output_ids)[0]

print(response)
We use Eager Attention/Flash Attention to make inference lightweight and fast, reducing memory usage while still handling long sequences efficiently. The merge_and_unload() step combines the LoRA adapters with the base model so that inference runs without extra adapter overhead. By specifying the reasoning language in the system prompt, the model can generate step-by-step reasoning in multiple languages, demonstrating the effectiveness of multilingual fine-tuning.
Conclusion
Fine-tuning gpt-oss-20B demonstrates how open-source large language models can be adapted to perform complex reasoning across multiple languages while remaining memory and compute efficient. By leveraging techniques like LoRA for parameter-efficient fine-tuning and MXFP4 quantization, we were able to enhance reasoning capabilities without requiring massive GPU resources.
Using the Multilingual Thinking Dataset allowed the model to learn step-by-step logic in different languages, making it more versatile and aligned for real-world applications. With careful dataset preparation, model configuration, and inference optimization (Eager/Flash Attention), OSS models can be safe, accurate, and performant, bridging the gap between open-source flexibility and practical utility.
This workflow not only highlights the power of open-source LLMs but also provides a practical blueprint for anyone looking to fine-tune large models for reasoning, alignment, and multilingual capabilities.
A lot of the resources in this article have been taken from the OpenAI cookbook. Please refer to it for more details.
Frequently Asked Questions
Q1. How much GPU memory do I need to fine-tune gpt-oss-20B?
A. With LoRA or QLoRA, you can fine-tune it on a single 80GB GPU (like an H100). Full fine-tuning, however, requires 300GB+ of GPU memory and multi-GPU setups.
Q2. Why use MXFP4 quantization instead of INT4?
A. MXFP4 preserves better numerical precision, especially for long-context reasoning, while still reducing memory and speeding up inference compared to standard INT4 quantization.
Q3. Can I fine-tune gpt-oss-20B on my own dataset?
A. Yes. Just format your dataset in an instruction-response style (as dictionaries with “question” and “answer” pairs) so the model can learn structured reasoning from it.
Data Scientist @ Analytics Vidhya | CSE AI and ML @ VIT Chennai
Passionate about AI and machine learning, I'm eager to dive into roles as an AI/ML Engineer or Data Scientist where I can make a real impact. With a knack for quick learning and a love for teamwork, I'm excited to bring innovative solutions and cutting-edge advancements to the table. My curiosity drives me to explore AI across various fields and take the initiative to delve into data engineering, ensuring I stay ahead and deliver impactful projects.