I just downloaded the latest 4 Billion parameter model. I hit ‘Run‘. After a while, the Google Colab instance crashes. Sounds familiar? Well this is bound to happen if we don’t pay attention to the required VRAM and what VRAM we are providing to the model. Quantization is something that can help you tackle this problem, and this is exactly what we will be covering in this blog; we will also learn how to calculate the VRAM requirements of the model, learn about multiple quantization techniques and the alternatives to handle these really large language models.
Table of contents
Parameters vs. Model Size
The parameter count is essential to measure a model’s footprint but we should not forget about the precision of weights of the model (Note: Weights of a model are the parameters). A simple way to estimate the model’s VRAM is {No. of Parameters x Precision (in Bytes)}.
Example: If we have a model with 300M parameters and the weights are stored in 32-bit precision. This means there are (300 X 10^6) * (4 Bytes) = 1.2 GB. So roughly this model will need 1.5 GB VRAM.
Note: 1 Byte = 8 Bits
What is Model Quantization?
Quantization reduces the precision of a model’s weights while aiming to keep performance roughly the same. This typically can shrink the model size by 2× or more. The model performance is of course affected but not by much if we perform the right quantization and test the results.
Example:high-precision numbers (like 32-bit floats) to lower-precision buckets (like 4-bit integers).
- Half-Precision (BF16/FP16): Reduces memory by 50% with almost zero loss in accuracy.
- Deep Quantization (INT8/INT4): Reductions of 75% or more. This is how we can fit large models onto consumer hardware.

Model Quantization in Action
In this section, we aim to perform quantization with the help of PyTorch using a Google Colab Instance. We will run inference with the Mistral-3 (14B) by quantizing and loading the model through HuggingFace transformers.
Note: This model needs 14 x 10
Pre-Requisites
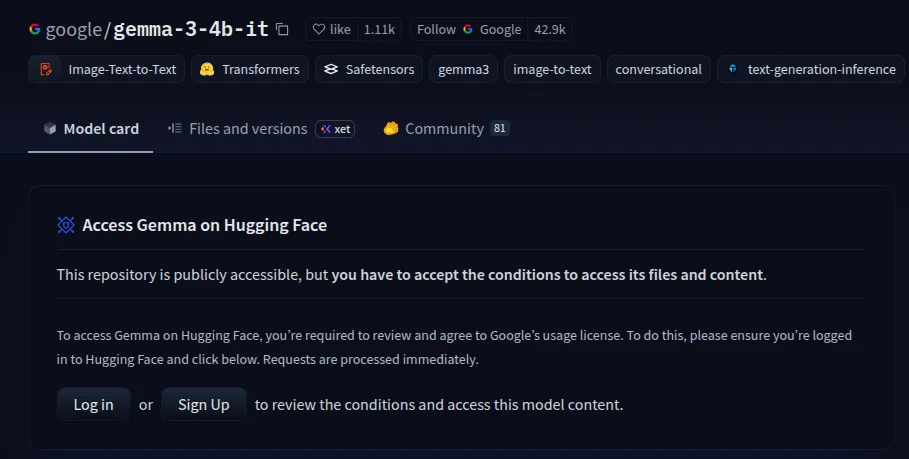
- We will take help from Hugging Face and Google colab for this demo. And we will be using a Gemma-3 model which is a gated model. Make sure this get the permission from here after logging-in.
- Create a Hugging Face token that we will later use from here.
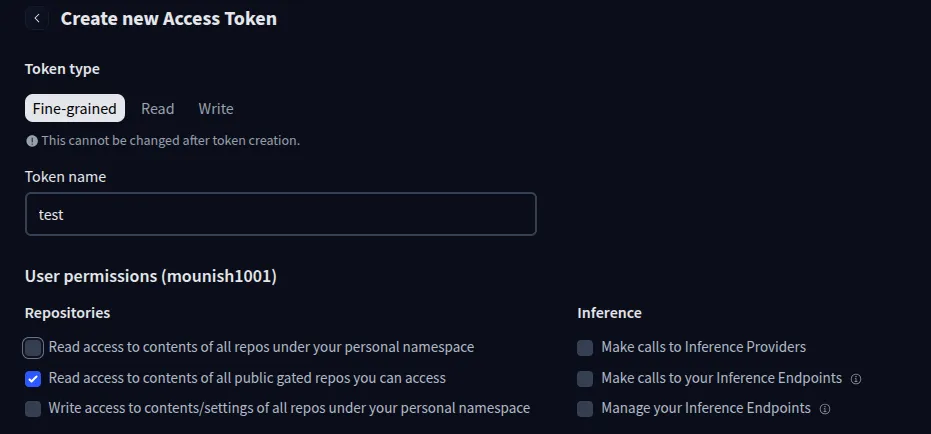
Note: Make sure to check the ‘Read access to contents of all public gated repos you can access’ option.
- Google Colab instance with T4 GPU:
Make sure you change the run time type to T4 GPU in a new Colab notebook.

Quantizing Models to bfloat16
Installations
!pip install -U transformers accelerate Enter your Hugging Face Token
!hf auth login Paste the Hugging Face key when prompted.
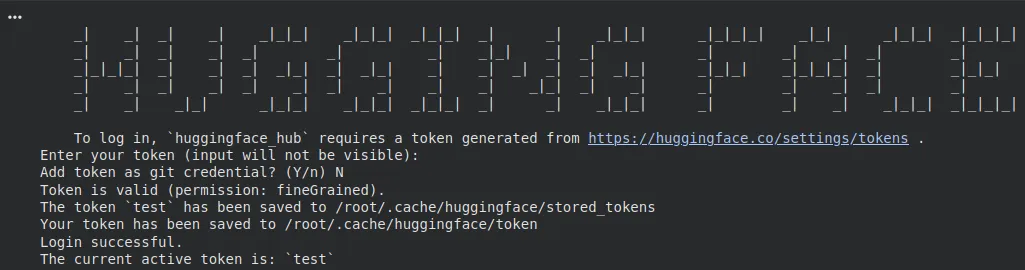
Note: You can type ‘n’ for Add token as git credential.
Imports
from transformers import AutoProcessor, Gemma3ForConditionalGeneration
from PIL import Image
import requests
import torch
Loading the model
import torch

desired_dtype = torch.bfloat16
torch.set_default_dtype(desired_dtype)

model_id = "google/gemma-3-4b-it"

model = Gemma3ForConditionalGeneration.from_pretrained(
    model_id,
    device_map="auto"
).eval()
Note: setting the dtype here will quantize the model and change the default precision of float32 to float16.
Looking at the model information
- Parameters and their Dtypes in the model:
for name, param in model.named_parameters():
    print(f"{name}: {param.dtype}")
    break
Output:
model.vision_tower.vision_model.embeddings.patch_embedding.weight: torch.bfloat16
Note: You can remove the break to see all the layers, also you can see that our parameters are now in ‘bfloat16’
- Model footprint:
print("Footprint of the fp16 model in GBs: ", model.get_memory_footprint()/1e+9) Output:
Footprint of the fp16 model in GBs: 8.600192738
Note: The footprint will be 17.200351684 GB if we don’t quantize the model, this will likely not run on the Colab instance we created.
Running Inference
processor = AutoProcessor.from_pretrained(model_id)

messages = [
    {
        "role": "system",
        "content": [{"type": "text", "text": "You are a helpful assistant."}]
    },
    {
        "role": "user",
        "content": [{"type": "text", "text": "Explain how a transformer works."}]
    }
]

inputs = processor.apply_chat_template(
    messages,
    add_generation_prompt=True,
    tokenize=True,
    return_dict=True,
    return_tensors="pt"
).to(model.device)

input_len = inputs["input_ids"].shape[-1]

with torch.inference_mode():
    generation = model.generate(
        **inputs,
        max_new_tokens=100,
        do_sample=False
    )
    generation = generation[0][input_len:]

decoded = processor.decode(generation, skip_special_tokens=True)
print(decoded)Output:
print(decoded)

Okay, here’s a quick explanation of how a transformer works:

A transformer uses electromagnetic induction to change voltage levels.

Would you like me to delve into a specific aspect, like how
Great! We successfully ran the inference on the quantized model and got good results. Now let’s try to quantize the model even further.
Quantizing Models even further
Installations
!pip install -U bitsandbytes Note: Install this along with the older installations if you have started a new instance.
Imports
from transformers import AutoProcessor, Gemma3ForConditionalGeneration, BitsAndBytesConfig
from PIL import Image
import requests
import torch
Loading the model
model_id = "google/gemma-3-4b-it"

# Optimized 4-bit configuration
quantization_config = BitsAndBytesConfig(
    load_in_4bit=True,
    bnb_4bit_compute_dtype=torch.bfloat16,
    bnb_4bit_quant_type="nf4",
    bnb_4bit_use_double_quant=True  # Quantizes the constants
)

model = Gemma3ForConditionalGeneration.from_pretrained(
    model_id,
    device_map="auto",
    quantization_config=quantization_config,
    torch_dtype=torch.bfloat16  # Crucial for Gemma stability
)Note: nf4 is a data type for highly efficient low-bit quantization that we are using. We are configuring the calculations under the hood in ‘bfloat16’ for a good performance.
Parameters and Size of the model
for name, param in model.named_parameters():
 print(f'{name}: {param.dtype}')
Output:
model.vision_tower.vision_model.encoder.layers.2.layer_norm1.weight: torch.bfloat16
model.vision_tower.vision_model.encoder.layers.2.layer_norm1.bias: torch.bfloat16
model.vision_tower.vision_model.encoder.layers.2.self_attn.k_proj.weight: torch.uint8
model.vision_tower.vision_model.encoder.layers.2.self_attn.k_proj.bias: torch.bfloat16
model.vision_tower.vision_model.encoder.layers.2.self_attn.v_proj.weight: torch.uint8
model.vision_tower.vision_model.encoder.layers.2.self_attn.v_proj.bias: torch.bfloat16
model.vision_tower.vision_model.encoder.layers.2.self_attn.q_proj.weight: torch.uint8
model.vision_tower.vision_model.encoder.layers.2.self_attn.q_proj.bias: torch.bfloat16
model.vision_tower.vision_model.encoder.layers.2.self_attn.out_proj.weight: torch.uint8
model.vision_tower.vision_model.encoder.layers.2.self_attn.out_proj.bias: torch.bfloat16
model.vision_tower.vision_model.encoder.layers.2.layer_norm2.weight: torch.bfloat16
model.vision_tower.vision_model.encoder.layers.2.layer_norm2.bias: torch.bfloat16
model.vision_tower.vision_model.encoder.layers.2.mlp.fc1.weight: torch.uint8
Notice something interesting? All layers are not scaled down. This is because the bitsandbytes quantization in transformers quantized the parameters and then takes two 4-bit weights and packs them into a single torch.uint8 container. Others are quantized to ‘bfloat16’.
print("Footprint of the model in GBs: ",

     model.get_memory_footprint()/1e+9)
Output:
Footprint of the model in GBs: 3.170623202
Great! The size of the model has been drastically reduced.
Running Inference
processor = AutoProcessor.from_pretrained(model_id)

messages = [
    {
        "role": "system",
        "content": [{"type": "text", "text": "You are a helpful assistant."}]
    },
    {
        "role": "user",
        "content": [{"type": "text", "text": "Explain how a transformer works in 60-80 words."}]
    }
]

inputs = processor.apply_chat_template(
    messages,
    add_generation_prompt=True,
    tokenize=True,
    return_dict=True,
    return_tensors="pt"
).to(model.device)

input_len = inputs["input_ids"].shape[-1]

with torch.inference_mode():
    generation = model.generate(
        **inputs,
        max_new_tokens=100,
        do_sample=False
    )
    generation = generation[0][input_len:]

decoded = processor.decode(generation, skip_special_tokens=True)
print(decoded)
Output
print(decoded)

Okay, here’s a breakdown of how a Transformer works in approximately 60-80 words:

Transformers are neural networks that excel at processing sequential data like text.

Essentially, the model simultaneously considers all input words, understanding their...
Well, the context captured by both the quantized models vary but we don’t see any noticeable hallucination in both the responses.
Alternatives to Standard Quantization
Here are some alternatives you can put to use instead of standard quantization:
- AWQ (Activation-aware Weight Quantization): This method protects the most important weights during compression. In PyTorch, we can load these using AutoAWQForCausalLM (using awq library) within Hugging Face’s from_pretrained method to ensure good accuracy with 4-bit weights.
- GGUF (Generalized Gradient Update Framework): Hugging Face transformers now support GGUF natively. Using the gguf you can perform Layer Offloading, splitting the model between VRAM and system RAM to run massive models on limited hardware.
- QLoRA: Yes, I’m suggesting fine-tuning your model. Instead of struggling to run a massive 8 Billion model, fine-tuning a 3 Billion model on your specific data can be better. A domain-specific model often outperforms a general model while using much lesser memory.
Also Read: Top 15+ Cloud GPU Providers For 2026
Conclusion
Next time you hit Run on a massive model, do not let your Google Colab instance crash. By learning the relationship between parameter count and weight precision, you can roughly calculate the memory footprint required. Whether through bfloat16 or deep 4-bit quantization, shrinking model size is no longer a mystery. You now have the tools and ideas to handle large models with ease. Also remember to test your models on standard datasets to evaluate their performance.
Frequently Asked Questions
Q1. How can I see my Google Colab CPU and GPU details?
A. View CPU details using !lscpu and GPU status via !nvidia-smi. Alternatively, click the RAM/Disk status bar (on the right-top) to see your current hardware resource allocation and utilization.
Q2. What datasets should I use to evaluate LLMs?
A. Evaluate LLMs using MMLU for knowledge, GSM8K for math, HumanEval for coding, and TruthfulQA. Use a domain-specific dataset if you’re evaluating a fine-tuned model.
Q3. What is QLoRA (Quantized Fine-tuning)?
A. QLoRA is an efficient fine-tuning method that uses 4-bit quantization to reduce memory usage while maintaining performance by training small adapter layers on top.
Passionate about technology and innovation, a graduate of Vellore Institute of Technology. Currently working as a Data Science Trainee, focusing on Data Science. Deeply interested in Deep Learning and Generative AI, eager to explore cutting-edge techniques to solve complex problems and create impactful solutions.